Here’s something fantastic you can do when you get bored at that holiday party: Construct complex fractals out of light using a few shiny Christmas tree ornaments. Who says the holidays aren’t exciting?
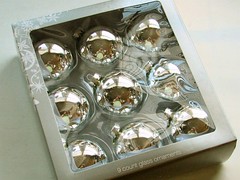
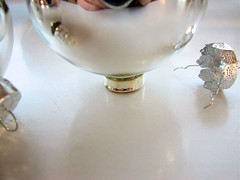
Here is our starting point: $5 worth of Christmas tree ornaments from Target that are shiny, silver, and spherical.
Making fractals is probably not what Target had in mind when they decided to sell these things, but it’s nice of them to help out anyway. Also, if you choose to get your ornaments by removing them from someone’s tree (especially if it’s at that holiday party) please remember to put them back when you’re done playing.
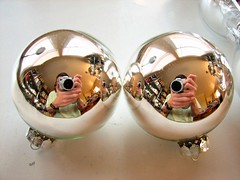
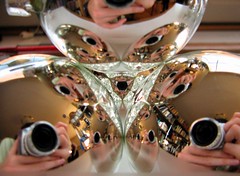
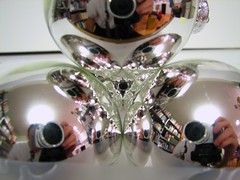
First, we place two of the shiny ornaments up against each other on a table top. These are pretty good spherical mirrors and you can see a lot of the surrounding room– and the camera in particular– reflected.
When you have two reflective spheres like this, there are an infinite number of reflections between them. The pattern of the reflections in this case is relatively straightforward: it’s very much like two flat mirrors facing each other. You’ve probably at some point been standing between two parallel mirrors and seen that infinite-tunnel effect. (Lots of reflections, but no chaos or fractals here, move along.)
Here we have three spheres, which is where the fractal nature of the system will begin to emerge. However, these are a little hard to hold in place, which is why my hand is there. Let’s fix that first: If you pull out the hanger in the ornament, you’re left with a flat end and so it becomes much easier to stand them up steady.
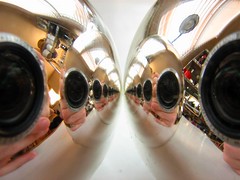
Now that they are steadied, here is a close-up view of the three ornaments. They sit in the same plane and are resting against each other. If you look at the number of images of the camera lens that appear on one of the three spheres, you can construct a one-to-one mapping between the number of images and the number of line segments in the Cantor set. That shows that the set of reflections has a fractal dimension equal to that of the Cantor set, which is one of the most famous types of fractals.
Another neat thing to notice here is the emergence of a virtual triangle in the center– an apparent white triangle (point down), whose corners are formed by the three intersection points of the spheres.
Here is our set of four stacked ornaments in a tetrahedral pyramid. The three lower ornaments have had their caps removed and are sitting upside down on the flat ends. In order to keep them from separating, a long piece of transparent tape holds the three together. Atop those three rests a fourth ornament (which still has its cap). Now things can start to get interesting.
We position the camera such that we look through the hole in the center of the front “face” of the tetrahedron, directly at the fourth sphere in the pile. As we move closer, we can begin to see the fractal in detail.
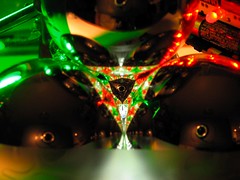
Move the camera in closer (at the expense of range of focus), and you can now see the fractal nature of the pattern inside– the effect is very much like an optical Sierpinski gasket.
(If it doesn’t yet look like a fractal, it might be because the picture is small– click on the photo to get to the higher resolution versions.)
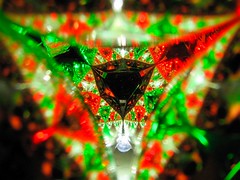
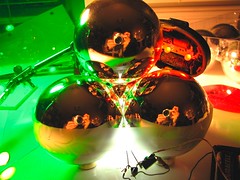
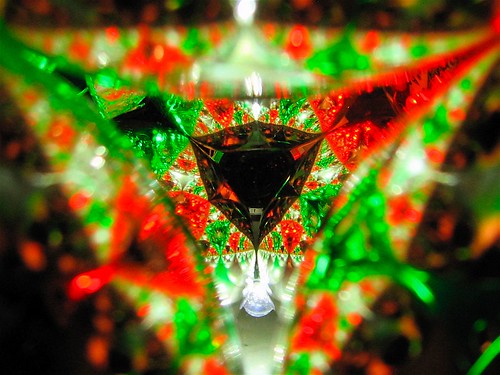
For proper holiday spirit, we need red and green colored lights, which will help to differentiate where the different reflections are coming from. The three light sources on the left, bottom, and right sides of the little pyramid (respectively) are a desk lamp with a green filter, a bright white LED, and a red LED bike tail light. Everything is held up by Mr. Hands in the background there.
Here’s what it looks like inside with more the proper festive lighting. A high-resolution version of this one is available– take a look!.
Okay, so what are we looking at here? This type of fractal is called a Wada basin. One of my favorite ways to look at these is by rendering them in ray tracing programs. I like POV-Ray, and you can read more about Wada basins and rendering them in POV-Ray here.
Some photos of “real” Wada basins are shown here. That lab uses the name “optical gasket” which is a play on the fact that this is a light-ray version of the Sierpinski gasket. One other collection of information about Wada basins mainly consists of photos and graphics lifted the two sites that we just linked to, however it also includes a Wada basin photo that was on the cover of Scientific American in 2002.
What’s next? One of the interesting things about fractals is that they tend to be intimately linked to chaos of some form of another. Generally speaking, chaos is characterized by a high sensitivity of a trajectory to initial conditions. The trajectories that we are interested in here are neighboring rays of light, which you can create with an inexpensive laser pointer. A truly remarkable thing happens if you merely point your beam into the space between the spheres– it neatly illuminates the entire fractal pattern. (Because some of that light will go into your eyes, this is *not* the time to show off your new super-bright laser pointer! Use the $5 one, please.) This happens because neighboring light rays from the pointer initially are very close together, but rapidly diverge once they start bouncing around between the spheres. Eventually, the rays become nearly random, filling up most possible stable trajectories between the spheres, which defines the pattern that becomes visible. Enough talk, let’s see how it looks!
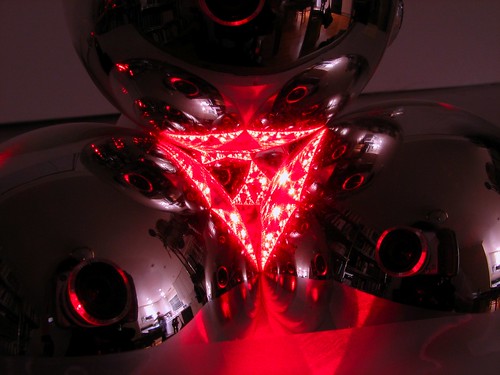
Here are two photos of the same stack of spherical ornaments. The photo on the left has normal lighting, but in the picture on the right, you can see me (in reflection) pointing a laser pointer at the inside of the pile. It’s really quite remarkable, the entire inside area of the stack lights up when you point the beam almost anywhere inside. Again, that’s a signature of chaotic behavior.
Here’s the same thing but with a slightly different viewpoint. In this case, I’ve mounted the laser pointer in one place so that I can use a longer time exposure on the camera– six seconds. I also took a picture of the same thing with the room lights off, it’s quite different looking!
All of the photos from this project, including some not shown above are available in this flickr set, and many of the pictures there have high resolution versions.
Keep it chaotic!






These are superb – lovely effect, especially with the laser illumination.
The day after I win the lottery, I will be installing these as garden lights, made out of stacks of 2′ stainless steel gazing balls with several colours of micro-controlled laser mounted underneath!
Alternate project:
1) Get a bunch of transparent, solid plastic or glass balls.
2) Superglue them together in a haphazard fashion.
3) Illuminate with one or more laser pointers.
==> LIGHT SHOW.
Note that you will undoubtedly be able to think of dozens of improvements before you even get to the Arduinos. (Rubber bands? Clock motors? Speakers? Pager motors? Solenoids?)