
Graduate school can do funny things to your head. Sometimes the urge to procrastinate becomes so overwhelming that you strike out in a great burst of creativity; determined to do something, anything, to avoid that which you’re supposed to be doing. Like the time that I painted my bicycle purple (with green polka dots) to avoid studying for my qualifying exam– but I seem to digress.
Where was I? Oh, yes: hard drive wind chimes. I used to disassemble hard drives, whenever possible, both to extract the magnets and to see how the different types worked. Different hard drives contain all kinds of wonderful components: voice coil motors, stepper motors, exotic bearings, electropolished machined parts, chemically etched metal webs, flexible circuitry, and my personal favorite: optical quadrature encoders for pivot arm position readout. The drive platters themselves are also quite remarkable: precisely made aluminum patters with a surface not unlike recording tape. The disks make a lovely clear note if you strike them, so it was only natural to make them into a set of wind chimes.
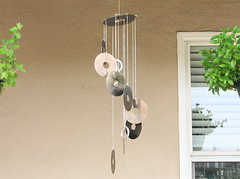
I made the set shown here sometime in 1999-2000. It’s actually the second set that I made, after I gave away the first one as a gift. Despite hanging outdoors for several years, it has held together quite well. The magnetic coating on the platters is still mostly intact, and they sound as great as ever. When the set was quite new, an interesting side effect was that the shiny shiny platters reflected little spots of light into the house. Naturally, my cats would chase the spots up and down the kitchen floor– it took a while to figure out what was going on.
This isn’t the only set of hard drive wind chimes out there; there are others. However, I like this particular implementation, and I’ll show how you can build your own set:
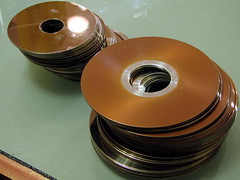
To begin with, you’ll need a set of hard drive platters. For each set of wind chimes, I used eight 3 1/2″ platters and one 5 1/4″ platter. If you have smaller platters (iPods?) or larger (!), by all means use them!
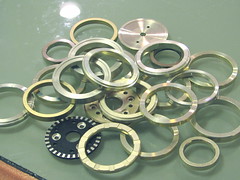
You’ll also need various other junk from the hard drives. Pictured here are various findings from inside the hard drives. Most of these are spacer rings, used to space apart the platters on older hard drives. I used these as “beaters” in the wind chimes.
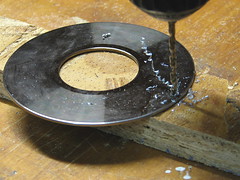
The 3 1/2″ hard drive platters hang from strings that wrap around a hole at their edge. The first step, then, is to drill a hole through each of the eight platters, fairly close to the edge. A drill of 3/32 or 1/8″ is generally the right size.
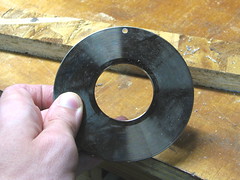
A 3 1/2″ hard drive platter with the hole drilled through it.
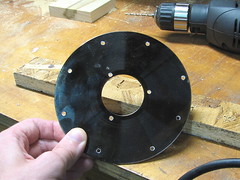
The top platter, 5 1/4″, needs to have a hole around the edge for each dangling platter that it will support. Drill eight holes around the perimeter of the platter.
There also needs to be a means to support the whole chime assembly. For this, add three holes equally spaced around the inside hole of the platter, close to the inside edge.
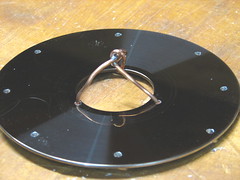
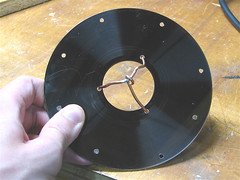
To support the chimes, make a hook assembly out of stiff copper wire. This assembly consists of one “U” shaped piece of wire and one (more or less) straight piece. The straight piece is soldered to the “U” shaped piece in the center. I wrapped the loose end of the straight piece back and down to keep it out of the way.
Second view of the copper hook, from the top, showing its approximate symmetry.
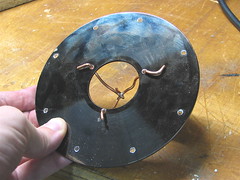
On the back side, the loose edges of the copper hook assembly are folded back to keep the hook anchored in place.
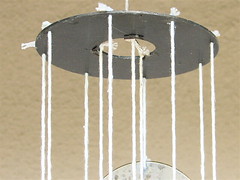
Begin to assemble the wind chimes with kitchen twine. Attach a single string to the top of the hook assembly. Strings through the eight holes on the perimeter lead down to the eight other platters. The strings are anchored at the top by simple knots in the strings.
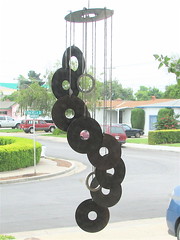
Complete assembly by tying the 3 1/2″ platters to the ends of the strings, with different lengths. Three ring “beaters” are added, hanging from the three parts of the copper wire hook.
Second view of the completed wind chimes, hanging out in our neighborhood.
That’s it– You’re done!
Enjoy your new wind chimes!
Technorati tags: hard drive, wind chimes, diy, make, toys, reuse, recycle, recycling, raw materials


Hi,
This is so lovely. But can I ask where can i get the hard drive platters and rings from? and what kind metal is it made of?
thank u so much.
These were obtained by taking apart a few hard drives. The platters are aluminum. However, I believe that newer hard drive platters are made of glass, which is somewhat harder to drill through, but probably makes an even nicer chime sound.
Windell H. Oskay
drwho(at)evilmadscientist.com
http://www.evilmadscientist.com/
Wind chimes drive me nuts. The musical part of my brain is always trying to find melody and structure in the wind chimes, and coming up short.