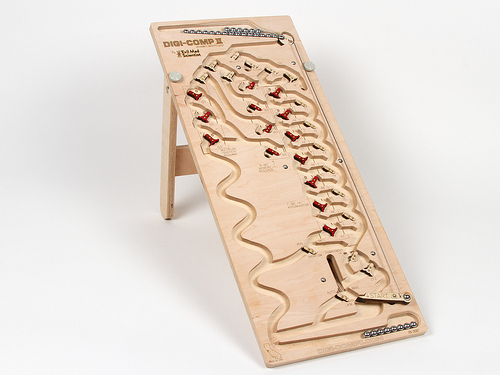
We’re pleased to finally announce availability of our brand new, long-awaited kit, the Digi-Comp II: First Edition. It’s a modern, fully-operational recreation of the original Digi-Comp II— the classic 1960?s educational computer kit —CNC routed from hardwood plywood.
The Digi-Comp II is a binary digital mechanical computer, capable of conducting basic operations like adding, multiplying, subtracting, dividing, counting, and so forth. These operations are all conducted by the action of balls rolling down a slope, directed by mechanical switches and flip flops, and all powered by gravity.
We’ve been working on project for over two years now, and so we’ve written before, in some detail, about how the Digi-Comp II works, and what kinds of things you can do with it. We’ve written about our larger than life version of the Digi-Comp II, which uses 8 Balls. We showed off that version at the 2011 and 2012 Bay Area Maker Faires and made a demonstration video to show how it works. We have also written about our smaller wooden prototypes that we displayed at the 2011 Maker Faire New York.
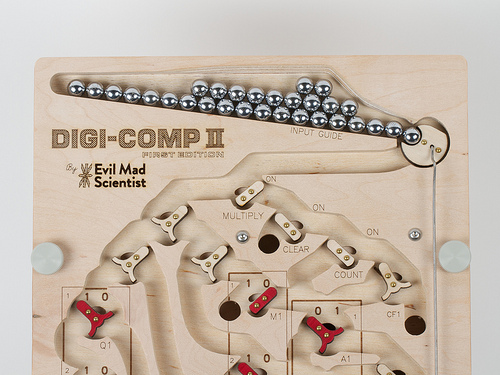
Our new version, the “First Edition,” is a descendent of the latter. As compared to the “2011” model, it has a huge number of refinements— including an improved ball feeder that both fits 30 balls at a time (so you don’t need to refill during most calculations) and is jam resistant, a more compact and reliable start lever, better labeling, better flip-flop design, and internal baffles that slow the balls down, to prevent them from flying out of the machine.
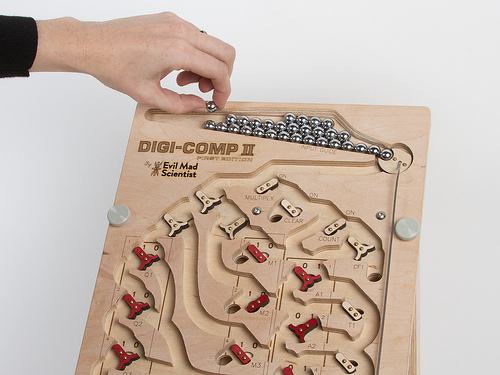
Many of these improvements were made possible by slightly reducing the size of the balls that we use. Whereas the “2011” model used ½” ball bearings, the First Edition uses standard 11 mm pachinko balls, which are easily available, shiny, and rust resistant. The fact that they are slightly smaller has allowed us to shrink some of the main circuitry, to allow for that larger ball feeder, to use thinner flip flops, and to fit the full machine into the same 10×24″ envelope that we had aimed for, which is considerably more compact than the 14×28.5″ size of the original.
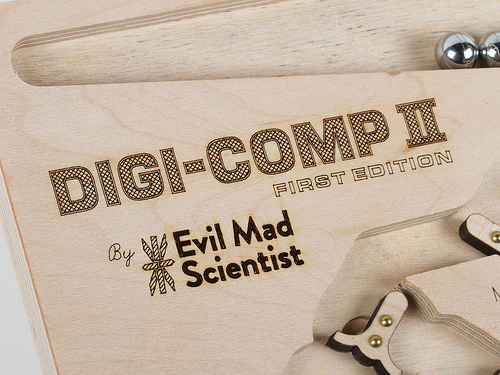
One of the nice things about keeping the size under 24 inches long is that we can fit the entire top deck of the Digi-Comp II into our 12×24″ laser engraver— so that we can directly laser engrave markings onto the playfield. And while it’s nice to be able to write out DIGI-COMP II in huge letters, the more important application is actually adding the individual markings by the flip-flops and registers:
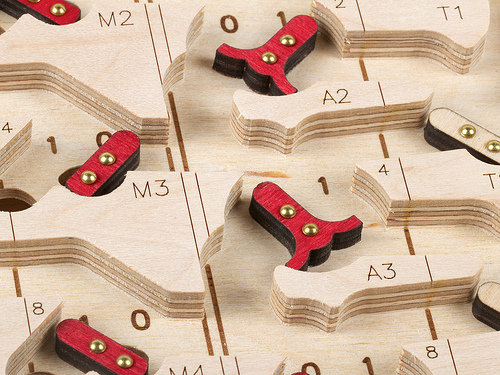
You may notice that the laser marks are very sharp on the “mesas” of the playfield, and less sharp but more bold down below. This is an intentional effect, created by laser engraving the playfield in a single pass, with the laser focussed just below the level of the “mesas.” On previous versions, we’ve either lasered the two parts independently, fully in focus at each depth, or focussed the laser halfway between the top and bottom— which leaves the engraving to look uniform, but less sharp, at each depth. But this method seems to create exactly what we want: sharp up top where it’s easier to read, and bold down below where it’s harder to see.
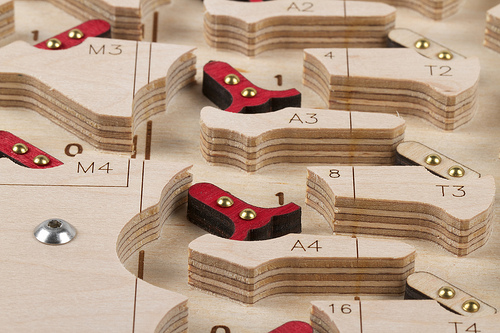
The playfield itself is made of 1/2″ thick maple-faced veneer-core all-hardwood plywood. This is a rock-solid material that is about as far from “hardware store” plywood as you can imagine. We use a CNC router to cut the pivot and limit holes for the flip flops and to carve the channels— roughly 3/8″ deep —where the balls can roll. The CNC router is precise enough that when we cut the channels for the balls, we evenly split one of the veneer layers, ending up with a clean inner surface. The Digi-Comp II also has a lower deck, below the playfield, that supports the clear-register and complement functions. The lower deck is carved in the same way, but does not have any laser engraving.
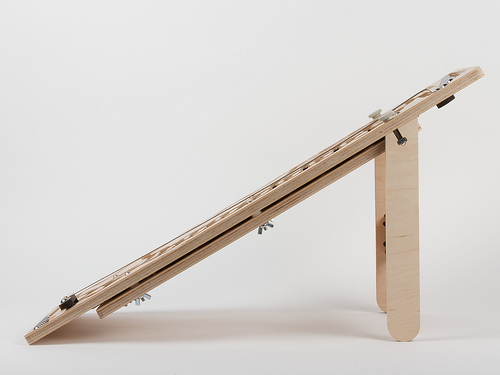
The lower deck is attached below the upper deck by six screws that come down from the top to meet six wing nuts below. Between the two layers are 3/16″ spacers that keep the decks uniformly separated. It turns out that it’s actually important to use six screws; our earlier prototypes tended to jam up when the spacing between the two layers wasn’t controlled well enough.
One of the other improvements is that the “First Edition” kit has a very sturdy stand, as shown above. The laser-cut stand on the “2011” model was flimsy, and the simple dowels on the original 1960’s kit were not much better. The new stand is a glued assembly made of two rigid legs and a crossbeam, made of the same remarkably-hard plywood as the rest of the machine. It can be attached to or detached from the playfield with the two fat thumbscrews. It holds the playfield at an even 30° from horizontal, such that the top sits about 12 ½ inches above your desk top— a particularly good angle for viewing the playfield. The stand is actually reversible, so that you turn it the other way and raise the playfield only about 20° from horizontal, giving the option of a slower speed of operation. If you want to go faster instead, you can overclock the Digi-Comp II by putting a book below the stand to increase the angle.
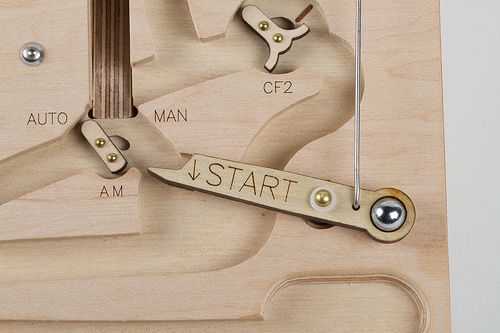
The new ball release mechanism has been fine-tuned and greatly simplified. We recently showed off a little video demonstrating how this part of the machine works. The start lever— now nicely labeled —is made of laser-cut poplar, has a brass rivet as its bearing and a glued-in pachinko ball as a counterweight. When pulled down by a human or a rolling ball, it pushes a stainless steel rod that moves the ball release at the top of the machine to release the next ball.
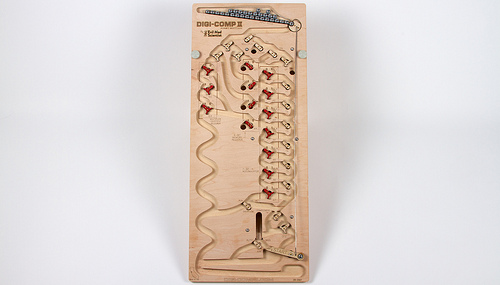
Finally, it’s worth noting that this is called the “Digi-Comp II: First Edition” for a reason: We are planning others.
The original 1960’s Digi-Comp II kit was made of thin vacuum-formed plastic (what we more often refer to as “coffee drink lid material”), supported by a sheet of masonite and fitted with injection-molded flip-flops and switches. Our CNC-cut wooden versions are much more substantial, but also cost a lot more to make, both in terms of raw materials and fabrication time. We’ve been slowly working towards what we hope will be a happy medium: a Digi-Comp II made of (more substantial) vacuum-formed plastic, reasonably sturdy, and at a more modest cost. We still plan to release a version like that, hopefully within the next year. This has been a long journey for us— making wonderful machines mostly because they are wonderful machines —and we’re very happy to release our first one into the world.
The Digi-Comp II: First Edition is now available to order at the Evil Mad Scientist Shop.


