Monthly Archives: September 2012

Open Hardware Summit 2012 Badges

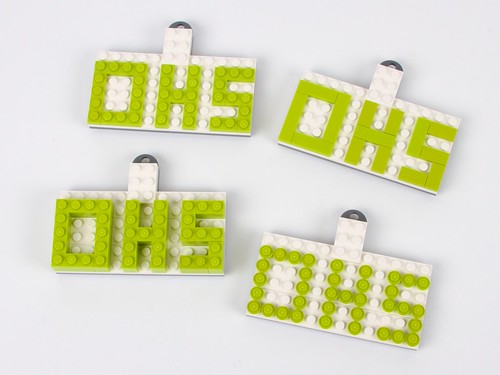
ohs lego badge 015

The 2012 Open Hardware Summit is happening today in New York City and we had the pleasure of designing and building the badges for this year’s conference.

As you can see, the badges are built out of Lego bricks, and are a bit on the whimsical side. The hardware community’s connections to Lego run deep, as so many of us developed our mechanical understanding with it, and many of us continue to use it both for prototyping and play. (This is really only part of the badge; there is also a paper underlay below the Lego, with the attendee name and affiliation.)

We used LEGO Digital Designer, free software for Mac and Windows, to create the preliminary designs for the badges.  As we started shopping on bricklink (“the unofficial Lego marketplace”) to figure out exactly how many parts were actually available in the world in the particular shapes and colors that we needed, we gradually modified our designs to make them work with more commonly available parts.

ohs lego badge 012

We ended up running with four slightly different designs: one with plates, one with tiles, one with bricks, and one “dot matrix” with single round tiles.

ohs lego badge 014

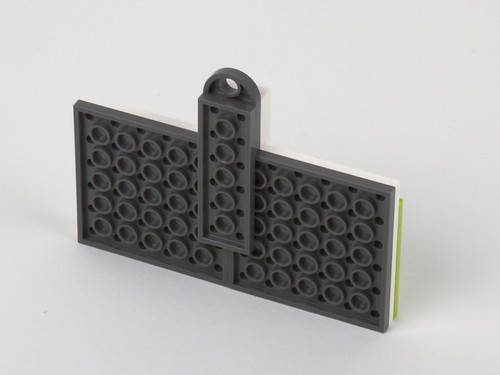
Here is the most important part: The “modified 2×3 plate with hole” on the top, where your lanyard clips, has to be held very securely.  To be able to work with different sizes of backing plates available, we used a couple of slight variations on this theme.

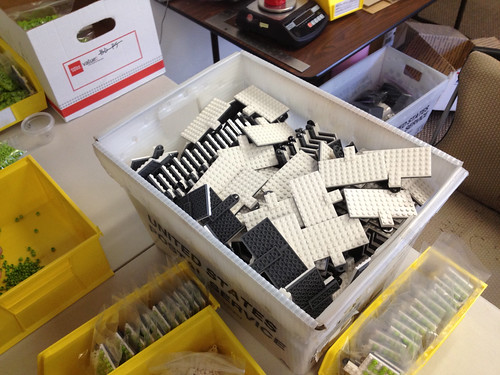
Backs waiting to be finished

We ordered nearly fifteen thousand Lego bricks, sourced from twelve different suppliers, to make sure we could get all of the parts we needed.

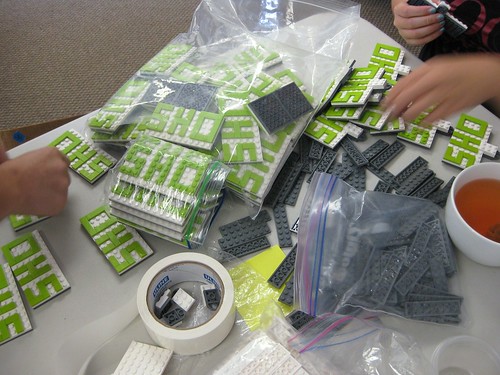
Badges in progress

ohs lego badge 017

When all the parts finally arrived, our shop staff was happy to drop everything else they were doing to spend several days building Lego badges in time for the summit.

ohs lego badge 020

And for a final touch, we added a tool in a holder to each badge.  There are a few different tool types— our own little easter egg.

As we did with last year’s badges, we are releasing the design files (such as they are) in the preferred format for modification (lxf files). The four representative models are available for download here (37 KB zip file).

Open Hardware Summit and Maker Faire New York

Open Hardware Summit Logo

We’re very excited to be heading to New York for the sold-out Open Hardware Summit next week. There is another fantastic lineup of speakers this year, and it will be good to have the opportunity to catch up with the community after an eventful year for open source hardware.

See me at Maker Faire!After that, we’ll be going to Maker Faire New York, where you can find us demoing our kits in the Maker Shed.

We’ll be on the Make Demo Stage with the Egg-Bot on Saturday at 2:30 and Sunday at 3:00.

We hope to see you there!

Photos from the Shuttle Flyby

The crowd at NASA Ames waiting for Endeavour

This morning, we were on hand to see the Space Shuttle Endeavour make a low pass overhead, atop its Shuttle Carrier Aircraft, at NASA Ames Research Center.

As you can see in the panorama above (or at least, as you can see if you zoom in), we were deep in the crowd, out on the tarmac of Moffett Field, surrounded by the tower, Hangar One— presently stripped of its wooden exterior —and far off on the right, the two other blimp hangars.

Shuttle 009

The event organizers apparently hadn’t thought to announce it when the shuttle was getting close, and with the hangars, buildings, and crowd, we couldn’t scan the horizon either.  However, we figured out one way of telling when the shuttle was getting close: When the folks in the control tower started pointing and taking pictures.

The next thing that we saw was a pair of fighter jet escorts. And then, the main attraction:

Shuttle 008Shuttle 007

And what a view!

This modified 747 NASA Shuttle Carrier Aircraft (there are two) has tail number N905NA.  It’s been doing this for a long while— here is a photo from 1978 —but this is one of its final missions.

Shuttle 004

From here, after 25 missions into space, Endeavour moves onto retirement at the California Science Center in LA; perhaps we’ll see it again someday. But, alas, never airborne.

Shuttle Endeavour Bay Area Fly-By

STS-126 Endeavour atop carrier aircraft

The Space Shuttle Endeavour will be passing through the Bay Area on Friday morning, September 21, and the NASA Ames Research Center has invited the public to come watch.

The shuttle is on its way to its new home at the California Science Center in Los Angeles, where it will be on display starting in October. It is passing over Mountain View on the way as a tribute to the work that was done there on the shuttle systems, including wind tunnel testing and thermal protection systems design and testing. NASA staff will be manning booths to share information about their contributions to the space shuttle program.

Event details are available on the NASA Ames website. All of the available parking passes have already been given out, so taking public transportation is encouraged. Hearing protection is recommended, as the 747 will be flying at 1,500 feet above the viewing area. We’ll hope to see you (and the space shuttle) there!

From the mailbag: flickering LEDs in series

We recently got a question about our flickering LEDs:

I’m wondering if it’s possible to wire these in series?

It’s a good (and not entirely uncommon) question, and the short answer is: “Yes, but not with each other.”

These LEDs have a little chip inside that turns them on and off in a flickering pattern. You can see it in the photo of the flat-topped white LED above. On the upper pad is the yellowish phosphor over the LED die. On the lower pad is the chip that turns the LED on and off.

If you put two of these in series, the first one turns the next one on and off repeatedly, interrupting the second chip and preventing it from executing its flickering pattern. The result is that you get momentary blinking, but not the nice flickering pattern.  (So yes, both would in fact light up; they just don’t behave how you might hope that they would.)

So how can you hook up a bunch of flickering LEDs together? If you want each LED to flicker separately, you can hook them up in parallel. But there is a way to use these in series with other LEDs. We can even use this to combine multiple LED colors to create some fantastic LED “flames” that would be great for stage props or putting inside pumpkins.
Continue reading From the mailbag: flickering LEDs in series

Vector engraved stipples

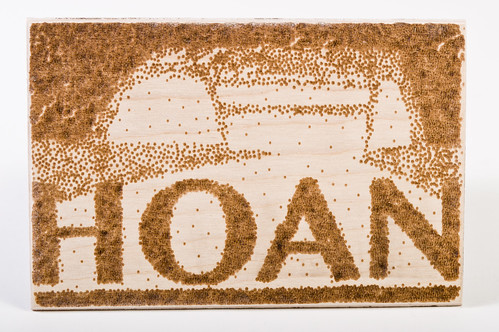
Laser-etched Hoan Bridge

Over at rasterweb, Pete has been playing with StippleGen2 to create artwork with the laser engraver at the Milwaukee Makerspace.

Laser-etched Hoan Bridge

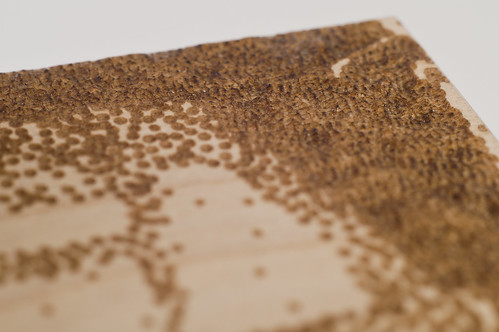
StippleGen’s output consists of lots of tiny overlapping circles and this piece was made by using vector engraving, where the laser traces out each circle individually. In some places, the lasered marks overlap many times, leading to a new and unusual surface texture. In the closeup above you can see the ridges and valleys formed by the overlapped engraved areas. Go check out his article for the rest of the story about the project!

The Art Controller

Art Controller

Today we’re releasing a new open source kit: A stand-alone, microcontroller-driven relay module called the Art Controller.

The Art Controller project was originally suggested by our friends (and Maker Faire regulars), San Francisco Bay Area kinetic artists Christopher T. Palmer and Nemo Gould.  Amongst other things that they build are amazing mechanical sculptures that need to run for a little while after a visitor presses a button or inserts a coin into the slot.

The long-established solution for driving electronic artwork (along with many similar endeavors) is to use a timer relay module; a little stand-alone board with a relay controlled by a timer.  There are several types of these: fancy programmable modules, bulletproof industrial types, and simple low-cost boards with a 555 timer and a pot that you turn to adjust the delay.  As we understand it, Christopher and Nemo go through the latter type like jellybeans.  But, what they realized that they really wanted was something just like that, except that you could reprogram it if you wanted to.

Art Controller

Hence the Art Controller.   It’s a low cost stand-alone relay module, with an on-board AVR microcontroller, an ATtiny2313, that manages the timing and I/O.

It can be used as a replacement for one of those basic 555-based relay boards, but it’s considerably more flexible in terms of timing range and functionality:

  • The timing is adjusted with an 8-position DIP switch, rather than a knob.  This cuts down on guess-and-check, but also gives a huge range. With those 8 little switches, you can select times from 1 second to 31 hours. (The ranges are 1-31 seconds, minutes, or hours, plus a few intermediate ranges.)
  • It can work as a one-shot timer or a continuously repeating timer.
  • There’s an option to trigger automatically upon turn-on (reset).
  • There’s a separate cancel input, so you can build a “STOP” button.
  • There’s an option to cancel a trigger if you push the “START” button a second time.

It comes preprogrammed, and all of those adjustments can be done with switches and wiring— handy if solder is your favorite programming language —so no computer or programming are actually required to get that far.

But, when that’s not enough, the on-board microcontroller can be reprogrammed in situ (using the board’s AVR ISP programming header) to handle the most specialized applications, potentially taking advantage of up to 16 free digital I/O pins.

And that’s pretty neat. 

Art Controller

Beyond the obvious applications in DIY projects, automation, and controlling art projects, we think that this is also going to be a fantastic relay board for education. It starts out as a (well-designed) simple function timer relay board, but can optionally transition to a full-on microcontroller development board when you’re ready for it.

So that’s the Art Controller in a nutshell: a versatile, easy to use, low-cost relay board that you can reprogram if you want to.

There’s plenty more detail on our product page: The Art Controller at Evil Mad Science.

And, special thanks to Christopher T. Palmer and Nemo Gould for a great project idea!


This post is included in our Halloween Project Archive, where you can find ideas for props, decor, and more.

Makerspace Launch

The Makerspace program is a joint effort by O’Reilly’s Make division and Otherlab to put dedicated space and tools for hands-on making into high schools. They describe their aims on their about page:

By creating makerspaces in an educational context, students can have access to tools and equipment that they might not have otherwise; they can collaborate on projects that are driven by their own interests, and by doing so, develop the capacity and confidence to innovate. We see making as a gateway to deeper engagement in science and engineering but also art and design.

On Monday, September 10, we’ll be attending the Makerspace launch event at the College of San Mateo. We’ll be demoing a few kits and are excited to have the opportunity to meet educators interested in bringing making into the classroom. If you’ll be attending, please stop by our table and say hi!

Klein Bottle Openers

Klein Bottle Opener by Bathsheba Grossman

This is one of the coolest things that you can actually buy. It is a Klein Bottle Opener by Bathsheba Grossman.  It is made in the shape of a Klein Bottle, a 3D representation of a single sided shape.  And it opens bottles. It’s a 3D printed stainless steel sculpture that fits nicely in the hand, giving you just the right kind of leverage; an absolute pleasure to use.

Klein Bottle Opener

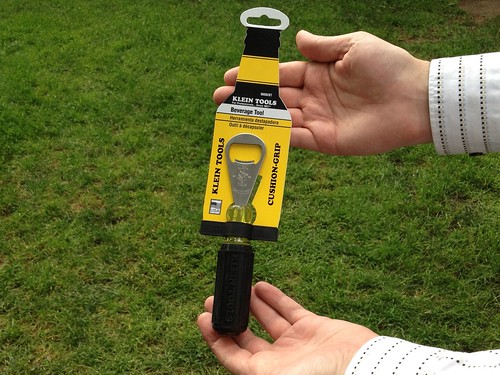
But— and this is where we were caught off guard— there’s a second great, yet completely independent, kind of Klein bottle opener out there: the Beverage Tool by Klein Tools. Klein tools is quite truly (as they say), “the #1 choice among professional tradesmen.”

We happened upon this gem at Hand-Eye Supply, the Core77 store, while visiting Portland, Oregon.  As far as we can tell, it was there because they like well-made tools, including those from Klein, not because they like mathematics.

Klein Bottle Opener

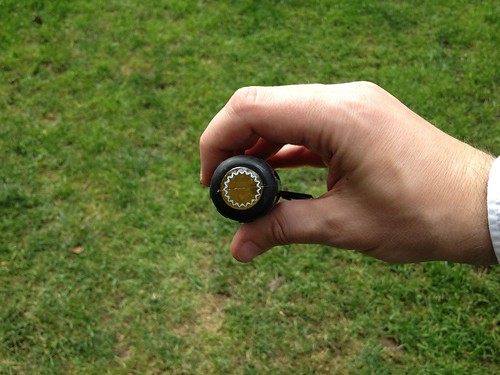
The tool has convenient “Tip-Ident” mark in the shape of a bottle cap so you can quickly find it among other tools.

And now, dear reader, you know where to get a complete set of Klein bottle openers.

Coming soon: Visual diffs for 3D models

Cube Hero Screenshot

After reading our post on Improving open source hardware: Visual diffs, Wil wrote in to to tell us about Cube Hero:

I have a demo up of visual diffs for 3D printable models. Here you can see a specific model, and … you can see diffs as I changed the model.

We’re excited to see new tools for collaboration like this being developed. Besides visual diffs, the project aims to provide visual versioning, 3D object sharing, and bill of materials integration. Cube Hero is looking for interested possible users, so go check it out–they’re accepting signups for updates and launch invitations.