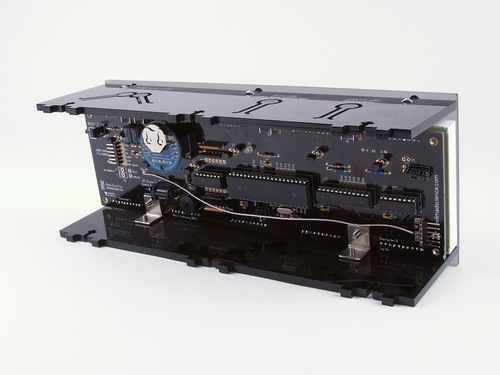
William Phelps recently wrote to us with alternative firmware for Alpha Clock Five, our oversized alphanumeric LED clock/data display kit. His firmware adds two very welcome features: Automatic daylight saving time (DST) correction, and automatic time setting via a GPS module. It works remarkably well.
Here, we’ll show you how to hook it all up and how to use it.
Hardware Setup
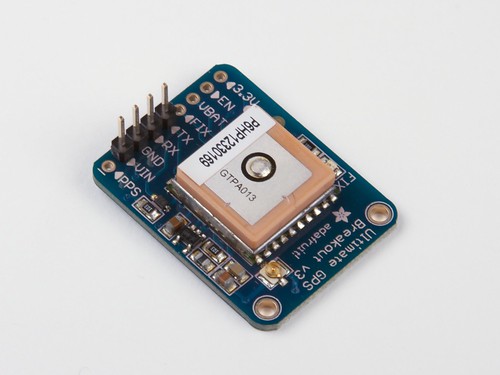
This project interfaces an Alpha Clock Five (either the classic red or newer white version), to the Adafruit Ultimate GPS Breakout. For constructing a cable between the two, we will modify a “rainbow” 6-pin F-F header socket cable, and we’ll also need to run one more wire to provide power to the GPS module.
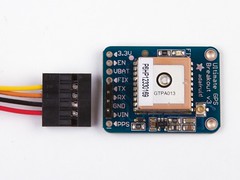
While the GPS module does have additional pins (and features) available, we only need four: 5 V power in, ground, and serial receive/transmit (“RX”/”TX”) for the data. We populated these four header pins on our module, so that it will be easy to connect the cable.
Alpha Clock Five features a “second” serial port on board (J5), which is normally used for daisy-chaining multiple Alpha Clocks together (as illustrated here). However, this port can instead be used for communicating with the GPS module. Port J5 has RX/TX and ground, but does not automatically provide 5 V power, so the next thing that we’ll have to do is route some power there.
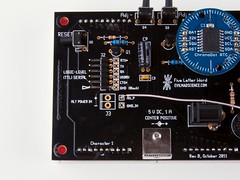
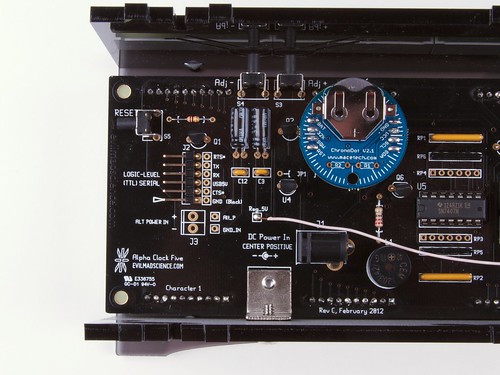
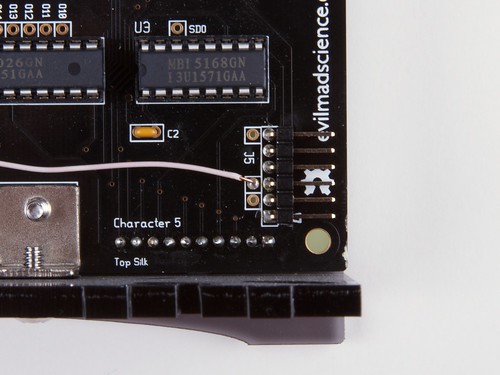
For Alpha Clock Five with white LEDs (or later revision Alpha Clock Five with red LEDs), there is an available place to tap into the 5 V power, labeled “Reg_5V”, located just to the right of the alternate power input (“Alt_P”). Here, we’ve added a wire from that point, leading off towards connector J5 on the right side of the circuit board.
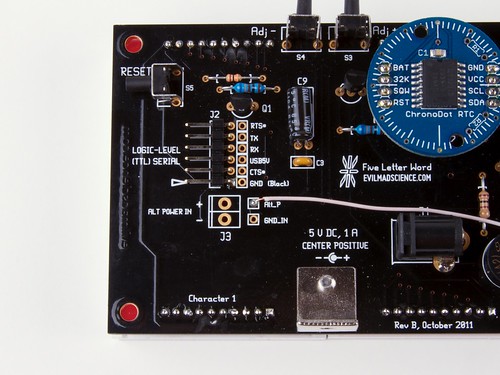
First-generation red Alpha Clock Five circuit boards do not have a separate “Reg_5V” pin, but since the board is already running at 5 V, you can instead tap into the 5 V power right at the “Alt_P” pin. Here, we’ve added a wire from that point, leading off towards connector J5, which is on the lower middle-right of the circuit board.
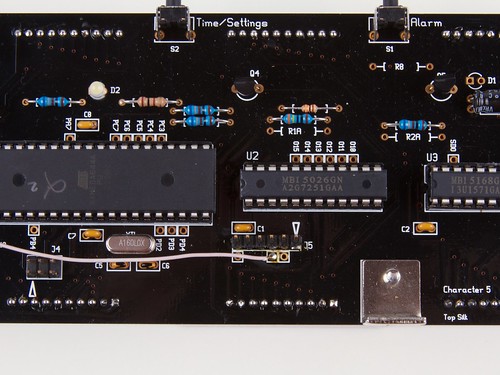
The other end of the wire goes to pin 3 of J5. Pin 1 of J5 is marked by a square pad and an arrow pointing towards it. If you skip one hole past that, you’re at pin 3. Pins 2, 3, and 6 of J5 have breakout holes, so you can go ahead and solder it into the breakout hole for pin 3.
And again, for certain first-generation Alpha Clock Five units, J5 is located closer to the lower middle-right of the circuit board. Despite the routing change, everything works just the same way: follow the same procedure to connect the wire to pin 3 of J5. (And, if you do not already have a header soldered at J5, you may want to add one.)
Next, we’ll make the cable to connect the clock to the GPS module. Again, we’re starting with the “rainbow” 6-pin FF-header cable, the same type that we normally use for daisy-chaining Alpha Clock Five units together.
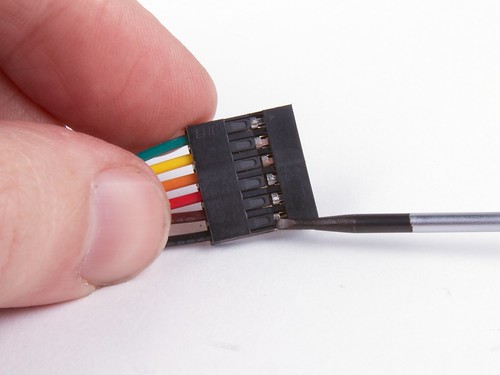
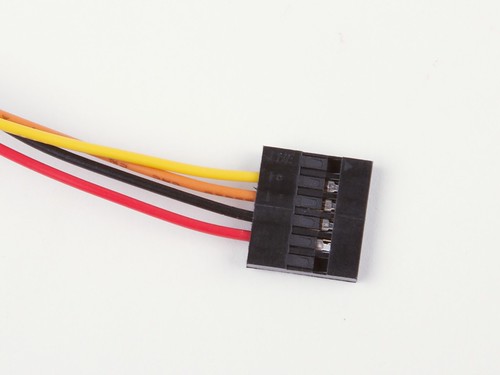
Using a tiny screwdriver, pry up the little plastic finger that holds one of the wires in place, and gently slide that first wire out: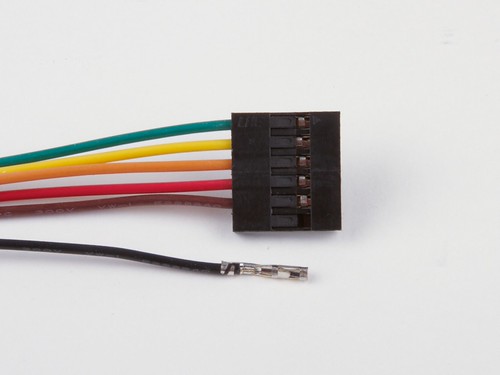
Repeat, removing the black, brown, red, and green wires. (If using an uncolored cable, remove wires 1, 2, 3, and 6.)
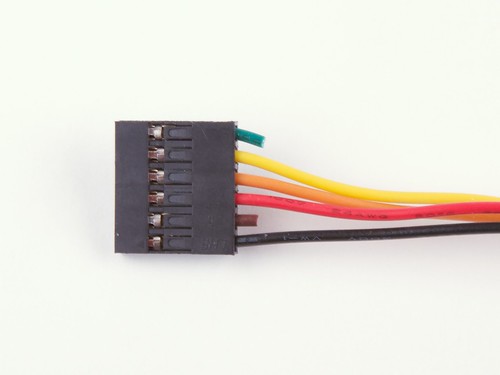
Then, reinsert the red wire (formerly at pin 3, now at pin 2), with the correct orientation so that it clicks into place, and reinsert the black wire as well (formerly at position 1, now at position 3).
On the other end of the cable, use the same procedure to remove the brown and green wires (from positions 2 and 6). You can also just cut those wires off, as we’ve shown here.
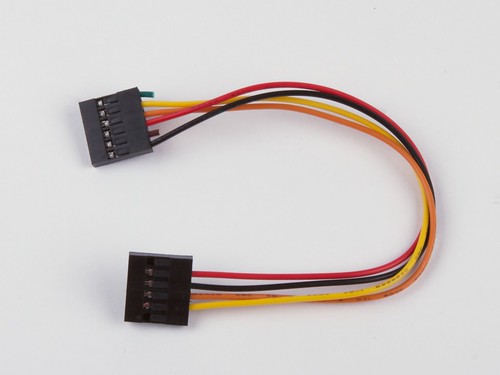
Here is the completed cable.
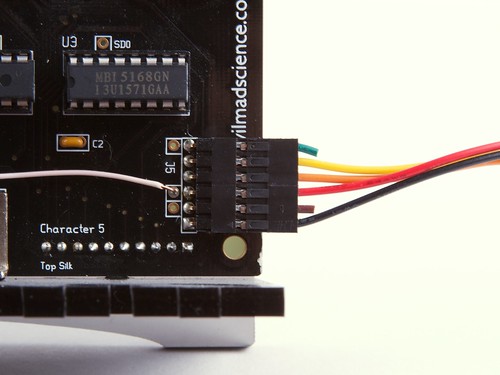
Attach the end where you have not rearranged the wires to J5 of Alpha Clock Five. Note that the black end is at pin 1 (as usual for this type of “rainbow” serial cable), and that the 5 V power that you’ve routed goes to pin 3, the red wire.
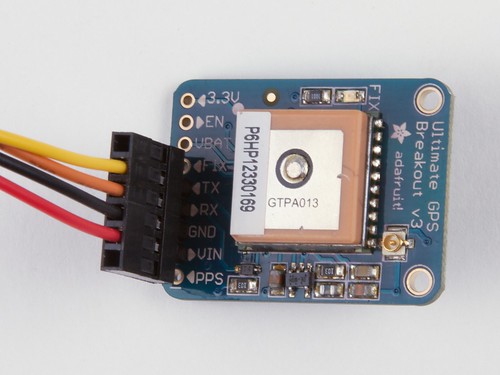
Attach the other end of the cable to the GPS module. Double-check orientation before attaching. The red wire (+5V) goes to “VIN”, and the black wire (ground) goes to “GND.”
Software Setup
The alternative firmware is hosted at GitHub, and you can download a zip file of its contents here. To upload the firmware, you’ll need an FTDI type USB-serial interface, and detailed instructions about how to upload firmware to Alpha Clock Five are available on our documentation wiki. For the alternative firmware, just install the new version over the original Alpha Clock Five library for Arduino.
The alternative firmware does change a few other things as well; in particular, you may want to look for and comment out the following two lines, which reverse the order of the user-interface buttons:
#define MENU_S1S2
#define REVERSE_PMBTNS
Usage
There are a couple of minor configuration options that must be set for GPS time setting to work correctly. First, enter the configuration menu, and scroll down to the GPS item. There, change GPS from “OFF” to “ON96”, which enables the GPS option (at 9600 baud). Second, adjust the time zone to the correct value. (We’re at -8, here in Pacific Standard Time; see this chart if necessary.) And of course, you may want to set DST to “AUTO” to take advantage of that feature as well.
Once enabled, the GPS module may take some time to find a fix, particularly if you’re in an area where GPS signals don’t penetrate too well, but we’ve found this particular module to be mighty sensitive, and had very little trouble getting it to set in just a few minutes.
We think that this is a pretty neat addition to the capabilities of Alpha Clocks, so we’re very happy to see it all come together. And, a big thank you to William Phelps!


While the serial input provides precision, It would be nice to utilize the PPS output to increase the accuracy of the clock. Granted, it’s just a desk clock, not a stratum-1 NTP time server, but it’d still be neat.
Using the PPS would make the clock precise to 10 ns, the next best thing to having your own atomic clock at home!
Is there a port somewhere that could be used to generate an interrupt?
By the time the string is generated by the GPS module, transmitted over the serial line, interpreted and displayed, the clock is already late by several ms.
That helps with precision, but actually not with accuracy. The GPS system is there to provide long-term accuracy. Its local oscillator’s short-term jitter is *far* in excess of that provided by the TCXO on the Alpha Clock Five, and so if you rely solely on the PPS output, time can easily wander off by seconds to minutes when GPS fixes are intermittent. So, if you were to pick only one communication channel between the two, the serial output is really the better choice.
Ideally, one integrates the error to create a steering signal, but a simple and better use of a GPS module like this is to gently steer the time in the right direction– say a few ms at a time –but only when fixes are good.
Actually, I was thinking if using both signals. The PPS to know exactly the start of the second and the serial to know which second we’re talking about. The only problem I can see is that the second event happens after the first. In case of GPS outage, rely on the RTC.
Excellent. I’ve been talking about this for over a year. Glad someone had the time to get it done.