In our annoucement article about the EggBot Electro-Kistka — the hot wax dispenser for the EggBot — we noted that it can be challenging to reposition an egg after taking it out to dye the egg between wax layers.
As an alternative suggestion, reader Dan commented:
Could you leave the egg in the EggBot and paint on the first layer(s) of dye with a brush? Then dip the egg for the last layer to get the ends covered.
Well, let’s try and see how it turns out!
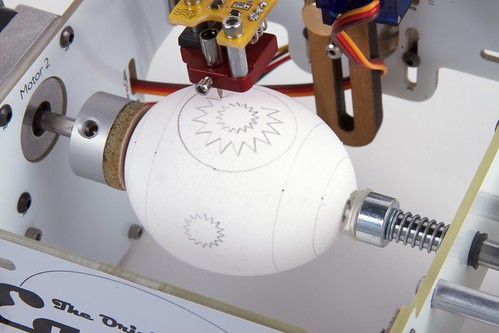
We begin by laying down a first layer of wax on the white surface of an egg. The areas that are covered by wax at this stage will remain white white when we remove the wax at the end of the process.
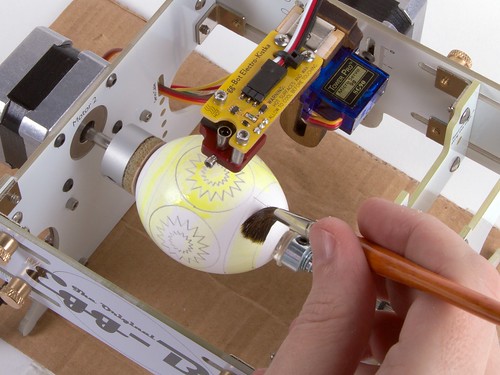
After the first layer is complete, we start the dyeing process. We’re using a watercolor brush to paint on the first dye: a yellow dye from our set of intense batik dyes. We brush it on by hand, in several layers, without removing it from the EggBot. During the process, we use the EggBot’s motor 2 (the “egg motor”) to rotate to different angles and allow the egg to dry with different sides facing down.
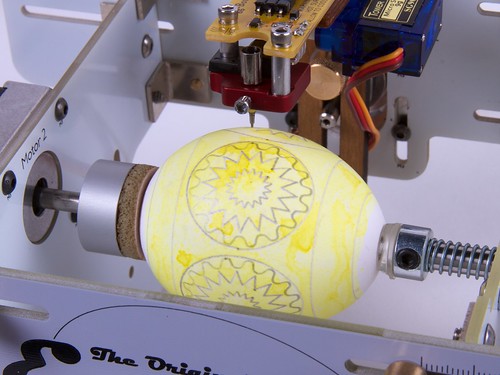
The end result — after several layers and allowing the egg to dry in several different positions — is very blotchy and not very impressive. During the painting process, the wet dye flows awkwardly into areas bounded by the wax lines, driven by gravity. And to make matters worse, the color is much more intense where the dye has been thicker. Let’s push on anyway, and see how it turns out.
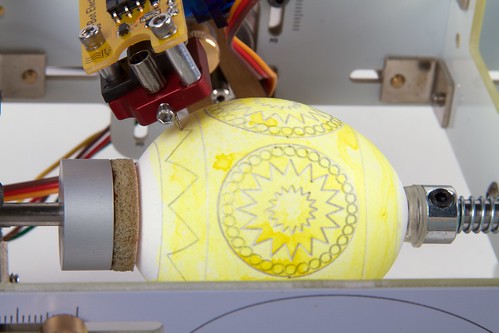
Here, we are painting the second layer of wax, which will define the areas that will end up yellow at the end of the process.
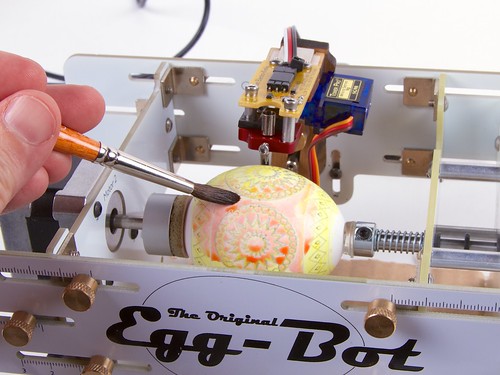
After the wax is done, we begin painting on the red dye. You can immediately see how the dye “bunches up” in areas bordered by the wax lines.
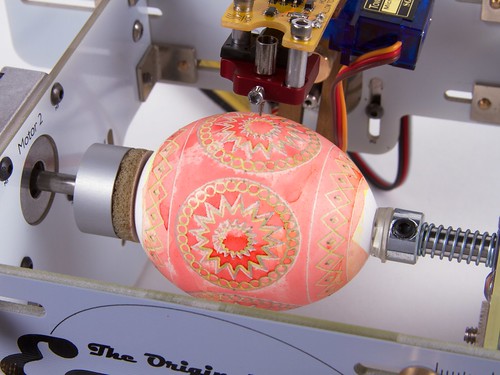
Holy McBlotchy! When the red is done, the coverage is anything but uniform. This red is normally very intense (example), but even after painting on several layers of dye over the full egg and allowing it to dry at a different angle for each, it’s blotchy and only occasionally intense.
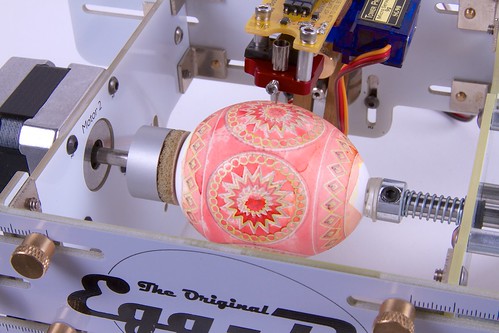
Pressing on, we add the final layer of wax, which will define the areas to remain red at the end of the process.
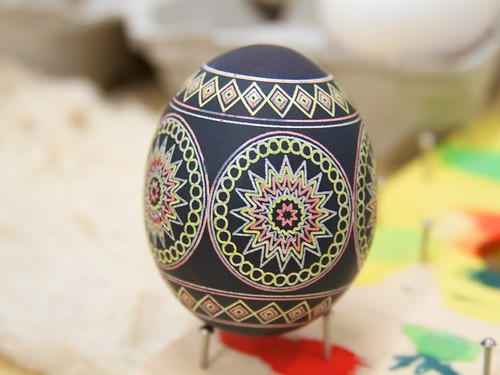
All done with wax, we remove the egg from the EggBot and dip it (the traditional way) into our black dye for a few minutes, and then allow it to dry.

Finally, we blow out the contents of the egg and use a hot air gun to remove the wax.
So, how did we do? It’s a mixed bag.
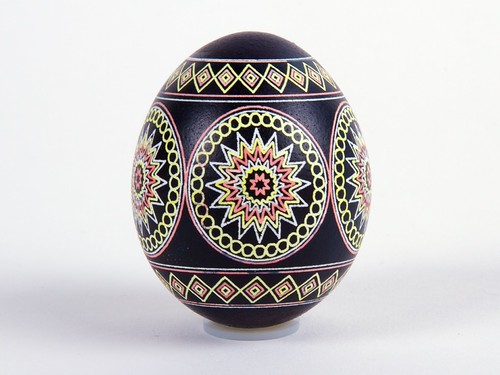
The good: The inter-layer alignment was trivially easy, and the results are reasonably good for the level of detail that we are using. Note, for example, how the thin horizontal stripes keep a constant distance from one another, and how the diamonds near the top and bottom are nicely centered. Both of those were hard to do when re-aligning the egg by hand.
The bad: (part a) Dyes made for eggs are meant to be used on eggs that are submerged in the dye. Brushing them on by hand left a blotchy appearance, without the kind of intensity that we normally expect from these kinds of dyes. Our yellow and red ended up more as pastel tones than vibrant colors.
The bad: (part b) Normal use of the EggBot (with pens or the Electro-Kistka) is pretty quick, but this process is actually annoyingly slow, because you need to wait for the dye to dry before drawing the next layer.
The ugly: Take a look at the red (well, pink) circle near the top of the egg:
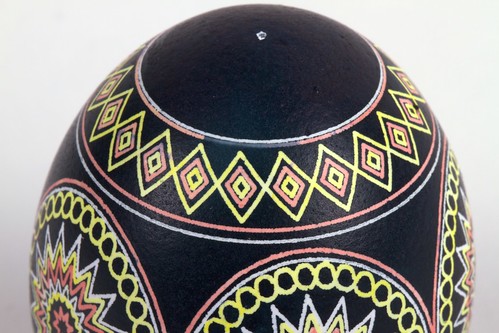
A section of the wax on that circle came loose while in the black dye, allowing that area to darken. If you look closely at the rest of the egg, you may be able to find a few other areas in which the wax came loose from the red or yellow — but not white — areas. Our best guess is that this is a side effect of the blotchy dye application. The wax adhered very well to the plain-white areas, but not 100% of the time where the dye was thick or uneven.
In conclusion, this method does work, but not as well as we might have hoped, due to the difficulty of actually dyeing the egg in place. Another approach that we’ll look at soon will be to rigidly attach the egg to a repositionable coupler with beeswax. That should allow us to take out the egg and dye it (coupler and all) and then easily index it back into the EggBot.


How about rotating the egg through the surface of a dye pool?
Hmm, for that matter, it might work best to use silicone pinch-bowels, since then they could conform a little bit to the shaft and thus give a few more millimeters of slosh-protection when being moved around.
Of course, that’s assuming it’s okay to get the coupler messy, but at that point one could just use an eye dropper with a bowl underneath. :)
Would a pencil mark show through the red and yellow (or similar) – and show up on the bottom pad? If so, when you’ve got the egg in place, just make a single line across the joint, then re-join it whenever you need to replace the egg. Might get a bit ‘off’ on subsequent eggs, I suppose…
I second the dye pool idea. Rotate it through for a few minutes (maybe double or triple the time you would normally leave it submerged in the dye). I think the necessary thing for a non-blotchy appearance is to keep it rotating why it dries. Write a program/sketch/g-code/whatever that will keep it slowly rotating for however long it takes, reversing direction occasionally so the dye beads move to the opposite side of the shape bordered by wax.
They beeswax-attached-coupler will probably work well too, provided the wax doesn’t let go. Good luck! :-)
That actually worked better than I might have guessed. Interesting idea, and assuming that you were going for pastels on black, not so horrible. My guess is that some sort of spray application might solve the blotchy issue in large degree. Good luck with future experiments.
I was going to mention the cup to hold the die under the egg with a drain/fill tube on the bottom of the cup and making the motor mount smaller so you can die more of the egg but the others beat me to the pool idea. As for the egg taking a long time to dry, blot the excess off with a cloth and then use a hair dryer on cool or a fan to dry the egg without melting the wax. To bad you aren’t here in phoenix as the drying time would be MUCH shorter.
Perhaps it might be better to work out a repeatable chucking and locating method which would allow removal of the egg, dip-dying, and accurate replacement.
Since holes are punched in the shell to remove the contents, it might be possible to create a pattern of holes which located the egg for each new application of wax. A jig or tool which provided a larger and smaller hole, or three holes in an isosceles triangle, could do the trick. These could mate with matching fixtures in the chuck.
Another, perhaps easier method, might be a set of small, 3D-printed mounts which could be fastened with a removable adhesive to either end of the egg, and mate accurately with chucking fixtures. If the cement was confined to the holes in the ends of the egg, it shouldn’t compromise the final dying step.
This is what I was thinking. If we’re already using wax we could affix a coupler to the top and bottom of the egg with wax. Heating the egg at the end of the process would remove the couplers. This sounds like a good 3-D printer project. I want a set…
a) I wonder if an air brush might do the trick, even coating with fast drying time is what generally happens with paints and ink dyes, perhaps egg dyes too.
b) perhaps a wetting agent in the dye would help something as simple as a few drops of detergent.
Bob
Hi.
When (and if) the ‘long moves’ are incorporated in the EBB firmware you could have the egg to slowly rotate while having part of the egg in a ‘dye pool’
RGDS
Ragnar