Even while the Kickstarter campaign for our WaterColorBot is in full swing, we’re continuing to improve its hardware design. Here are a select few of the refinements we have made since the last revision that will make the WaterColorBot better for everyone.
1. Spectra cord for more elegant design and better performance.
The position of the WaterColorBot’s paint brush is controlled by a pair of stepper motors. Each motor turns a little winch, that moves a length of cord, that in turn controls the X or Y position of the brush through a set of pulleys. This is a classic method of controlling motion; it is simple, reliable, and quite precise.
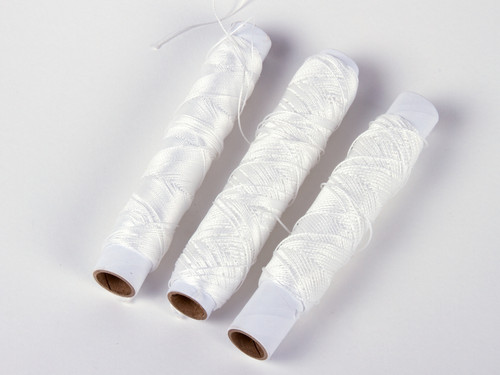
To keep that precision, it’s helpful to have a cord that doesn’t stretch much under load. We’ve recently upgraded the cords on the WaterColorBot from Dacron (a low stretch polyester) to Spectra fiber. Spectra is a high-performance polymer that is frequently quoted to be (by weight) “ten times stronger than steel” and “40% stronger than kevlar.”
In making the change, we’ve been able to move to a thinner cord (now only 20 mils, 0.5 mm, across) that stretches even less, is even more abrasion resistant, and is rated for 100 pounds of force instead of 50.
But there’s another benefit of using Spectra, at least as significant as the ones mentioned above.
In terms of composition, Spectra fiber is a form of UHMW (ultra high molecular weight polyethylene). UHMW is an important industrial polymer in its own regard because it is not just tough but incredibly slippery, with a coefficient of friction approaching that of Teflon. For this reason, UHMW plastic bearings are often used for high-performance applications in industry. And, in the newest revision of the WaterColorBot, we take advantage of the fact that it makes such a good bearing.
In the previous versions of the WaterColorBot (with Dacron cords), we used little plastic pulleys to route the cords around the chassis. However, it turns out that the coefficient of friction between Spectra and stainless steel is so low that we can actually remove the pulleys. Instead, we route our new Spectra cord directly around flat-head stainless steel rivets, located where the pulleys used to be. Not only is this arrangement significantly more elegant, but the performance is better than ever.
In order to keep the Spectra cord from gradually slipping down and rubbing against the wood, we also have added a new feature: A handful of round-head stainless steel rivets, pressed flush to the wood, directly below the path of each cord. These rivets provide the cord with a gentle nudge upward, each a single point of contact with extraordinarily low friction.
2. Improvements to make assembly even easier.
As we’ve had the opportunity to build additional revisions of the WaterColorBot, we’re continuing to find ways to make it easier and more fun to put together. Here’s one of them: New slots cut into the edge of the chassis make it that much easier to get to the set screw that holds each winch to its motor.
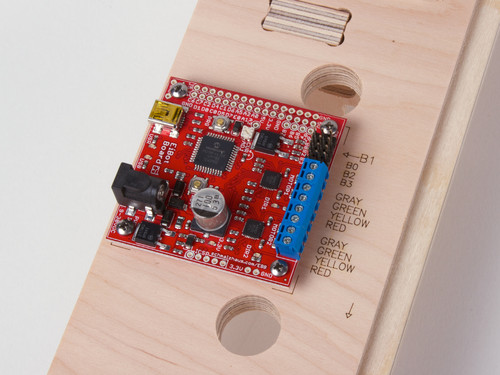
And another: When you hook up the eight motor wires to the EBB driver board, you’ll no longer have to look back and forth at the instructions, because we’ve engraved the wire colors right into the frame of the chassis. It’s amazing what a difference a little change like this can make in the experience of putting it all together.
3. Larger brush holder.
The brush holder on the WaterColorBot carriage can now fit a brush– or pen or anything else that in the holder –up to 0.4″ (10 mm) in diameter, up from 0.325″ (8 mm). That means that it can fit a wider variety of pens and pencils. And while that is fundamentally a small change, it does open up the WaterColorBot to some very interesting new possibilities.
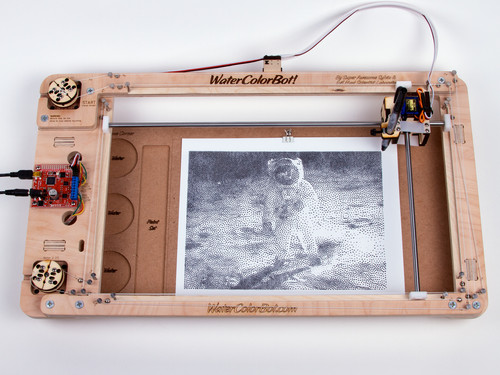
Here, we’ve used the WaterColorBot, fitted with a Sharpie Pen, to sketch out a stipple drawing that we made from a photograph with our StippleGen software.
Not bad for a first try!


Very nice but I already have your next project. On one of my first jobs many years ago they had a large flat bed plotter that was used for printed circuit plots. You have all the parts so all that is needed is to get it working at about 3 times it’s current size. I am working on family trees and most likely will be using the large printers at the office supply store but this could open up other possibilities. Even if you can’t get the precision needed for my project, it would still be a low cost way of creating large scale art.
After all, it worked for the Egg-Bot.
Have just pledged for a kit (late adopter)! Was curious, could this be adapted to produce home-brew PCB’s with the appropriate pen and copper board (no experience with this)?
It certainly can, but it’s not going to give the high resolution that you can get with some other methods. It’s certainly going to be adequate for making circuit boards with 0.1″ pitch through-hole parts. Another thing to try would be using a conductive-ink pen to print circuits directly.
I like the sounds of that…sounds like a pretty straightforward way to start building some simple PCBs…thanks!
Replace the pen with a laser diode and you have a laser cutter. This should be sufficient to cut thin wood or paper for model makers.
Very nice. We use Spectra in our research robots. It’s incredible stuff – light, strong, and stiff. The one challenge is always attaching the stuff because, as you indicate, it’s so slippery. Knots come undone easily. How are you attaching the ends? The best we’ve come up with is using a hitch knot with lots of extra loops for friction and a dab of CA glue to keep it all in place.
Hi Andrew,
Yes– it’s actually something that you need to think about! One end is held by a double overhand knot, that goes through a keyhole, under tension. The other end is clamped under a piece of wood by two screws. These both seem to be absolutely reliable for what we’re doing, although if the forces were significantly higher, it might be a different situation.