All posts by Lenore Edman

About Lenore Edman

Co-founder of Evil Mad Scientist Laboratories.

Open Medical Hardware: The Open Stent

Untitled
Untitled
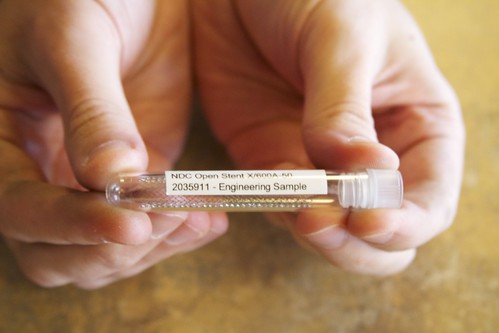
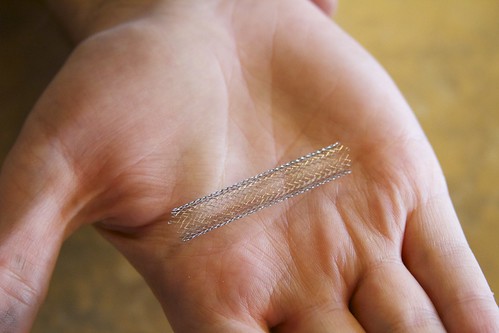
The stent pictured above is an example of an Open Stent from NDC, makers of nitinol materials and devices, particularly for medical applications. In their introduction to the project, they write:

The first problem that we encounter when developing useful and practical educational resources for stent design is that every design we might want to use as an example is proprietary! That leaves us without much to talk about… So to solve this problem, the first step was to create a design to use as an example. The Open Stent is designed to be completely generic, but also realistic, and relatively easy to modify and extend to be useful for whatever purpose a designer intends.

In addition to publishing their draft of Open Stent Design, which they call “a practical guide and resource for design and analysis of a generic Nitinol stent,” NDC has provided extensive calculation tools and CAD files as well, to help others evaluate and create derivatives of the design.

The project is a fascinating open source hardware use case, where creating an open design provides a platform for education and discussion where none existed before.  It’s also very exciting to recognize this as an early example of open source hardware in the field of medical devices— one of the places where open hardware can potentially make a very big difference in the world.

Evil Mad Scientist Open House, August 12

If you’re in the San Francisco Bay Area next Monday, we hope you’ll join us for an open house:

When: Monday, August 12, 5 pm ? 9 pm
Where: Evil Mad Scientist Laboratories
175 San Lazaro Ave, Suite 150
Sunnyvale, CA, 94086

Come see the WaterColorBot in action (just a few days before the end of our Kickstarter campaign!), meet minor internet celebrity Zener the cat, and share in food and conversation.

Marking Klein Bottles with the Eggbot

Untitled

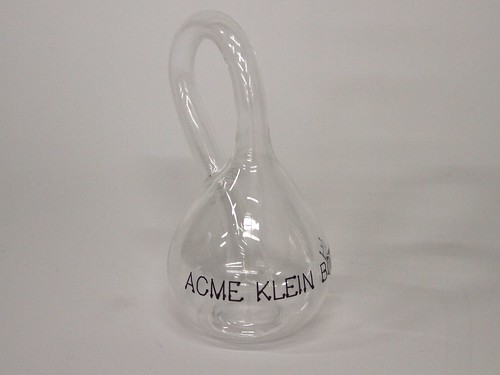
We were lucky enough to have a visit from Cliff Stoll, geek celebrity and proprietor of Acme Klein Bottle. Acme is the finest source of Klein bottles on the internet.

Cliff came with an esoteric dilemma: how to engrave a glass Klein bottle. Acme Klein bottles are blown from borosilicate (Pyrex) glass, which has a low coefficient of thermal expansion, which means that the usual way of engraving a curved glass surface—laser engraving—doesn’t actually work.  With more common types of glass, you can use a laser engraver to etch anything you want into the surface. But with Pyrex, the surface simply melts unevenly rather than creating the microfractures that give an etched appearance.

Untitled

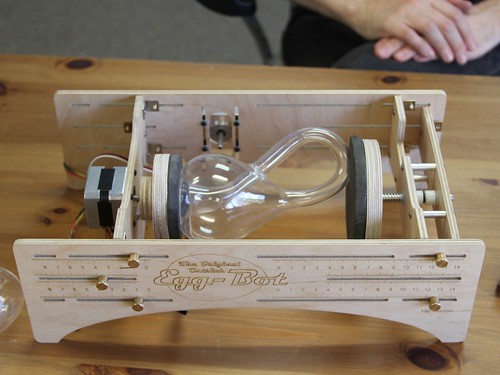
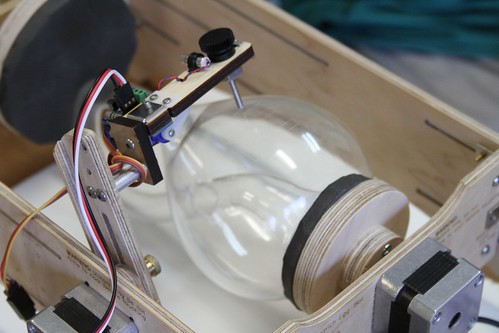
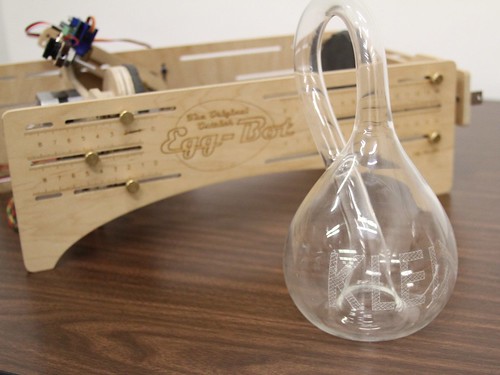
So how would you etch the curved surface of a Klein bottle? It turns out, to our surprise, that it is remarkably easy to do it with an Ostrich Eggbot fitted with a diamond engraver attachment.

There was one complication, which is that a Klein bottle is a funny shaped object! In order to fixture the Klein bottle in the Eggbot, we made a couple of extra large couplers—much larger than the tiny pads normally used to hold the ends of an egg—with EVA foam rubber pads on their surfaces. The extra large couplers held the Klein bottle securely for rotation.

Untitled

Untitled

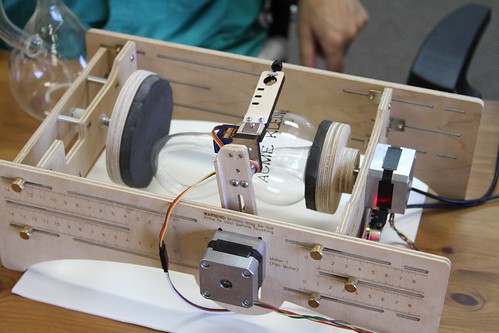
We did some initial tests with Sharpie and a medium sized Klein bottle to make sure our fixturing worked well.

Untitled

And then we hooked up an engraver for a real test.

Untitled

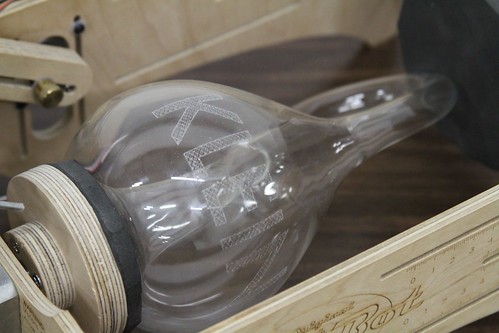
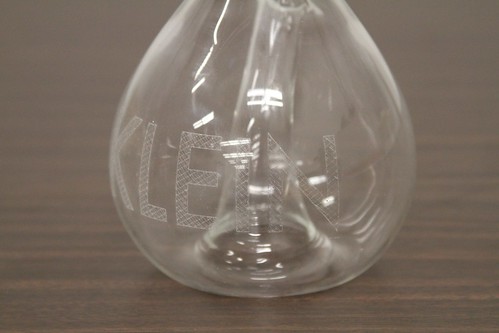
Here’s what the Klein bottle looked like after engraving. Not being particularly creative, we etched the word “KLEIN” into the side.  Because the Klein bottle is made from thick borosilicate glass, it takes engraving remarkably well. It is a much more sturdy object than the fragile Christmas ornaments that we have engraved in the past.

Untitled

While we can’t imagine that it is a major market segment, the Eggbot seems to be ideal for working with Klein bottles (insomuch as anything can be perfect for working with a closed, non-orientable, boundary-free manifold). But regardless, it’s quite wonderful to find an unexpected application like this, where our little robot can solve a real-world problem that we had never even considered.

WaterColorBot at Dorkbot SF, 7/31

Dorkbot SF, the San Francisco chapter of Dorkbot, is having its next meeting tomorrow, July 31. And, we will be bringing along the WaterColorBot for show and tell between the main acts. So if you’re in the area, this would be a great opportunity to come and see the WaterColorBot up close and personal.

Dorkbot is a loosely organized sporadic meeting of people generally interested in “Doing Strange Things with Electricity.” The event will be at Otherlab starting at 7:30 pm. You may know Otherlab from their wonderful Othermill recently launched on Kickstarter. Anyone can attend and admission is free, although there is a suggested donation.

The Mug Marker

Untitled

Untitled

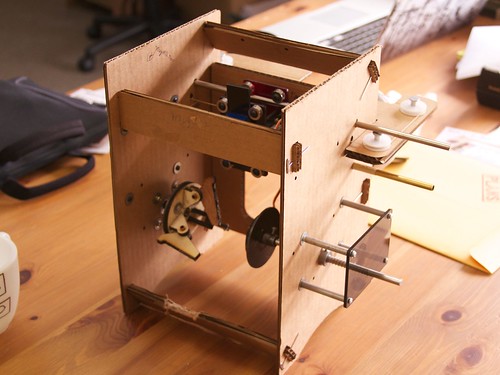
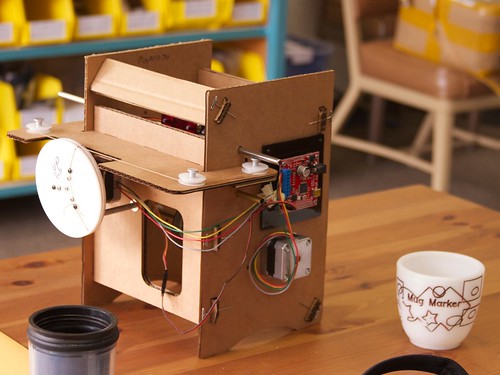
Don McRae recently stopped by our shop last week to show off his homebrew CNC project, the “Mug Marker” — a wonderful little cardboard robot that can draw on mugs.

Much like the Mug Plotter on Instructables, it uses the same EBB controller board and stepper motors as the Eggbot, but with linear motion for the pen instead of rotation. However, unlike that version, Don has incorporated the same winch-drive mechanism that we use on the WaterColorBot to provide motion for the linear axis– meaning that it can go fast or slow, with very good accuracy.

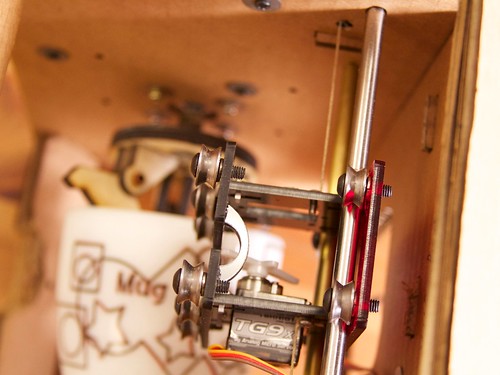
Don laser cut the large white winch on the back of the machine from acrylic. It controls a string that pulls the pen carriage back and forth as it rides on a pair of rods:

Untitled

Untitled

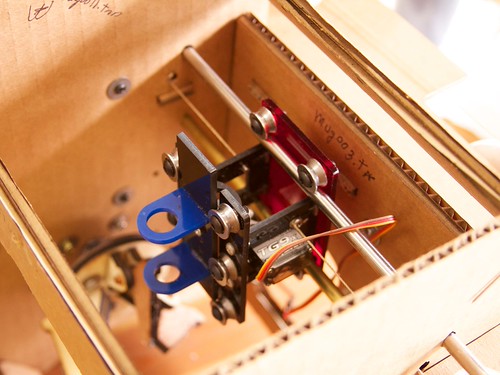
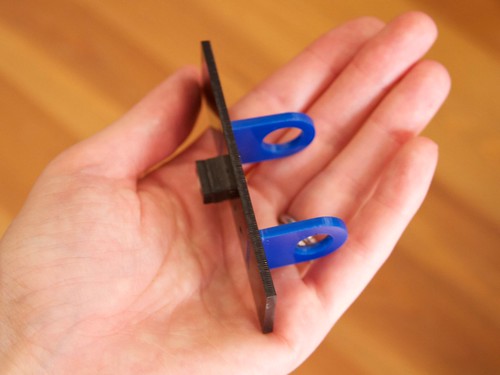
The pen holder itself slides into some additional bearings, and has a small protrusion on the back that rests on the servo horn, allowing it to be lifted up or lowered down.  Like the Eggbot’s pen-lift mechanism, this mechanism only (actively) lifts the pen, which means that it can ride over uneven surfaces, or plot on mugs with variable diameter.


Untitled

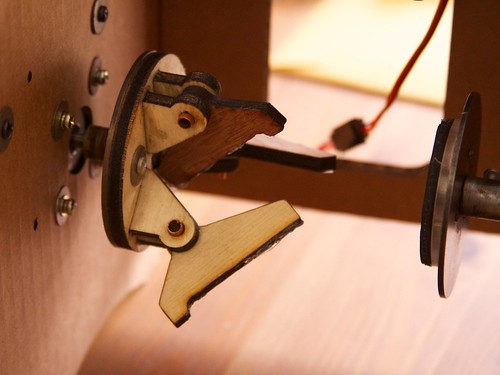
Underneath the pen carriage, the opening of the mug fits onto a three-jaw coupler on the motor shaft, and the base of the mug is held against a rubber faced spring loaded plunger. Small copper tubes are used as bushings to allow the coupler pieces to rotate inward or outward to allow mugs of differing diameters to fit on. A little silicone on the surface of each of the three parts provides a gripping surface, and the upcurved lip keeps the mug from sliding too far.

Untitled

Looking down through the pen carriage, you can see the mug below held in the coupler.

Untitled

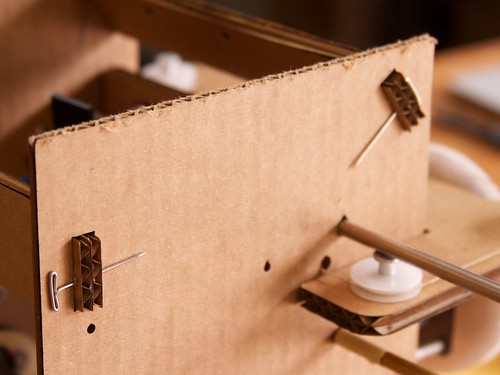
The chassis of the machine is made from cardboard, either hand or laser cut to slot together, and held together very cleverly with pins. The whole machine is put together from a combination of off the shelf parts and found materials, many of which are laser cut for the correct shape. For software, Don uses the Eggbot Inkscape extensions with very reproducible results.

Thanks to Don for bringing it by and letting us take pictures!

Foul Play in the Floral Department

Untitled

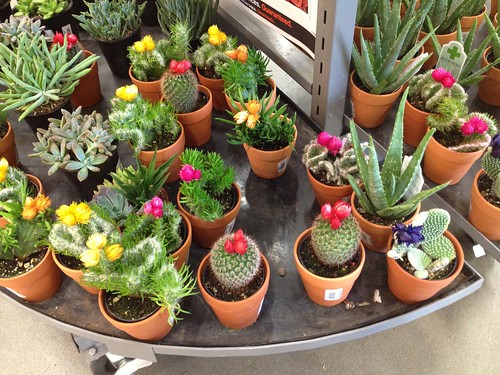
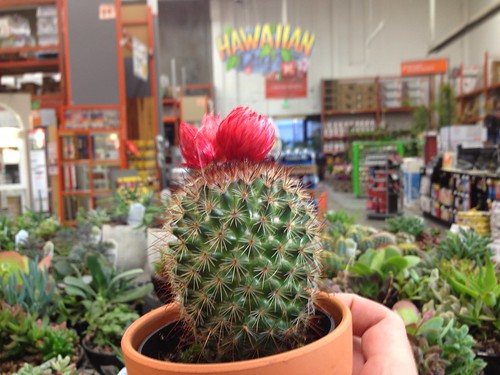
While walking through Home Depot on an unrelated mission, we happened to walk by a display of succulents, and were struck by the unusual blue color of some of the flowering cacti.

Untitled

But on closer inspection, we could see what was really going on: the flowers on the top were attached… with glue. In fact, most of the flowers on the cacti and succulents were glued on.  Some of them, like this winner here, even had globs of glue spilled down onto the spines of the cactus below.

This is a deceptive (yet sadly common) practice— and apparently many people do get fooled by it —as we found garden forum posts and warning articles about it, including here, here, here and here.  This seems not so far away from buying a fruit tree at a nursery, only to find out (once you get it home) that the fruit was only glued to the tree.

Untitled

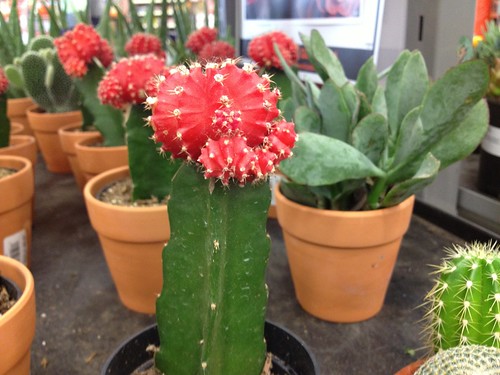
It looks like they are trying to make the less showy cactuses compete with the brightly colored grafted ones that they sell, like the ones shown pictured here. (This may not be a naturally occurring configuration, but at least it is a real, living plant.)

Untitled

Strawflowers are used because they keep their color well after drying. They also open and close as the humidity changes and they absorb more water or dry out more, giving the illusion of being part of a living plant.

And if it’s not bad enough that the customer is being deceived about the nature of plant they are buying, the glue can often damage the plant below, especially during the removal process.

Vintage Technology: Laser and Video Discs

Laser and video discs 2

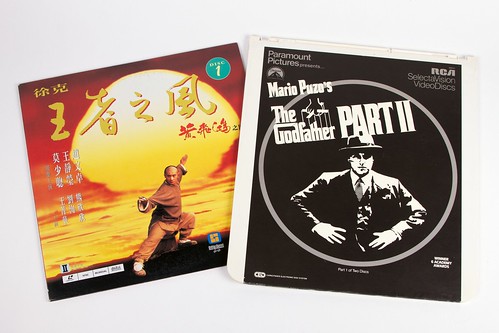
OMG—Is that Once Upon a Time in China IV?

Well, yes, but that’s not what we’re here to talk about. We’ve dug up specimens of two very different types of high-tech video playback media from decades ago— and it’s much more interesting than you might guess. Continue reading Vintage Technology: Laser and Video Discs

Eggers using Eggbots

One of our favorite things about the Eggbot is that we get to connect to the communities that embrace it and find new uses for it. One such group is (not surprisingly) egg artists. They affectionately call themselves “eggers” and are, more likely than not, members of the International Egg Art Guild. One of their enterprising members, Fran, has been creating patterns for use with the Eggbot and sharing them through the Eggers Eggbot Group on Facebook or on Thingiverse.

A pattern, after being marked with the Eggbot using a pencil or marker, can be carved, painted, or decorated in a variety of ways. Carving is generally done by hand using a lightweight air powered drill (such as the Turbo Carver).

As with any specialized group of enthusiasts, they have regional shows to display and sell their creations, and to buy and sell the tools of the trade. Fran uses her Eggbot both for marking eggs for her own projects, and for marking eggs to sell at shows for others to finish.

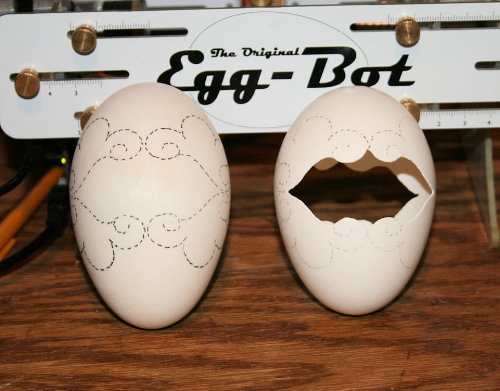
The Eggbot is particularly useful in evenly distributing a repeating pattern around the egg—something that can be difficult to do by hand. The interlocking circles shown on two of the ostrich eggs above were also used to make the egg ornament at the top.

Thank you to Fran for sharing your pictures and projects!

Photomask Mirrors

Untitled

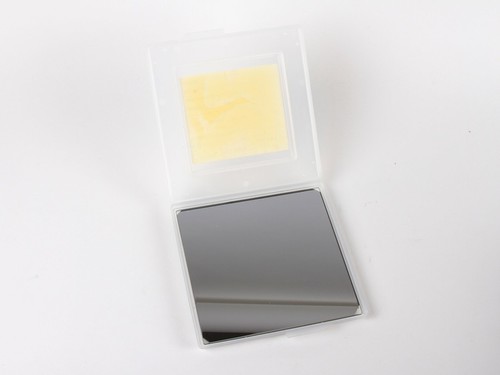
At our local Silicon Valley electronics surplus shops and electronics flea market, we frequently come across all sorts of bizarro semiconductor manufacturing paraphernalia. Here is one of those types that we have written about before, in our coaster project:

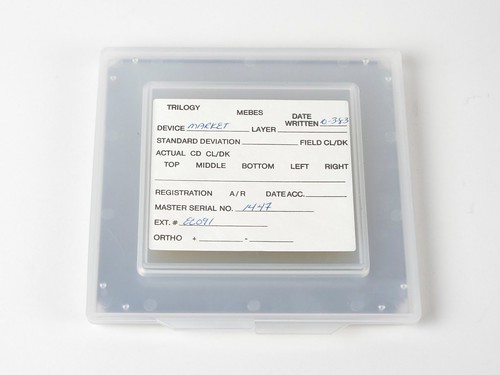
Photolithographic masks, or photomasks are clear templates used in semiconductor manufacturing. Typically, they are made of UV-grade fused silica and have a highly intricate chrome metal film pattern on one side.

The most commonly available masks are test patterns used for calibration, as production masks are guarded carefully. This particular one dates back to 1983!

Untitled

Now looking inside at it, it’s hardly a mask at all. It’s nearly fully silvered—perhaps a mask pulled out before the etching step of its process.

Untitled

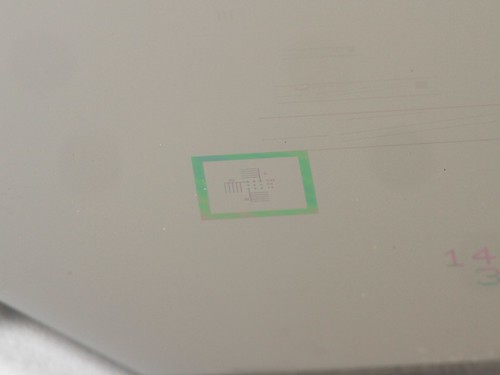
If you look at an oblique angle, you will find a few incredibly detailed patterns, and some printed on markings. This one is marked “5.1 INCH ARRAY” across the top and “1447 3-OCT-83-13. 5” across the bottom.

Untitled

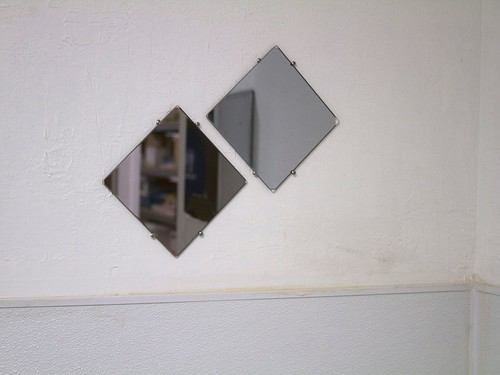
So, what to do with them? Since they don’t have the neat patterns that made those coasters so cool, we used some truss-head screws to mount them to the wall.

Untitled

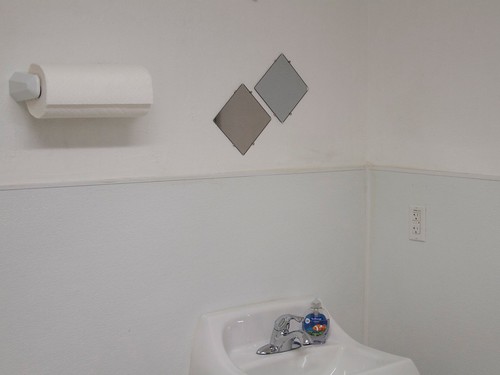
And here we are then, using a couple of photolithographic mask as bathroom mirrors! (With a couple of units at different heights for different-height people.) It solves a couple of problems at once: how to display the beautiful ephemera of semiconductor manufacturing, and what to do about a soulless little extra bathroom at our shop that didn’t come with a mirror.


WaterColorBot Kickstarter Update #1

KS_Thankyou

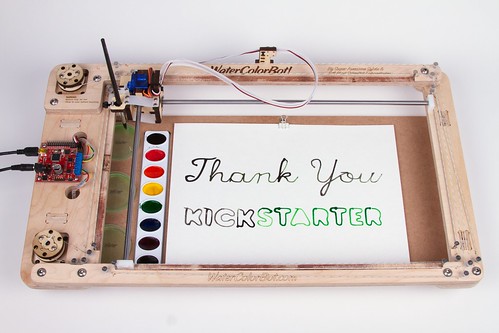
Our sincere gratitude goes out to all of our Kickstarter backers and everyone who has helped to spread the word about our WaterColorBot Kickstarter campaign. It has been incredibly rewarding to see each new pledge come in, from friends both old and new. We’re thrilled to announce that we exceeded our funding threshold of $50,000 after just over 60 hours: WaterColorBots are coming!

Today we recorded a little video that you can see on our update page of the WaterColorBot saying (well, painting) “Thank You.” One of the questions we have heard a few times (and have added to our FAQ) has been, “Can the robot go get more paint when it runs dry?” The answer is yes, as you can see in the video.

So is it all in the can and ready to ship? No, not quite yet. You may notice one goof in the video: an unnecessary color change. We’re still sanding away at the rough edges, in order to make sure that everything is ship-shape before we ship.

Thanks for all of the great questions and comments. We’ve already started adding to the FAQ based on your feedback, and we’ll continue to do so as the fantastic questions keep coming in. We’ve already got some excellent suggestions for future software directions, and changes and additions to the API. Getting real feedback from all of you about the different ways that you hope to use the WaterColorBot is immensely helpful in guiding us forward.

We’ve seen the project posted all over the internet, including on AdafruitBoing BoingEngadgetTech CrunchGizmodo Germany, and even as far away as Indonesia at Jeruknipis. Many of you have posted it to Twitter and Facebook, and we’re grateful for all of your support.

We had planned to post an update after a couple of days, but we didn’t imagine that we would get to post about surpassing our threshold so soon! We’ll be posting more updates in the near future. There are a lot of interesting details about the WaterColorBot that we haven’t yet written about and are looking forward to sharing with you.