All posts by Windell Oskay

About Windell Oskay

Co-founder of Evil Mad Scientist Laboratories.

Evil Mad Scientist Linkdump: March 2014

Back from the dead: The Evil Mad Scientist Linkdump. Last seen circa 2010, the Linkdump is our occasional collection of interesting links. You can find our archived linkdumps here.

MakerBeam Comes of Age

makerbeam pieces

Back in 2009, we helped support the launch on Kickstarter of MakerBeam, a miniature open source aluminum T-slot profile construction set. Just a few months later, we wrote about receiving our first batch of MakerBeam parts.  And while there were some good things that might be said about those first-batch parts, there were some not-so-good things as well. For example, custom screws that couldn’t really be tightened and fastening plates made of too-brittle plastic. With some improvement — stainless steel brackets — MakerBeam eventually found limited distribution in 2011 at Sparkfun in the USA and at MakerBeam.eu, but on the whole, it seemed to be fizzling out of existence.

But, things change, sometimes for the better.  In 2012, Terence Tam’s excellent OpenBeam (a slightly larger T-slot profile, also currently sold by MakerBeam.eu) came roaring out of the gate, reminding us of what great things one can build out of extrusion profiles.  Meanwhile, the folks from MakerBeam.eu took hold of MakerBeam and began to run with it — turning a languishing project into an open source hardware success story. They recently sent us a starter kit to review, and we have to say— we were blown away.

makerbeam 2014 20

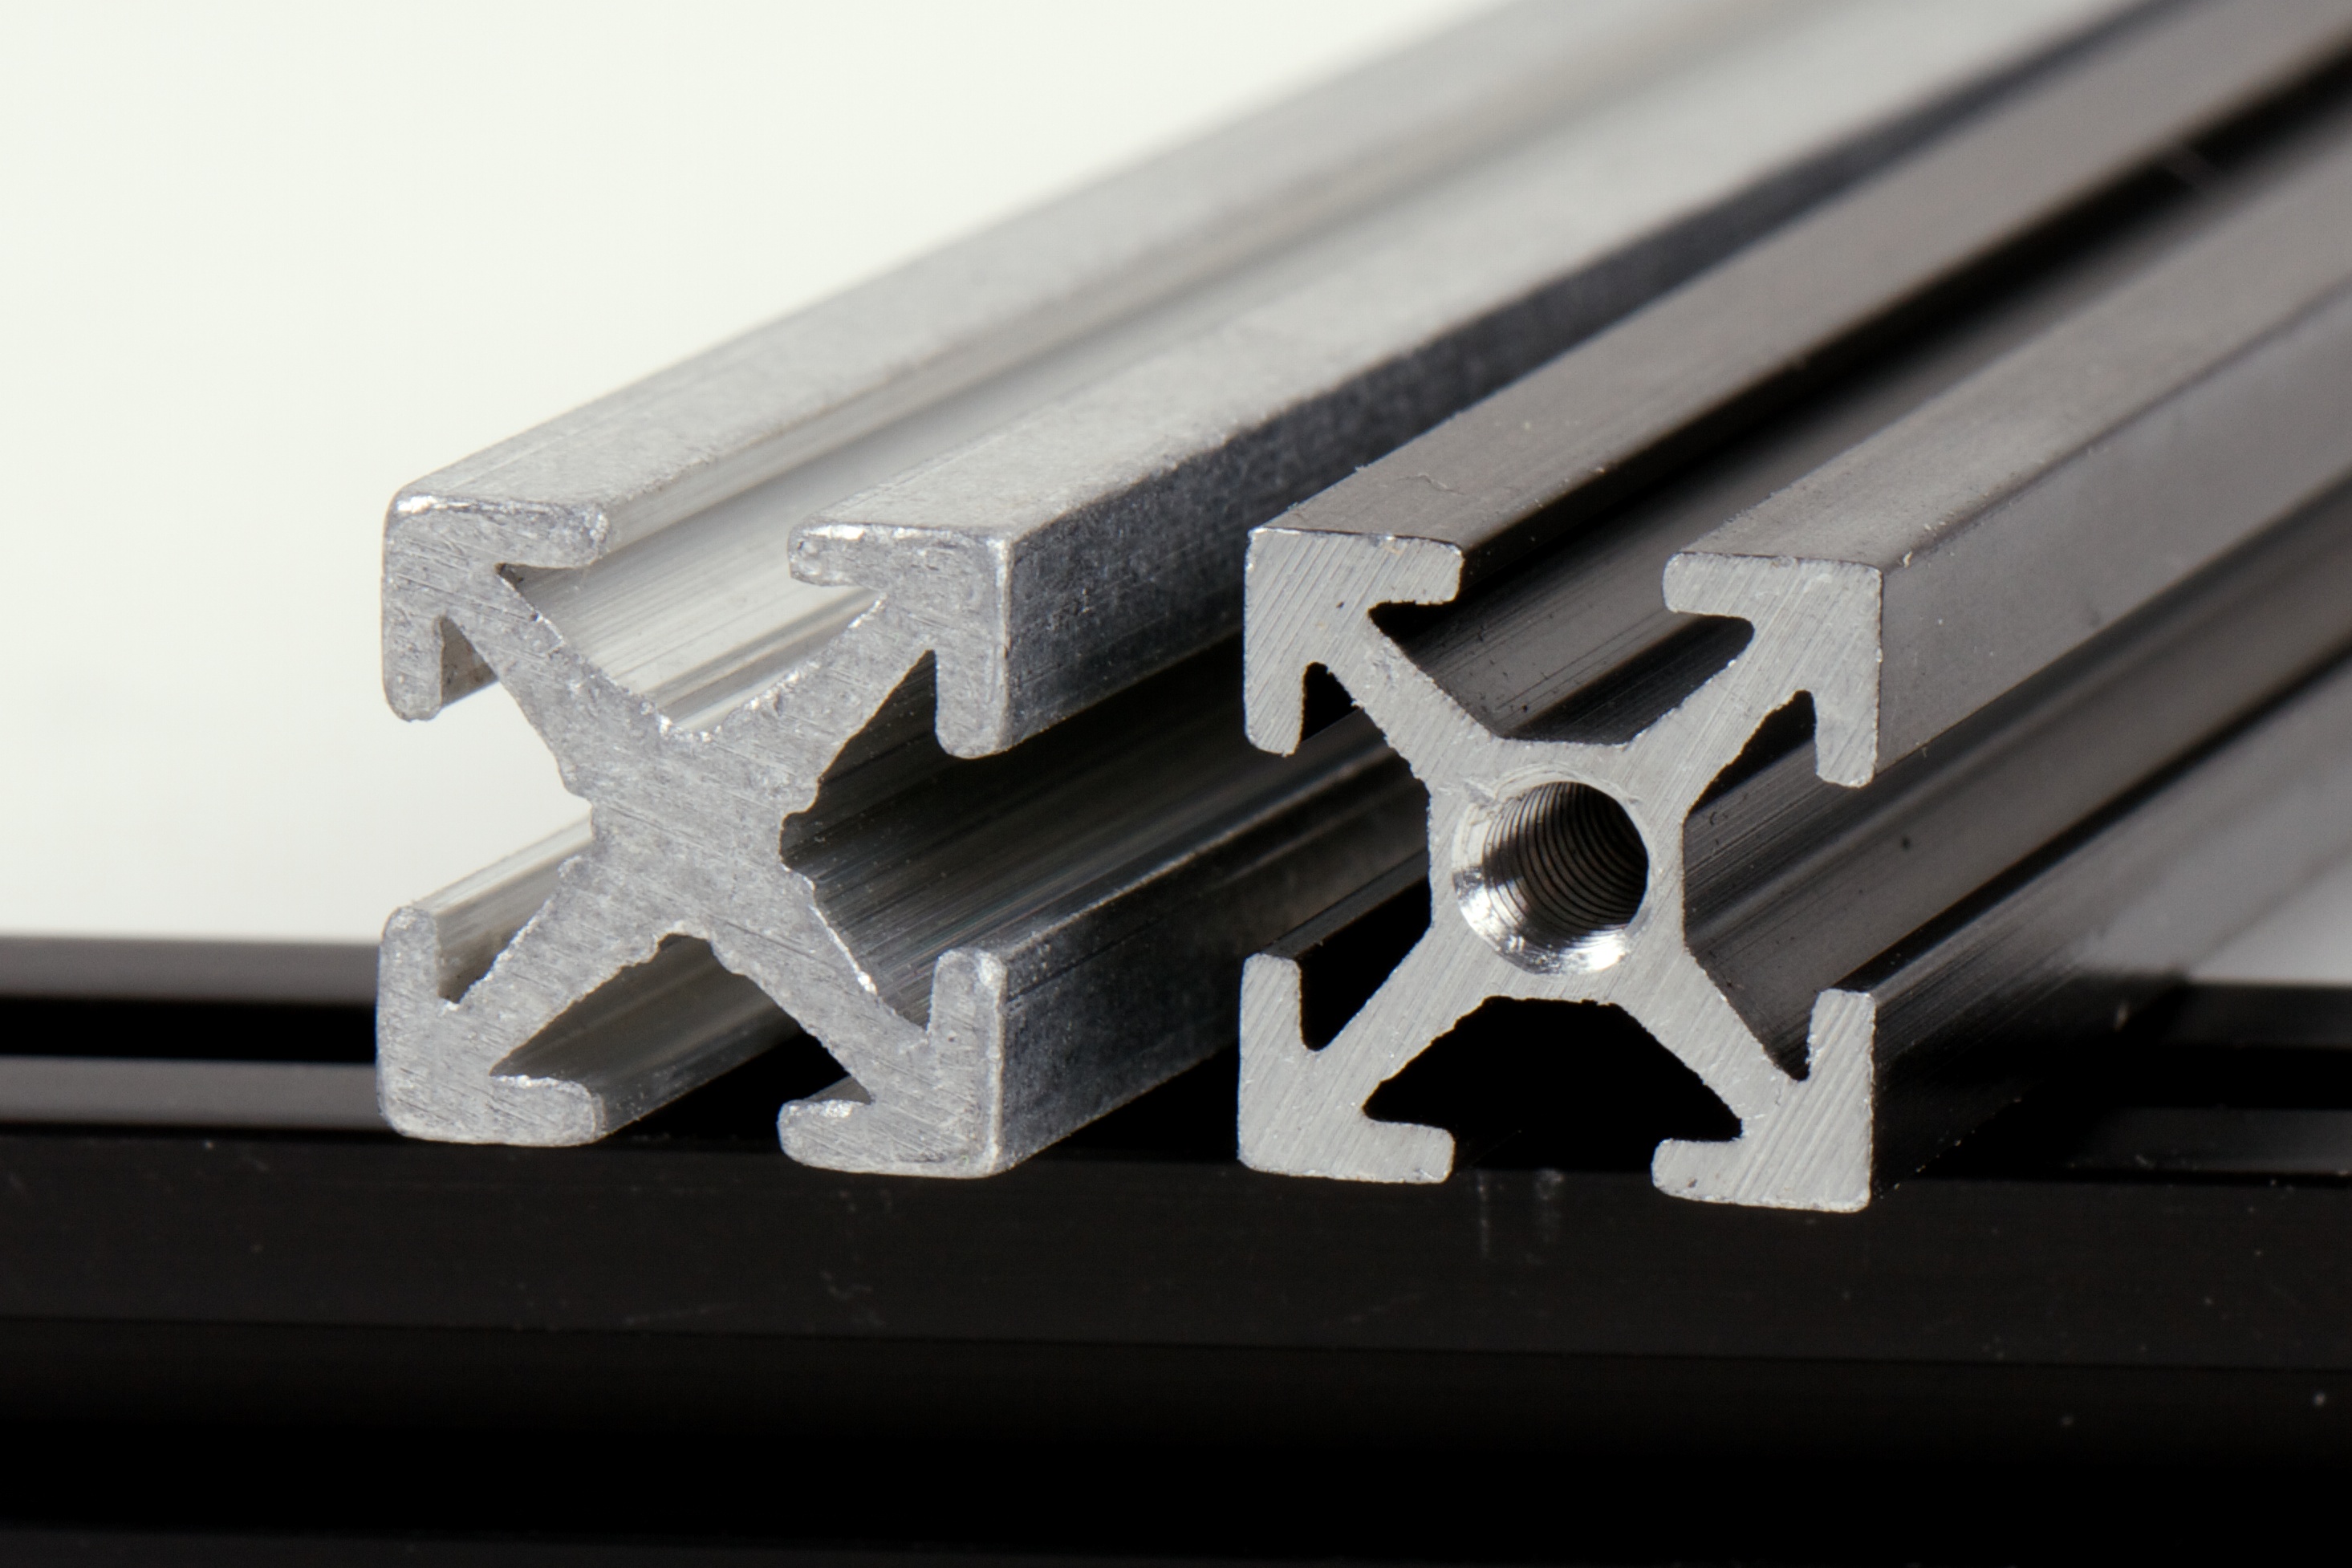
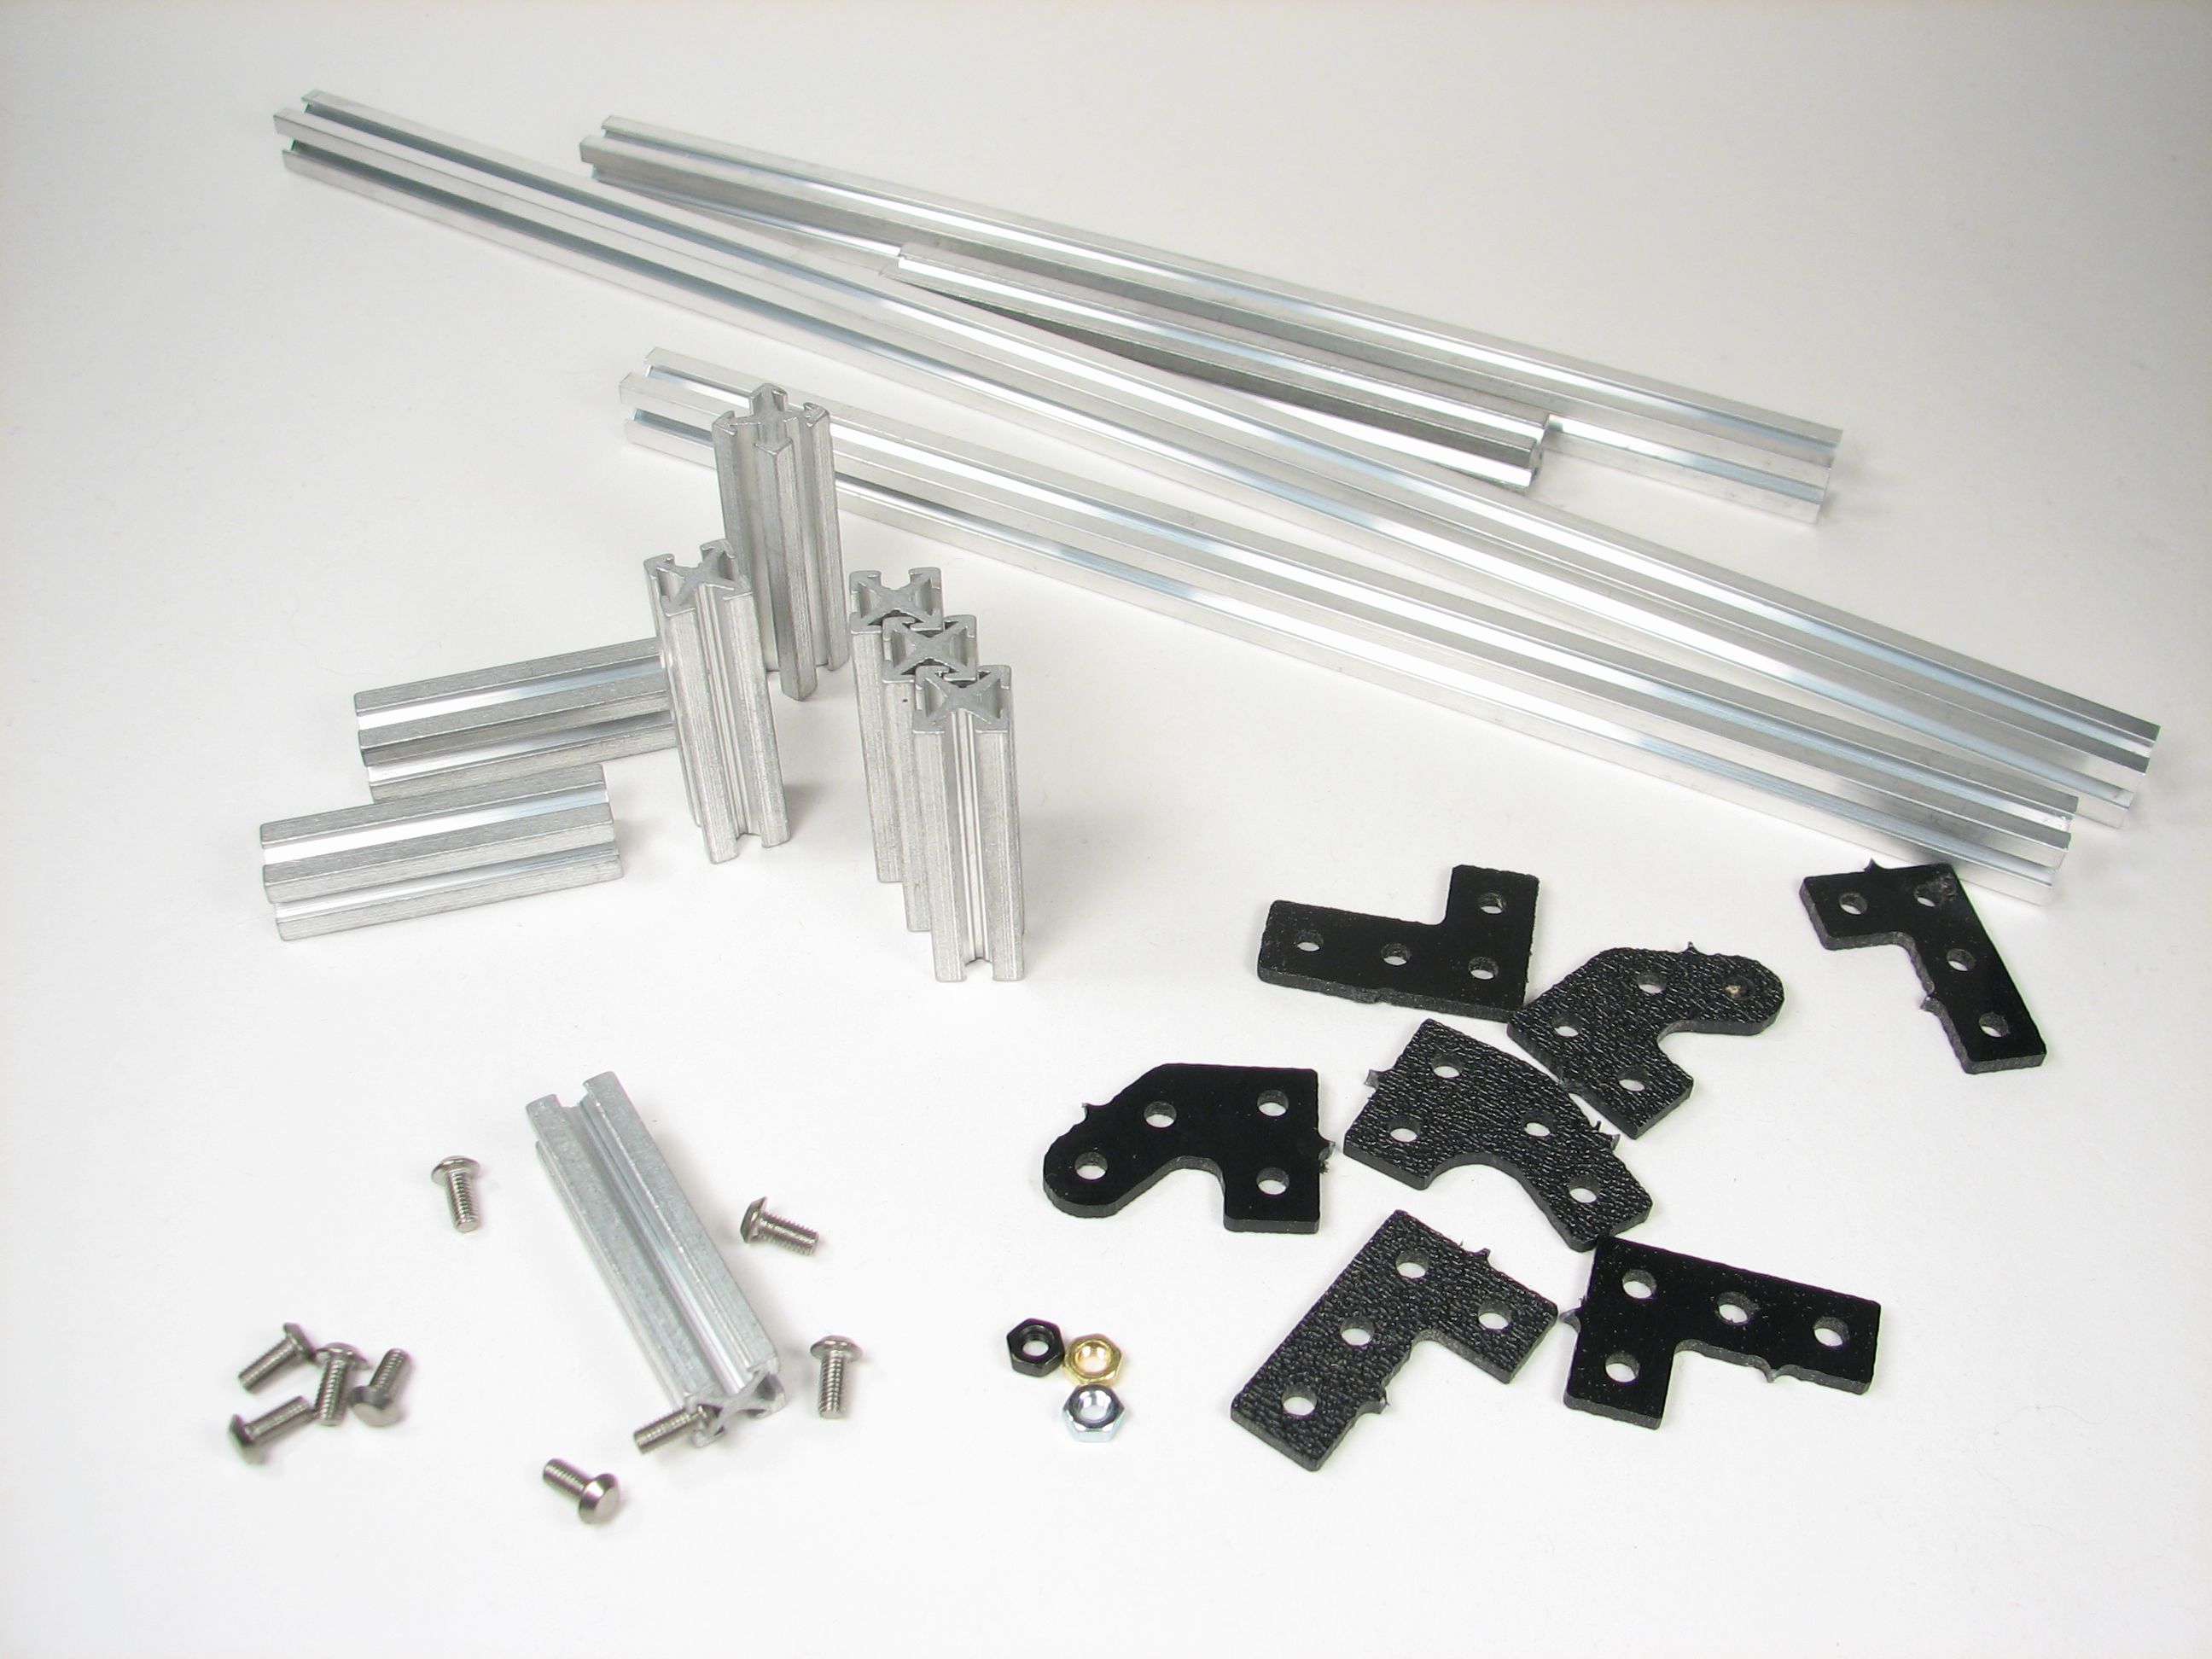
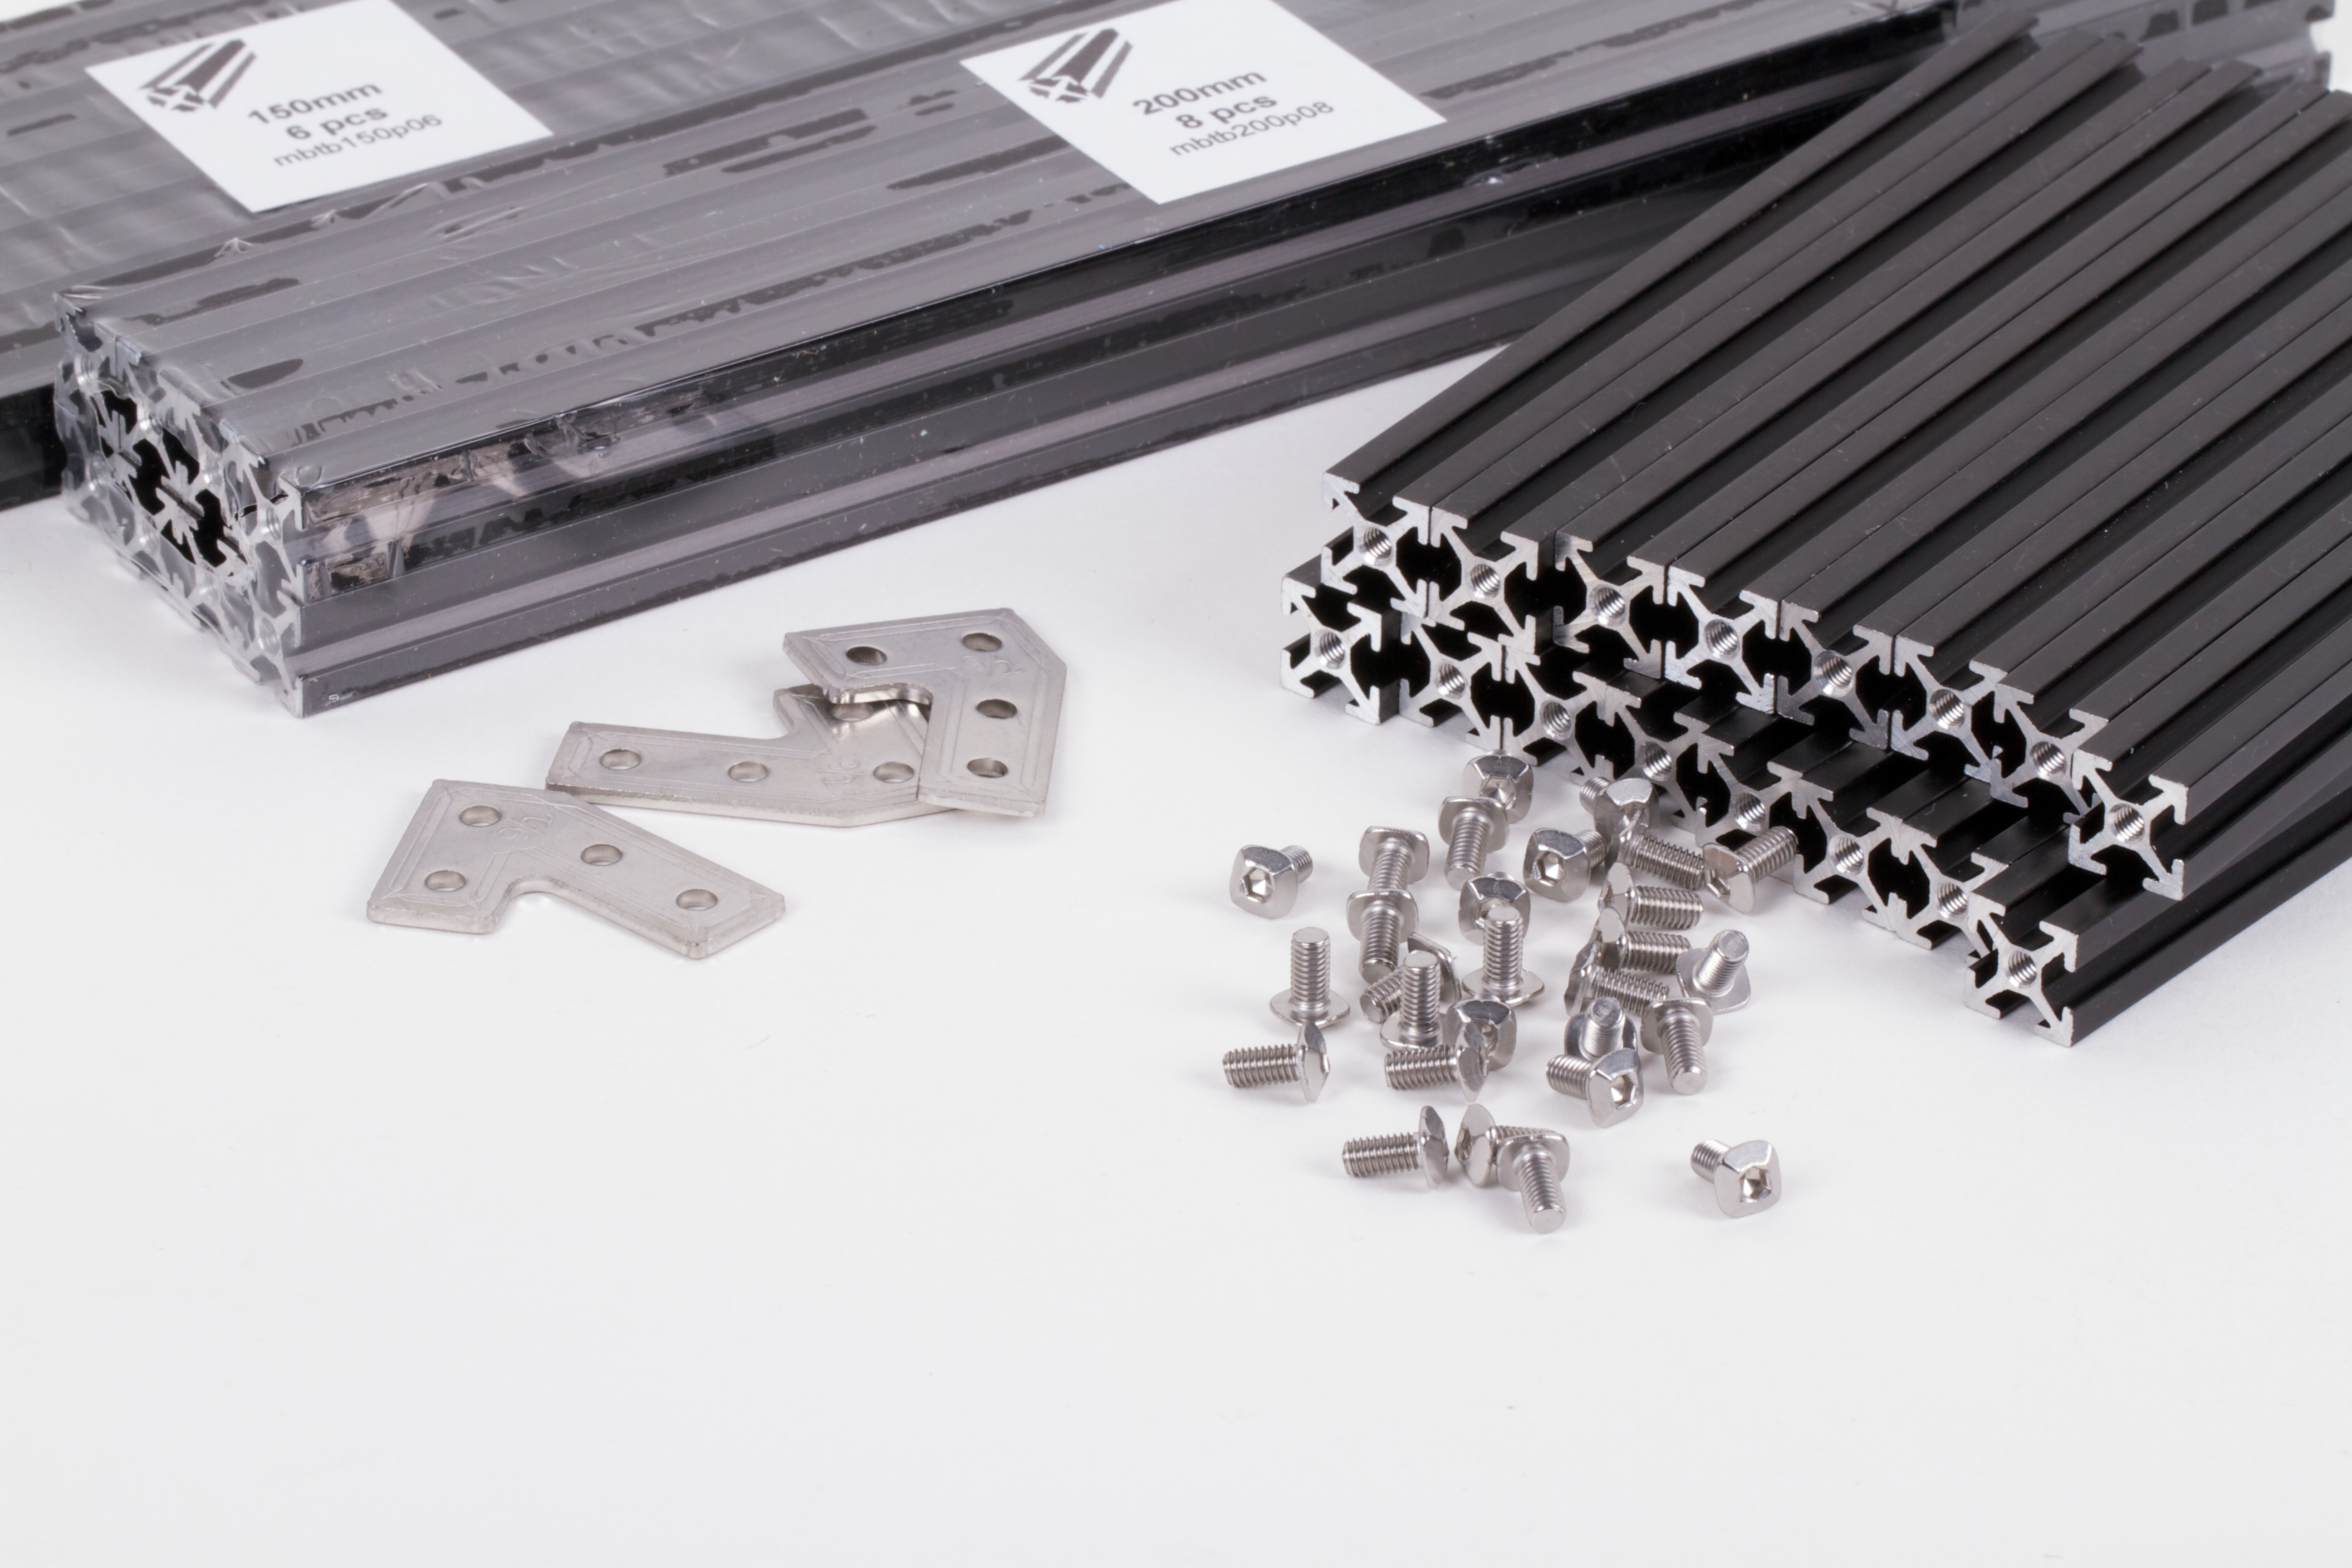
To begin with, they redesigned the profile itself.  The basic proportions are still the same (10 mm across), but the new shape has a thicker solid core that improves strength, and now allows the ends to be tapped. (The hole does not go all the way through.)  They also started having their profiles anodized, providing a harder outer surface, and tapping the ends.

makerbeam 2014 10 makerbeam 2014 11
makerbeam 2014 15 makerbeam 2014 16

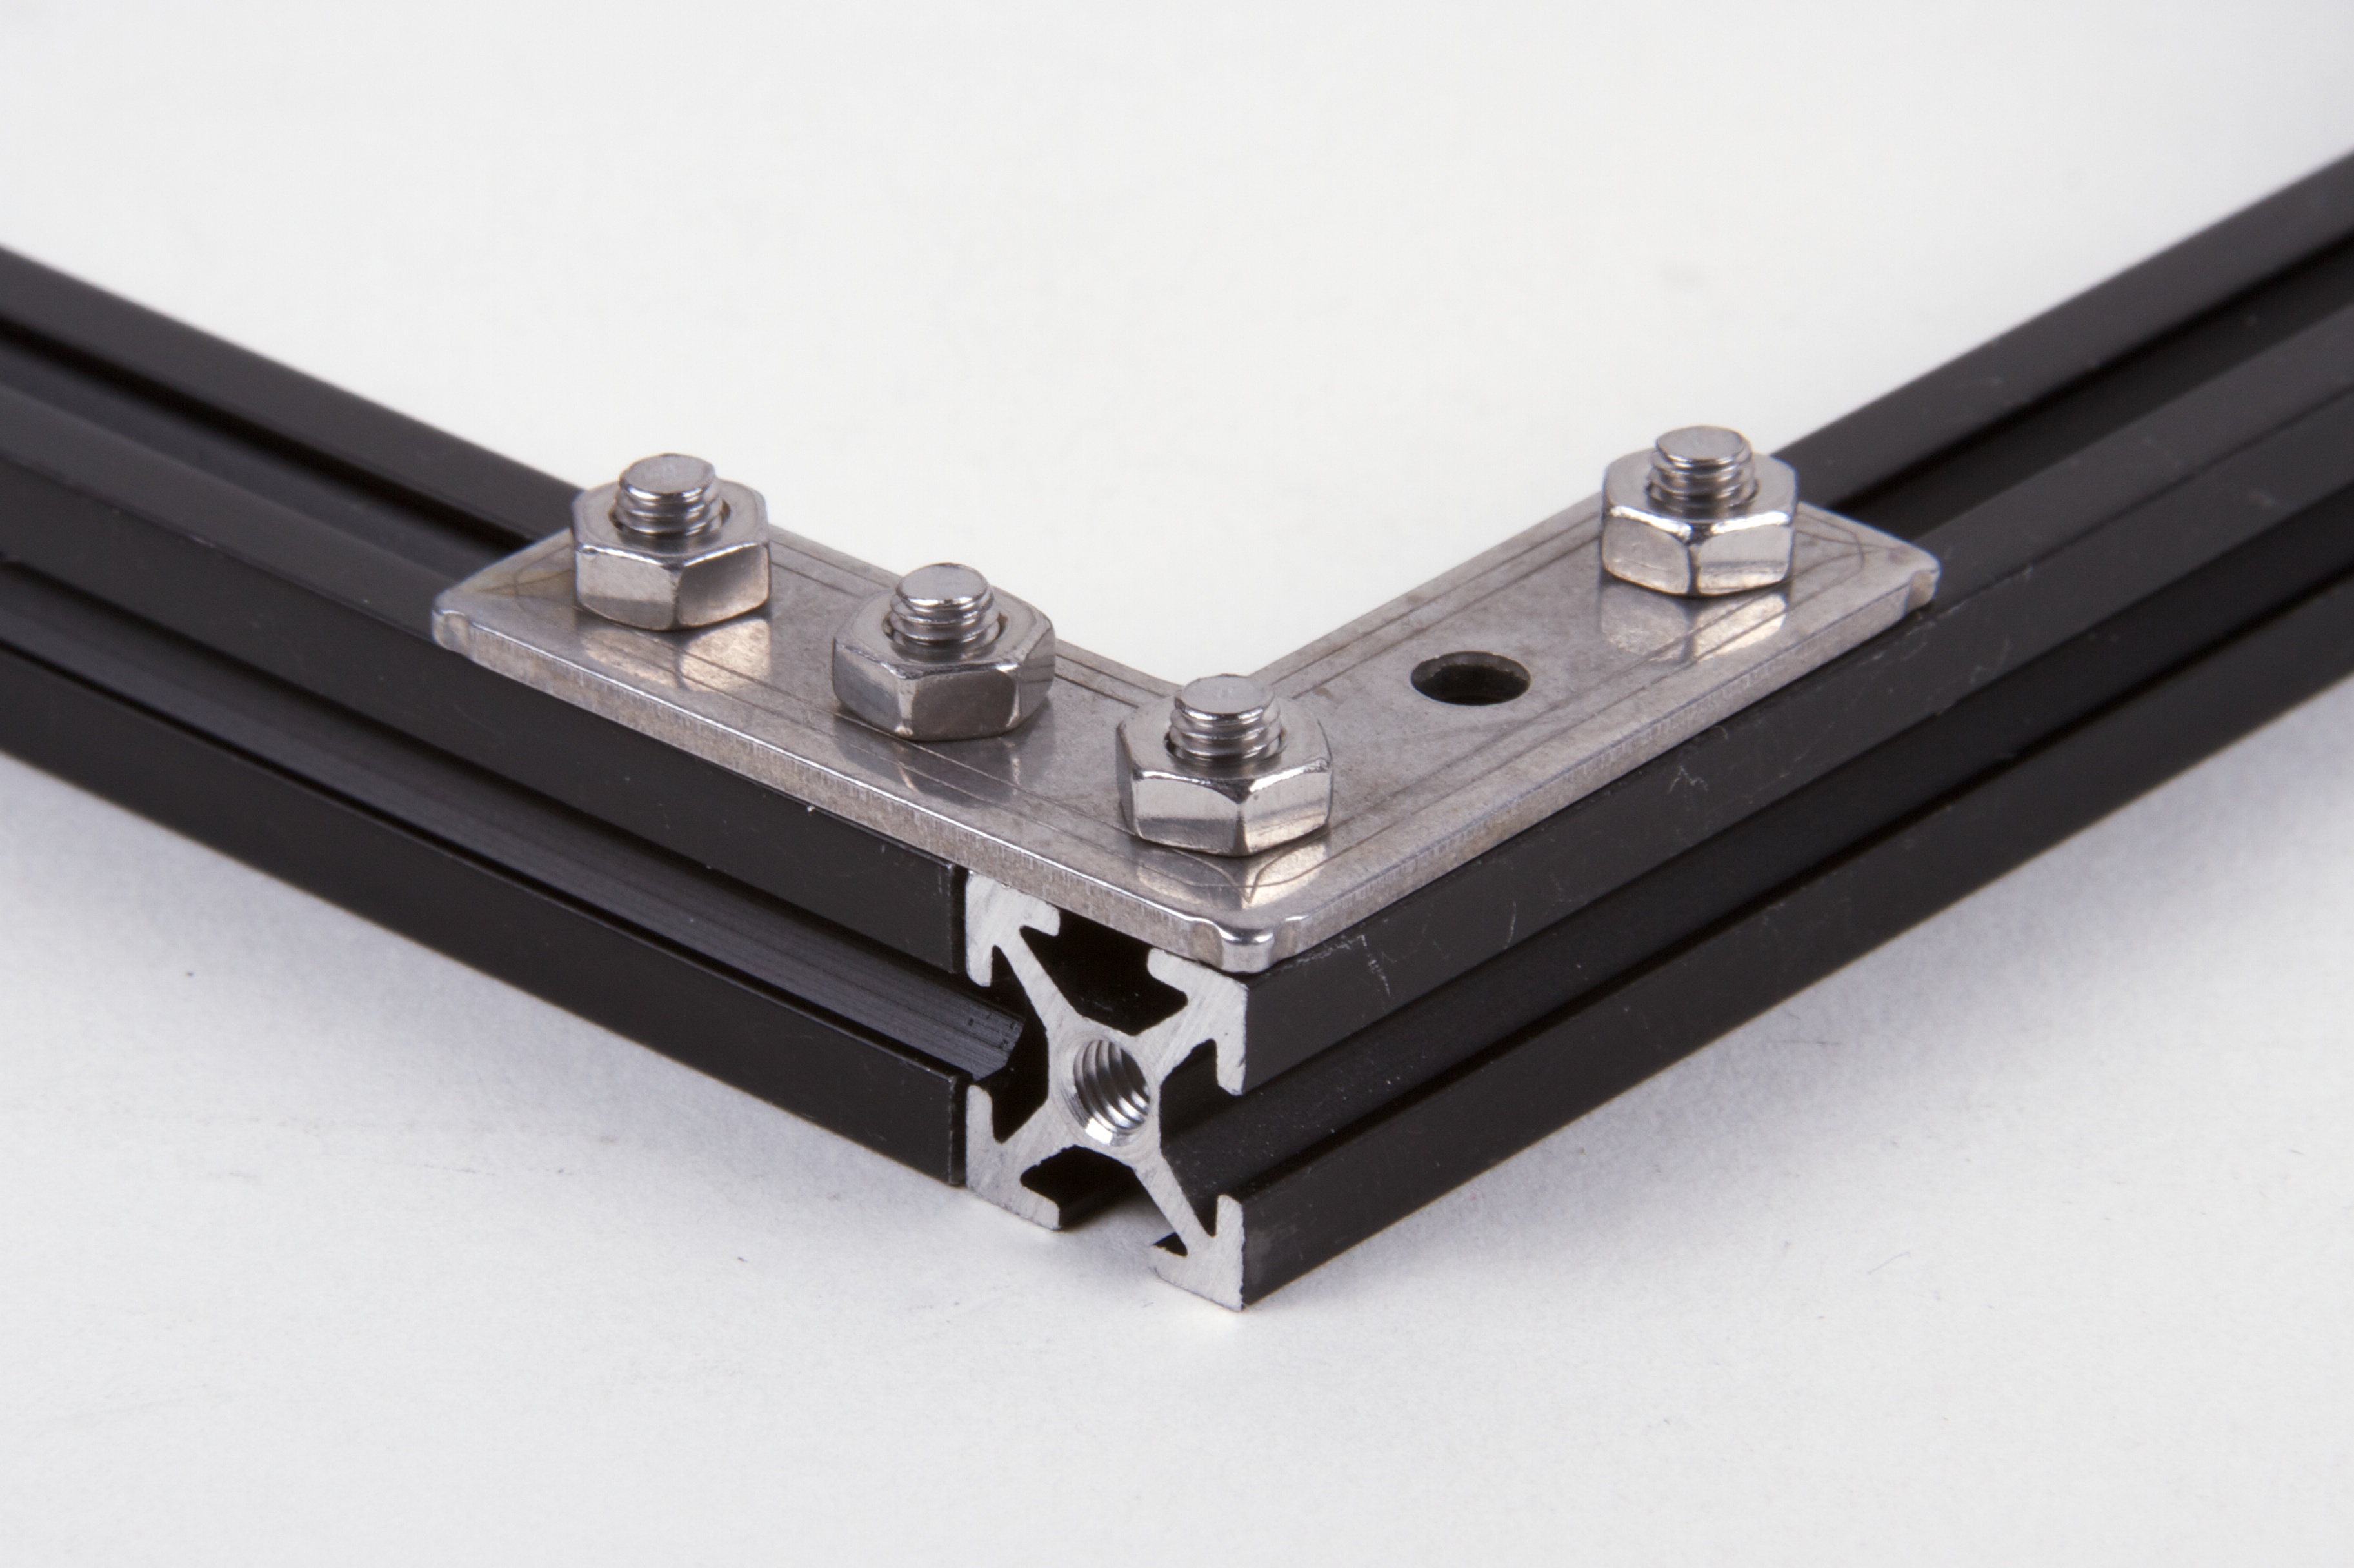
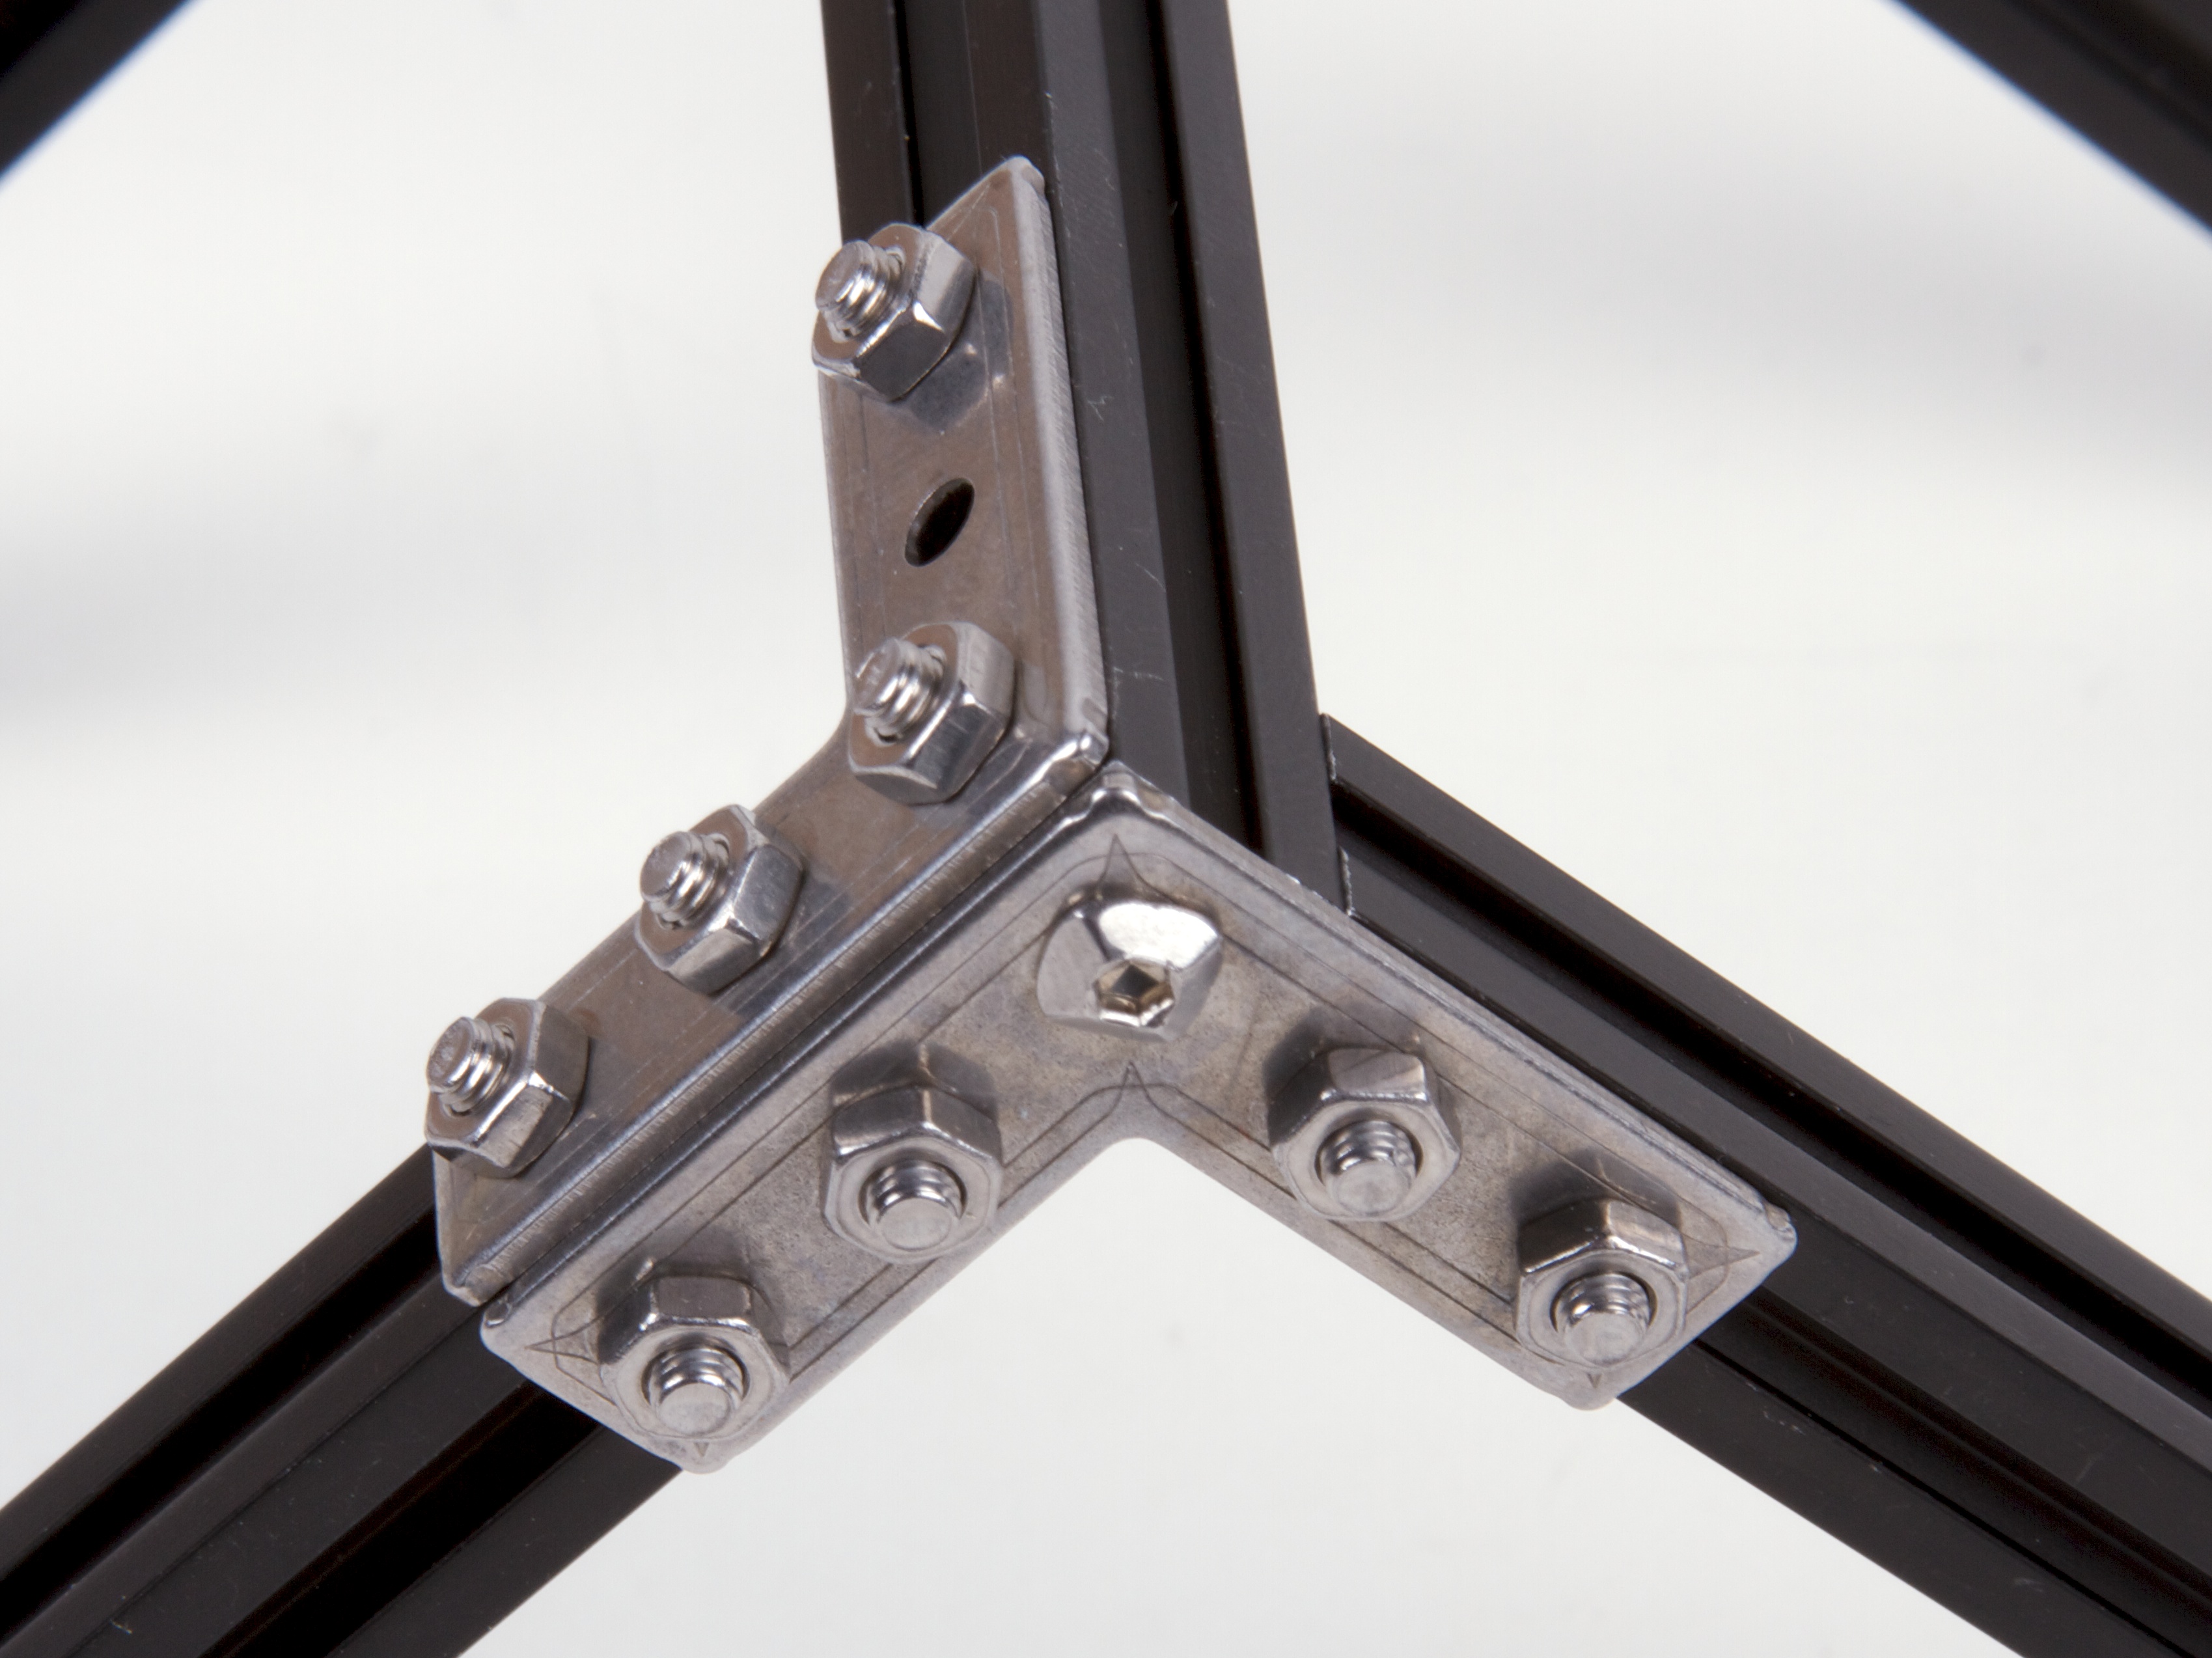
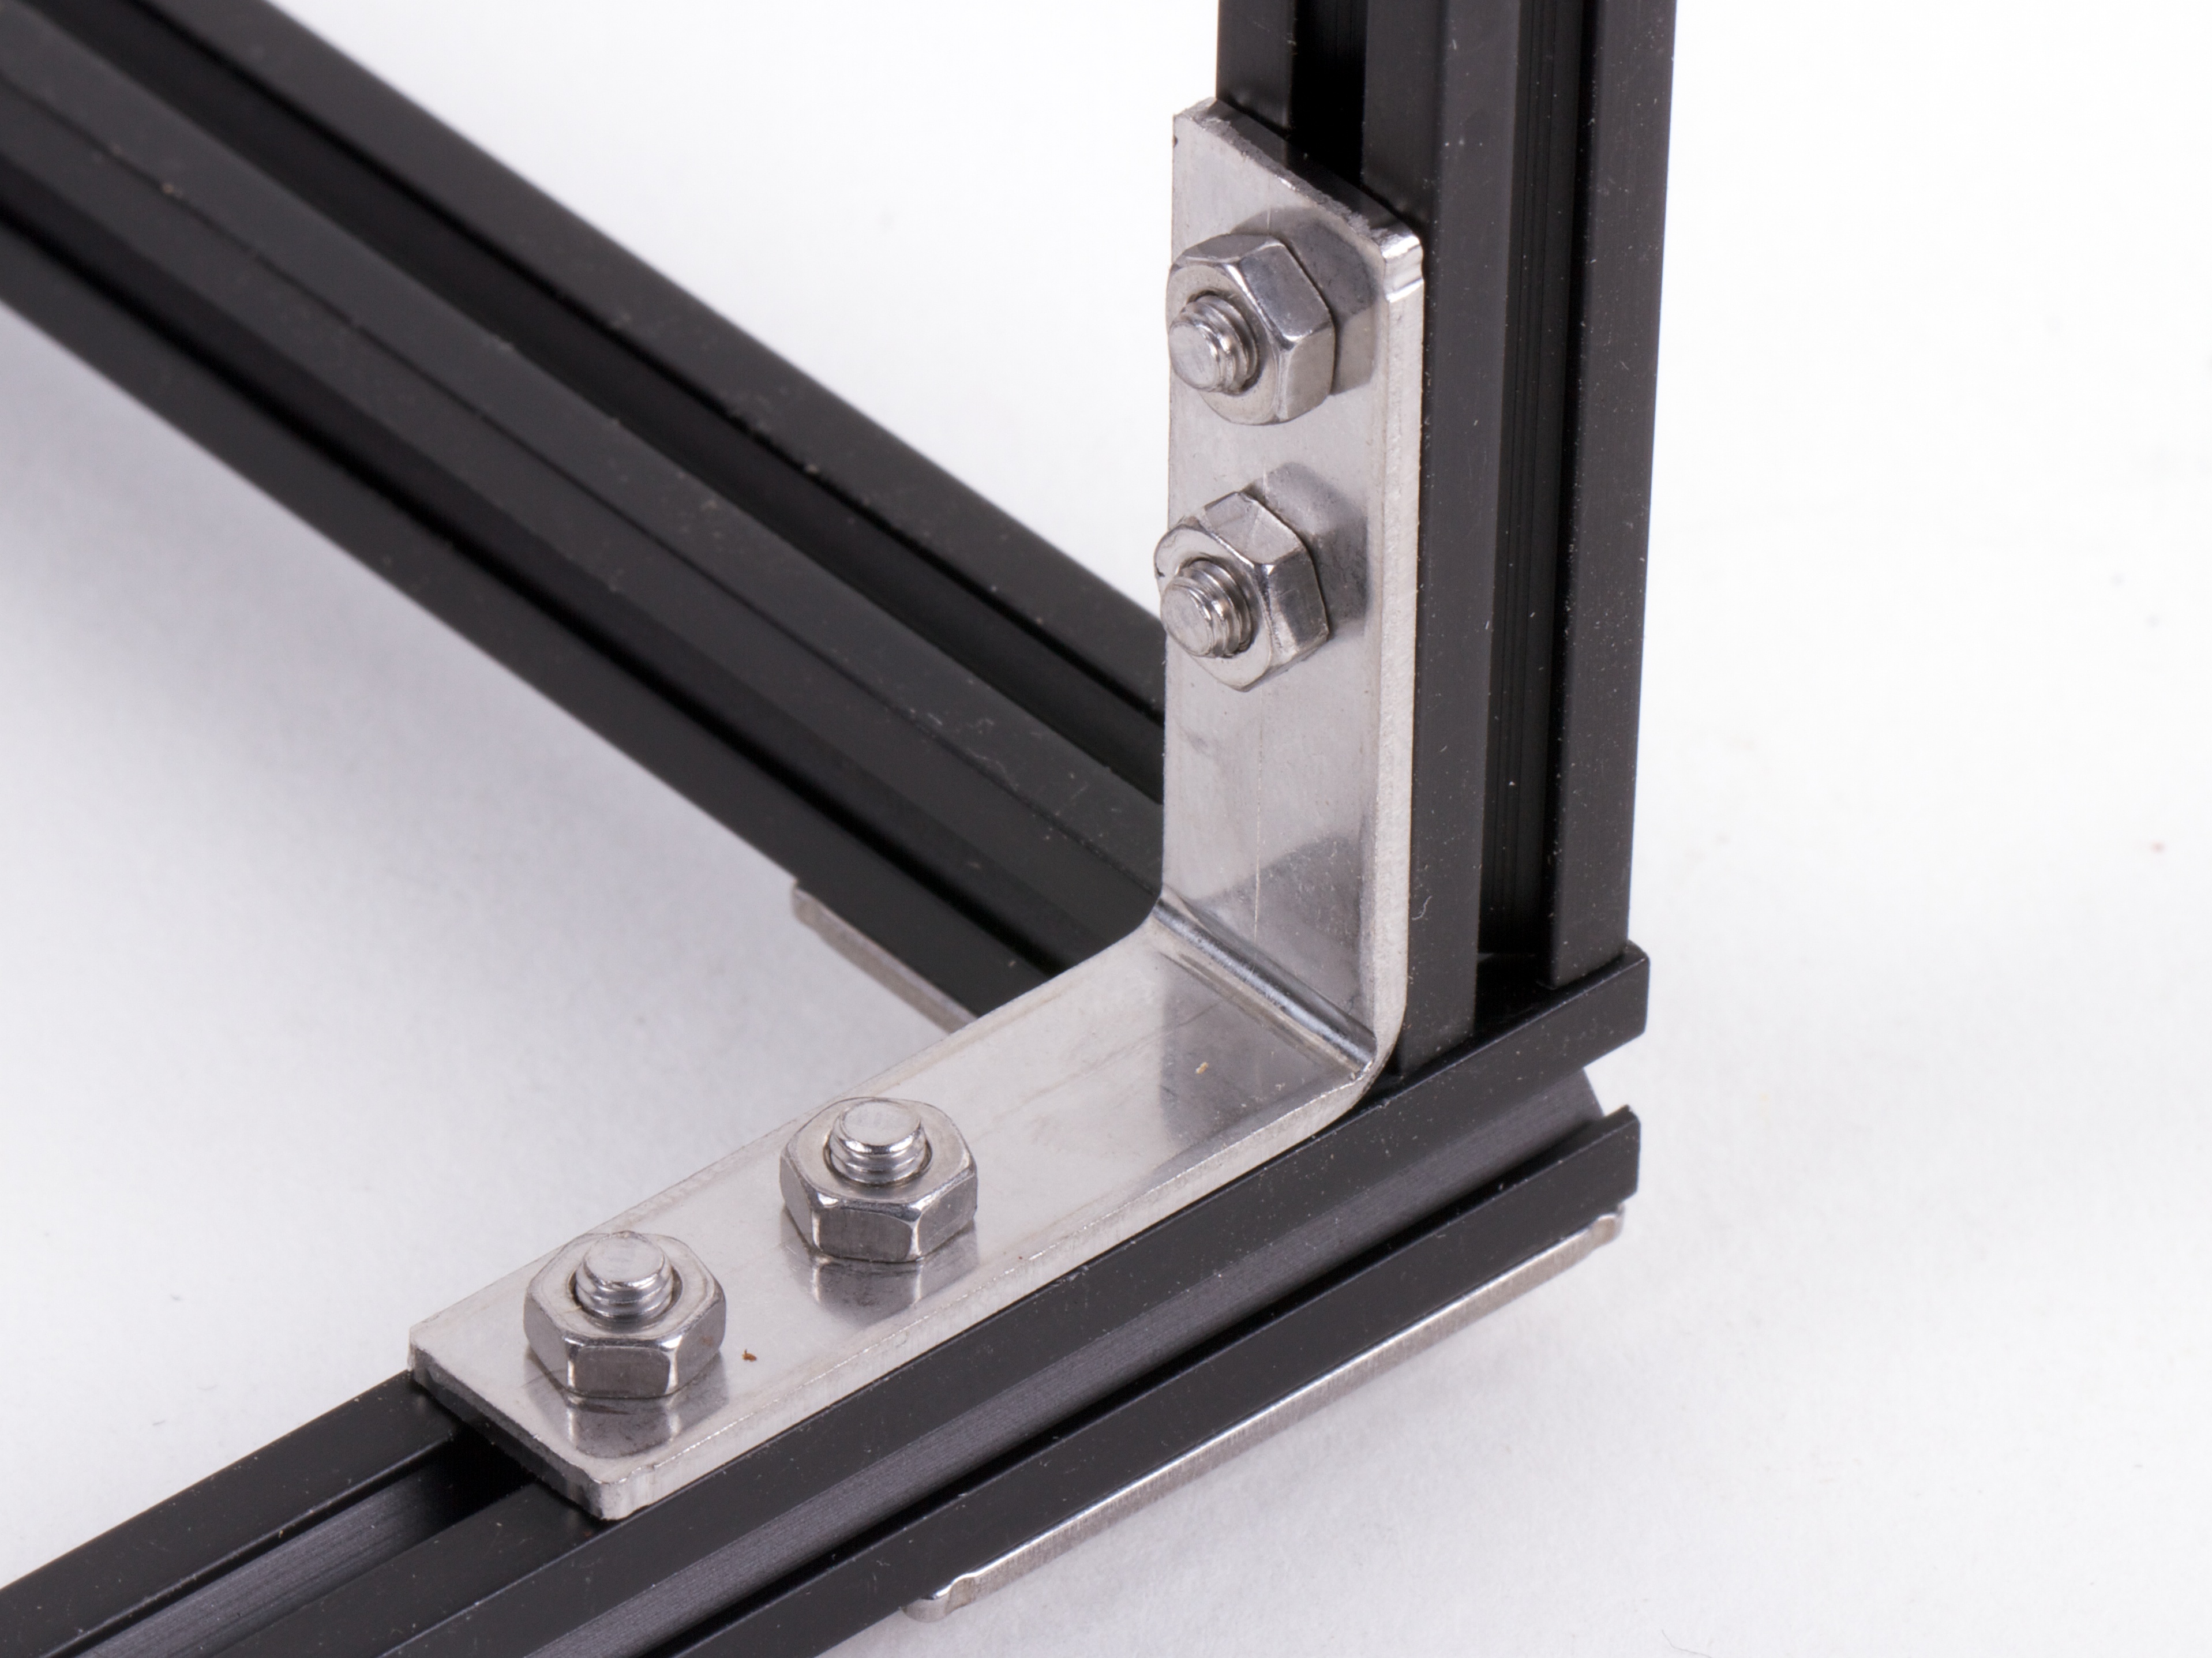
Next up: Nicely made stainless steel angle brackets and fastening plates.  Rock solid when bolted down, although (things being small) you may need to use several of them to get the kind of rigidity that you need for certain applications. We already had some of these shapes from the original MakerBeam makers.

makerbeam 2014 17

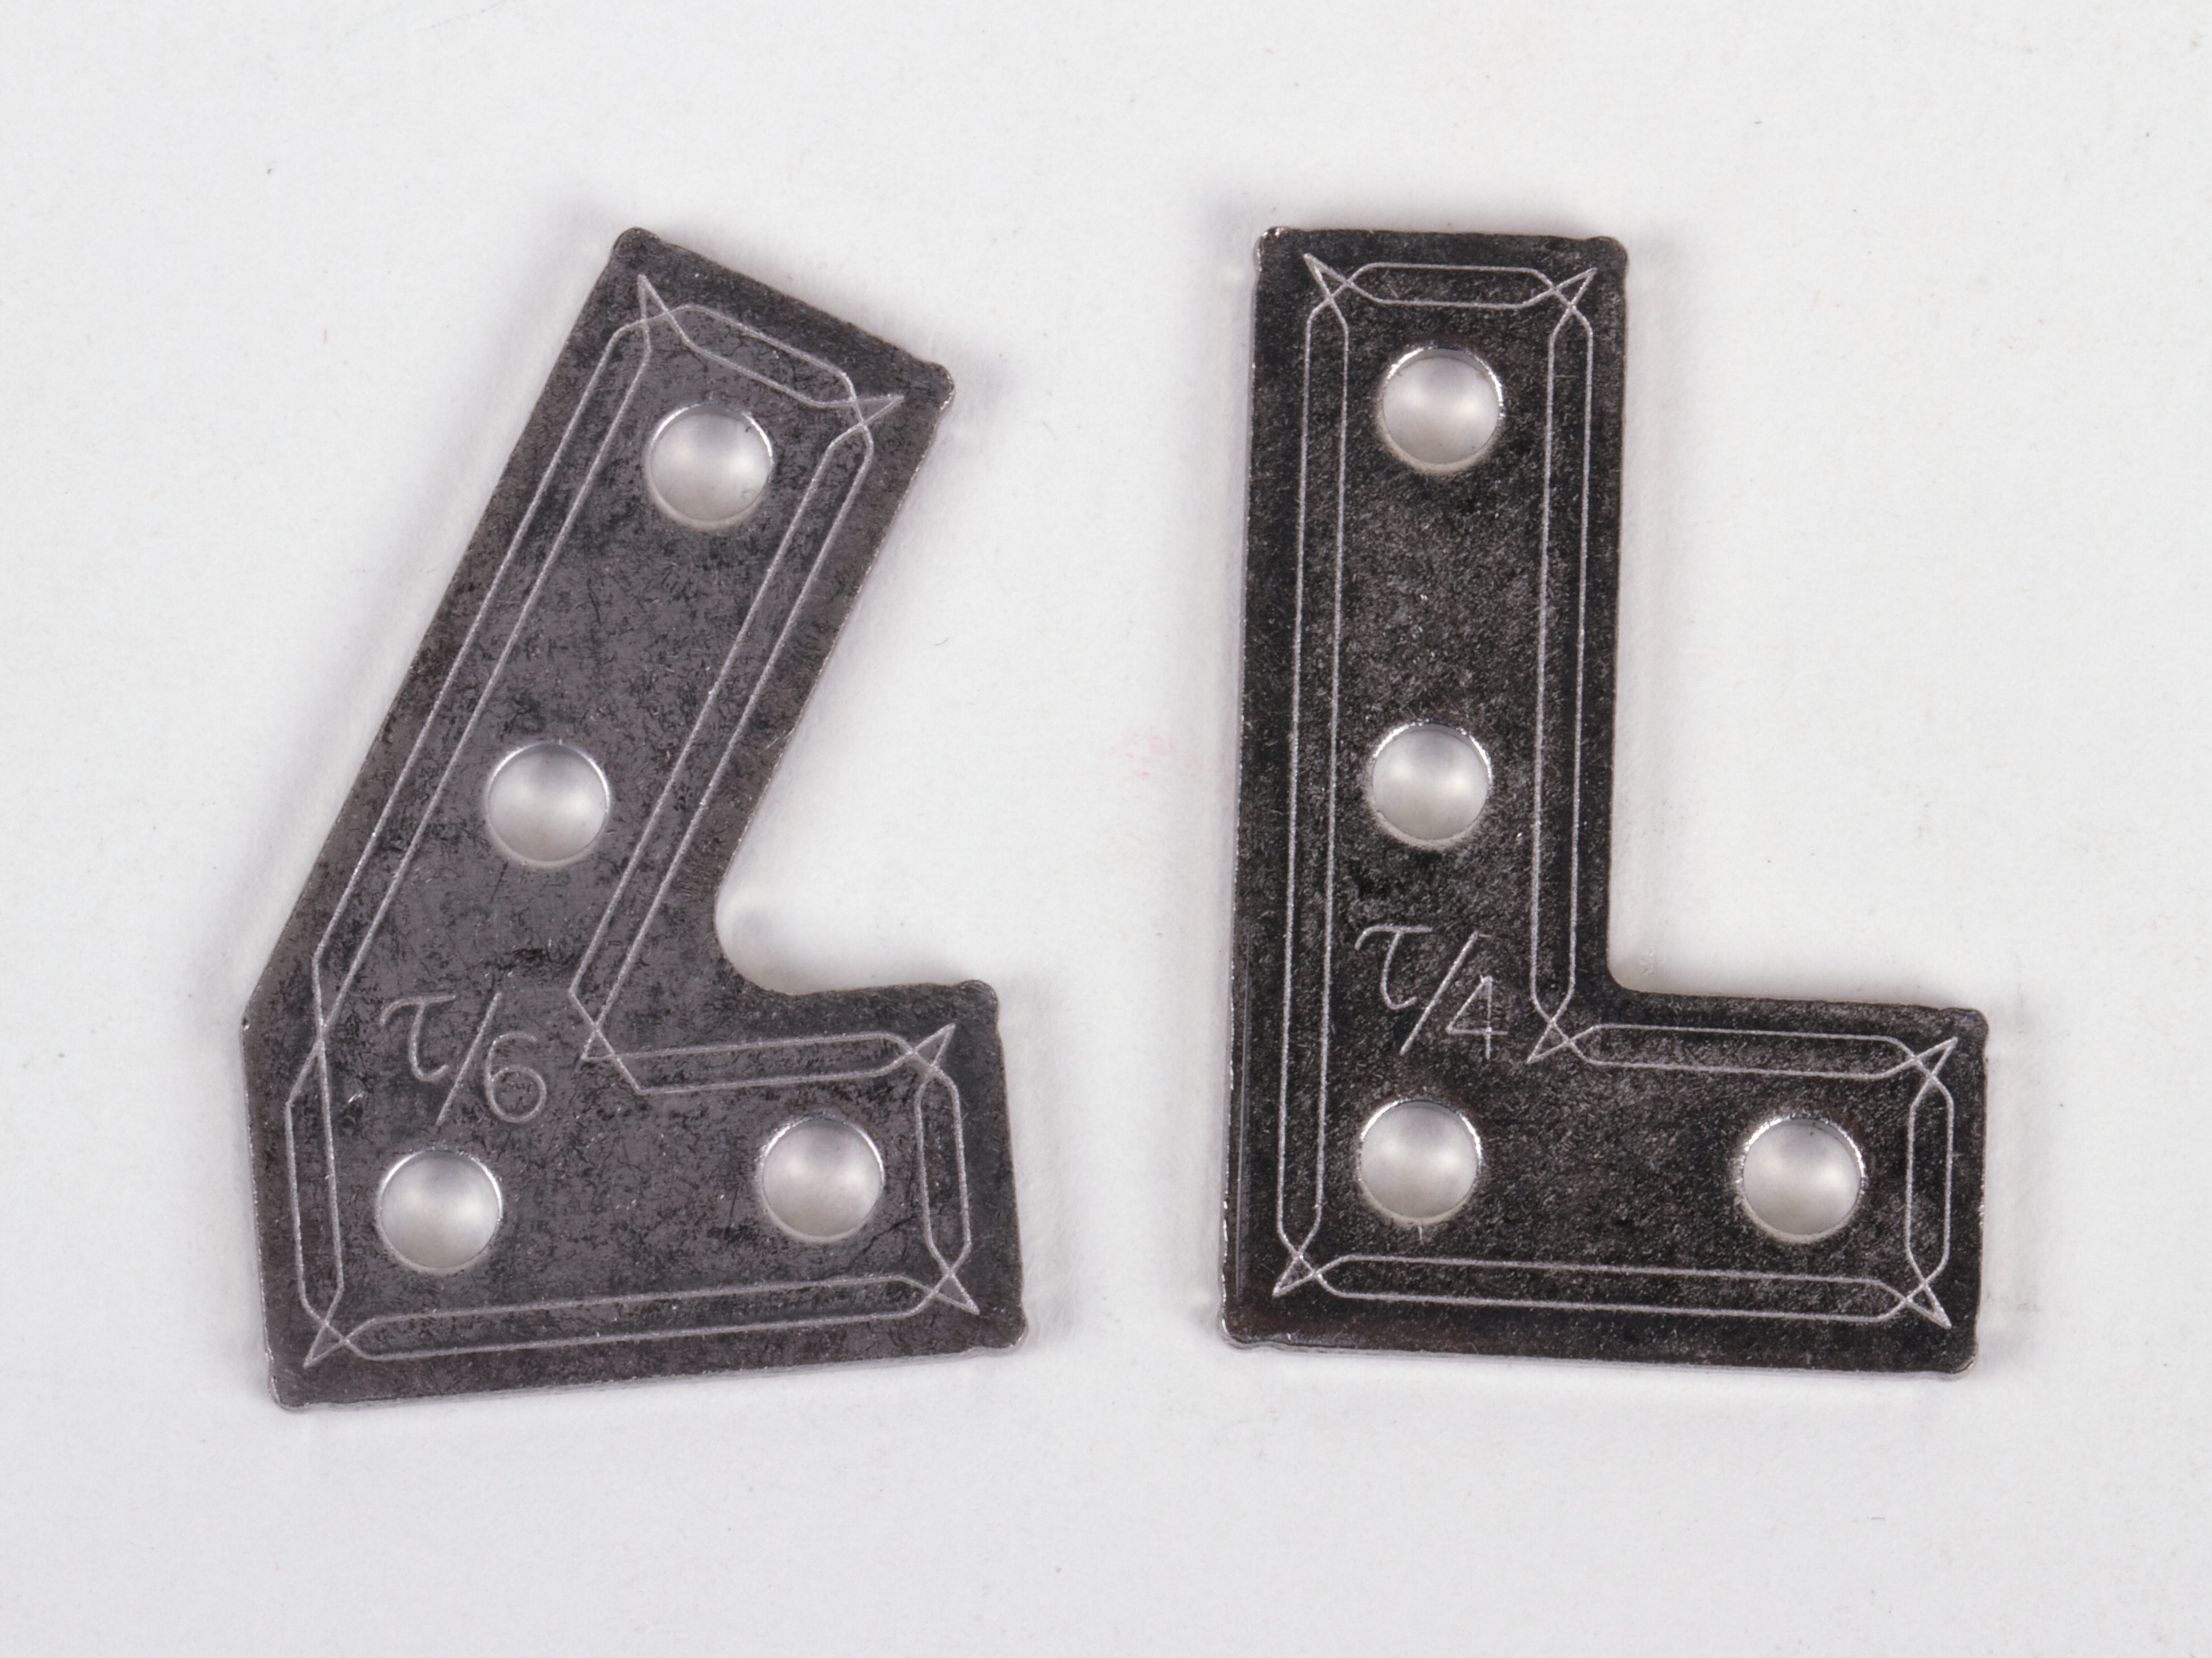
Silly: Some of the fastening plates (the ones designed by the original MakerBeam team) are inscribed with the angle in fractions of Tau, as in ?/4 instead of 90°.  Our guess: it’s certain to please many fewer people than it annoys.


makerbeam 2014 4
makerbeam 2014 5

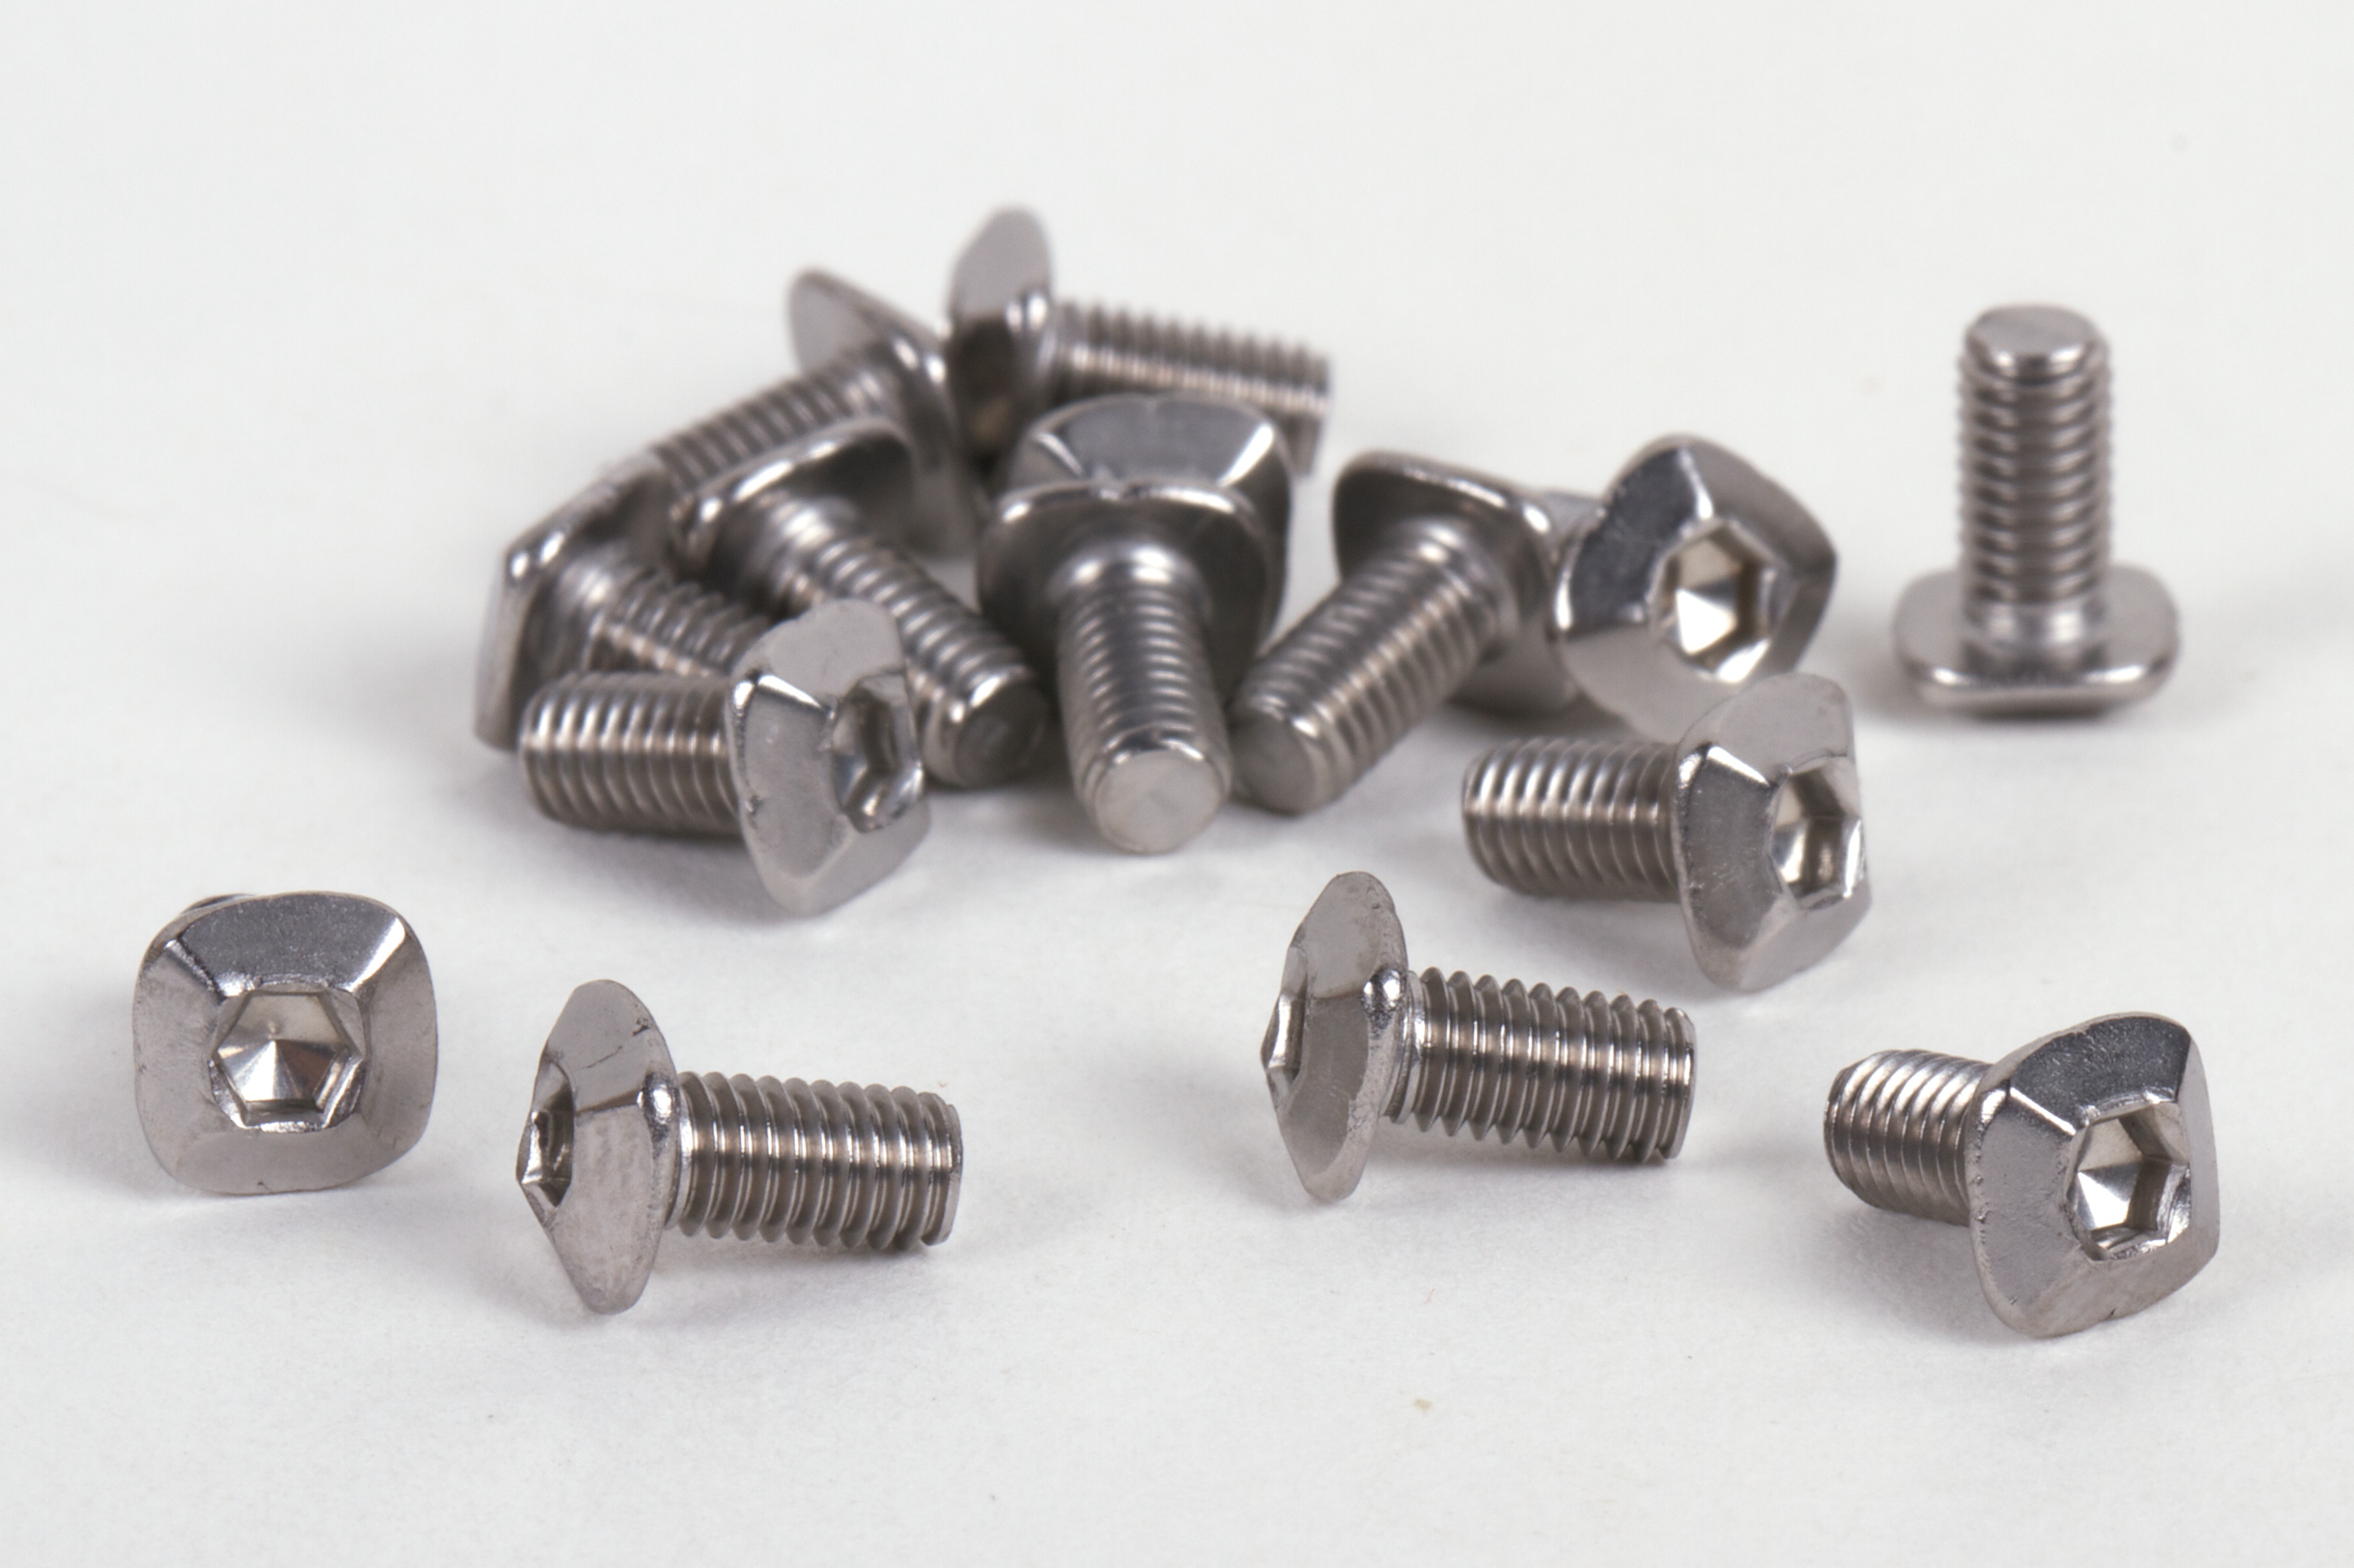
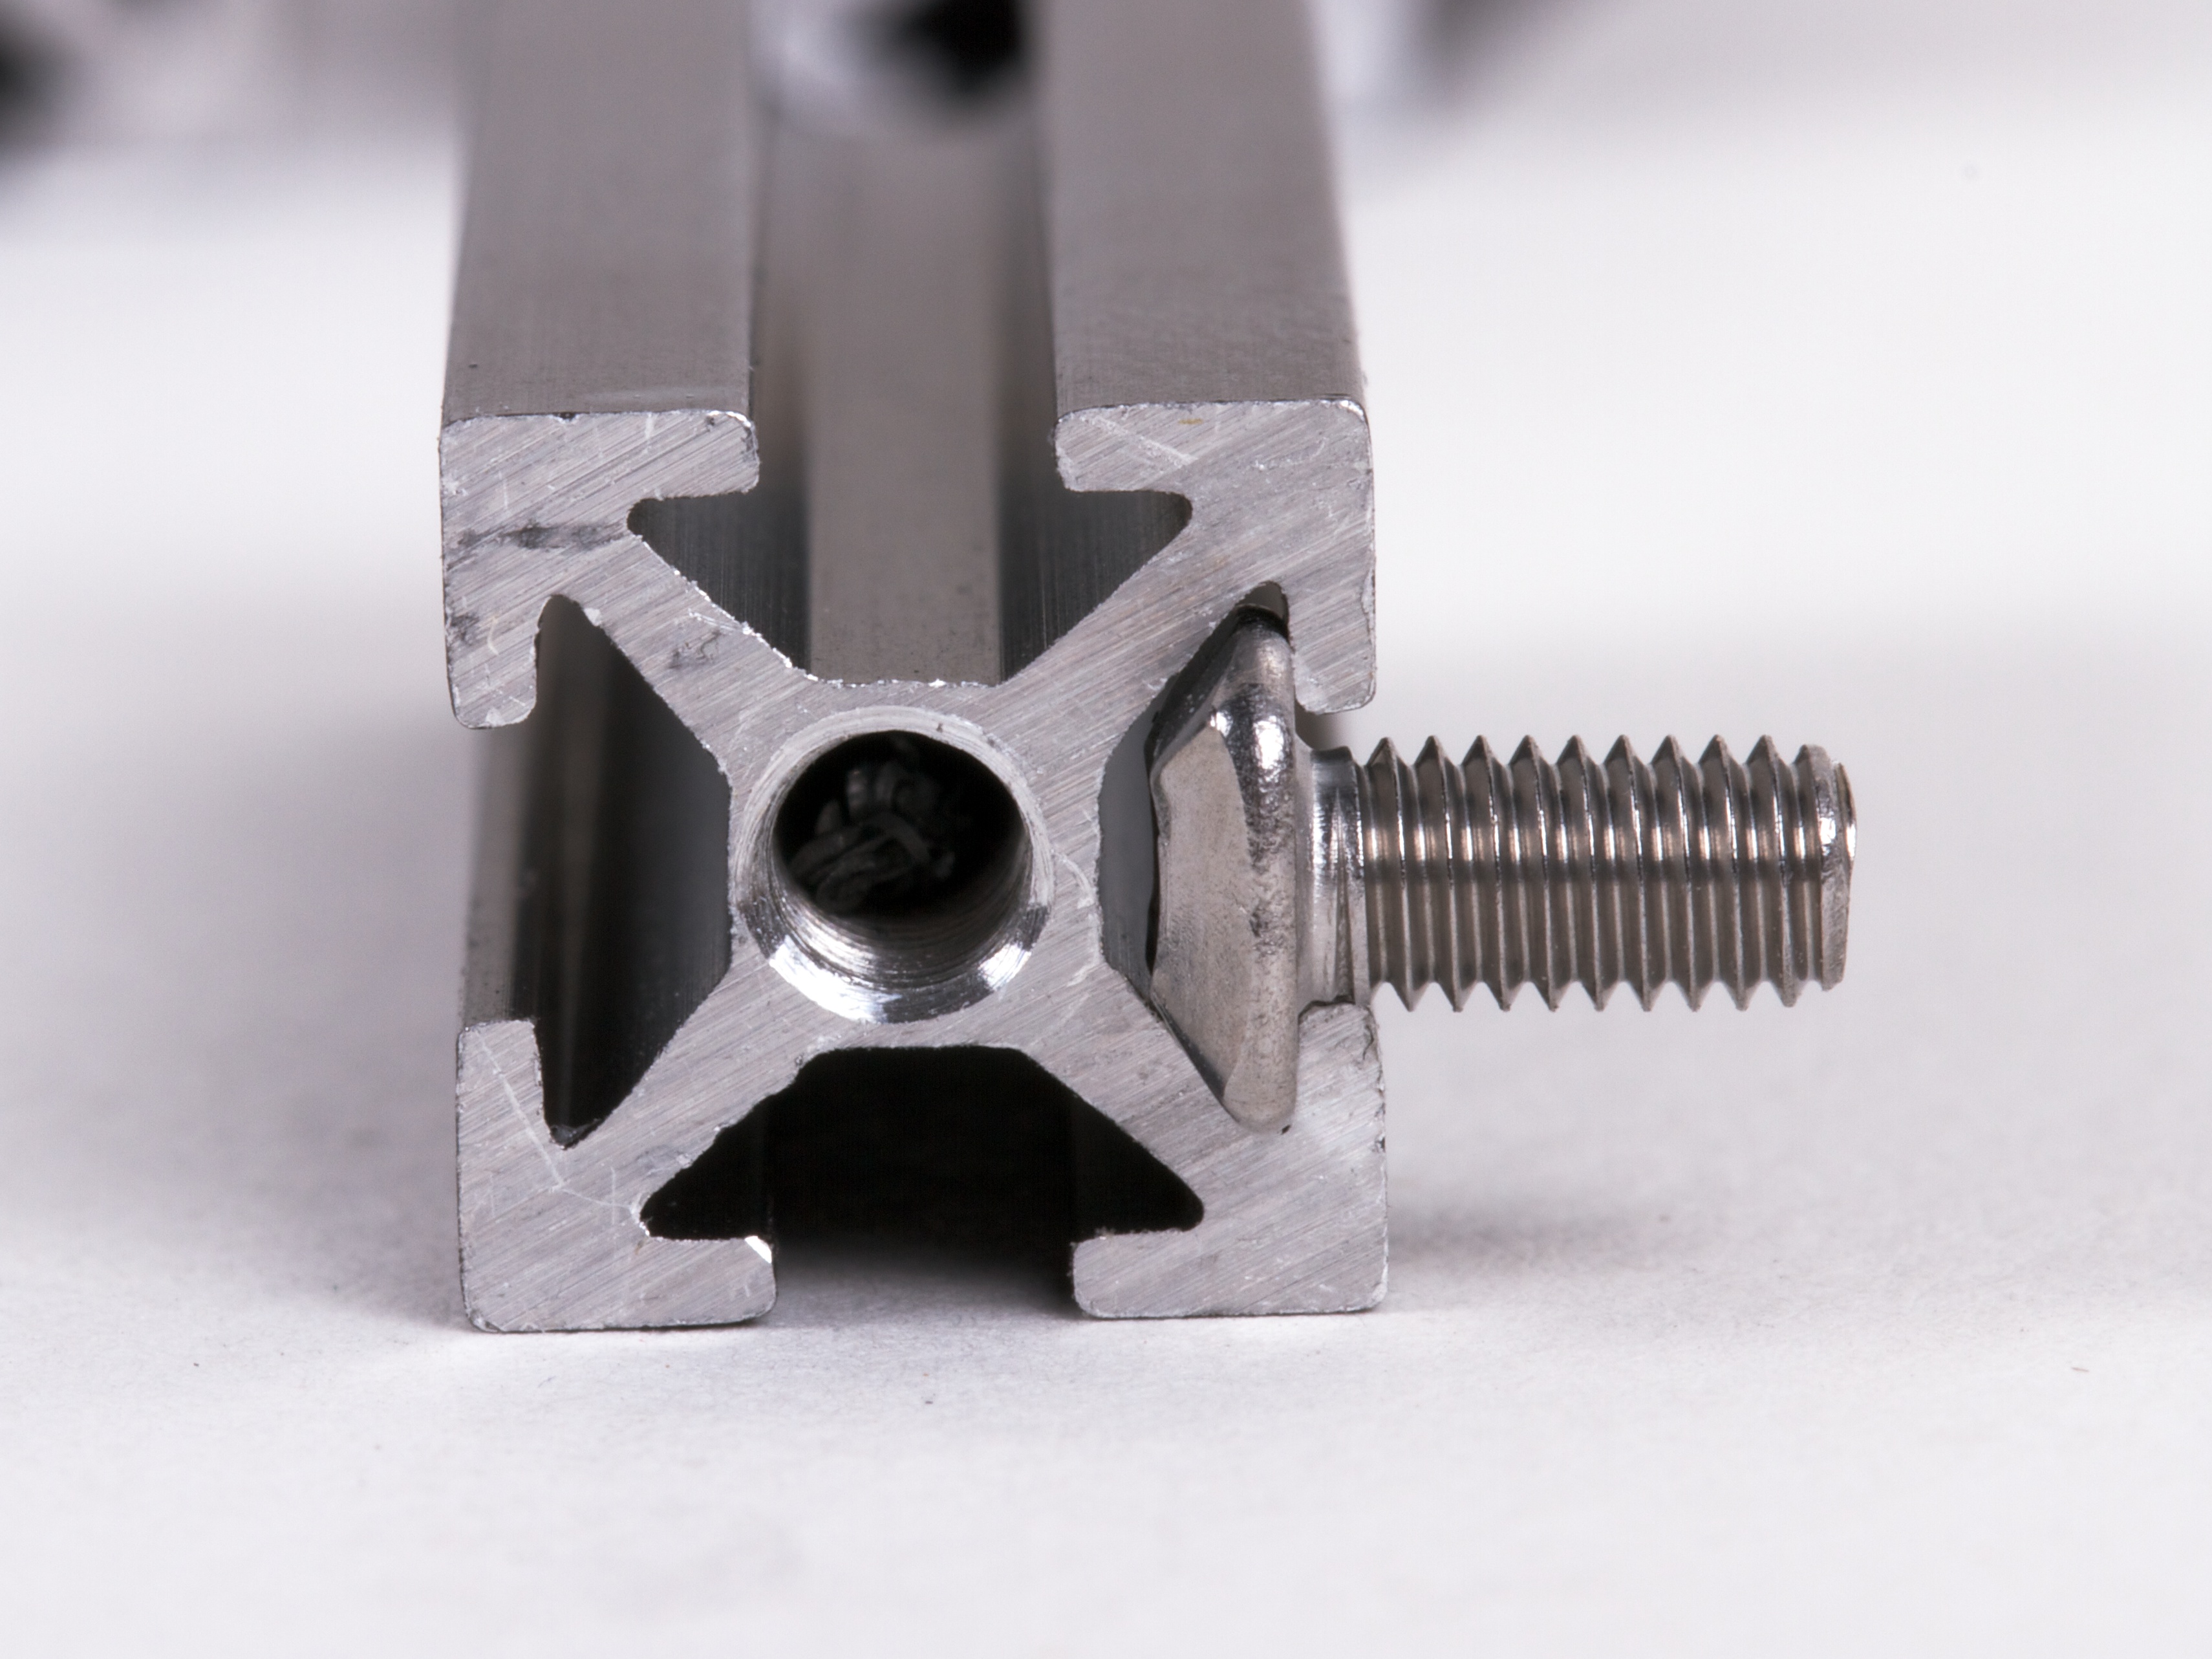
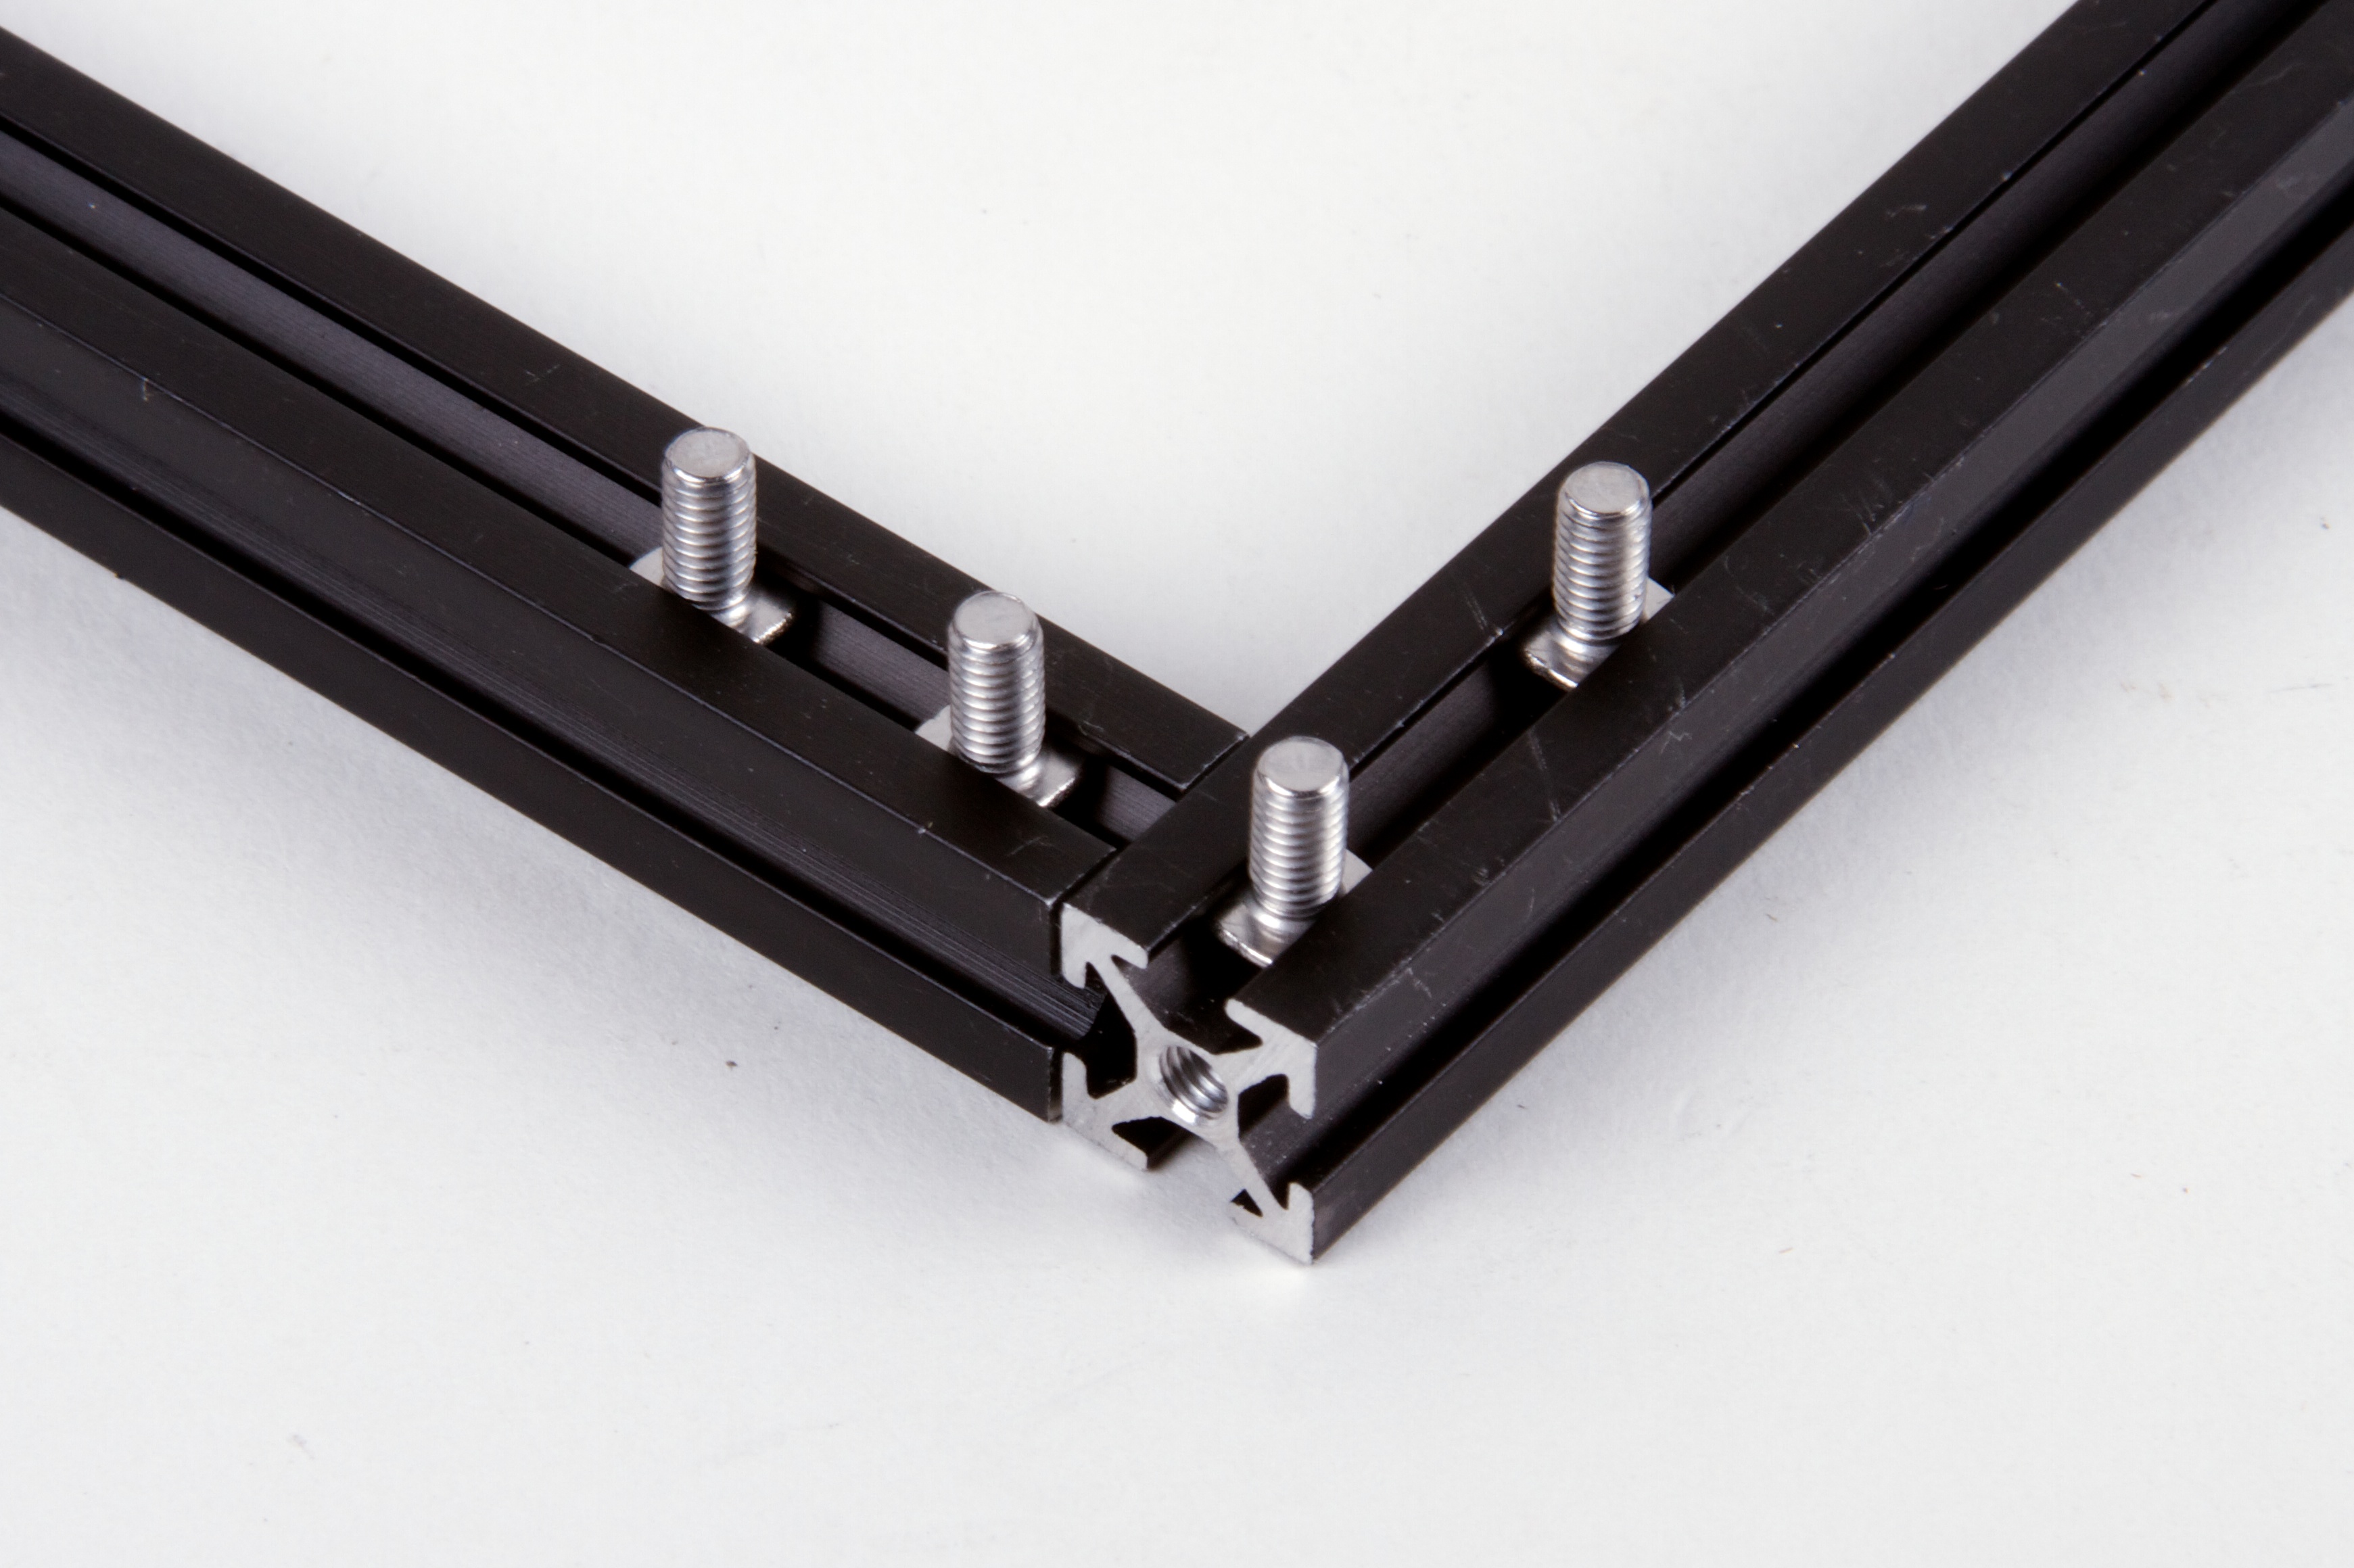
And, most important: A fastening system that really works.  These stainless steel M3 screws with modified pyramid-shaped button socket cap heads are simply fantastic.  They slide easily into and out of the MakerBeam slots, and lock into place perfectly with a simple hex nut on the exterior.

There are arguments to be said for and against putting screw heads in the channels, but if you’re going to do it, you had damn well better do it right. And, finally, someone is doing it right.  You can read about the evolution of the fasteners on the MakerBeam.eu blog, here, here, here, here, and here.


makerbeam 2014 18


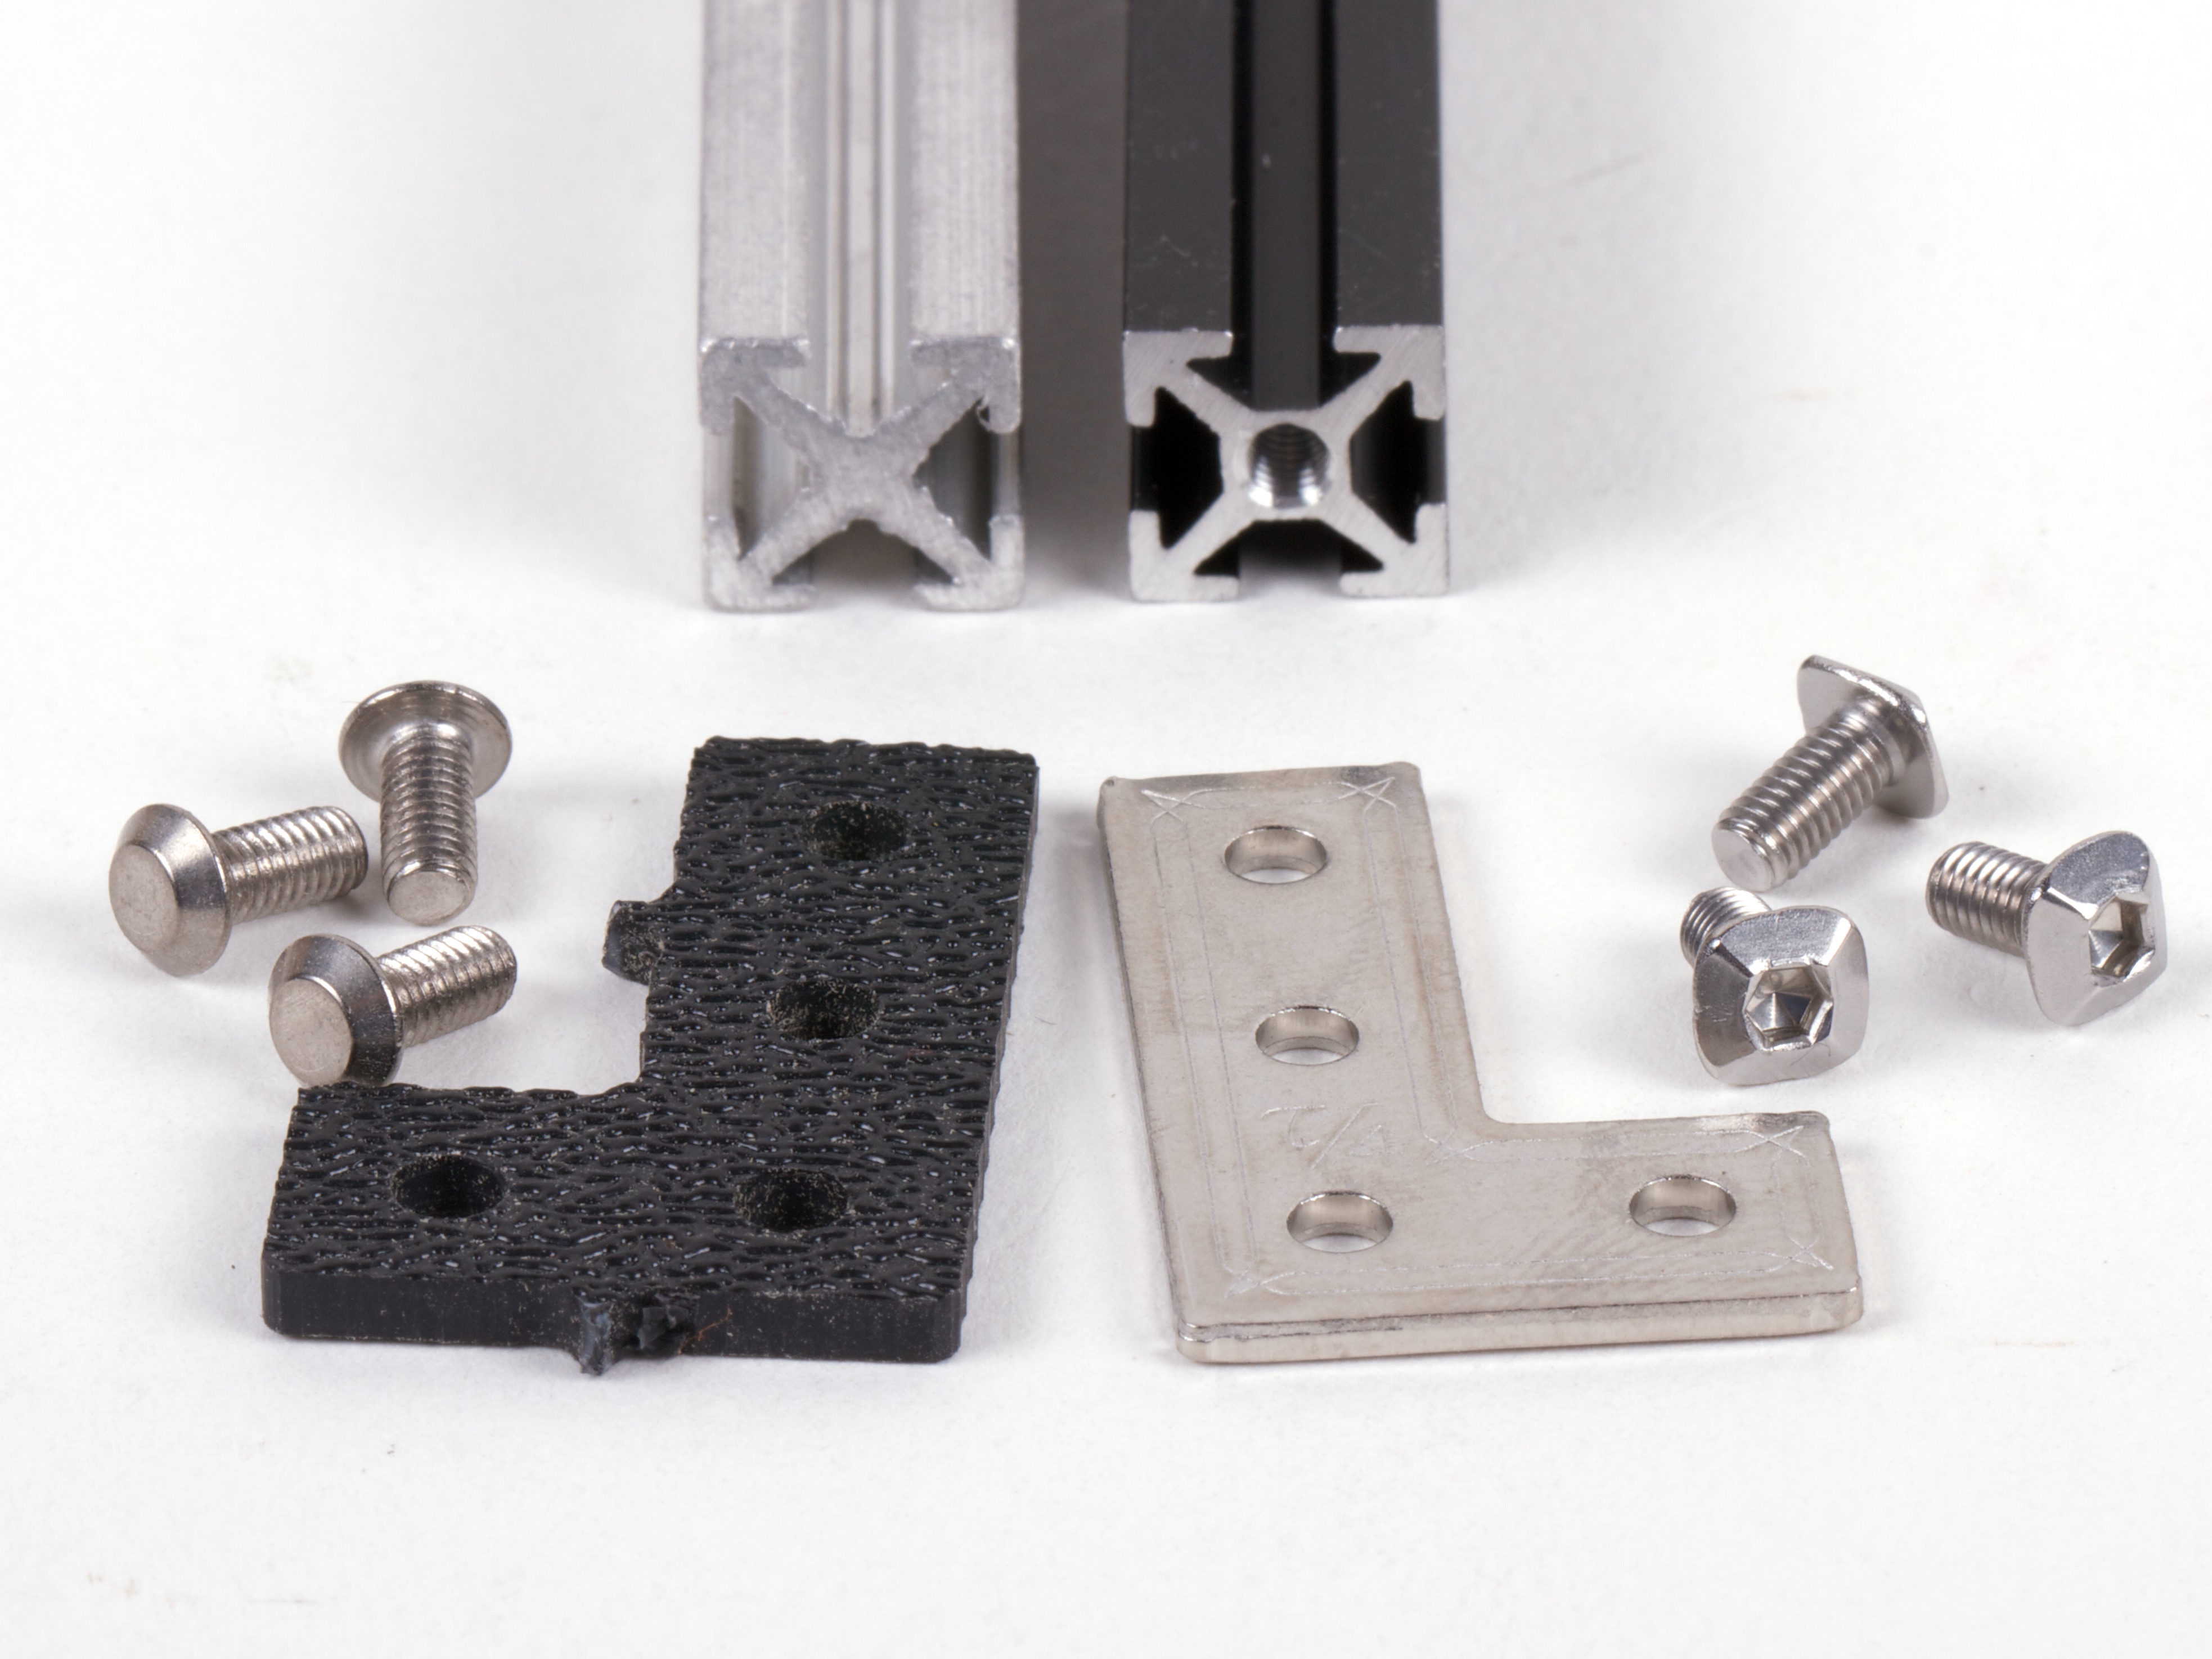
Old components, Left side:  MakerBeam profile 1.0, old-style screws, machined ABS fastening plate.
New components, Right side: MakerBeam profile 2.0, new screws, stainless steel fastening plates.

makerbeam 2014 8

So, after nearly five years, MakerBeam has come of age, and finally fulfilled its promise of being a really nice miniature construction set.  Our congratulations and thanks to MakerBeam.eu for doing such a great job of this, and especially for making these sets available for everyone else.

Evil Mad Scientist Valentines, 2014 Edition

Lo Res Valentines

Last year we released a set of six equation-heavy “Download and Print” cards for Valentine’s day.  This year, we’re doubling the size of the collection (to twelve!) by adding six more cards, this time heavy in symbols, not equations:

valentines

You turn me on” …with an SPST switch.

valentines

I can hardly resist you.

There is room for a future superconductivity joke here, involving a phrase like “I can’t resist you (below a certain temperature).

valentines

You can download the full set — including the 2013 cards — here, a 500 kB pdf document.

As with last year’s set, print them out on (or otherwise affix to) card stock, and [some steps omitted] enjoy the resulting lifelong romance.


Update: New cards have been released! Please check out the 2019 set, which contains all 42 cards from 2013 through 2019.

A Compendium of Watercolor Paint Pan Palettes

sargent art paint palette

As part of the documentation for the WaterColorBot project, we’ve put together a compendium of information about commonly available watercolor paint palette sets.  For each of the sets, we’ve tested to see how well they work in the WaterColorBot— in terms of physical size, color order, paint quality, brush quality, and so forth.

You can find the complete list on our documentation wiki site, here.

WaterColorBot kits: In stock, and new accessories


We’re very pleased to announce some updates on the WaterColorBot project— the watercolor-painting pen plotter that we designed in collaboration with Super-Awesome Sylvia.  First and foremost: kits are (finally!) available from stock at our store, now that we’ve finished shipping the rewards from our Kickstarter campaign and our other pre-orders.

We’ve also been working on a host of new applications and accessories that we’ll be writing about in the near future. The first new accessory is the Buddha Board holder pictured above, which indexes a Buddha Board (overly-interactive website link / Amazon.com link), that lets you make temporary paintings with just water.   We’ve found the Buddha board not only to be one of the best tools for trying out new things on the ‘bot (without using up paint and paper) but also to be great for live demos of the WaterColorBot, so that you don’t need to provide a fresh sheet of paper for everyone that tries it out.  You can find it in our new index of WaterColorBot accessories.

The Classic Lego Space Flight Jacket

CLS Flight Jacket 15

Here’s a little project that we’ve been working towards for a long time: a custom-painted leather flight jacket (“bomber jacket”) featuring the “Classic Lego Space” logo.  (Yes, I totally spent years serving in the Lego space corps!)  And, if you’ve ever wanted to make your own painted leather jacket — whatever the theme — here’s how to do it.

Continue reading The Classic Lego Space Flight Jacket

EEVBlog #555: The 555 kit review

555 kit review

Over at EEVblog, the (simply wonderful!) Electronics Engineering Video blog, Dave Jones has posted episode #555 — about our “Three Fives” discrete 555 timer kit.  It’s an hour-long video, in which he builds the kit on camera, and more importantly walks through the the equivalent schematic to explain (and show) how it works, right down to probing the circuit with a scope. If you’re interested in how analog electronic circuits work, you’ll likely find it to be an excellent use of an hour, even if you’ve already built the kit yourself.

The Winch Cutting Jig

WinchCutter 5

In our recent article, The Making of the WaterColorBot, we walked through the manufacturing process of the WaterColorBot, in which we make use of a number of specialized jigs, with varying levels of complexity.  We also left a teaser:

“The winch is also assembled from laser-cut wooden parts. The lower part has the shaft collar that mounts to the motor shaft, and the upper part has two halves that disassemble for cord management. It turns out that the winding-drum part of the winch needs to be quite round and concentric with the motor shaft for smooth operation– smoother than we can get with the laser. We solve this with our very-most-complicated assembly jig….”

And here it is.
Continue reading The Winch Cutting Jig