All posts by Windell Oskay

About Windell Oskay

Co-founder of Evil Mad Scientist Laboratories.

Prefabricated Octolively Modules

Octolively Modules

Last year we released Octolively, an open source interactive LED kit, designed to respond in gentle and complex ways to stimulus provided by human interaction.

While Octolively has been a success (and a lot of fun), thus far it has only been available as a soldering kit. Today, we’re pleased to supplement those with a new version: prefabricated Octolively modules, all built-up and ready-to-use, so you can jump right in and start playing with the LEDs.


Octolively Modules

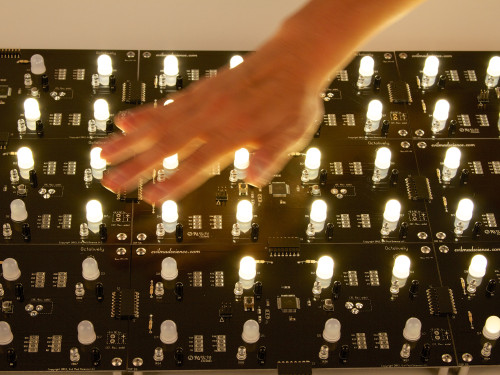
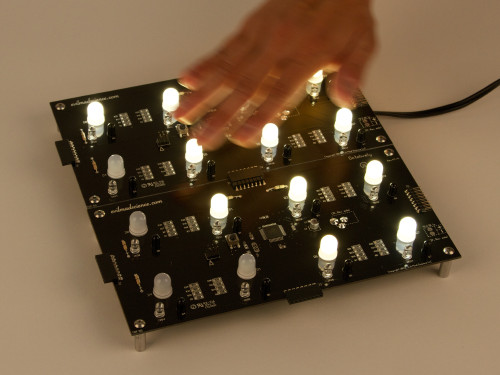
Like the soldering kit version, each “prefab” Octolively module is 4 × 8 inches (10.16 × 20.32 cm) in size, and features eight huge (10 mm) ultrabright LEDs, spaced along a two-inch grid.  And, for every LED, there is an independent infrared proximity sensor pair, configured to act as a reflective motion sensor.
Octolively Modules

The most obvious change from the soldering kit version of Octolively is that the topside components take up a lot less space. All of the resistors, capacitors, and the microcontroller have been replaced by their surface mount equivalents.


Octolively Modules

However, this not really a “surface mount” circuit board, it’s more accurately a “mixed technology” board.   Some of the components— in particular many “optoelectronic” components, like our visible and infrared LEDs —just don’t have great surface mount versions.  For example, when we’ve tried building motion sensors circuits with SMT infrared LEDs (even the pricier types that have itty-bitty lenses) we found that they just didn’t project enough IR light to be effective. Similarly, we’ve found that visible surface mount LEDs tend to be perceived as dim, even when a huge amount of light is being emitted, because the light usually goes into a very wide angle.


Octolively Modules

The microcontroller is an Atmel ATmega164A, in the 44-pin TQFP package.  (And in case you’re wondering, yes that’s exactly as redundant as “ATM machine.” )

Those white gumdrop-looking things are (as before) the big 10 mm LEDs, but they certainly seem even bigger sitting next to that chip.


Octolively Modules

Ready-to-use Octolively modules are available now at Evil Mad Science.

Additional details— including the datasheet and documentation links —are available on the product page.

A Simple Relay Shield for Arduino

Relay Shield

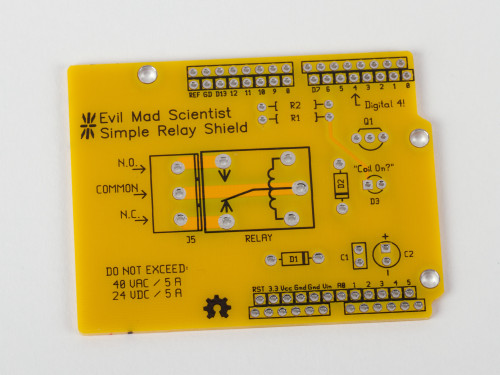
Introducing our newest kit: the Evil Mad Scientist Simple Relay Shield for Arduino.

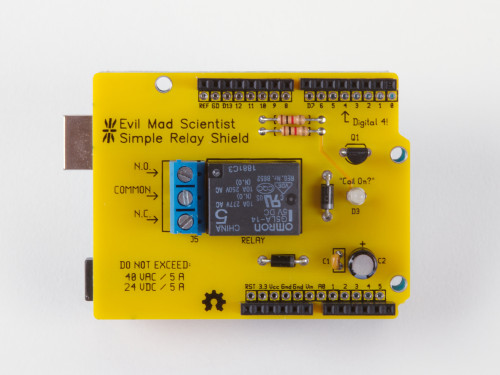
It’s a dead-simple single-purpose low-cost mechanical relay board, with a single low-power SPDT relay that can switch moderate loads of up to 5 A, AC or DC.

Relay Shield

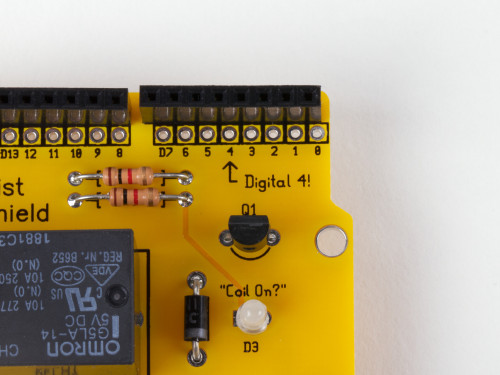
The relay is controlled by digital line 4— and that’s well labeled, too.

No library is needed. For a demo, just open the Arduino “Blink” example sketch and change the LED pin to 4.   When output Digital 4 on your Arduino is low, the relay is in the “normal” state: the “Common” pin of the screw terminal is connected to the N.C. (“Normally Closed”) pin of the screw terminal.

When output Digital 4 goes high, the “Coil On?” LED will light up and the relay enters (for lack of a better term— suggestions welcome!) the “abnormal” state, and the Common pin is instead connected to the N.O. (“Normally Open”) pin of the screw terminal.

Relay Shield

One of the main concerns about using higher voltages and/or currents on an Arduino shield is that you potentially have these things wired awfully close to things sticking up from your Arduino board, like the microcontroller itself or the USB connector.  If you sometimes would like a little more breathing room, a good solution is to add the insulator shield Googly Eye Shield between the two.

Relay Shield

The Simple Relay Shield circuit board is a standard 2-layer, 1/16″ thick FR-4 PCB, but with highly-visible yellow soldermask.  While it is (yes) very simple, the Simple Relay Shield is an open source hardware project. The circuit board is designed in gEDA, and the design files are available for download at the Evil Mad Science Wiki.

The Simple Relay Shield is available now at Evil Mad Science.

Make your own epic-scale water weenie!

Water Weenie 32

Summer is here, and with it, the advancing aqueous arms race!  Squirt cannons, water balloon launchers, and myriad other technologies for soaking your fellow citizens.

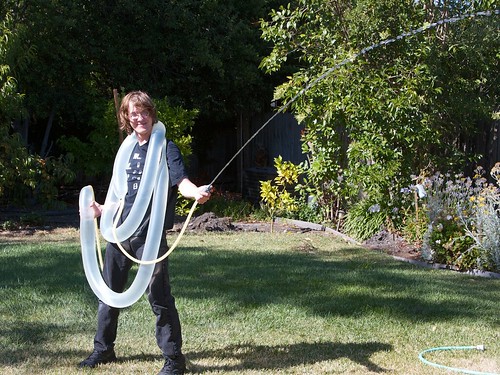
One of the classic squirt mechanisms is the “water weenie,” where the water is stored under pressure in a length of elastic tubing, and the force to eject the water is provided by the restoring force of that tubing. Often the elastic tubing is a simple length of latex “surgical” tubing, or in the case of the classic Wham-O Water Wiennie, a literal rubber balloon.   While people have almost certainly been squirting each other with these things since (we’re guessing about ten minutes after) the invention of the water balloon, the technology has more recently been reinvented as the “constant pressure system” used in modern high-end water guns.

Here is our take on the water weenie: How to make your own high-performance, arbitrary-capacity squirt machine, starting with basic hardware.    Our 10′ version shown above— which you can lift if you’re strong!  —throws water up to 25 feet and can empty over ten gallons of water onto your target in one continuous shot.  And of course, you can make it bigger if you want to.


Continue reading Make your own epic-scale water weenie!

This mutant-airplane business may be getting out of hand

Mutant Airplane

Whoa! What the heck is that?

It turns out that it’s a flying testbed for new gear-driven turbofan jet engines being developed by Pratt & Whitney. While much can be done on fixed test stands, this lets them test the engines on a real aircraft at high altitude and under a wide variety of environmental conditions.

The little engine under test above— destined for smaller regional jets —is mounted to a “stub wing” on a specially-modified Boeing 747SP.  That’s the same short-body model of 747 that NASA adapted for the SOFIA aircraft-based telescope.  This particular aircraft is a full-time testbed at Pratt & Whitney; its main engines are larger versions of the little one under test.

These new gear-driven engines are interesting on their own; a gearbox between the main fan and the turbine allows each side to run at a more optimal speed, and promises a significant increase in overall efficiency.

Link: Test Flights Start for Titanium-Blade Engine @ Design News.
For more photos, take a look here: PurePower Engine photos

StippleGen 2

StippleGen 5

Two months ago, we introduced StippleGen, a program that can generate stipple diagrams and “TSP path” art from images, using Adrian Secord’s algorithm of weighted Voronoi stippling.  It’s a great (and free) tool for turning a photo into CNC-ready artwork, for use on the Eggbot or in other contexts.

twain5kw-newframe

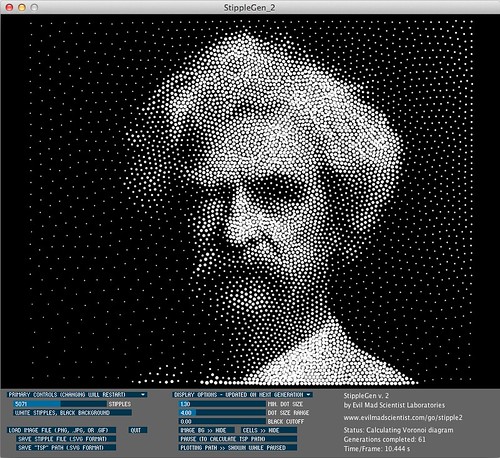
Today we’re announcing a new verison, StippleGen 2. As with the earlier version, StippleGen 2 is free and open source software, written in the Processing development environment. It comes ready to run on Mac, Windows, and Linux, and it is available for download now.

StippleGen 2 comes with three new features: A gently redesigned set of controls that makes life easier on tiny laptop screens, an inverse color scheme— as illustrated above —so that you can now calculate white stipples on a black background, and comprehensive documentation on our Wiki.

newgui

The controls in StippleGen 2 have been redesigned and streamlined. They are also overall a bit thinner so that the full screen (and all of the controls) can now be viewed on an 11″ MacBook Air, without reducing the size of the main display area.

rembrant2kw

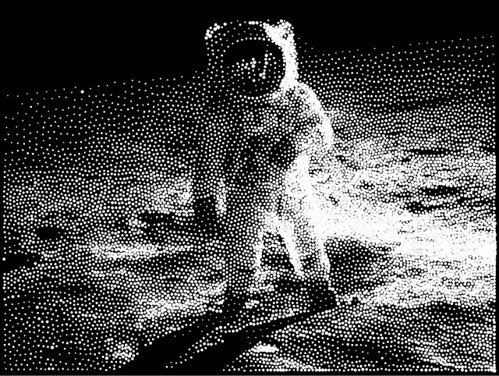
In the first version of StippleGen, the image was always computed with black dots on a white background. For most images that have a light-colored background, this is a good choice.  However, if you have an image with a dark background, you may find that nearly all of your stipples are used to just darken the backdrop, leaving less detail available in the foreground of the image.

StippleGen 2 gives you the option to draw with black stipples on a white background or white stipples on a black background. By using a dark background here, you may be able to recognize Rembrandt in just 2000 white stipples.

rembrant10kwhite

It does, of course, look better with a larger number of points.

apollow10kblackapollow10kw-newframe3

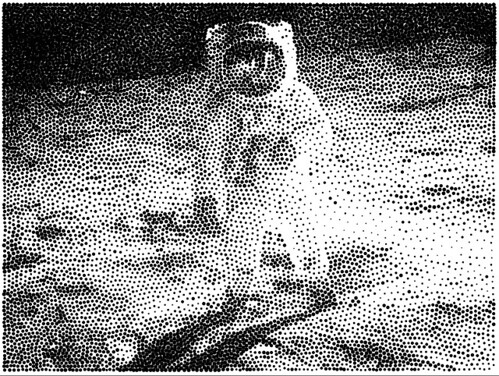
For images with a lot of black and a lot of white, it can be hard to choose which is the better scheme.

However, as this is tool to generate applied artwork, the choice is often made for you in advance.  If you are drawing with a black pen on a white egg, you’ll want black stipples.  On the other hand, if you’re carving into a black panel, white stipples might be the better choice.


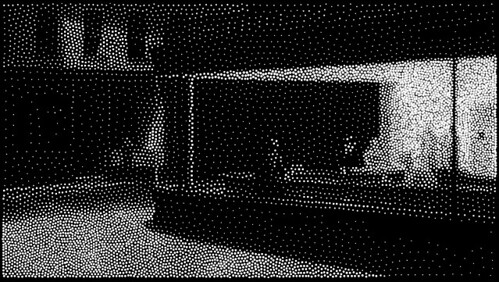
hopper7600w
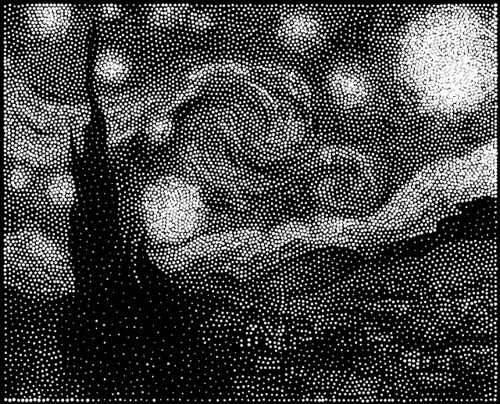
starry10kw

And here are a couple of other “test images” that we’ve been running in the new color scheme.

plant10k_vor

And finally, we have written up comprehensive documentation for StippleGen 2, hosted on the Evil Mad Science Wiki.

StippleGen 2 is free and open source software, now available for download here.
Go try it out for yourself!

A Spectacular Speck on the Sun

Today, Tuesday June 5, 2012, the planet Venus— the planet in our solar system that is closest to the shape and size of Earth —will leisurely pass squarely between the Earth and sun.

The Transit of Venus, as it is called, is a once (or maybe twice) in a lifetime event. If at all possible, make an effort to see it today, because you won’t have another chance… at least until the year 2117.

While it will not be visible everywhere in the world (see map), it will be visible for all of North America, Asia, Australia, and eastern Europe. (The latter, towards sunrise on June 6.)   The transit begins at 22:09 UTC, peaks at 01:29 UTC, and ends at 04:49 UTC.  Here in the PDT time zone, that’s 3 PM, peaking at 6:30 PM, and finishing below the horizon. (More at the LA Times.)

Now, how to actually view it?

If you were clever, you might have stashed away an eclipse-viewing filter from the recent solar eclipse.  If not, another option— one that is cheap and easy to find at hardware stores —is a set of welding glasses with a #14 filter. (That’s black glass. Sadly, those dark green goggles that you found in the shed are likely not safe for direct solar viewing.)

But, as the Ontario Science Center warns you,

Be careful: there are many materials that may seem to block out the Sun’s rays, but which are not safe to use for solar viewing. DO NOT LOOK AT THE SUN THROUGH sunglasses, photographic neutral density filters, polarizing filters, photographic film, dark plastic such as garbage bags, or smoked glass.


The other approach to consider is indirect viewing. You can build a pinhole projector, or a simpler yet version.  You can also use a telescope set of binoculars to focus sunlight onto a surface for indirect viewing. (Using binoculars or a telescope for direct viewing requires a carefully chosen solar filter, to be safe.)

If all else fails— maybe you’re in cloudy Portland —NASA has got you covered. Head right over here for a “live” feed of solar pictures from the SDO spacecraft in orbit around the Earth, and updating every 15 minutes.

Update: A nice summary of the historical background of viewing transits of Venus is here.

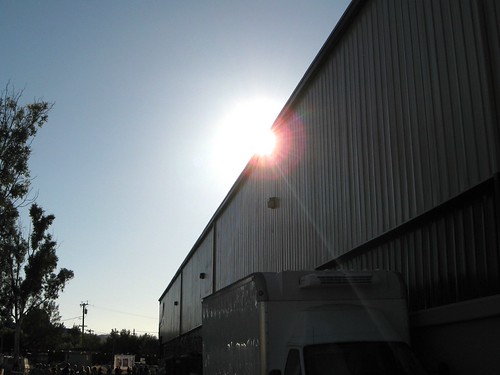
[Image source]

Modkit Micro on Kickstarter

modkit

Our friends at Modkit are running a new Kickstarter campaign for their excellent Modkit Micro software.

[… ] Microcontrollers are no longer just for engineers — anyone can now pick up an Arduino board at their local Radioshack! Now that microcontrollers are even easier to find and buy, they should be just as easy to interact with and program. Modkit Micro works to make microcontrollers accessible to anyone, regardless of their particular background or skill set.

Modkit Micro is a graphical programming environment for microcontrollers that supports a growing number of popular microcontroller platforms including Arduino and Wiring boards. It makes it easy for almost anyone (perhaps especially those with no programming background) to get started using microcontrollers, just by dragging and dropping blocks on their screen to write the firmware.

That part is already pretty neat, but what’s really great about Modkit is that it isn’t trying to be a substitute for “real” programming in source code. When you’re ready to go deeper, Modkit allows you to go “under the hood” to directly view and edit the code that it generated for you. If you’d like early access to try out Modkit, we’d encourage you to support their project— they’re opening up the next round of access to supporters this month.

Link: Modkit Micro on Kickstarter

Shadows of an Eclipse

Eclipse 2012- 5

There were a lot of amazing things that we saw this weekend at Maker Faire— everything from live demonstrations of snails creating artwork (by Presley Martin) to the DIY pick and place machine (from buildyourcnc.com).

There was also something special in the sky: the solar eclipse on Sunday.

Eclipse 2012- 9

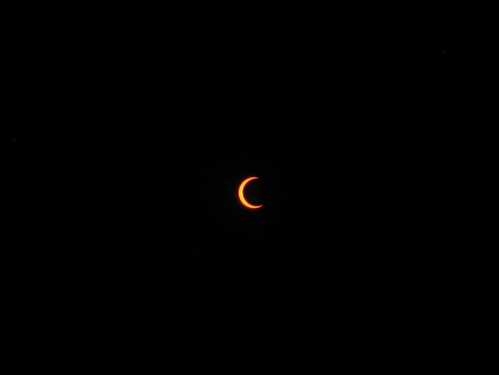
Viewed elsewhere (e.g., further north in California) this was an annular eclipse, where the sun does not disappear entirely, but instead becomes a ring of fire (since the apparent size of the moon is not large enough to block the full disk of the sun).

For us at Maker Faire in San Mateo, it was a spectacular partial eclipse, which we were able to view through solar viewing filters, kindly handed out by the Exploratorium.


Eclipse 2012- 8

Of course, it turns out that you don’t actually need a solar filter to watch the eclipse. Any little aperture— in this case the cap between my hand and the camera —can act as the pinhole in a pinhole camera and project the image of the sun onto a surface.


Eclipse 2012- 4

Eclipse 2012- 2

So if you’re not sure if an eclipse has started, or how much of an eclipse it is, just hold out your hands and make some little apertures; the shadows will show up with little bright spots in the shape of the sun, whether that’s a circle, ring, or crescent.

Eclipse 2012- 1

Stranger yet is to look around at all the shadows that you see every day. Even the shadow of your hand takes on an unexpected shape when the sun is anything other than round.
There are actually five outstreched fingers on my hand here, but you can hardly tell that when every bit of light that seeps through (or around the edges) projects a crescent-shaped image.

We take for granted that the shadow of an object will the same shape as the object, but as you can see, that isn’t necessarily the case when the light source isn’t round.

New Bumper stickers!

Just in time for Maker Faire, we’ve got brand new vinyl stickers, reflecting the new design of our site.

Specifications: 10.5″ x 2.0″ (266 x 51 mm), UV coated and weather resistant on tough vinyl, with an easy-peel backing. Shown above with Diavolino for scale.

(Sorry, no datasheet yet.)


If you’d like to show your support for our little project blog, let us humbly suggest that these new stickers just might considerably enhance the appearance of your car, laptop, lab notebook, bike, sumo robot, name tag, home-brew 3D printer, tesla coil, K’nex gun, interositor, oscilloscope, fission reactor, hovercraft, or electronic art projects.


Come find us at Maker Faire— we’ll have a stack of these to give away —or pick them up at our store, where they’re part of our site-wide pre-Maker Faire “DIY Fever” sale this week.