All posts by Windell Oskay
On the Future of the Internet
Project sites like ours are a product of, and are only possible in an open internet that promotes the free exchange of knowledge.
Legislation currently pending in the US congress–
H.R.3261 “Stop Online Piracy Act” and S.968 “PROTECT IP” — threaten, at a minimum, to significantly undermine our ability to encourage collaborative learning through linking to and direct sharing of resources and ideas. At worst, Evil Mad Scientist Laboratories could someday disappear from the web without warning, and without due process of law.
If you like our site, please take just a minute to contact your representatives in congress. For more information about what these bills could mean for the internet as a whole, there are more resources over at the EFF.
A Mermaid’s Purse, for Breakfast
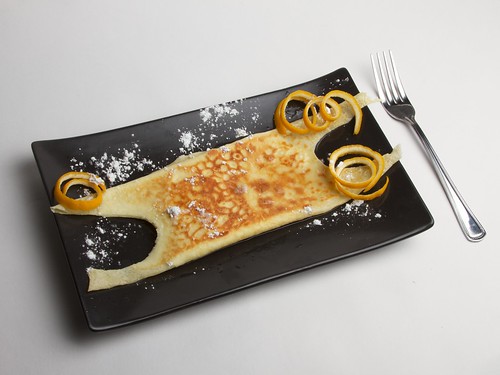
A mermaid’s purse is the iconic protective egg case of certain oviparous (egg laying) sharks and skates.
Here’s another version, made of crepes, perfect for protecting your eggs at breakfast time. Continue reading A Mermaid’s Purse, for Breakfast
Basics: Introduction to Zener Diodes
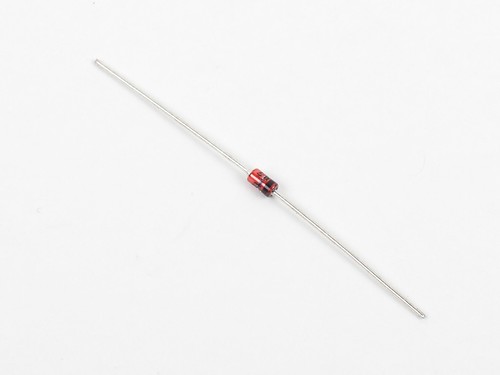
Zener diodes are a special type of semiconductor diode– devices that allow current to flow in one direction only –that also allow current to flow in the opposite direction, but only when exposed to enough voltage. And while that sounds a bit esoteric, they’re actually among the handiest components ever to cross an engineer’s bench, providing great solutions to a number of common needs in circuit design.
In what follows, we’ll show you how (and when) to use a Zener, for applications including simple reference voltages, clamping signals to specific voltage ranges, and easing the load on a voltage regulator. Continue reading Basics: Introduction to Zener Diodes
CNC halftones with ASCII art
Recently we have seen some fantastic DIY examples of CNC image carving with traditional halftones and alternative versions with regions generated with reaction-diffusion equations. More impressively, all of this is now possible with freely available, homegrown software released by the people behind those projects (Here and here.)
Seeing these examples reminded us of another “classic” method of making halftones: ASCII art. In what follows, we walk through the process of using making CNC halftones for engraving or carving from both vintage and automatically generated ASCII art. Continue reading CNC halftones with ASCII art
Alpha Clock Five
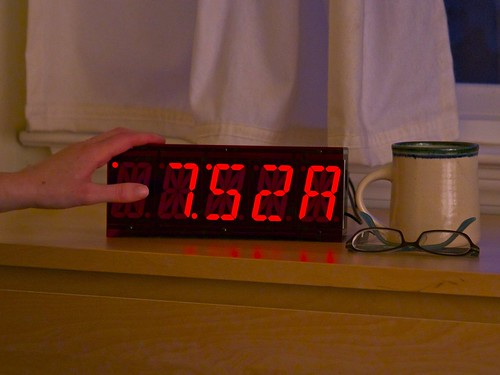
What’s cooler than itty bitty alphanumeric LED displays? Freaking huge ultrabright alphanumeric LED displays, that’s what!
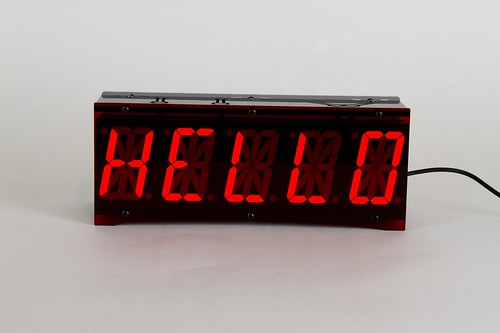
And so today we’re releasing a new kit, the Alpha Clock Five, an open-source, hacker-friendly alarm clock kit, based around an block of fiveultrabright red 2.3″ character height alphanumeric displays:
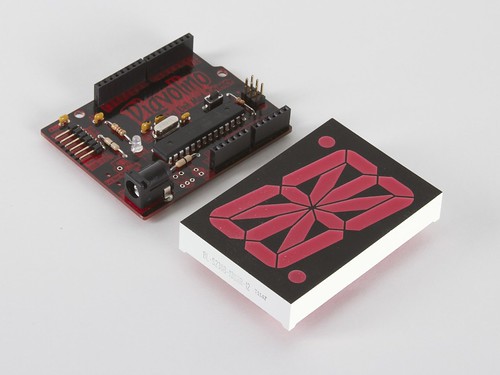
So, how big are these things?
For scale, here’s one of the displays next to a Diavolino board:
These displays are great in many ways– they’re extremely bright for one –but the downside is that they are actually a bit tricky to drive. The 10 “big” segments each have two LED elements in series, twice in parallel, while the smaller segments have two LED elements in series, but not in parallel, and the decimal points each have a single LED element. To drive each LED element at (for example) 25 mA and 2 V requires 4V, 50 mA to be provided to ten segments, 4V 25 mA to the six short segments, and 2 V at 25 mA to each decimal point. And, it’s a fair number of signals to manage as well.
To solve the problem, we designed a multiplexed driver board, with two LED driver chips at different current set points. A 16-bit constant-current LED driver is preset at 50 mA and drives the ten large segments, while a separate 8-bit constant-current LED is preset at 25 mA and drives the short segments and the decimal place. The multiplexing is in analogy with an LED matrix, where each alphanumeric character comprises one row of our matrix– which just happens to have 54 LED elements inside. One row is switched on at a time by one of five transistors. We used high-current, low-saturation-voltage PNP transistors, type 2STX2220– the low saturation voltage means that you *can* use these to switch a useful 4 V load, even when running at 5 V.
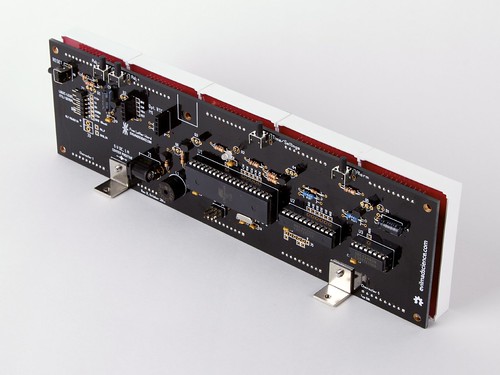
The circuit board is 9.430 X 2.736″ in size, and extra stiff at 0.094″ thick in order to support those heavy LED displays in their sockets. An ATmega644A microcontroller runs the show, and is preloaded with a bootloader so that you can program it like a Sanguinoboard, through a version of the Arduino IDE with added extensions. There’s also a magnetic buzzer so that it can be a full-on alarm clock, and a spot for a Chronodot module, for good timekeeping and battery backup.
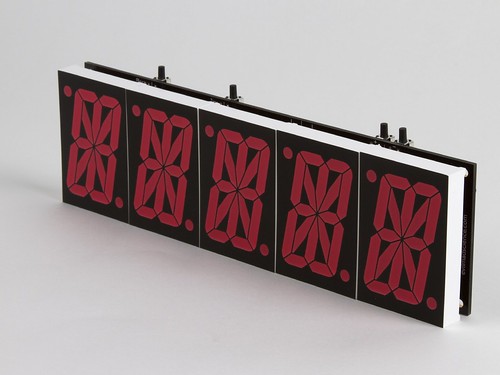
Here’s what the front of the “brick” looks like, with the five displays socketed next to one another. There are four right-angle tactile button switches hanging off of the top edge, so that you can adjust the time, alarm time, brightness, and so forth. If you hold the two rightmost buttons for a couple of seconds, it brings you to the options menu, where you can (for example) switch between 12 and 24 hour modes:

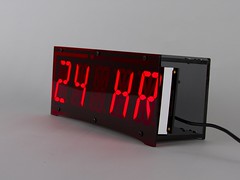
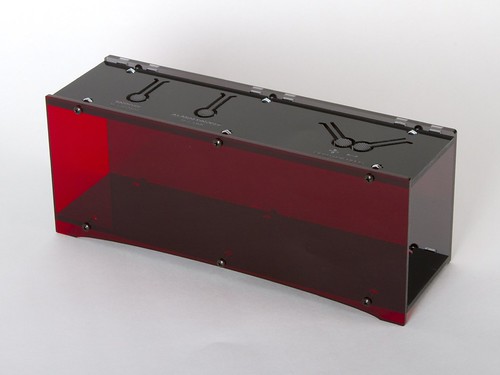
The circuit board, laden with alphanumeric displays, sits inside an acrylic case:
The front side of the case is deep red transparent acrylic (#2423 red transparent, should that come in handy), and serves to increase the contrast of the displays. The back of the case is gray transparent acrylic, and the top and bottom are black. The top surface has engraved labels for the four buttons, and four button keys cut into the acrylic. The thin beam flexes easily, contacting the right-angle switch below, when the circuit board is there.
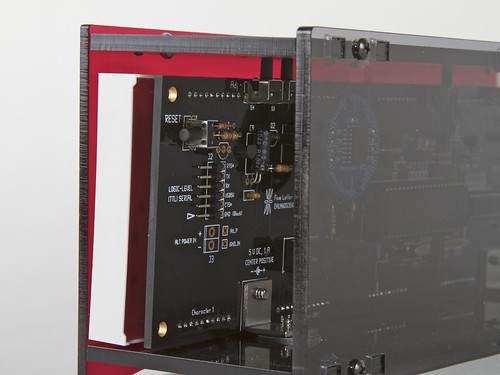
The back of the case is transparent so that you can see the circuit board. There’s also a white LED “night light” on the circuit board that can be enabled or disabled with the top buttons, and the sides are open to provide easy access to the TTL serial interface.
Obviously there’s a lot that could be done by hooking up a nice 5-character alphanumeric data display device to your computer.
On top of everything else, Alpha Clock Five is also a full-fledged alarm clock, right down to the snooze mode— although the word “SNOOZE” didn’t quite fit on the display (it says “SNOOZ,” if you must know).
Perhaps the biggest challenge for making it “bedroom compatible” was that it needed to not just be able to be extremely bright, it also has to be able to go crazy dim– which it can do, with fourteen levels of adjustable brightness.
And it has some fantastic features as an alarm clock– for example multiple alarm tones and digits that are big enough to see even if you normally wear glasses.
And with a bit of code, it can be so much more. Soon, yours might say spell out “TRACY WAKE THE HECK UP” or use a couple of its spare I/O lines– and only make you coffee if you actually manage to get up on time.
Alpha Clock Five is available now at the Evil Mad Scientist Shop.
Improving the Menorah kit
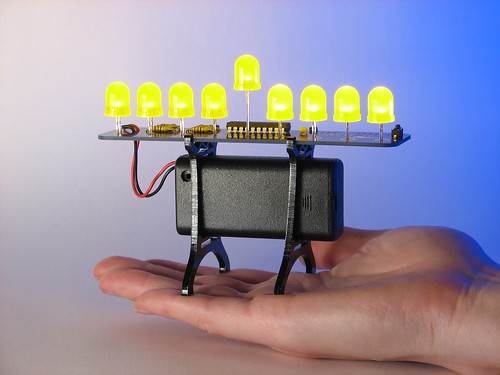
One of our favorite little kits is our Deluxe LED Menorah kit. Since we introduced it two years ago, one of the most common questions that we get asked is this: “Can you use candle-flicker LEDs in it?” And thatturns out to be a very interesting question.
The simple– but, alas, naive –answer is “yes.” We have discussed candle-flicker LEDs in the past, and in most cases, yes you candirectly substitute them for regular LEDs.
But if you do go ahead build up a menorah kit with the candle-flicker LEDs,
what you will find is that the performance is simply terrible: Not only do these LEDs fail to perform properly– (there is no “candle flickering”), but they actually exhibit behavior that we might categorize as “not even wrong”– the LEDs are not particularly steady either, but are rather a bit weak and jittery.
The reason for this is that in the kit, the LEDs are not left continuously it, but are instead continually– and far too quickly for the eye to see –pulsed on and off. This is done because the menorah kit uses pulse-width modulation (PWM) dimming to produce a range of different brightness levels. Not only does the menorah have two different selectable brightness levels, but it also has the ability to softly “fade in” and “fade out” the LEDs when they light up or switch between the brightness levels.
In most ways, this PWM dimming is a wonderful thing. It allow us to create these gentle fades and different brightness levels, and allows us to really fine-tune the performance for better power efficiency. While this works extremely well for regular LEDs, each of the so-called “candle-flicker LEDs” is not just an regular LED, but is actually a regular LED packaged with a tiny integrated circuit that executes the “random flicker” program. And, that chip can only execute its program properly if it’s left on continuously. If instead, it is continually pulsed on, we might indeed expect to end up with the kind of jittery, inconsistent behavor that we do see in the kit.
How could we go about fixing this, if we wanted the LEDs in our menorah to flicker? It would be straightforward to remove the dimming features from the software, and actually use the self-flickering LEDs in a mode where we leave them on continuously. But in doing so, we would lose a couple of our favorite features: the gentle fade-ins that make the kit so elegant, and the ability to have multiple brightness settings.
So that’s a tough choice: Do we forgo flickering, or live without our elegant gray scale fades?
But fortunately, there is a way out. The right solution is to remember that we do have a microcontroller– an ATtiny2313 –running the show, and to start acting like it. If we go back to regular (non-flickering) LEDs, we should be able to write a “random walk” flickering algorithm and add that to our existing firmware. In doing so, we can keep our original fades and brightness modes. We also can keep the kit price the same (since we don’t need the more expensive flickering LEDs), and as a hugeadded bonus, we can now turn on or turn off the flickering at will– something that you can’t do with LEDs that always flicker.
Today we’re releasing the new version of the menorah kit software, and shipping it in the kits. And, we made a little video(embedded below) to show off the new flicker modes and what happens when you try and use flickering LEDs with PWM:
The new source code– Menorah kit software version 1.3 –is available here, and it can be used to upgrade any older Deluxe LED Menorah kit as well. :)
The Googly Eye Shield For Arduino
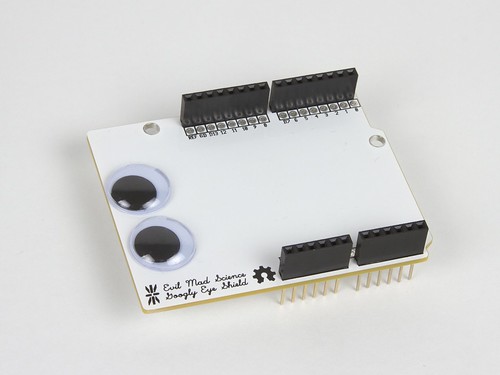
Introducing what is arguably the most important Arduino accessory ever created: the Googly Eye Shield for Arduino.
It’s an (extremely simple) open source hardware kit, but we feel that it fills an important niche. We’ve put together a promotional video to explain.
Decorating Christmas Ornaments with the Eggbot
As we are approaching that time of year when conifers tend to sprout up in living rooms, here are some techniques and tips for making awesome personalized ornaments with the EggBot. Continue reading Decorating Christmas Ornaments with the Eggbot
Basic kludges: 5 minute SOIC-DIP adapter
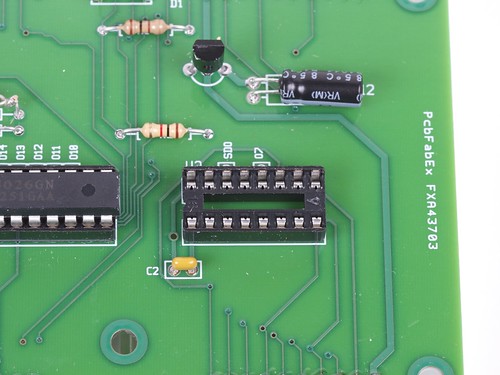
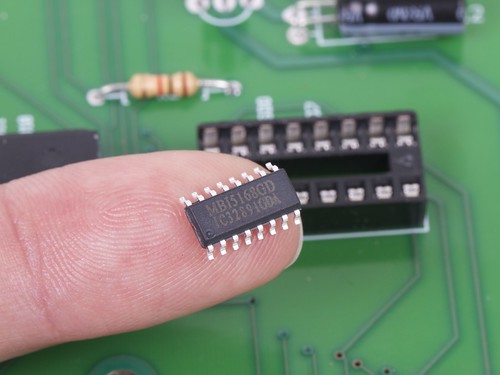 Doh! We’ve got the right chip handy, but only in the wrong package!
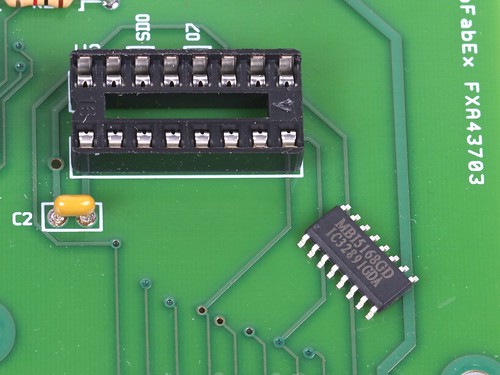 No siree, that chip will not fit in our socket. :(
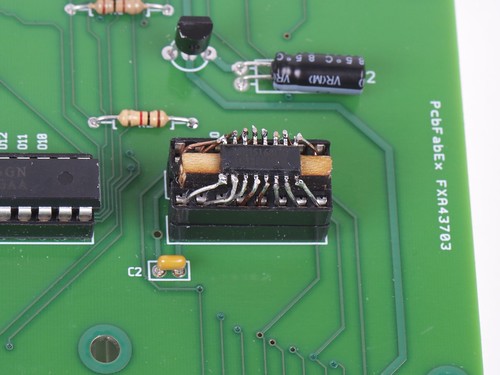
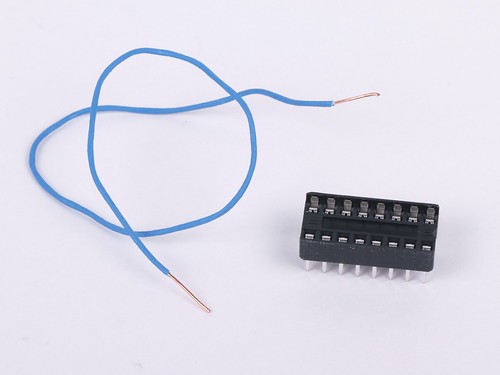 Fortunately, we’ve got tools: some thin copper wire, a spare DIP socket, and a few minutes of time. So, even without a readymade SOIC-to-DIP adapter, we’re still good to go.
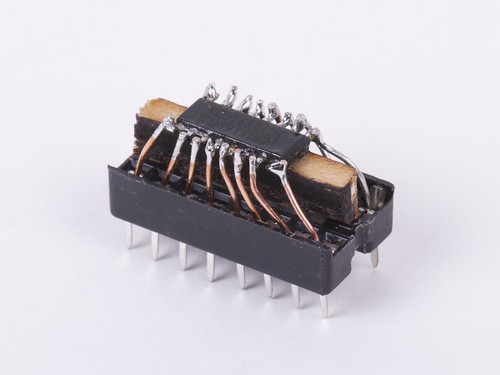 It’s helpful to raise the little chip up a bit with a wood or plastic shim, and then to fix it in place with hot or super glue. Strip the insulation off of the wire, and cut into small sections. Starting at the center of the chip, insert one end of each little wire into the socket and solder the other end to the matching pin of the IC. Trim the leads just above the chip.
And (poof!) it fits in the circuit board after all.
Beautiful? Heck no. (More like slimy but satisfying.) But finding a way to get your circuit board to light up without a few more days for the “right” chip to show up can be a wonderful thing indeed.


