All posts by Windell Oskay

About Windell Oskay

Co-founder of Evil Mad Scientist Laboratories.

Circuitry Snacks

555 LED flasher 1

PCB with components   Joule thief 2

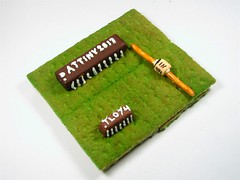
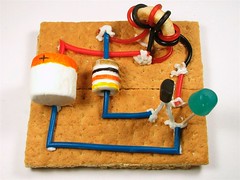
Here we present what is arguably the tastiest way to design and learn about electronic circuits: make circuitry snacks!

Two of our favorite things in the world are playing with electronics and playing with food, and so it is about time that someone finally got around to combining the two. We begin by gathering up appropriate snack-food building blocks and making food-based models of electronic components. From these components, you can assemble “circuitry snacks”– edible models of functioning electronic circuits. You can make these for fun, for dessert, for your geek friends, for kids, and for teaching and learning electronics.
Continue reading Circuitry Snacks

Computing the volume of a cat

Cat volume computation

How do you compute the volume of a cat?

Dunking it in water doesn’t work– you only get the volume of the rat-like creature that lives inside the cat; much like the feeble alien within a Dalek. (And, if your answer had anything to do with contour integrals, get real.)

Here is a low-tech method that works: Using successive approximation, determine the smallest box that the cat will fully enclose itself in, and measure the size of that box. Cats tend to leave a few appendages hanging out of the corners– you may need to assist with folding the cat into the box for the final stages of approximation.

This cat is approximately 648 cubic inches in volume.

Class Reminder: Choosing a Microcontroller (Sat 7/7 @ TechShop)

ATtiny2313MakeController

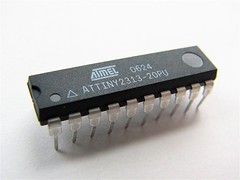
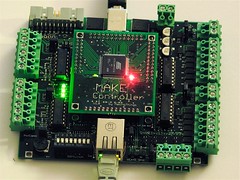
Tomorrow I’ll be again giving my seminar called “Choosing a Microcontroller” at TechShop. This class is a broad introduction to the capabilities and variety of single-chip computers, as well how to actually pick one for a given application. It’s easy to get overwhelmed looking at the variety of range of micros, from four-bit micros that have a 4-bit wide data path — and actually cost four bits— to AVRs and PICs, basic stamps and Arduinos, to 32-bit gorillas with names like ARM, Blackfin, and Coldfire. So, we’ll try and cut through the fog and help you figure out where to get started.

If you’ve heard people getting excited about or doing cool things with microcontrollers and want to learn more, this might be a great introduction to the field.

Sign up for the class here.

If you are interested in the topic but can’t make it, you might want to take a look at our
list of resources for choosing microcontrollers.

This is the last time that this particular class will be offered in the near future. Another intro AVR class will be forthcoming, probably in August. As always, if you have other ideas for classes that are within our expertise, please let us know.

Cooking hot dogs via electrocution

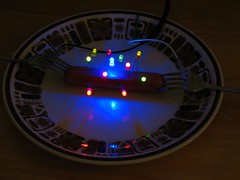
cooking   LED 1

How to cook hot dogs… with electricity!

[Disclaimerzilla: While we could give you lots of warnings about all the different dangers involved and how to possibly skirt them, the simple truth is that this just isn’t safe. If you are foolish enough to attempt this, you will have to deal with pointy things, raw electricity out of the wall, hot steam, and the possibility of fire. If that isn’t enough, and you succeed, you are still faced with the possibility of having to eat a hot dog. In summary: do not, under any circumstances, cook hot dogs this way.]
Continue reading Cooking hot dogs via electrocution

Reminder: Upcoming classes at TechShop

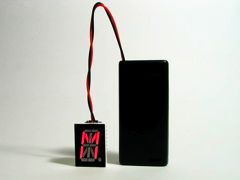
led micro-readerboard   Blinkylights1

Build your own LED Micro-Readerboard this Satuday (6/30, 1:00 PM) at TechShop. It’s a single class where you choose phrases for and solder together your own LED Micro-Readerboard. As a new option: you can choose to make yours an AlphaPOV display! This class is a fun first introduction to what you can do with a microcontroller– where you make a neat toy that you get to take home. (Kids can take this class too, assuming that you’ve already taught them to solder.) Sign up here.

A week later, “Choosing a Microcontroller” (7/7 @ 1:00 PM) is a detailed seminar on the capabilities of microcontrollers and walks you through the process of finding one for your application. Sign up here.

AlphaPOV: An alphanumeric persistence of vision display

AlphaPOV4

You have probably seen persistence of vision (POV) toys at some point– little LED dot-matrix displays that, when waved around, display a picture or a message that seems to hang in mid air. We’ve been playing with 16-segment LED displays lately, and it some point it occurred to us that we’d never seen an alphanumeric POV display. So, we went ahead and tried it out, and hey– it works! AlphaPOV is the result. It’s a neat effect since the clearly defined segments– designed for text– introduce a certain degree of legibility into the display.

The starting point for building this project is our LED Micro-Readerboard. Normally, the micro-readerboard shows one character at a time, so that you can read it sequentially while holding it still. Here, we use a (very slightly) modified version of the firmware that blinks the characters on and off at high speed. Read on for details, AVR source code and a few more pictures.
Continue reading AlphaPOV: An alphanumeric persistence of vision display

Slicing STL files in POV-Ray


We have been using POV-Ray to create 3D models and render bitmap slices that can be printed with the CandyFab 4000, our home-built 3D sugar fabricator. One thing that we could do to extend the usefulness of this procedure is to be able to take STL files as input, because STL is the de facto standard file format for 3D fab shops and the machines that do the fabrication. So, here’s how to do it: STL files can be converted to POV-Ray format, and from there we can use our usual bag of tricks to render the set of bitmap slices.


In this article, we explain that process in more detail: We’ll take an STL file, import it into POV-Ray using the stl2pov utility, and then set it up to render a series of slices. Our example file is the sculpture Metatron by Bathsheba Grossman, who has released the STL file for it into the public domain (with some interesting results). The picture above shows Metatron, as rendered in POV-Ray.


The first step is to get and install the stl2pov utility from the author’s page. It’s a cross-platform command line program. (Mac/Linux/Unix users, follow the instructions to compile the source. Windows users, go ahead and download the compiled binary.)


Next, we need an STL file to convert. If you have your own, you can certainly use that. To follow along using the Metatron STL file, go to http://www.bathsheba.com/downloads/ and download the file metatron.zip, a 3.1 MB .ZIP file. After decompressing, that yields metatron.stl, which weighs in at 6.6 MB.

Since we have the utility and the source STL file, we’re ready to perform the conversion. The output file after the conversion will be a large text file that can be awkward to work with. A solution that makes things easier is instead to make it into a POV-Ray .inc (include) file, so that we can simply edit a small POV-Ray wrapper that calls the included file that describes our complex object. To perform the conversion at the command line, execute the following code in the directory with metatron.stl:


stl2pov -s metatron.stl > metatron.inc

The “-s” option turns on smoothing, an option that I have found to increase reliability, and the command saves the converted output to a new file called “metatron.inc”. Unless your computer is really fast, go get some coffee and come back in ten minutes– the conversion can take a while. My file ended up at 28 MB — large enough that you may want to edit it in a dedicated text editor (emacs, vi, AlphaTK….), not the editor built into POV-Ray.


The contents of the new metatron.inc consist of a single definition of a POV-Ray mesh object made out of smooth triangles. It looks like this:

#declare m_Rhinoceros_Binary_STL___Jun_15_2005__ = mesh {
smooth_triangle { // #1
<-1.56964, 0.774161, -0.360695>, <-0.898199, 0.389497, -0.20379>,
<-1.59137, 0.732853, -0.338752>, <-0.910102, 0.368279, -0.189959>,
<-1.57298, 0.776465, -0.341074>, <-0.903134, 0.383962, -0.192153>
}
smooth_triangle { // #2
<-1.58513, 0.728167, -0.377533>, <-0.910933, 0.36028, -0.200995>,
<-1.56964, 0.774161, -0.360695>, <-0.898199, 0.389497, -0.20379>,
<-1.56618, 0.771805, -0.379959>, <-0.892874, 0.395758, -0.214829>
}

[Snip! Insert 28 MB of the same right here…]

smooth_triangle { // #138379
<0.486637, 0.670353, 0.431943>, <0.678163, 0.482259, 0.554546>,
<0.451365, 0.691581, 0.456294>, <0.669205, 0.482143, 0.565423>,
<0.480983, 0.649411, 0.456491>, <0.678073, 0.468723, 0.56614>
}
smooth_triangle { // #138380
<0.451365, 0.691581, 0.456294>, <0.669205, 0.482143, 0.565423>,
<0.427022, 0.675693, 0.497914>, <0.659582, 0.482502, 0.576319>,
<0.456994, 0.655713, 0.480073>, <0.669431, 0.473142, 0.572712>
}
} // end of mesh m_Rhinoceros_Binary_STL___Jun_15_2005__


The #declare statement in the .inc file tells us that it defines a POV-Ray mesh object called “m_Rhinoceros_Binary_STL___Jun_15_2005__”, and it is up to us to use it. Minimally, we need to call #include “metatron.inc” to get the file, and then place the object somewhere. Here is a complete code example, for a POV-Ray file (let’s call it “metatronSimple.pov”) that can draw the Metatron, given that the metatron.inc file is present:

//metatronSimple.pov

#include “metatron.inc”

background{color rgb 1 }

object{ m_Rhinoceros_Binary_STL___Jun_15_2005__
rotate 90*x

texture{ pigment{ color rgb <1,0.5,0> }
finish { ambient 0.15
diffuse 0.85
specular 0.3 } } }

light_source { <-20,100,20> color rgb 2}

camera {
perspective
angle 35
right x*image_width/image_height
location <-3,7,15>
look_at y*0.25
}


Since we can now render the sculpture, are we done? Note quite. There’s one little detail to worry about which is that the mesh object does not really have a defined inside or outside, which becomes a problem when you want to start slicing it up with boolean operations. The solution to this is to define what’s called an “inside vector” that tells POV-Ray where the inside of the sculpture is.
The vector is added just before the closing bracket of the #declare statement, at the very end of metatron.inc, like so:


inside_vector <-0.5, 0.68, 0.5>
} // end of mesh m_Rhinoceros_Binary_STL___Jun_15_2005__


With that modification, you can now use full constructive solid geometry operations on the imported STL object, including slicing it. As we described in the article about the CandyFab 4000, it’s a matter of rendering an animation in POV-Ray to automatically generate the slices. For each frame of the animation, we take the intersection of the object of interest with a thin, flat rectangle, which is raised up a little bit higher with each successive frame:


#if (overview)
object { m_Rhinoceros_Binary_STL___Jun_15_2005__ rotate 90*x }
#else
intersection {
object { m_Rhinoceros_Binary_STL___Jun_15_2005__ rotate 90*x }
box { < -50, 0, -50>, < 50, .10833, 50>
translate y*frame_number*0.10833 }
}
#end // end if


As you can see, we’ve also added a code “switch” (“#if (overview)”) that determines whether we’re slicing the object or just displaying it. Also note that the slice thickness can be chosen however you like; our 3D slices are 0.10833″ thick right now, so that’s the value that’s displayed here.

Of course, if you’re just displaying the object (not slicing), you might want to make it look a bit nicer. The rendering at the top of this article was made by adding a background, some texture, lighting, moving the camera, and was otherwise gussied in ways that you don’t want if you’re slicing up the object. These are all controlled by the same software switch (overview) which is at the beginning of this POV-Ray file, which is called “metatron.pov”. You can download this code example (along with metatronSimple.pov) here (3 kB .ZIP file).


Setting overview = 0 instead, we can now render the slices. Turn on animation, i.e., the clock variable, in POV-Ray, and set it to render 58 frames. You can use the lowest quality setting (Quality 1) and antialiasing should be turned off. Running that produces 58 separate bitmap image files; here is what a selection of four of those slices looks like:


Just looking at a few slices doesn’t really give you a flavor of what the whole object looks like, however. One trick to visualize it is to scan rapidly through the image slice files like a flip book. You can watch this little quicktime movie (53 kB) of doing just that to get the idea. If you watch a few times, it can give you good intuition into how the structure actually fits together.


So are we planning to render Metatron in sugar? Yes, but not yet– it’s a detailed sculpture and we need to improve our effective resolution (or total build size) before going there. We have, however, previously used the technique we’ve described here to fabricate Soliton, which is another one of Bathsheba Grossman’s sculptures.

Resources for getting started with AVRs

This is a short list of resources for getting started with AVR microcontrollers. It’s intended as a supplement to intro AVR classes that we have given. We intend to periodically update this list; leave your suggestions for additions in the comments, please. (Last update: October 2012)

First of all, these GUI installers for the GNU AVR toolchain are really excellent: Two flavors for Mac and Windows:

CrossPack (Mac – recommended solution)

MHV AVR Tools (Windows – recommended solution. Also available for Linux and Mac)

On Linux and Unix-like operating systems (Macs included) you can also follow the directions given by bdmicro (330 kB PDF) for installing the components one at a time.

Almost certainly the best place to get started is at Ladyada’s AVR tutorial. It is extensive and up to date, and it will probably be kept up to date better than most of the other resources that we mention here.

A couple of other sets of instructions and reference guides:

Some notes on hardware:

A few interesting examples of AVR source code:

  • TV-B-Gone, the open-source version.
  • Gobs of other good examples at Ladyada.net
  • Procyon AVRlib by Pascal Stang. Open-source C libraries to do all kinds of things– some quite advanced.

Our own articles about and using AVR microcontrollers:

  1. An AVR-based Analog Plotbot with an E-Paper Display
  2. Quick and Dirty D to A on the AVR: A timer tutorial
  3. Fixing a bad frequency fuse bit on an AVR
  4. Resources for choosing a microcontroller
  5. Programming the Atmel ATtiny2313 in Mac OS X (only partly Mac specific– but mostly out of date. Some hints about programmers, programming, and target boards.)
  6. How to make high-tech LED decorations for the holidays
  7. LED Micro-Readerboard, version 2.0
  8. LED Micro-Readerboard, version 2.0: FAQ File (with hints about programming)
  9. Instructables: Micro-Readerboard Build
  10. Using AVR microcontrollers: Minimalist target boards
  11. The Adafruit Industries USBtinyISP kit
  12. Using an ADXL330 accelerometer with an AVR microcontroller
  13. AlphaPOV: An alphanumeric persistence of vision display
  14. MiniPOV Cylon firmware
  15. Make a Robotic Snap-O-Lantern!
  16. Peggy, A Light Emitting Pegboard Display
  17. Solid freeform fabrication: DIY, on the cheap, and made of pure sugar
  18. Meggy Jr RGB
  19. POV Lissajous figures
  20. Resurrecting Tennis for Two
  21. Business card breakout boards for ATmega48/88/168/328
  22. Scariest Jack-o’-Lantern of 2008
  23. Simple Solar Circuits
  24. The Mignonette
  25. Peggy 2.0
  26. Single Sided Circuit Board with an ATtiny2313
  27. Business card breakout boards for ATtiny2313
  28. Basics: Serial communication with AVR microcontrollers
  29. Giant 7-segment displays
  30. Deluxe LED Menorah
  31. The Larson Scanner
  32. The Rovin Pumpkin
  33. The Bulbdial Clock
  34. Using an ADXL335 accelerometer with an AVR microcontroller
  35. Mac Sleep Light Pumpkin
  36. Octolively Interactive LED panels
  37. ISP Shield for Arduino
  38. Reading and writing flash contents
  39. Sharing target boards
  40. On the design of the Bulbdial clock
  41. Diavolino
  42. Interactive Game of Life Exhibit
  43. Say Hello to xmega
  44. Blink an LED with an AVR
  45. The Art Controller

Using AVR microcontrollers: Minimalist target boards

USBtinyISP and simple target

This is a quick how-to guide on making ultra-simple development boards for programming AVR microcontrollers. Most recent-vintage AVRs can be programmed through an ISP (in-system programmer) connection; all that is really needed is a place for the chip to sit and a way to connect to the programmer.

That’s where these minimalist AVR “target boards” come in. These little boards cost only about $2 and take only a few minutes to make.

It turns out that I build a lot of these because asking “how do you make a circuit to program the AVR?” is really the same as asking how you can program an AVR that is in a circuit. And, we might as well start with a simple circuit.
Continue reading Using AVR microcontrollers: Minimalist target boards