Category Archives: Art

Photomask Mirrors

Untitled

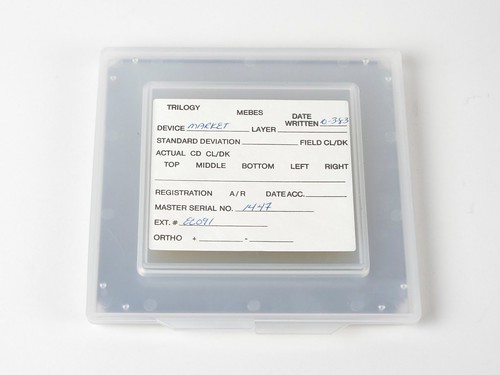
At our local Silicon Valley electronics surplus shops and electronics flea market, we frequently come across all sorts of bizarro semiconductor manufacturing paraphernalia. Here is one of those types that we have written about before, in our coaster project:

Photolithographic masks, or photomasks are clear templates used in semiconductor manufacturing. Typically, they are made of UV-grade fused silica and have a highly intricate chrome metal film pattern on one side.

The most commonly available masks are test patterns used for calibration, as production masks are guarded carefully. This particular one dates back to 1983!

Untitled

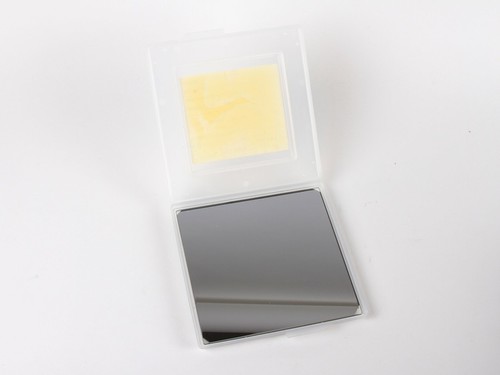
Now looking inside at it, it’s hardly a mask at all. It’s nearly fully silvered—perhaps a mask pulled out before the etching step of its process.

Untitled

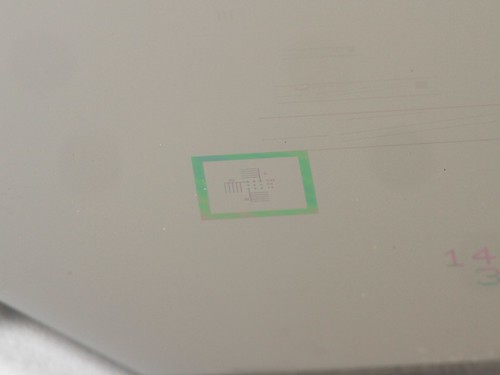
If you look at an oblique angle, you will find a few incredibly detailed patterns, and some printed on markings. This one is marked “5.1 INCH ARRAY” across the top and “1447 3-OCT-83-13. 5” across the bottom.

Untitled

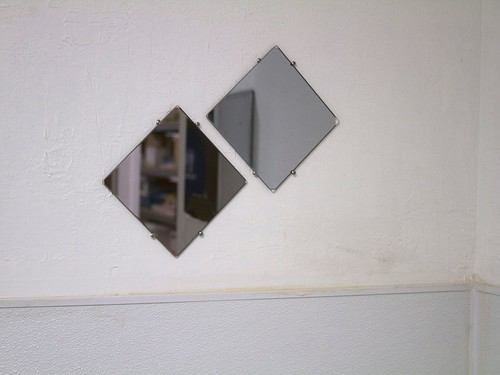
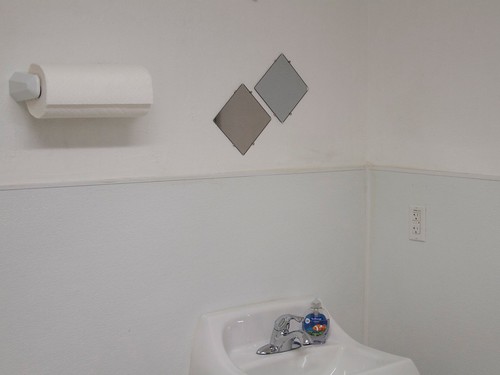
So, what to do with them? Since they don’t have the neat patterns that made those coasters so cool, we used some truss-head screws to mount them to the wall.

Untitled

And here we are then, using a couple of photolithographic mask as bathroom mirrors! (With a couple of units at different heights for different-height people.) It solves a couple of problems at once: how to display the beautiful ephemera of semiconductor manufacturing, and what to do about a soulless little extra bathroom at our shop that didn’t come with a mirror.


WaterColorBot Kickstarter Update #1

KS_Thankyou

Our sincere gratitude goes out to all of our Kickstarter backers and everyone who has helped to spread the word about our WaterColorBot Kickstarter campaign. It has been incredibly rewarding to see each new pledge come in, from friends both old and new. We’re thrilled to announce that we exceeded our funding threshold of $50,000 after just over 60 hours: WaterColorBots are coming!

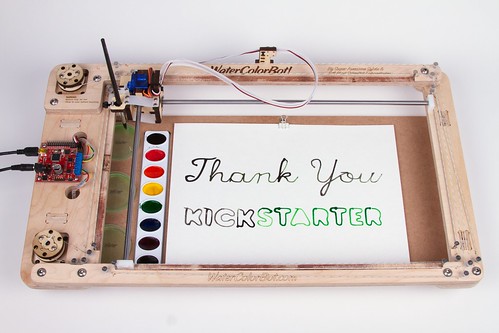
Today we recorded a little video that you can see on our update page of the WaterColorBot saying (well, painting) “Thank You.” One of the questions we have heard a few times (and have added to our FAQ) has been, “Can the robot go get more paint when it runs dry?” The answer is yes, as you can see in the video.

So is it all in the can and ready to ship? No, not quite yet. You may notice one goof in the video: an unnecessary color change. We’re still sanding away at the rough edges, in order to make sure that everything is ship-shape before we ship.

Thanks for all of the great questions and comments. We’ve already started adding to the FAQ based on your feedback, and we’ll continue to do so as the fantastic questions keep coming in. We’ve already got some excellent suggestions for future software directions, and changes and additions to the API. Getting real feedback from all of you about the different ways that you hope to use the WaterColorBot is immensely helpful in guiding us forward.

We’ve seen the project posted all over the internet, including on AdafruitBoing BoingEngadgetTech CrunchGizmodo Germany, and even as far away as Indonesia at Jeruknipis. Many of you have posted it to Twitter and Facebook, and we’re grateful for all of your support.

We had planned to post an update after a couple of days, but we didn’t imagine that we would get to post about surpassing our threshold so soon! We’ll be posting more updates in the near future. There are a lot of interesting details about the WaterColorBot that we haven’t yet written about and are looking forward to sharing with you.

Introducing The WaterColorBot

Today we’re thrilled to be launching our newest kit: the WaterColorBot.

The WaterColorBot is a brand-new project from Evil Mad Scientist Laboratories and Super Awesome Sylvia — a friendly art robot that moves a paint brush to paint your digital artwork onto paper, using a set of watercolor paints.

We’ve previously written about how we got started on this project (in a guest post by Sylvia), and about Sylvia’s visit to the White House Science Fair, where she was able to give President Obama a personal demonstration of the WaterColorBot.

And now, you can get one too!  We’re launching the WaterColorBot today on Kickstarter, and we’d like to ask for your support in getting it out there.  The WaterColorBot is an enormously powerful tool for helping to get young people interested in technology:

Beyond simple fun, we think that the WaterColorBot has enormous potential for STEM and STEAM education, especially as a way to get young people engaged with hands-on technology and robotics. We are particularly interested finding ways to inspire young women to pursue careers in science and technology. We cannot imagine any better way to do so, than starting with a robot co-designed by a 12 year old girl.

Perhaps more than anything else that we’ve done, we think that the WaterColorBot really can make the world a better place, one (young) Evil Mad Scientist at a time.

Peach Chutney

Untitled

Here’s how to make a variant on our plum chutney, tailored for the creamy sweetness of peaches.

We’ve reduced the overall quantity of fruit and sugar to get a higher spice concentration. The cayenne and ginger are increased to make it even spicier. Pepper flakes are added both for flavor, and for pretty flecks of color against the pale peach pieces. We also added cloves for a little more depth of flavor.

The peaches are not peeled, both to get more peach flavor and for the color the skins add. Wash well or peel (blanching makes peeling easier) if the provenance of your peaches is unknown and you’re concerned about pesticides.

Ingredients:

  • 6 cups cut up pieces of peaches, pits removed, skins (optionally) left on
  • 2 lemons, cut into small pieces, seeds removed
  • juice from 3 more lemons
  • 2-3 Tbsp fresh ginger, peeled and grated (a microplane works great)
  • 1 Tbsp cumin seeds
  • 1 stick of cinnamon
  • 1 tsp cayenne pepper
  • 1/2 tsp red pepper flakes
  • 1/2 tsp garam masala
  • 10-12 whole cloves
  • 1/2 cup water
  • 3 cups sugar

Put everything except the sugar into a sauce pot and cook, stirring occasionally, until the fruit starts to soften, about 10-15 minutes.

Add sugar and cook, stirring frequently, until it thickens to a consistency you like (20 minutes to an hour). Remove cinnamon stick after cooking.

Untitled

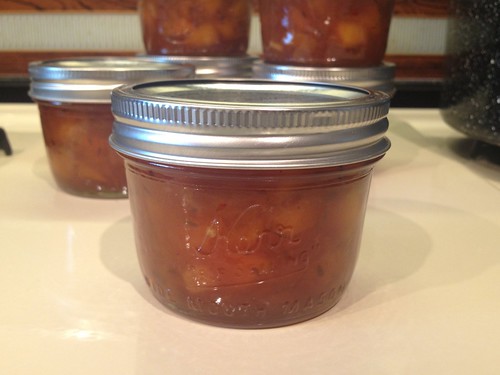
You can also follow your favorite canning procedure for longer term storage. Makes about 3 pints.

DIY Hatbox Stamps

Matthew Borgatti recently put up an excellent post about the process of creating a hat box stamp for Pork Pie Hatters:

A professional looking tool made from a few simple digital fabrication techniques and some easy hand finishing. I really love when a process can be this straightforward and precise and take the hand crafting out of the equation. Laser cutting allows me to put the time and labor and love in the conception step and not on the execution.

He walks through the details of the aesthetics, design, fabrication and finishing.

Time Lapse Fog over San Francisco

Adrift is a beautiful short film by Simon Christen chronicling the fog of the San Francisco bay.

I spent many mornings hiking in the dark to only find that the fog was too high, too low, or already gone by the time I got there. Luckily, once in a while the conditions would be perfect and I was able to capture something really special. Adrift is a collection of my favorite shots from these excursions into the ridges of the Marin Headlands.

Via @drwave.

Bullet Time Fireworks with a GoPro and a Ceiling Fan

fireworksfireworks

Just in time for the Fourth of July, Jeremiah Warren created an incredible relatively low-budget “bullet time” rig— with a 240 fps GoPro camera mounted to a ceiling fan —to photograph fireworks. He posted a full writeup showing how to build it on his web site.

fireworks

fireworks

The clever hack about using the GoPro on the ceiling fan is thanks to Mark Rober, who showed how to do it back in May, mostly with smaller-scale subjects.  But Jeremiah has taken the idea and run with it, adapting it for larger-scale photography.

And as you can see, the results are simply fantastic.You can find more videos and the full how-to on Jeremiah’s site.

PCBmodE: Make your PCB a work of art

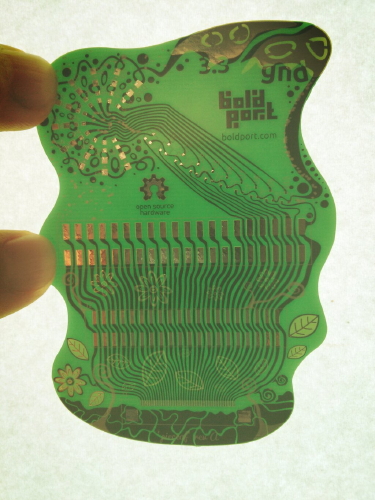
The folks at BoldPort have created PCBmodE, free open source software for designing printed circuit boards, but with an artistic perspective. Traditional EDA tools are designed from an engineering perspective, whereas PCBmodE treats the PCB as a creative palette. They aim to give you freedom to express your design with all the tools of the medium.

We wanted to create circuit boards that have curvey traces, meandering paths, and multiple soldermask layers, so we developed PCBmodE (say “PCB mode”), an open source Python software that unshackle us from the constraints imposed by traditional PCB design tools. We use the power of Inkscape — the leading open source vector graphics editor — to achieve any shape imaginable. Together with our powerful back-end tools, we can manufacturable beautifully functional boards.

They’ve posted about several of their example boards including pieceof (pictured above), a Raspberry Pi daughterboard called shimmy, and a tribute board dedicated to Bob Pease. This is a really neat approach to building circuit boards, and it looks like it has a lot of potential.