Category Archives: Evil Mad Scientist Shop

Ostrich EggBot 2.0

Ostrich EggBot
Ostrich EggBot

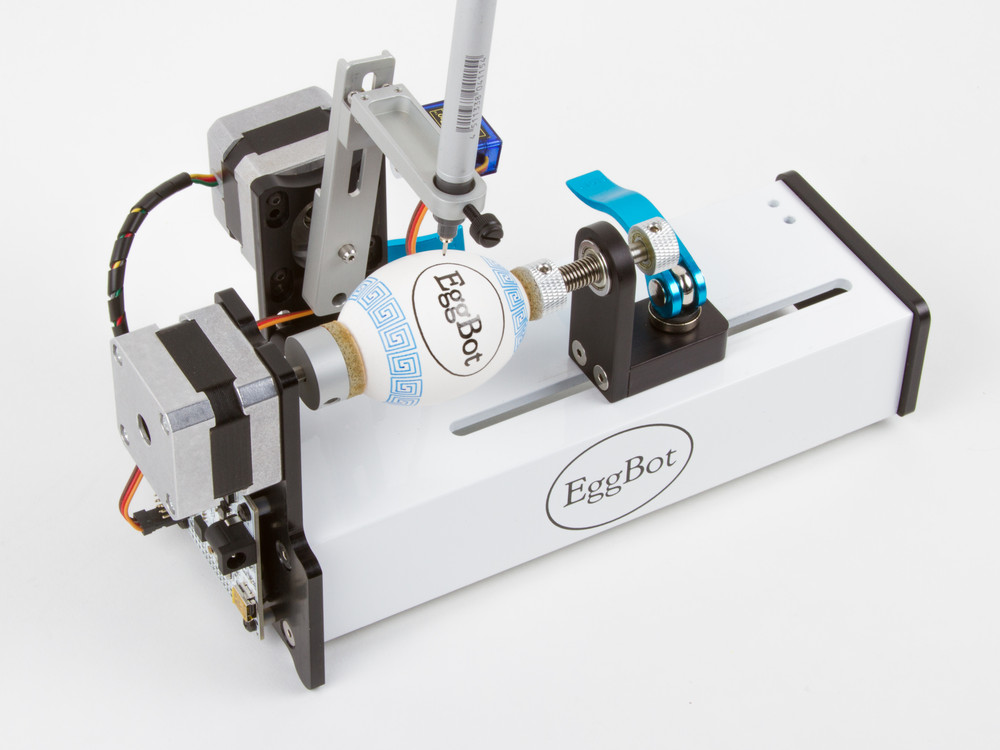
We’ve just released version 2.0 of our Ostrich EggBot kit!  This is the giant size EggBot. Like the smaller models, it’s a machine capable of drawing on the surface of all kinds of spherical and egg-shaped objects up to 6.25 inches (15 cm) in diameter, including large ostrich eggs.

This chassis of the new version is CNC machined from melamine-faced MDF, and laser engraved with markings and calibration scales. (The previous version was made of plywood; you can read about it here.) We’ve also updated the graphics, and rolled in a number of subtle improvements based on user suggestions and our own extensive experience with the machine and other members of the EggBot family.

Ostrich EggBot Ostrich EggBot

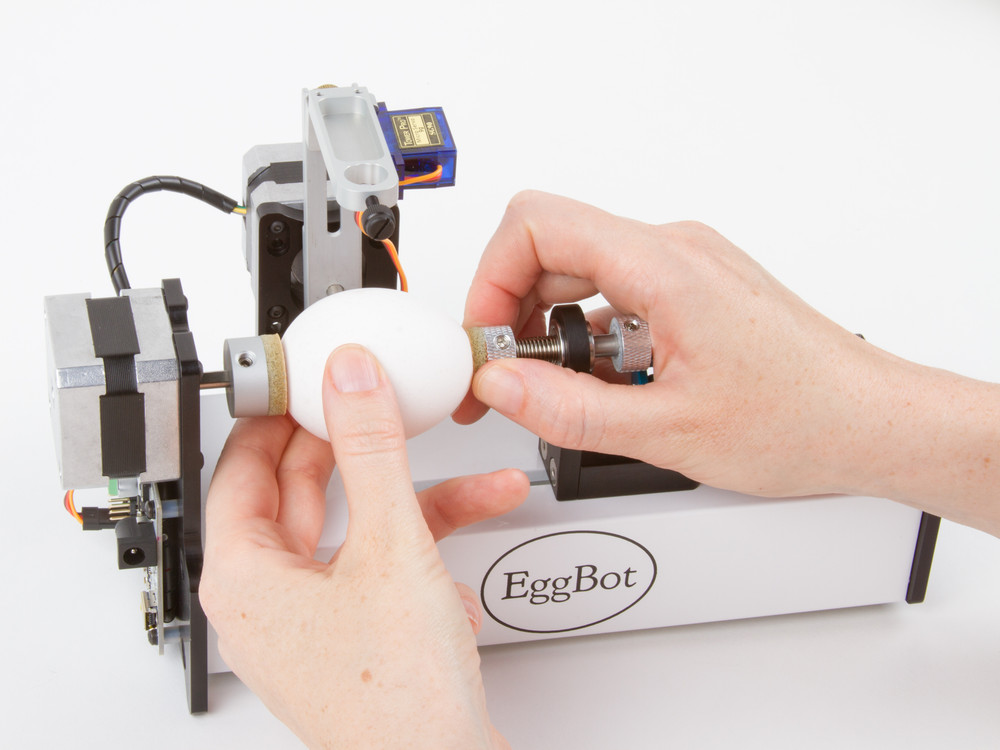
With a relatively large chicken egg chucked into the holders, you can get a better sense of scale. (An ostrich egg is a terrible object to suggest a sense of size!)

The tailstock (the sliding portion of the right hand side) has been slightly redesigned for higher stiffness and better ease of use. The bulk of the stiffness in the directions that we care about (that is, in the directions where the chassis material is not strong) derives from the steel angle brackets, and the new tailstock helps to reinforce that for better overall rigidity.

Ostrich EggBot

One of the best things about the new chassis material is that it laser engraves particularly well, giving high-contrast, highly readable adjustment scales on the sides. And that makes it all easier to use in practice. All considered, this has turned out to be quite a nice little upgrade.

Solderless Flickery Flame

We’ve talked previously about making simple LED pumpkins with candle flicker LEDs. Lately we’ve been playing with making better looking flames by using multiple independent flickering LEDs with different colors and lens styles. It makes a spectacular difference: it goes from something that looks like, well, a flickering LED to something that really looks like there might be a flame in there.

The end result is pretty neat: A compact battery powered “flameless flame” that looks great in a pumpkin, luminaria, or as a stage prop. The interplay of the different LED types and colors gives an ever-changing and shifting flame display.

Other than the candle flickering LEDs, the parts are commonly available. We’ve also bundled them together in the Solderless Flickery Flame Kit.

Components:

  • Battery Holder (2×AA with switch)
  • Mini-breadboard
  • 6 × candle flicker LEDs (2 red diffused, 2 yellow diffused, and 2 yellow clear lens)
  • 6 × 68 ohm resistor
  • 2 × wire jumper
  • White paper bag (optional)

Also needed:

  • 2 × AA Batteries (not optional)
  • Wire clippers, cutting pliers, or “beater” scissors (optional)

Hook up the battery holder to the breadboard several rows apart to give enough room to install the resistors and LEDs. Optional: peel off the backing on breadboard and adhere it to the battery holder. Connect each LED with its own 68 ohm resistor. (Use the “in parallel” method from this article.) The extra jumpers are included to help bridge across the center gap in the breadboard.

Trimming the resistor leads will keep the breadboard tidy, and help prevent short circuits. Trimming the LED leads to varying heights will help distribute the light in different ways.

The white paper bag included with the kit can be used for creating a traditional luminaria or for making a ghostly halloween decoration.


You can find more Halloween decor projects in our Halloween Project Archive.

Introducing the EggBot Pro

EggBot Pro

An EggBot is a compact, easy to use art robot that can draw on small spherical and egg-shaped objects. The EggBot was originally invented by motion control artist Bruce Shapiro in 1990. Since then, EggBots have been used as educational and artistic pieces in museums and workshops. We have been working with Bruce since 2010 to design and manufacture EggBot kits, and our well-known Deluxe EggBot kit is a popular favorite at makerspaces and hackerspaces around the world.

Today we’re very proud to release the newest member of the family: the EggBot Pro, a near-complete reimagining of the EggBot, designed for rigidity, ease of use, and faster setup.

EggBot Pro

The EggBot Pro is as sturdy as can be: Its major components are all solid aluminum, CNC machined in the USA, and powder coated or anodized. (And isn’t it a beauty?)

The most common mechanical adjustments are faster with twin bicycle-style quick releases, and repositioned thumbscrews for easier access.

EggBot Pro

The frame also has an open front design that gives much better visibility while running, and greatly improved manual access when setting up.

EggBot Pro

And, it comes built, tested, and ready to use — no assembly required.  Assuming that you’ve installed the software first, you can be up and printing within minutes of opening the box.

The EggBot Pro begins shipping this week. We’ve also put together a little comparison chart, so you can see how it fits in with the rest of the family.


New Winches for WaterColorBot

We’ve just given the WaterColorBot a little bump up to kit version 1.5. The new version now comes with a pair of beautifully machined aluminum winches.

The winches are precision cut on CNC machines and anodized clear. We add a few extra little parts (flat-head rivets to wind the winch around, screws, and a stamped and polished stainless steel “clamp” to hold the string end), and wind them with the same “100 pound” Spectra cord as we did before.

We described the process of making and winding our older laser-cut wooden winches in our blog post about the making of the WaterColorBot, and again in our post about the  winch cutting jig. For better or worse, transitioning to the new aluminum means that we’re no longer using our older wooden winches that we described in those blog posts.  But in the end, these new winches are a better, more elegant solution.

 WaterColorBot kit version 1.5 is now shipping from the Evil Mad Scientist Shop.

The XL741 Discrete Operational Amplifier

Ever since we released our Three Fives discrete 555 timer kit last year, people have been asking us “When are you going to come out with a 741 op-amp?” It has taken us quite a while to get here, but the answer is… Today!

Our XL741 Discrete Operational Amplifier is a real, working op-amp that you can build yourself.  It’s a transistor-scale version of the original ?A741 integrated circuit, that incredibly versatile and popular analog workhorse. As with our 555 kit, you can probe inside to see the inner workings of the circuit as it works. And, like our 555, it comes with a beautiful anodized aluminum “IC legs” stand, so it even looks great when it isn’t plugged in.

The kit was designed and developed as a collaboration with Eric Schlaepfer, and is a direct adaptation of the equivalent schematic from the original Fairchild ?A741 datasheet.

If you’ve ever used operational amplifiers, you’re probably familiar with the ?A741 (or colloquially, just “the 741”). Designed by Dave Fullagar and released by Fairchild in 1968, it’s the quintessential and most popular op-amp of all time. While newer op-amp designs easily outperform the ?A741 in just about every possible respect (speed, noise, voltage range, and so on), the 741 remains widely beloved and in active production by multiple manufacturers even today — over 45 years later.

And, if you haven’t used an op-amp, this a great way to learn. Op-amps are simple, wonderful building blocks for making analog computers. With op-amps, you can build circuits that can (for example) add, subtract, amplify, take logarithms, perform integration, or perform other operations on your signals. Or buffer and copy them, or cleanly convert current to or from voltage, and on and on and on.

A regular op-amp is an integrated circuit; a little black box. The XL741, on the other hand, is a big black box, with a heck of a lot of points where you can can probe inside, to see what’s going on, in real time. And that’s a unique opportunity.

The XL741 is a quick, easy to build soldering kit, with through-hole components, and not too many of them. (And, have you see our awesome resistor wallets?)

And, best of all, the XL741 is in stock, and begins shipping today. 

Visit our store page for links to the XL741 datasheet, assembly instructions, and additional documentation resources.

A WaterColorBot Water Clock

watercolorclock_1

We built a evaporating-hand water clock using a WaterColorBot fitted with a Buddha Board. The Buddha Board is a black board with a gray ceramic coating that becomes transparent when wet, so you can paint on it with plain water to make black marks that disappear as the water evaporates.  (And, it fits nicely in a WaterColorBot with the appropriate jig.)

watercolorclock_2watercolorclock_3

As a clock, once a minute it draws the minute hand, then the hour hand, and finally the outline of the clock face.

watercolorclock_4

As the water evaporates over the course of a few minutes, the old minute hands fade away. It’s a neat effect.

And of course, video:

Continue reading A WaterColorBot Water Clock

555 kit, version 2.0

555 Kit v 2.0

Today we’re introducing version 2.0 of our “Three Fives” Discrete 555 timer kit.  Version 2.0 has a number of little tweaks and improvements, with a cleaner design and — coolest of all — an all-new set of smooth anodized aluminum legs.

555 Kit v 2.0

The Three Fives kit is a faithful and functional transistor-scale replica of the famous 555 timer integrated circuit — one of the most popular and well-loved chips of all time. (An original NE555 IC is shown above for scale.)

We are also releasing the first version of our educational supplement for the Three Fives kit: A detailed description of how the 555 circuit actually works, with plenty of opportunities for further exploration.  You can find it on the downloads section of the product page or on our documentation wiki.


Simple Relay Shield v 2.0

relay shield

A minor bump for one of our little open source Arduino add-ons. The Simple Relay Shield is an easy to use single-relay board that does one thing, and does it well: It adds a beefy little mechanical relay to an Arduino, which you control through pin Digital 4.

relay shield

Version 2.0 adds the ability — by popular request — to control it from a pin other than D4. Solder the jumper in the normal way (in location JP), and it works on pin D4. Hook it up to any other digital pin, say to D7, and now you have a relay on that pin. The Simple Relay Shield is available as a complete soldering kit or as a bare PCB, and you can find documentation on our wiki.