Category Archives: Evil Mad Scientist Shop

The Egg-Bot Electro-Kistka

Hardware 1
Pysanky eggs

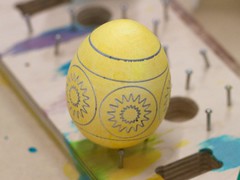
We’re pleased to announce the availability of the Egg-Bot Electro-Kistka: An electric hot wax pen designed to be used with the EggBot. A kistka is the wax tool used in the traditional wax-resist and dye (batik) method to produce colorful eggs in the same fashion as Ukranian pysanky.

We would like to acknowledge that this is not by any means the first time that anyone has strapped a kistka to an EggBot— We wrote about Ann’s DIY version a few months ago, and we’ve seen other versions (both manually heated and electric) in YouTube videos dating back several years.

Hardware
 Hardware 2 Hardware 4

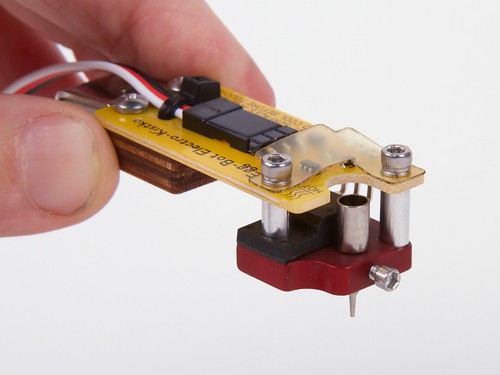
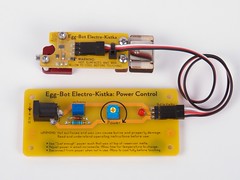
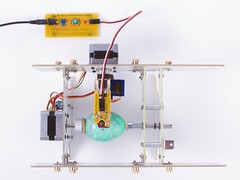
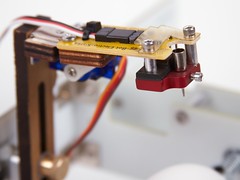
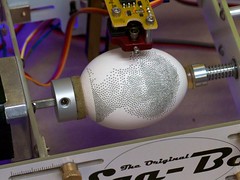
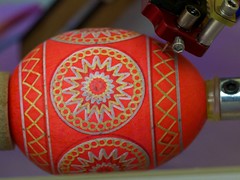
The Electro-Kistka consists of two main parts, connected by a cable: A heater assembly that gets mounted to the EggBot’s pen arm (in place of the usual pen holder), and a power control board that sits behind the EggBot.

The power control board is relatively simple: it accepts input from a plug-in power supply, and has an adjustment pot so that you can set the power level of the kistka.

The heater assembly has two parallel surfaces that you can see in the pictures.  The upper is a yellow circuit board with control electronics, and the lower red part is a machined aluminum heater block that holds the actual kistka tip.

Hardware 3 Hardware 6

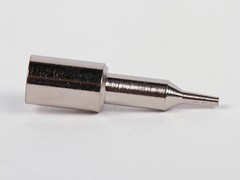
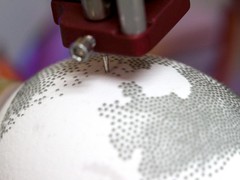
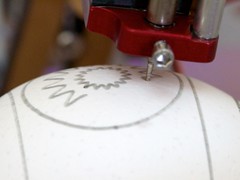
The kistka tip (right) has a small wax reservoir at the top and a smaller-yet point on the bottom that feeds molten wax onto the egg surface through gravity and capillary action.

Designing a good kistka tip is an art unto itself, and we are using field-proven kistka tips, wax, and other accessories from Folk Impressions, manufacturers of the excellent “white handle” electric kistka.  The tips are interchangeable and a number of sizes are available. For all of the examples shown here, we’re using only the #2 (medium) tip that comes with the kit.

Process: two-tone

The basic wax resist process is as follows: Apply wax to the parts of the egg that should remain the present color, and then dye the entire egg a different color.

Twain 1 Twain 2
Twain 4 Twain 5

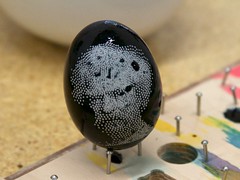
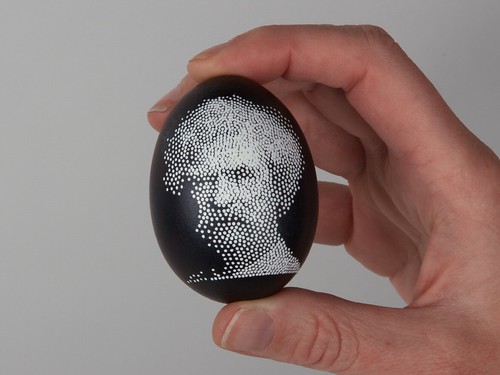
For a simple two-tone image — white on black — we started with Mark Twain, one of our example images from the StippleGen project.  From a user standpoint, drawing wax onto the egg works exactly the same way as using a felt tip marker in the EggBot — it’s just a different tool that does the drawing.  The wax itself is black-colored beeswax, which is nice because you can see it against the egg.

After the EggBot finishes, we dip the egg in dye for a couple of minutes, and leave it to dry on a grid of little nails.

Twain 7

Once the egg is dry, we remove the wax with a heat gun on the low setting (a glorified hair dryer…) and a tissue. With the black wax gone, the contrast is stunning. (If you are interested, here is how it looks before the wax is removed.)
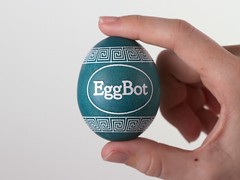
Eggbot Logo 1 Eggbot Logo 2

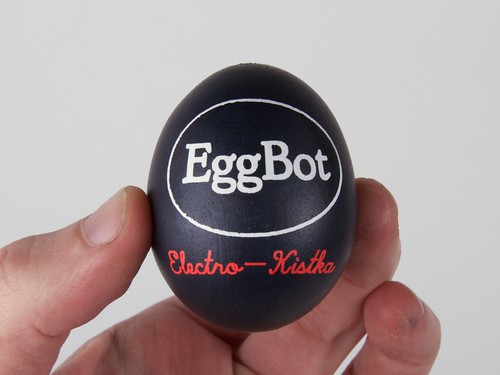
Another example of a two-tone egg.  Alternately, you could dye the egg before the wax resist first goes on (say, yellow), and then dye it blue afterwards. The end result would be yellow lettering on a blue background.
Process: Multicolor

overkill 1 overkill 2
overkill 3 overkill 4

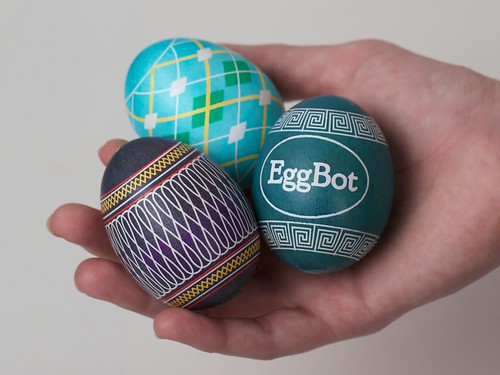
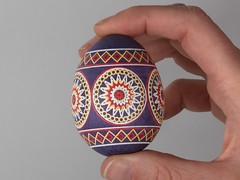
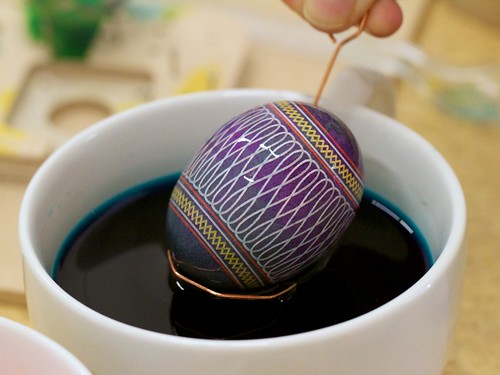
Making multicolor eggs uses the same process, but with added complexity.  For this example, we applied wax resist on a bare (white) background, and then dyed the egg yellow and allowed it to dry (upper right).  We then applied a second layer of wax, dyed the egg red and allowed it to dry.  Finally, we applied a third layer of wax (lower left), dyed the egg blue, and allowed it to dry.  The results after removing the wax (lower right) show the white, yellow, red, and blue areas — not bad!

A caveat: It is harder than it looks.  While two-tone eggs are straightforward, we have found it to be challenging to precisely reposition an egg after removing it for dyeing. Thus, it takes considerable patience and experience to produce multicolor eggs with good registration between subsequent color layers.  We’d be interested in exploring better ways to do this.
traditional 2
Still, maybe it’s worth the effort.

MoreEggs 4

The Egg-Bot Electro-Kistka begins shipping this week.

From the Mailbag: on STEAM Education

Evil Mad Scientist STEAM T-shirt
Trevor wrote in:

I’ve probably said it a million times, but I don’t think I’ve told you guys. You’re amazing. When it’s time for a new project I jump over to EMSL first. I use your projects to demonstrate a lot of STEAM principles at my Makerspace, and proudly wear my EMSL STEAM shirt every Saturday morning when I’m teaching our Makerspace Cadets class. (It’s a fun sciencey/makey/artsy class for kids). Keep up the great work. :)

Thank you for the kind words, and for your dedication to your students!

WaterColorBot kits: In stock, and new accessories


We’re very pleased to announce some updates on the WaterColorBot project— the watercolor-painting pen plotter that we designed in collaboration with Super-Awesome Sylvia.  First and foremost: kits are (finally!) available from stock at our store, now that we’ve finished shipping the rewards from our Kickstarter campaign and our other pre-orders.

We’ve also been working on a host of new applications and accessories that we’ll be writing about in the near future. The first new accessory is the Buddha Board holder pictured above, which indexes a Buddha Board (overly-interactive website link / Amazon.com link), that lets you make temporary paintings with just water.   We’ve found the Buddha board not only to be one of the best tools for trying out new things on the ‘bot (without using up paint and paper) but also to be great for live demos of the WaterColorBot, so that you don’t need to provide a fresh sheet of paper for everyone that tries it out.  You can find it in our new index of WaterColorBot accessories.

Decorating Christmas Ornaments with the Eggbot

ornaments

Despite what you might guess from the name, our Egg-Bot kit is not just for eggs.  In fact, it turns out to be a pretty freaking amazing machine for decorating and personalizing your own Christmas ornaments!

Today we’re releasing the “Eggbot Holiday Super Pak” — a set of Eggbot-ready holiday ornament designs to give you a head start.  The set includes the designs above and many more.  It’s free, available for download as part of our EggBot Example set (on our GitHub releases page), and will be periodically updated as we add more designs.

Read on for some additional tips and tricks for using ornaments in the Eggbot!

Continue reading Decorating Christmas Ornaments with the Eggbot

Two New Menorah Kits

Breadboard LED Menorah Kit

Hanukkah comes remarkably early this year, starting on Thanksgiving day, November 28.

Today, just in the nick of time, we are releasing two new LED menorah kits for 2013 that complement our consistently popular Deluxe LED Menorah Soldering Kit.

Breadboard LED Menorah Kit - Parts

The first kit, the Deluxe Electronic Breadboard Menorah Kit, is a response to two requests that we frequently receive: (1) for an LED menorah kit that doesn’t require soldering and (2) for a menorah kit with assorted multicolor LEDs— for that assorted-color candle look. (Nailed it!)

The kit includes a 6″ transparent breadboard, 10 mm LEDs in red, orange, yellow, green, blue and warm white, a control button, battery holder, and a pre-programmed microcontroller.

Breadboard LED Menorah Kit

While the electronic components— the microcontroller, resistors, control switch, and LEDs —are essentially the same as in the Deluxe LED Menorah Kit, we’ve had to make quite a few changes to the layout and firmware to redesign the circuit to lay out so neatly on a breadboard. Additionally, as the perceived brightness of different LED colors can vary quite a bit, we’ve included a specific set of per-color resistors to even out the overall brightness levels.

The Deluxe Electronic Breadboard Menorah Kit is in stock now, and ready to make happy campers on some night(s) of Hanukkah this year.

Special Edition LED Menorah Kit

For the second new kit, the multicolor Special Edition Deluxe LED Menorah Kit, we’ve brought the assorted multicolor LEDs back to our original Deluxe LED Menorah Soldering Kit. Because, why should breadboarders have all the fun?

Special Edition LED Menorah Kit

And it even looks good with the lights off! The new Special Edition LED Menorah Kit is in stock and shipping now.

The “Three Fives” Discrete 555 Timer Kit

555 kit

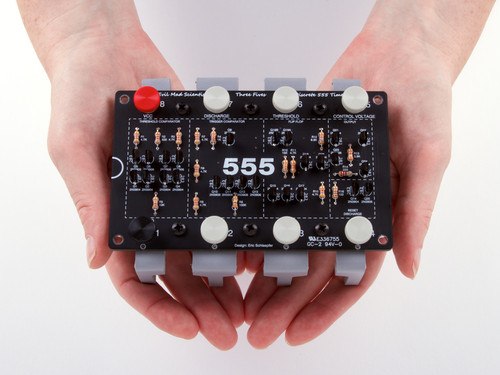
We’re pleased to announce our newest kit, the “Three Fives” Kit, a kit to build your own 555 timer circuit out of discrete components. Here’s a way to re-create one of the most classic, popular, and all-around useful chips of all time.

The kit is a faithful and functional transistor-scale replica of the classic NE555 timer integrated circuit, one of the most classic, popular, and all-around useful chips of all time. The kit was designed and developed as a collaboration with Eric Schlaepfer, based on a previous version (pictured here), and adapted from the equivalent schematic in the original datasheets for the device.  There have been a few other examples of circuits like these (such as the one that we featured in our article about the 555 contest), but we really like how this one has come together.

555 kit

The kit is designed to resemble an (overgrown) integrated circuit, based around an extra-thick matte-finish printed circuit board. The stand— which gives the circuit board eight legs in the shape of DIP-packaged integrated circuit pins —is made from machined and formed semi-rigid PVC foam.

555 kit

To actually hook up to the giant 555, there are the usual solder connection points, but there are also thumbscrew terminal posts that you can use with bare wires, solder lugs, or alligator clips.

555 kit

One of the really cool things about having a unintegrated disintegrated discrete circuit like this is that you can actually hook up probes and monitor what happens at different places inside the circuit.

555 kit

So that’s our new “Three Fives” Kit (shown above with an original NE555 for scale). It’s not quite as big as our 555 footstool, nor as tasty as our edible version, but it’s a great little circuit, and it’s got legs.

Evil Mad Scientist Open House, August 12

If you’re in the San Francisco Bay Area next Monday, we hope you’ll join us for an open house:

When: Monday, August 12, 5 pm ? 9 pm
Where: Evil Mad Scientist Laboratories
175 San Lazaro Ave, Suite 150
Sunnyvale, CA, 94086

Come see the WaterColorBot in action (just a few days before the end of our Kickstarter campaign!), meet minor internet celebrity Zener the cat, and share in food and conversation.

Introducing The WaterColorBot

Today we’re thrilled to be launching our newest kit: the WaterColorBot.

The WaterColorBot is a brand-new project from Evil Mad Scientist Laboratories and Super Awesome Sylvia — a friendly art robot that moves a paint brush to paint your digital artwork onto paper, using a set of watercolor paints.

We’ve previously written about how we got started on this project (in a guest post by Sylvia), and about Sylvia’s visit to the White House Science Fair, where she was able to give President Obama a personal demonstration of the WaterColorBot.

And now, you can get one too!  We’re launching the WaterColorBot today on Kickstarter, and we’d like to ask for your support in getting it out there.  The WaterColorBot is an enormously powerful tool for helping to get young people interested in technology:

Beyond simple fun, we think that the WaterColorBot has enormous potential for STEM and STEAM education, especially as a way to get young people engaged with hands-on technology and robotics. We are particularly interested finding ways to inspire young women to pursue careers in science and technology. We cannot imagine any better way to do so, than starting with a robot co-designed by a 12 year old girl.

Perhaps more than anything else that we’ve done, we think that the WaterColorBot really can make the world a better place, one (young) Evil Mad Scientist at a time.