Category Archives: Eggbot

Eggbot Code Easter Egg

Over in the Eggbot forums, user ragstian has been poking around in the firmware for the the controller board for the Eggbot, the EBB. He found an easter egg: holdover code from an old demo mode which would do standalone plots without a computer attached. The plot above depicts one of the very earliest versions of the Eggbot kit.

And on the reverse, www.egg-bot.com. Nicely done!

The MarshMallowMatic

Marshmallowmatic

Introducing the MarshMallowMatic: the world’s first dedicated CNC marshmallow toasting machine— capable of custom marking and toasting of marshmallows under robotic control.

The MarshMallowMatic is built from a special, modified version of our Ostrich Eggbot kit, fitted with a compact oxy-fuel torch:

Marshmallowmatic

The oxy-fuel torch can produce a 1″ (2.5 cm) long flame, with temperature in excess of 5000 °F (2760 °C).  “And wow, can it toast marshmallows!”

MarshmallowmaticMarshmallowmatic

Muybridge Carousel for Eggbot

The Horse In Motion

In the 1870s, Eadweard Muybridge, using brand new photographic techniques, helped settle a bet about whether horses lifted all their feet off the ground at once. His iconic pictures of horses in motion are frequently used in arts and crafts. (Aside: we even ran into them at Maker Faire in a FlipBooKit animation.)

Muybridge Carousel

Amanda found a file on thingiverse of outlines of the Muybridge horses that were intended for use for laser cutting (for animation purposes). She remixed it for use with the Eggbot to make the horses go around the egg and published her Muybridge Carousel design on thingiverse.

Muybridge Carousel Trio
Photo by Amanda Geyer

Citizen Science: How Big is a Bird Egg?

emu egg in ostrich eggbot

While talking about egg sizes in the context of the Eggbot project, we realized that while we have access to a few samples, we do not have a good understanding of the normal variation in the sizes of various bird eggs.

The sizes of chicken eggs are well understood and well regulated, but for other types of bird eggs (like the emu egg above) the sizes are not necessarily so standard. If you have access to other types of eggs or eggshells, we’d like your help in gathering data about the size and variation in these other types of eggs.

We’ve set up a survey form to collect egg size data and we plan to post about our results once we have collected enough data.

Thank you!

DIY Electric Kistka for Eggbot

Ann posted instructions in our forums for creating an electric kistka (wax pen) for the Eggbot for traditional Pysanky egg dying techniques. She used nichrome wire, krylon tape, a modified kistka, and a 2xAA battery holder with a switch and described how to mount it in the Eggbot. She posted a couple of designs to Thingiverse demonstrating the technique including the rose design pictured above.

For a Humpty Dumpty design, she wrote up how she made it:

Using eggbot and custom electric kistka, plotted the Humpty Dumpty picture and text on an egg. First plotted outline, dyed brick, colored in bricks by hand with kistka, dyed blue.

You can check out her other designs for the Eggbot on Thingiverse.

Marking Klein Bottles with the Eggbot

Untitled

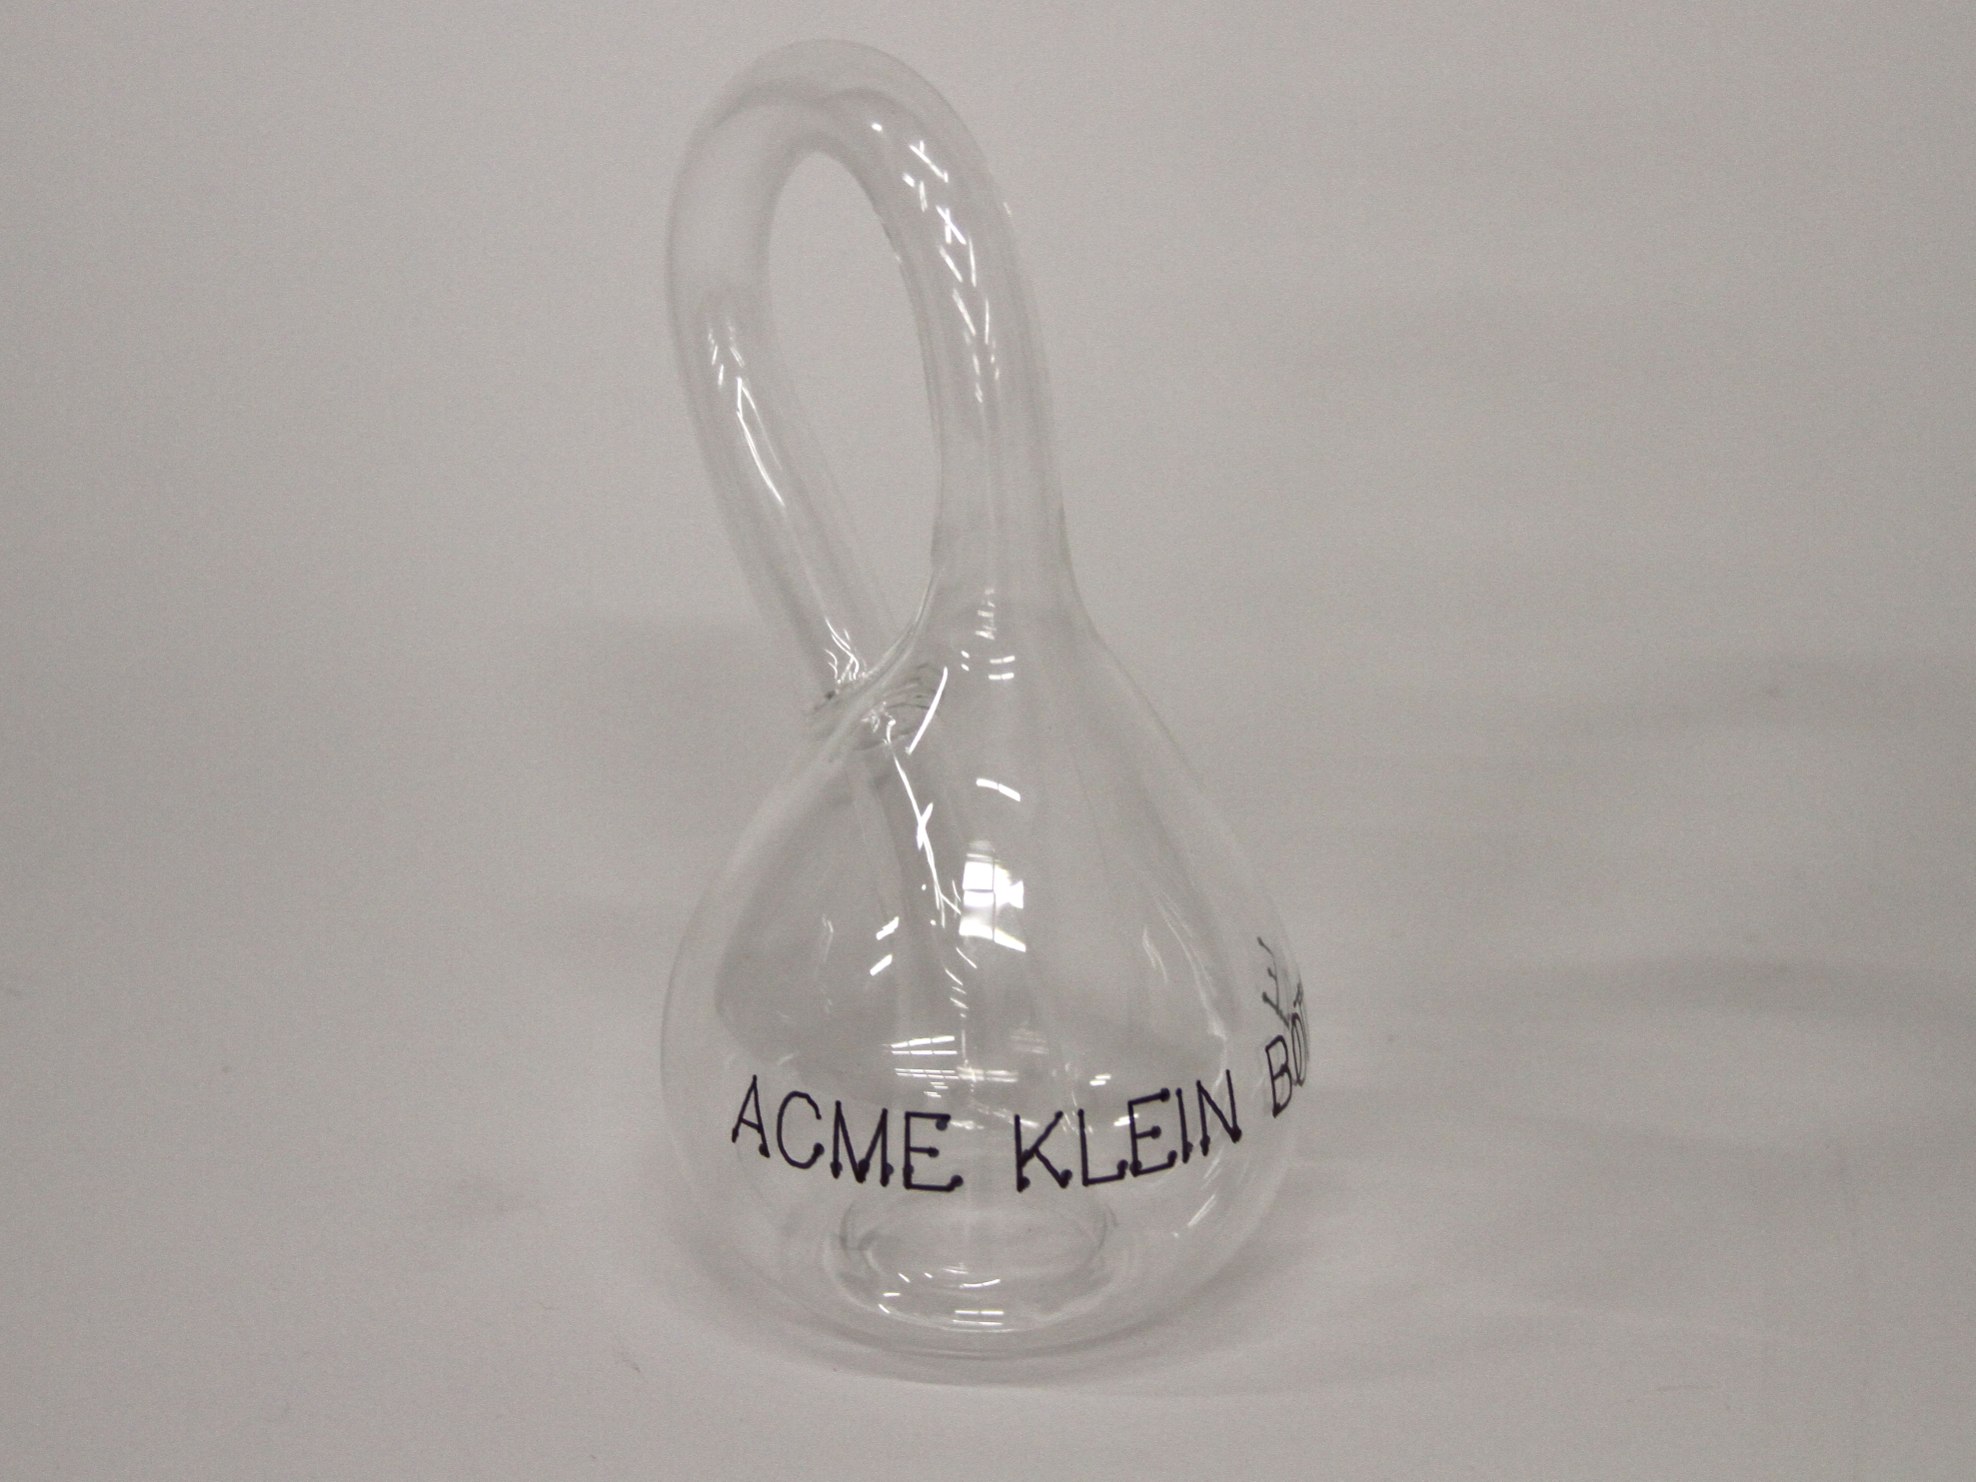
We were lucky enough to have a visit from Cliff Stoll, geek celebrity and proprietor of Acme Klein Bottle. Acme is the finest source of Klein bottles on the internet.

Cliff came with an esoteric dilemma: how to engrave a glass Klein bottle. Acme Klein bottles are blown from borosilicate (Pyrex) glass, which has a low coefficient of thermal expansion, which means that the usual way of engraving a curved glass surface—laser engraving—doesn’t actually work.  With more common types of glass, you can use a laser engraver to etch anything you want into the surface. But with Pyrex, the surface simply melts unevenly rather than creating the microfractures that give an etched appearance.

Untitled

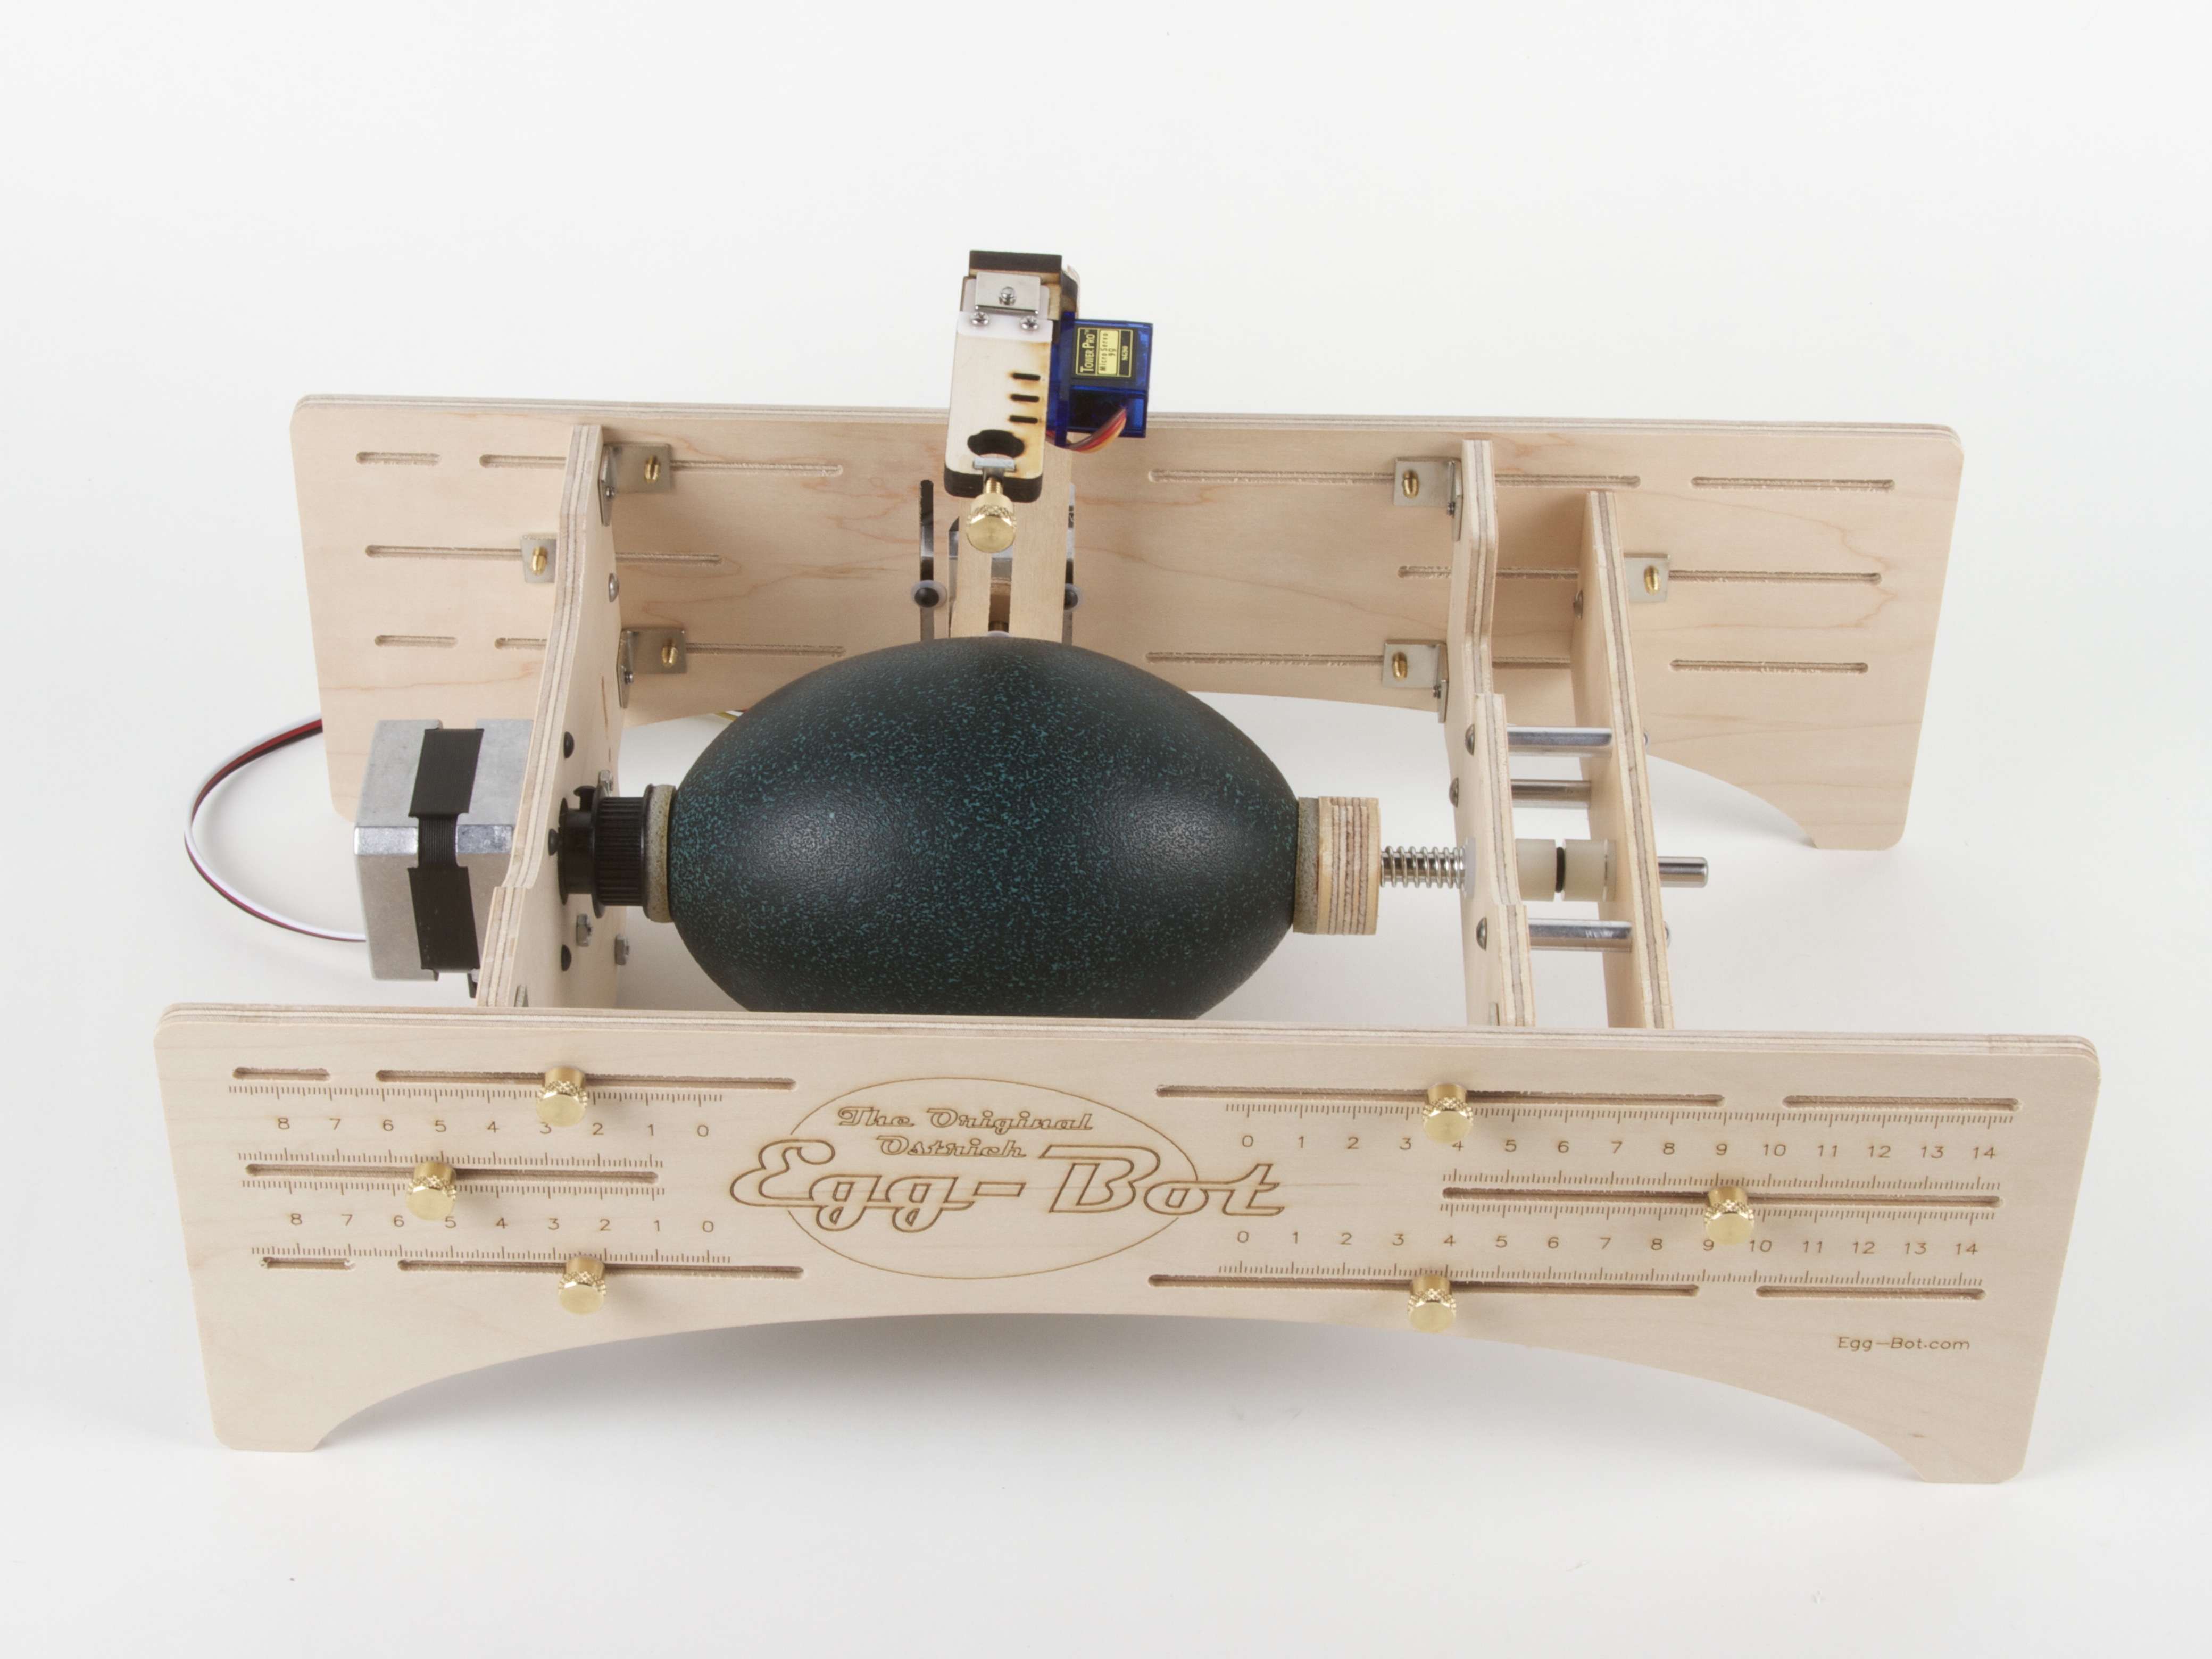
So how would you etch the curved surface of a Klein bottle? It turns out, to our surprise, that it is remarkably easy to do it with an Ostrich Eggbot fitted with a diamond engraver attachment.

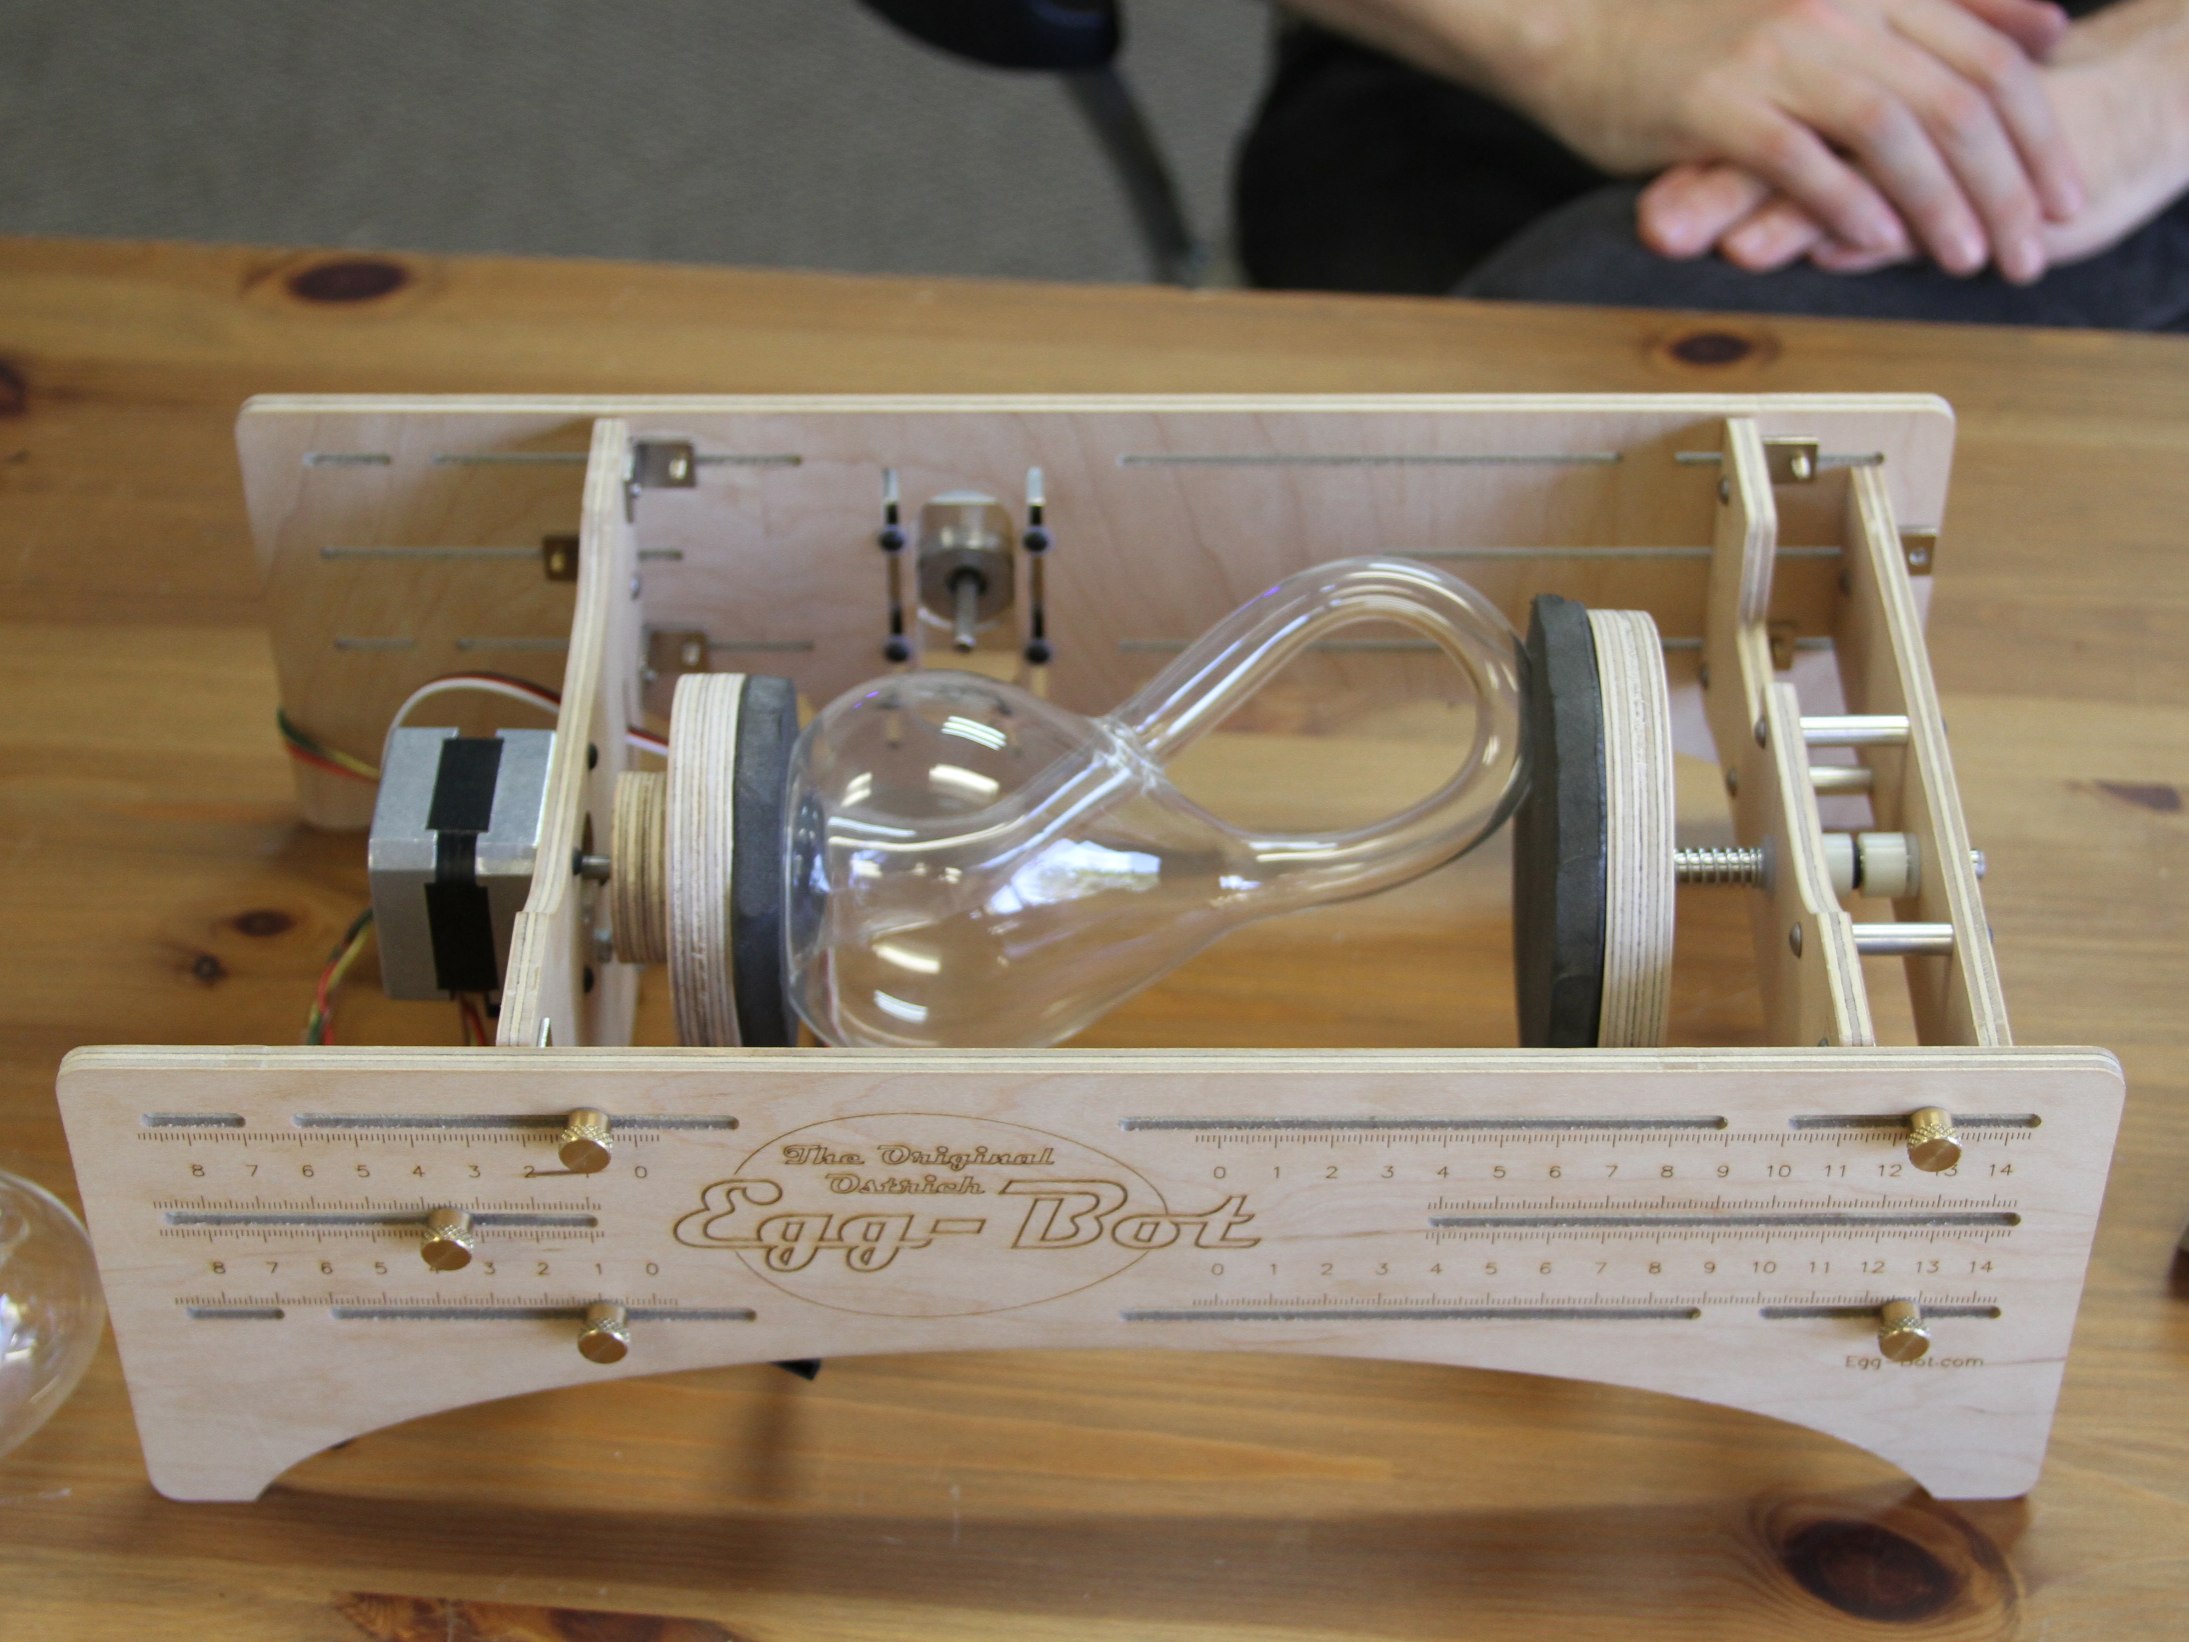
There was one complication, which is that a Klein bottle is a funny shaped object! In order to fixture the Klein bottle in the Eggbot, we made a couple of extra large couplers—much larger than the tiny pads normally used to hold the ends of an egg—with EVA foam rubber pads on their surfaces. The extra large couplers held the Klein bottle securely for rotation.

Untitled

Untitled

We did some initial tests with Sharpie and a medium sized Klein bottle to make sure our fixturing worked well.

Untitled

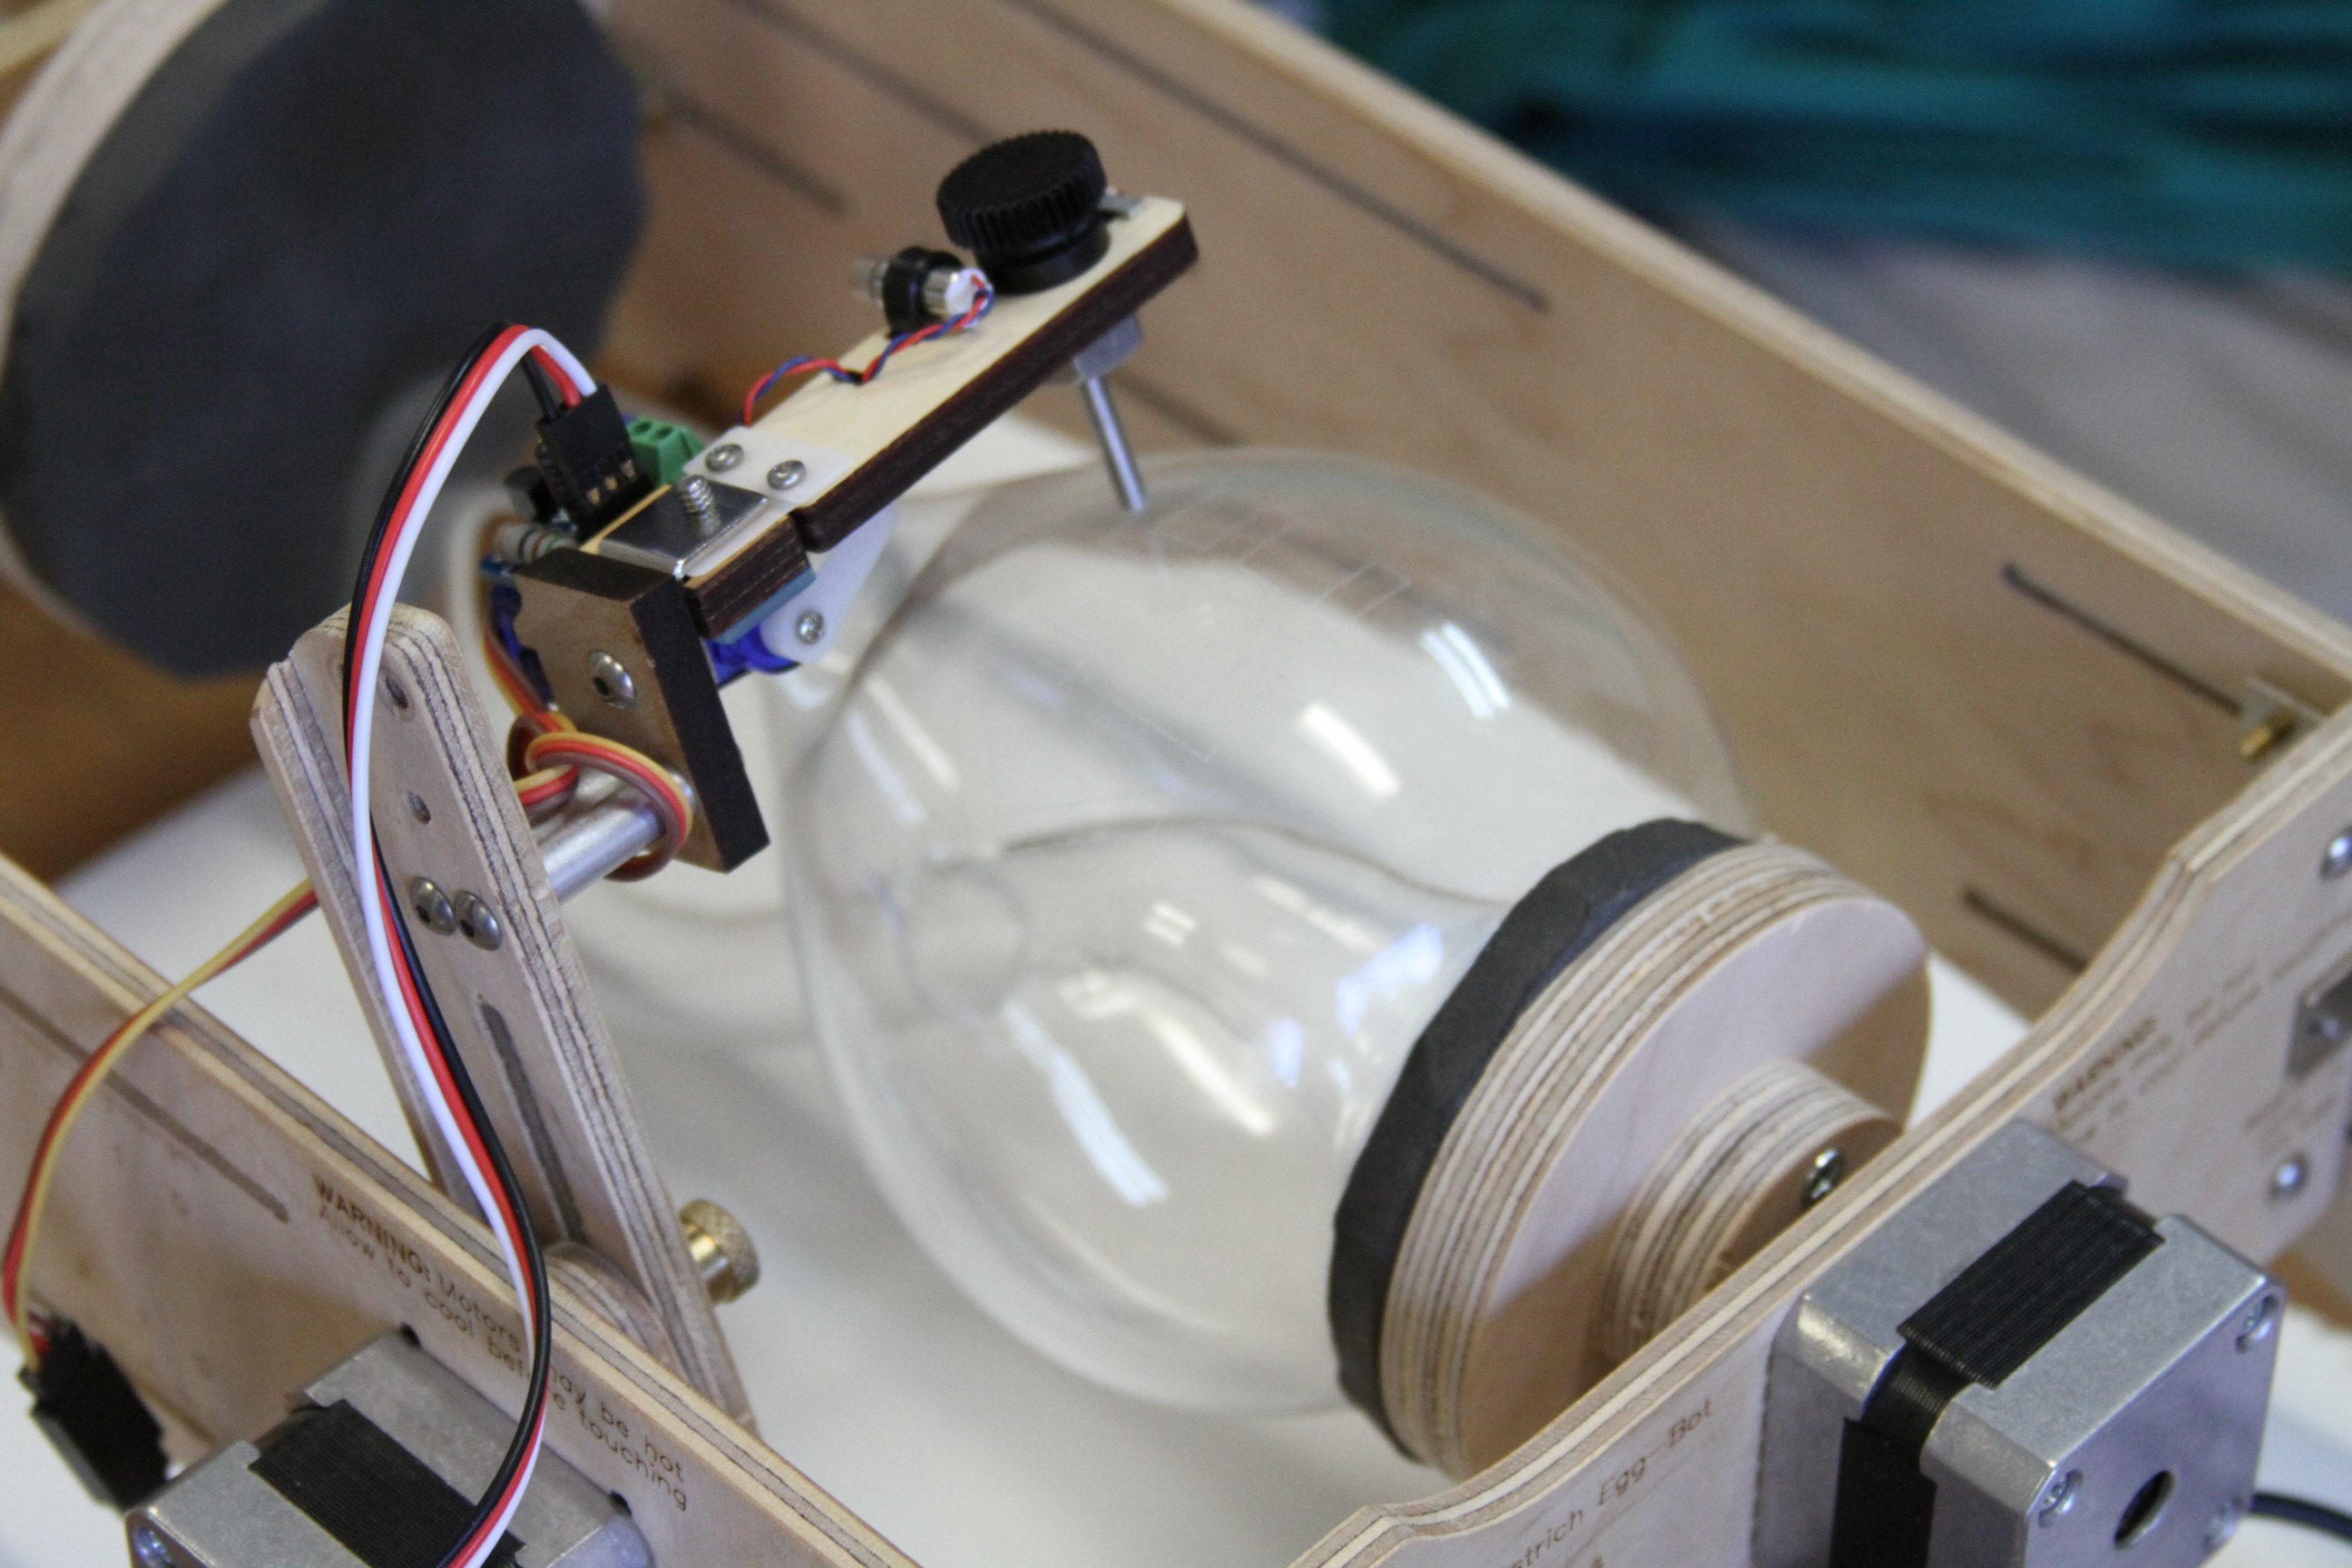
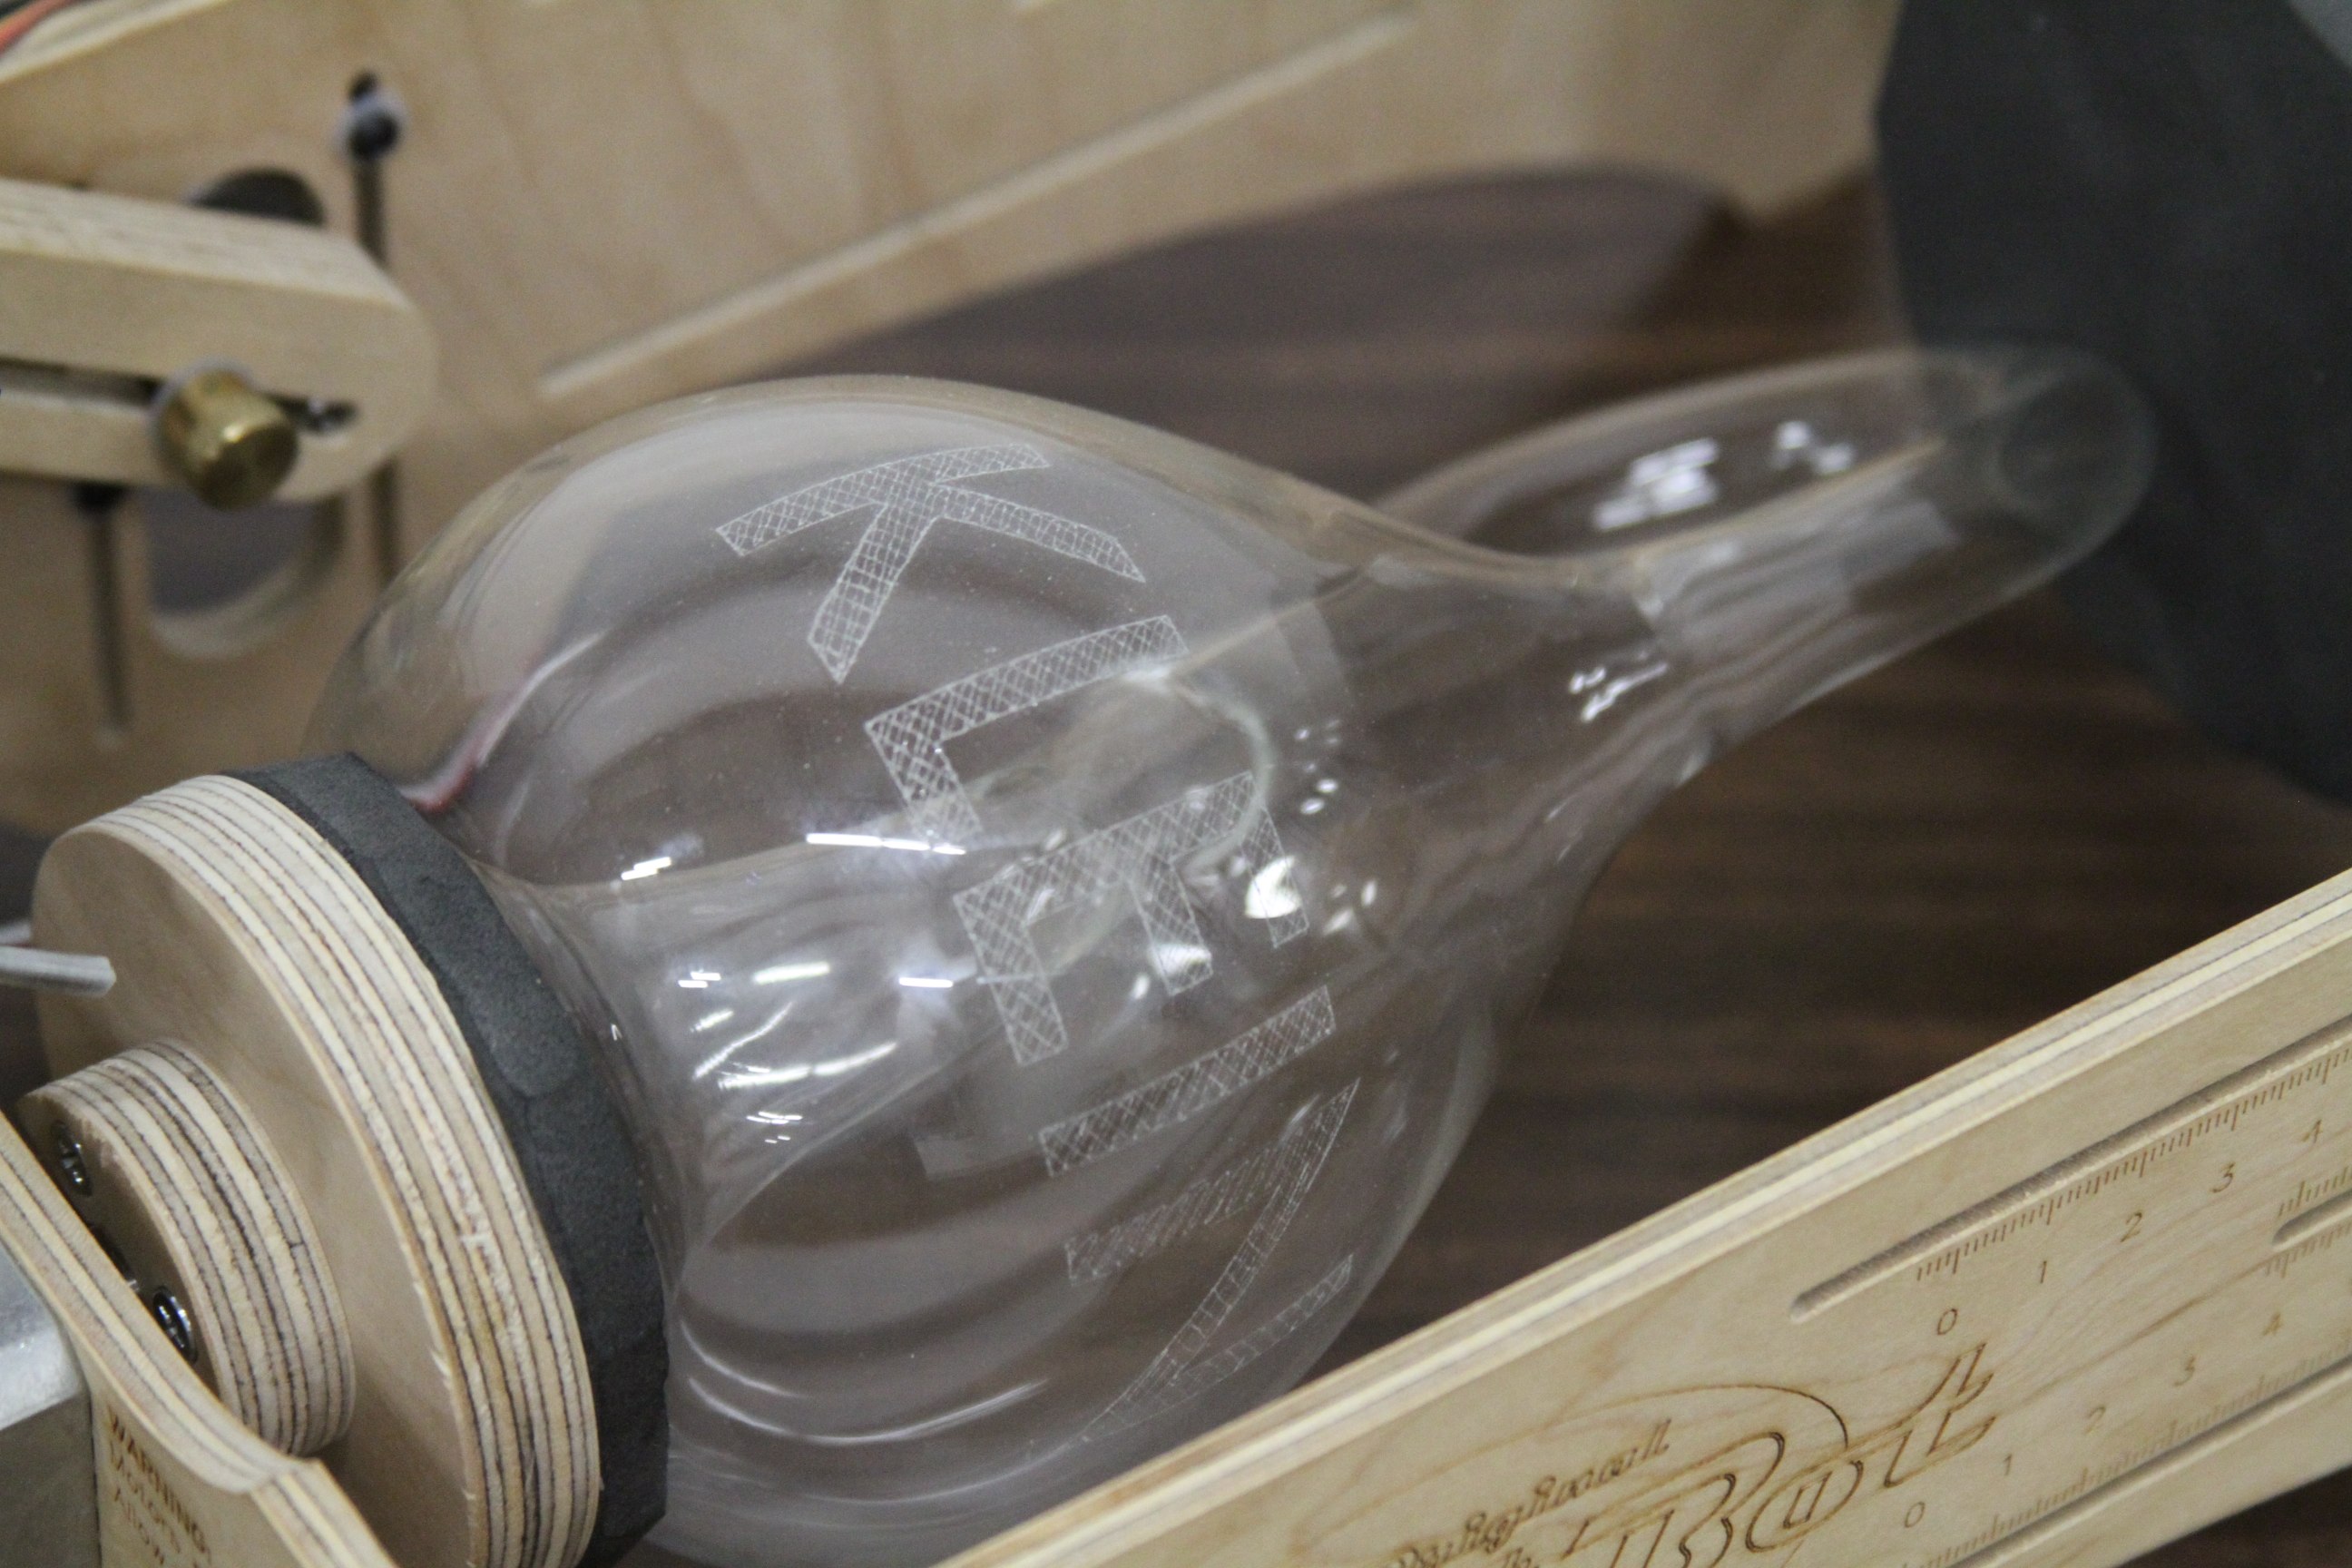
And then we hooked up an engraver for a real test.

Untitled

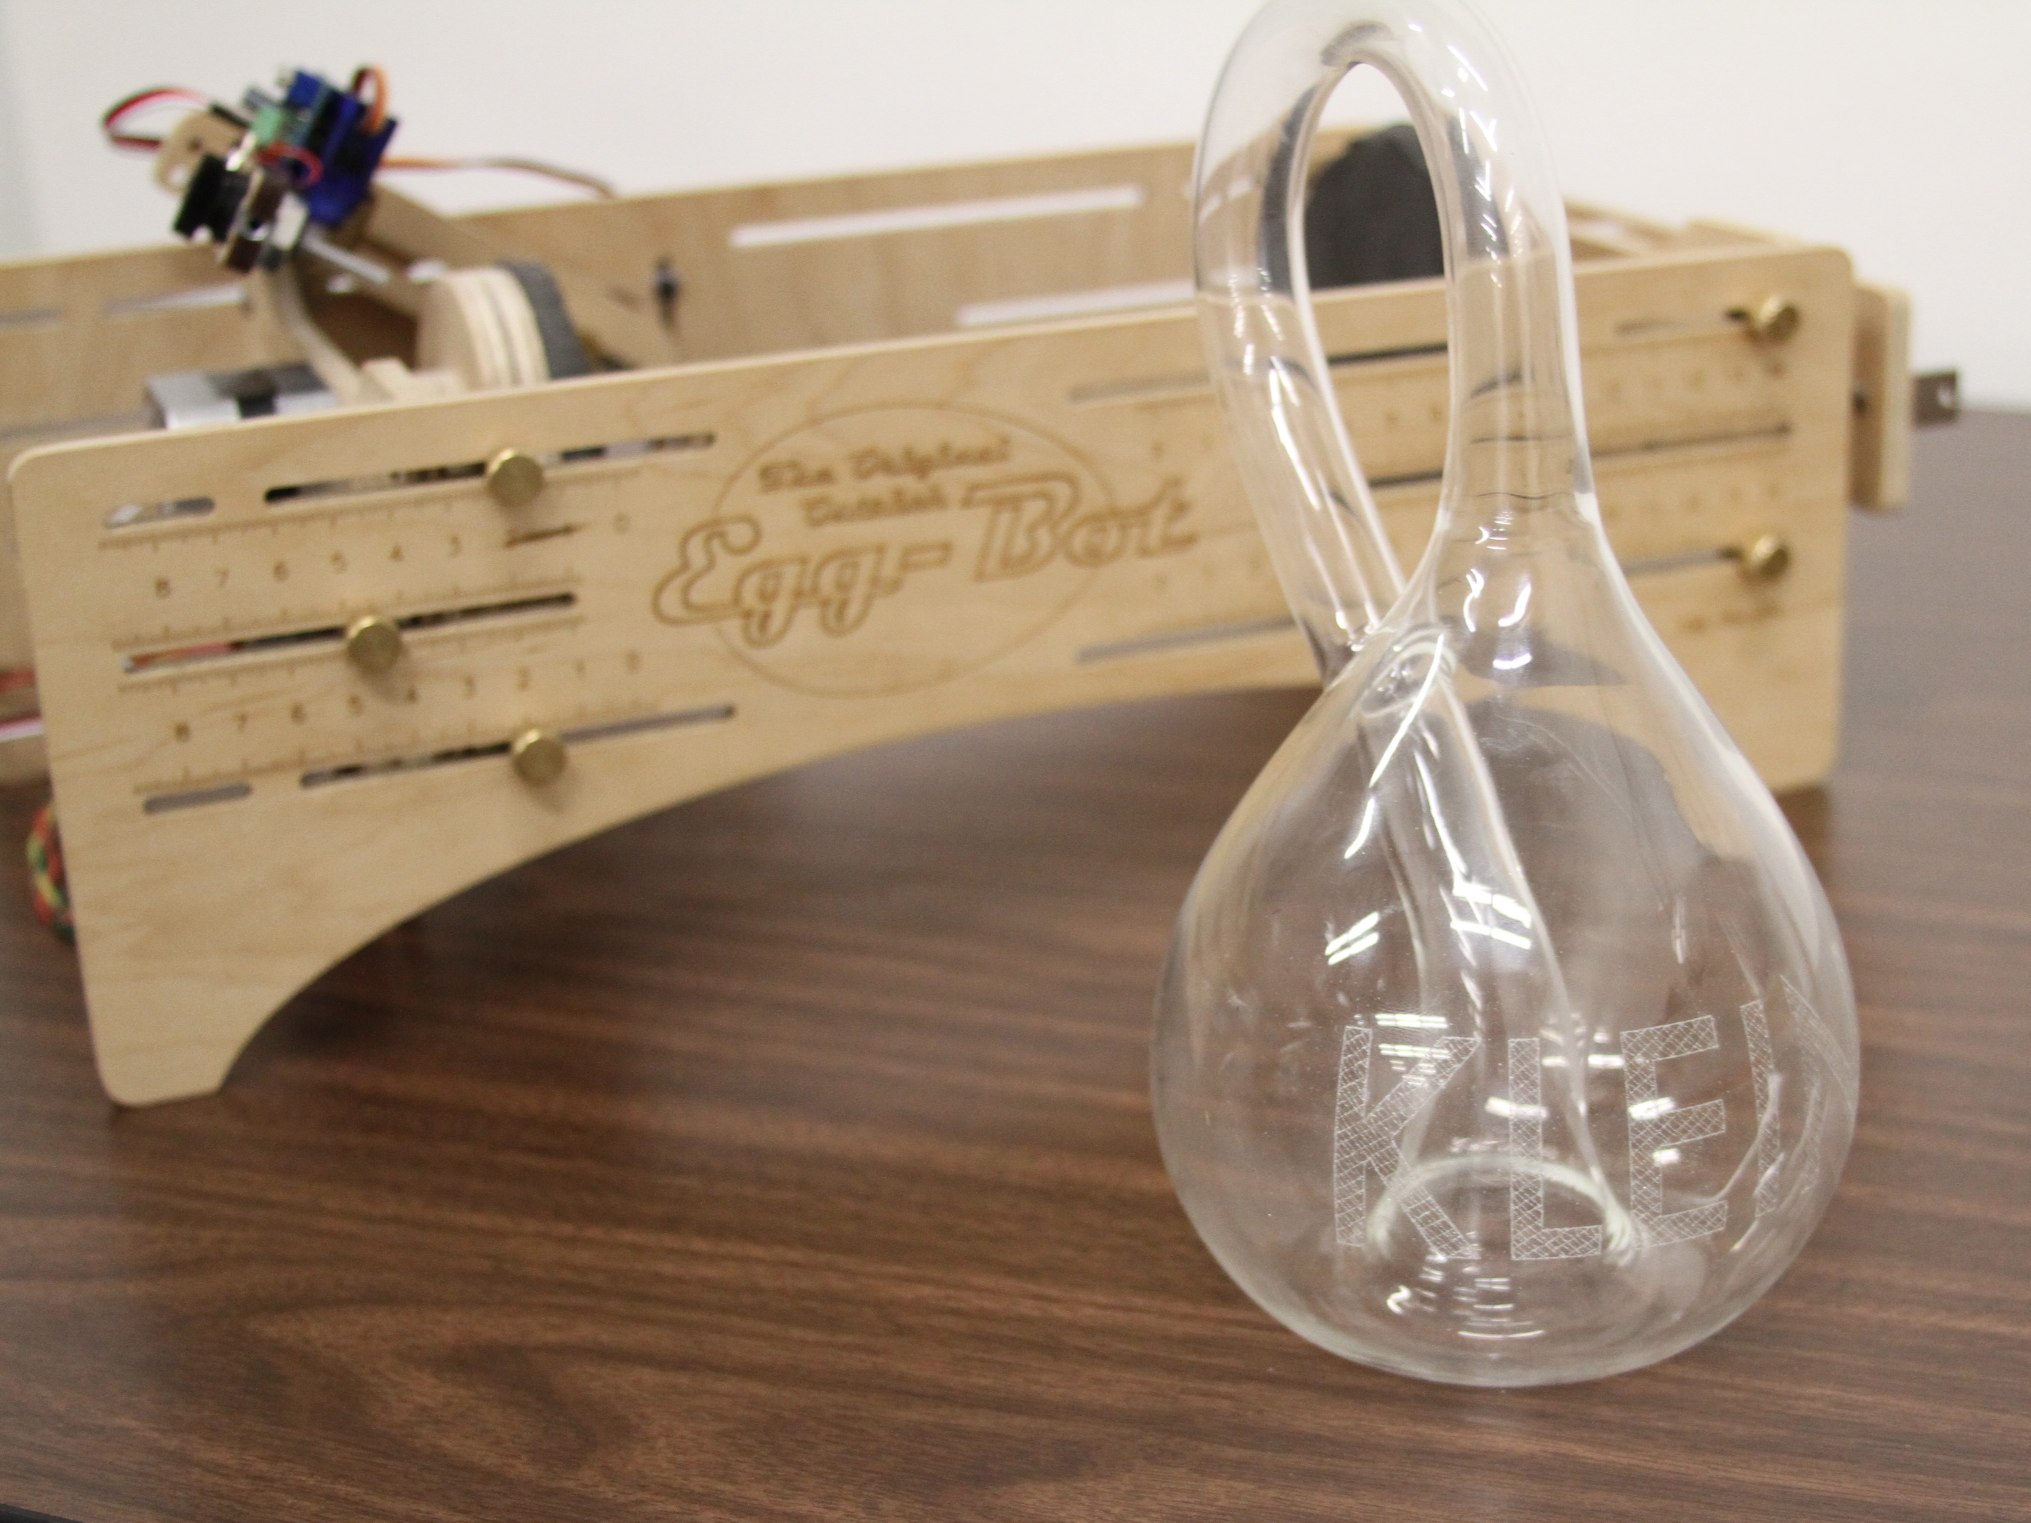
Here’s what the Klein bottle looked like after engraving. Not being particularly creative, we etched the word “KLEIN” into the side.  Because the Klein bottle is made from thick borosilicate glass, it takes engraving remarkably well. It is a much more sturdy object than the fragile Christmas ornaments that we have engraved in the past.

Untitled

While we can’t imagine that it is a major market segment, the Eggbot seems to be ideal for working with Klein bottles (insomuch as anything can be perfect for working with a closed, non-orientable, boundary-free manifold). But regardless, it’s quite wonderful to find an unexpected application like this, where our little robot can solve a real-world problem that we had never even considered.

Designs for Eggbot by RoboGenius

We’ve been watching the work of RoboGenius for quite some time. He has created some of the neatest non-geometric work anybody has done on the Egg-Bot. Recently, he uploaded a number of his designs to thingiverse, which means you can try them out, too. He has also been posting great pictures of them to flickr. When asked in the Egg-Bot user list how he created them, he posted:

The short answer is that it’s all done line by line in Inkscape.

The slightly more tedious answer is that it starts with an image (generally something off the web, or that has some significance to me), then I import that image onto my 3200px X 850px template in Inkscape and position it where I want it on the egg/ball. I then take a look at the image and decide how many color layers I’ll be needing for the plot and add those to the project, naming them sequentially followed by the color I use for the layer (for example: 1 – Yellow, or 5 – Black). I always begin with the lightest colors first, and generally end in black. Then it’s simply a matter of tracing over the picture on the correct layer using the bezier line tool (Shift + F6), and bending those lines with the path editing tool (F2). Once I get the basic lines created, I’ll create and fill any solid shapes using the EggBot Contributed Hatch fill extension (spacing should be set to 6 for eggs). To add shading, you simply go over the same places a couple of times with the same color, which can be achieved with Copy and Paste, and occasionally the shading can be enhanced by altering the angle of the line to match the angle of the shape or intended shadow (the Master Chief design is a good example of this technique).

That’s pretty much it. To finish off the project, I like to color all of the lines in a layer to match the marker used in that layer, then delete the layer with the picture in it.

Thank you for generously sharing both your designs and your techniques, RoboGenius!