Category Archives: EMSL Projects

The 555SE and 741SE surface-mount soldering kits

555SE and 741SE kits

Today we are pleased to announce the release of two new soldering kits: the 555SE discrete 555 timer and the 741SE discrete op-amp.

Both of these new kits are surface mount soldering kits — our first surface mount soldering kits — and we think that you’re going to love them.

555 kits, big and small

You might be familiar with our Three Fives discrete 555 timer and XL741 discrete op-amp kits. Both are easy soldering kits that let you build working transistor-scale replicas of the classic 555 timer chip and the famous µA741 op-amp. Those two are constructed with traditional through-hole soldering techniques and are styled to like “DIP” packaged (through-hole) integrated circuits.

Our new 555SE and 741SE kits implement the same circuits, now with surface mount components, and are styled to look like smaller “SOIC” packaged (surface mount) integrated circuits, complete with a heavy-gauge aluminum leadframe stand. Side by side with their through-hole siblings, the new kits are exactly to scale, with half the lead pitch and a lower profile.

555SE kit for scale

The 555SE and 741SE kits each come with eight (tiny) color-coded thumbscrew binding posts that you can use to hook up wires and other connections.

You can also probe anywhere that you like in these circuits — something that you generally can’t do with the integrated circuit versions.

741SE kit close up

The new 555SE and 741SE circuit boards are black in color, with a gold finish and clear solder mask so that you can see the wiring traces between individual components. There are a few other neat details here and there, such as countersunk holes for mounting the board to the leadframe.

The surface mount components are relatively large, with 1206-sized resistors and SOT-23 sized transistors, and assembly is straightforward with our clear and comprehensive instructions. These kits are designed to be a joy to build, whether you’re an old hand at surface mount soldering, want some practice before tackling a project, or are introducing someone to it for the first time.

Family portrait

And here is the new family: XL741, the Three Fives, along with the new 741SE and 555SE.

You can find the datasheets and assembly instructions for these kits, as well as links to additional documentation, on their respective product pages.

Both new kits are part of our ongoing collaboration with Eric Schlaepfer, who we have worked with on a number of dis-integrated circuit projects including the four kits here and the MOnSter 6502.

From the mailbag: Geometry with AxiDraw

Mark from MN wrote in to say:

I persuaded my school district’s community foundation to buy an AxiDraw for me to use with my high school geometry students. It’s SO GREAT! These kiddos are seeing their 2D creations come to life because of AxiDraw, which is a great motivator for their future studies (either computers or mathematics or art or all/some of the above).

We’ve written about how AxiDraw gets used in the classroom before, and we love hearing from teachers who are using it. Thanks for the note, Mark!

Spicy Plum Chutney

Jars of chutney

I’ve been using my Plum Chutney recipe for years and enjoying every batch. Our own plum tree is now mature and producing lots of wonderful fruit each year, so I have had many opportunities to reproduce and refine my recipe. Here’s my new spicier recipe, with notes below on ingredient changes and other tips I’ve learned over the years.

Ingredients:

  • 8 cups cut up pieces of plums, pits removed, skins left on, fresh or frozen
  • 3 lemons, (optionally peeled) cut into small pieces, seeds removed
  • juice from 3 more lemons
  • 1/4 cup fresh ginger, peeled and grated (a microplane works great) or cut into matchsticks
  • 2 Tbsp cumin seeds
  • 2 sticks of cinnamon
  • 1 tsp cayenne pepper
  • 1 tsp garam masala
  • 1/4 tsp salt
  • 4 cups sugar (granulated or brown)

Throw everything except the sugar in a sauce pot and cook, stirring occasionally, until the fruit starts to soften. Add sugar and cook, stirring regularly, until it thickens to a consistency you like. You can test the consistency by putting a spoonful in a cold dish in the fridge for a few minutes. Remove cinnamon sticks after cooking. You can also follow your favorite canning procedure for longer term storage. Makes about 3-4 pints.

Fruit and spices in pot

We’ve tended toward more flavor intensity in our cooking over time, and I’ve settled on a version with twice as much spice as before. Sometimes I’ll cut the some or all of the ginger into matchsticks instead of grating it, which results in little bursts of ginger flavor when you’re eating the chutney. If you like that, by all means, use matchsticks! For a more even flavor or consistency, stick to using the microplane. I added a small amount of salt, which makes all of the flavors shine just a little bit more.

I’ve stopped adding water to my preserves. It cooks a little faster without as much liquid, and there’s enough liquid in the lemon juice to get it started cooking even if the fruit isn’t covered. I’ve also started removing the lemon peel for most of the preserves I make other than marmalade. The peel gives it a stronger lemon flavor, and keeps the pectin in the pith from gelling from as well. If you want a thicker consistency, you can leave the peel out. If you want zingier lemon flavor, leave it on.

Using potato masher to crush fruit pieces

One other consistency related tip: if I want a less chunky consistency, I use a potato masher to crush the fruit pieces early in the cooking. During fruit season, I try to preserve as much as I can by making jams and chutneys, but I usually run out of time and end up cutting up the last of the crop and freezing it. Using frozen fruit for jams seems to work just as well as fresh. The other thing I usually run out of is sugar, because I often forget how much it takes to make preserves, so I started using brown and granulated interchangeably in the chutney. I even used palm sugar once! Which sugar you use doesn’t seem to affect the flavor significantly, so use whichever you have on hand.

From plottertwitter: a first painting

Corey Haber just posted a clip of his AxiDraw finishing its first painting:

Astronomy Cookies

Galaxy, globular cluster and nebula cookies

We love any excuse to create science themed food, and we had a blast brainstorming our contribution to “Astro-Gastro” contest at the annual member meeting at the Fremont Peak Observatory. We settled on some of the things we love to show visitors to the observatory: Galaxies, globular clusters, and nebulas.

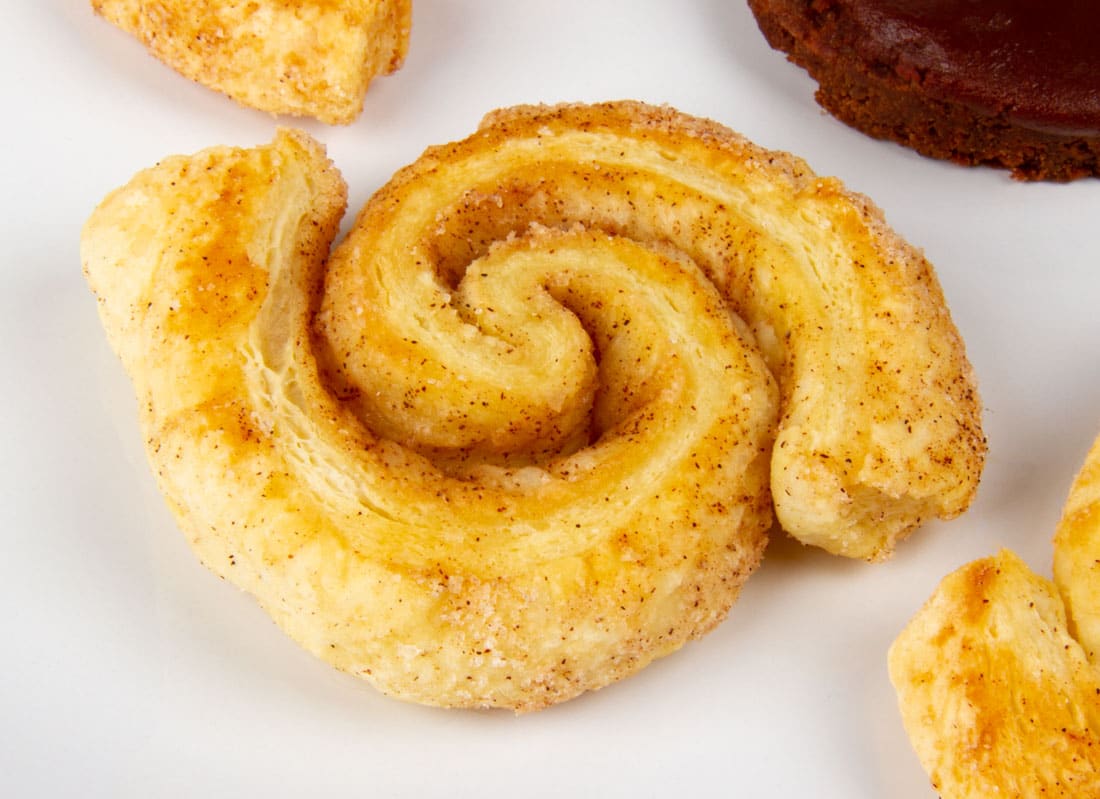
Cinnamon Pinwheel Galaxy

Cinnamon Pinwheel Galaxies are inspired by palmiers. They are made with puff pastry that is coated in cinnamon sugar and rolled up, sliced and baked. The recipe is identical to palmiers except that you first fold the pastry over itself a little further than halfway, and then roll up from the folded edge to create the spiral pattern that shows when you slice them.

Globular Cluster Cookie

Chocolate Globular Clusters start with the same chocolate graham crackers we used for our Edible Asteroids project.

We iced them with a chocolate icing derived from a recipe for Black And White cookies from Baking Illustrated. Melt 2 oz unsweetened chocolate in double boiler. Bring 2 Tbsp light caro syrup and 3.5 Tbsp water to a boil in small saucepan. Remove from heat and stir in 2.5 cups powdered sugar and 1/4 tsp vanilla. Stir icing into chocolate in the double boiler. You may need to reheat the chocolate icing in the double boiler to keep it at a good consistency for spreading.

Immediately after spreading the icing on a cookie, very slightly moisten the top of the icing with water. You can either dip a finger in a dish of water and smooth a bit over the surface of the icing or use a water mister to give it a very light spritz. The water on the surface will make it sticky enough for the sprinkles to adhere to. Drop small white non pareil sprinkles over the center of the cookie. We used a small funnel held over center of the cookie, to create a dense cluster in the middle, and fewer and fewer as you reach the edges.

Meringue nebulas

For the Meringue Nebulae, we divided a batch of meringue into two, and colored half of it with black food coloring. The other half we split again and colored with red and blue respectively, stopping before it was fully mixed in to allow for some color variation. We spread the blue meringue along one side of a piping bag, and red along the other. Then we filled the middle with the grey. We piped the mixture out with a #12 icing tip in a wavy, uneven fashion. Using two different sizes of non pareil sprinkles made it look like there were stars of different brightness in our nebulae.

Meringue Nebula closeup

Other astronomers brought moon rock smores, almond asteroid cookies, and an Orion constellation cake. We’re tickled that the Cinnamon Pinwheel Galaxy won the contest against such fun competition.

Featured artist: Michael Fogleman

Drawing of lots of small coils titled Spiral Galaxies

Michael Fogleman is an active member of the plotter art community. His twitter feed often contains either new art, or links to new tools that he has made.

He has created and shared some incredible resources, including a wide variety of vector art tools and even an alternate Python library for AxiDraw.

Drawing of a protein diagram displayed at the Plotter People Meetup

I am a fan of science as an art subject, and Michael’s protein ribbon diagram drawings are a great example. A ribbon diagram depicts the 3D structure of the protein as well as the common secondary structures of helixes, strands, and coils.

In addition to making the drawings, he has a twitter bot that publishes ribbon diagrams and has published the code for the project. This ribbon diagram was one that we got to see at the Plotter People meetup in San Francisco.

Drawing of Galaga

Michael hits another of my weaknesses, vintage gaming with his NES Sparklines drawings.

For these drawings, I use an NES emulator (of my own creation) to record a snapshot of the Nintendo’s RAM at each frame (60 fps). The NES only had 2048 bytes of RAM. For each address in memory, I plot its values over time as an individual sparkline. I only show addresses that changed at least once, so there are usually fewer than 2048 sparklines. Because each game developer used the memory in different ways, each game produces its own unique look when plotted.

MOS 6502 processor drawing

He also plotted something dear to our hearts (and close to the heart of the NES), the MOS 6502 processor.


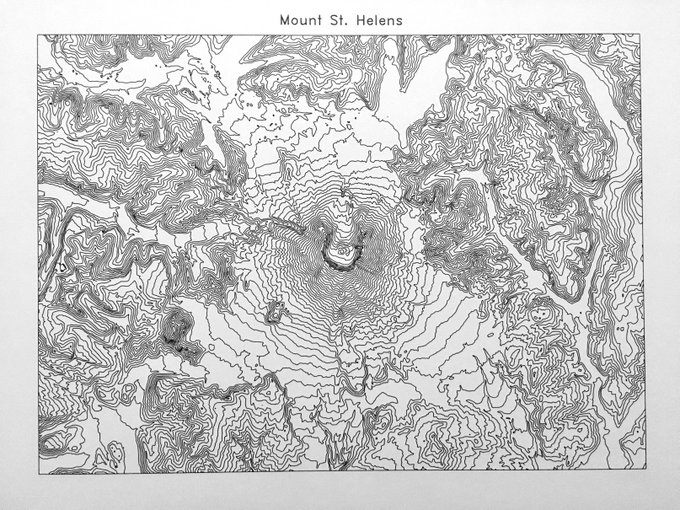
Topographic map of Mount St. Helens

One subject that I’ve often thought appropriate for plotting are maps, and Michael’s topographic maps are elegant. Again, in addition to making drawings, he has provided his code for working with AWS terrain data as well.


Drawings of the Stanford bunny

Michael sells drawings, and accepts commissions for favorite NES games, proteins, map regions, and even cellular automata. He has projects on wide ranging subjects, not limited to pen plotters, so go check them out!

Featured Artist: Vincent Pidone

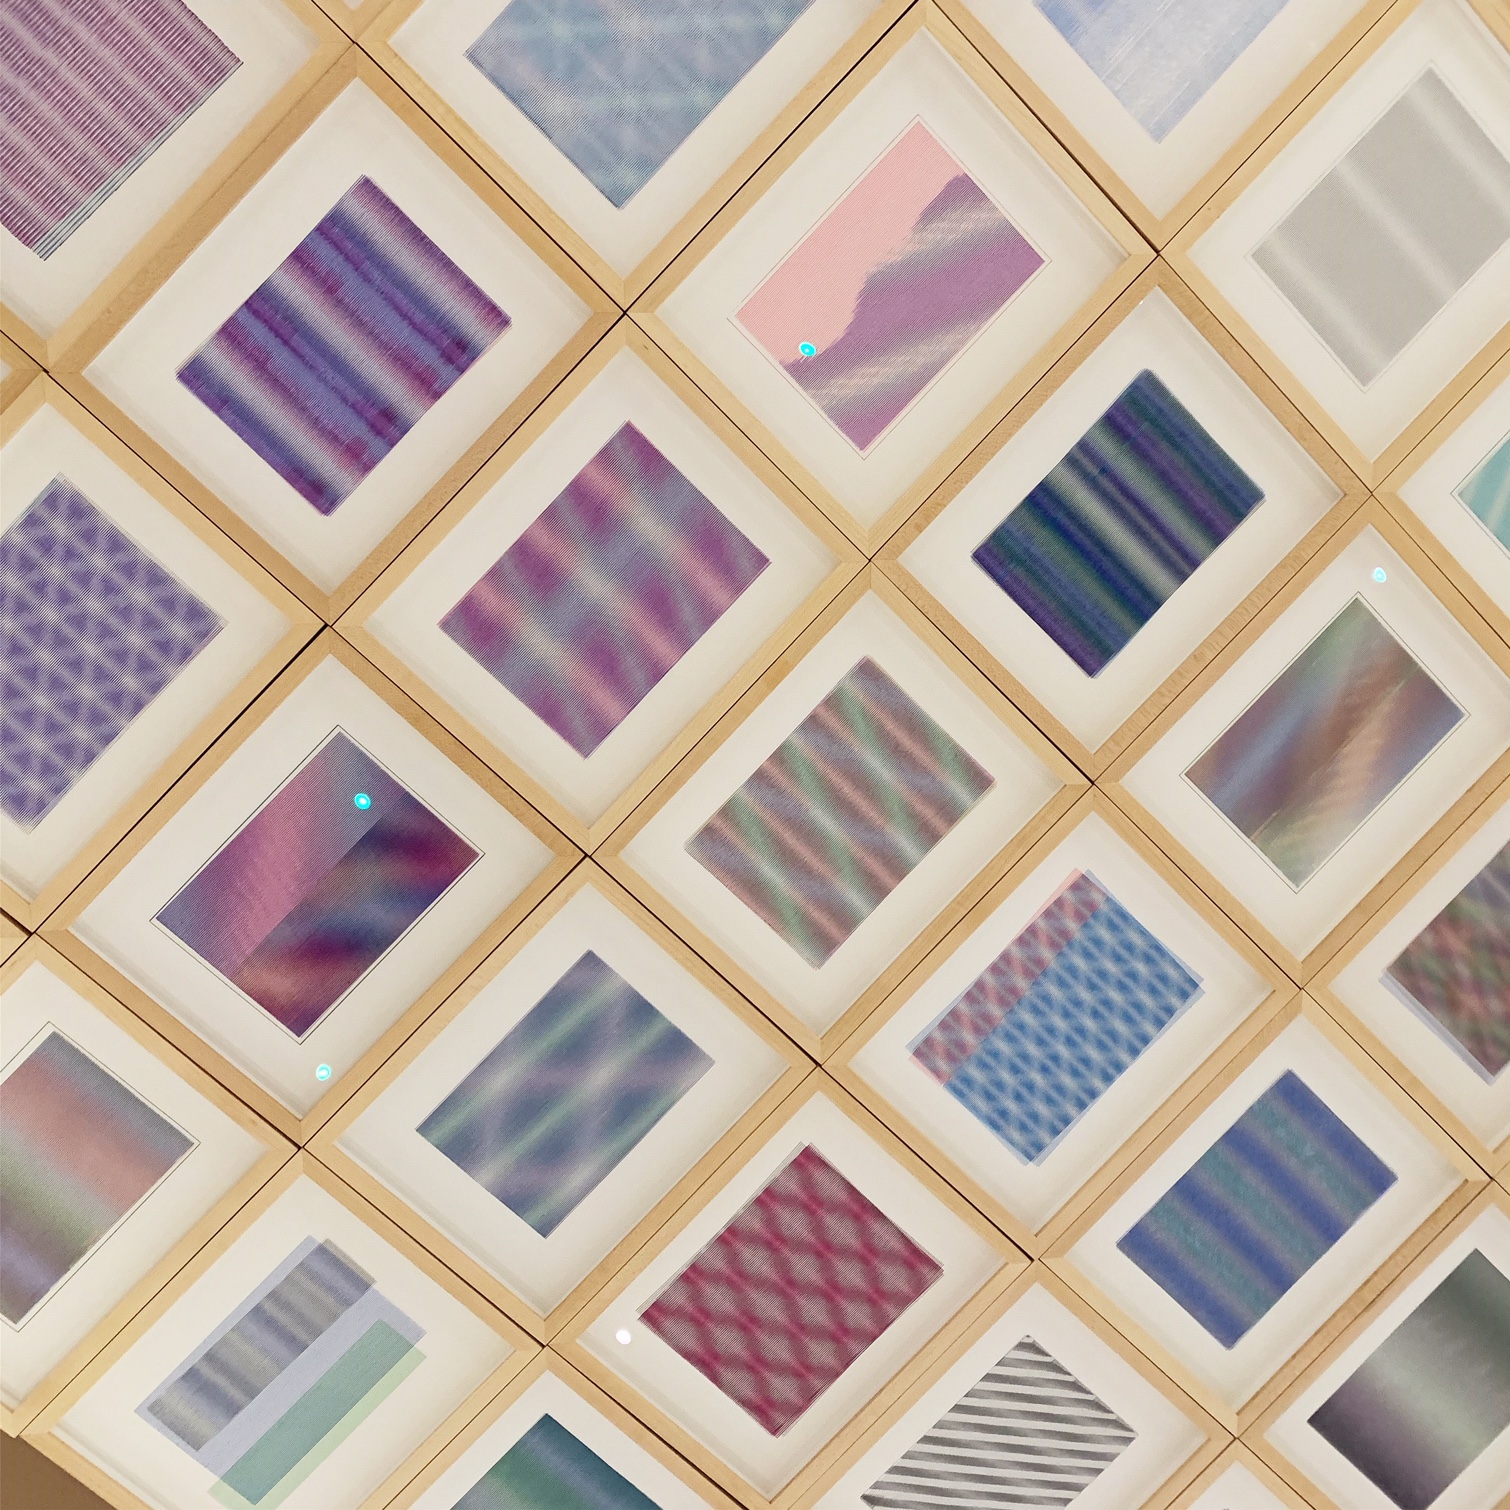
An array of drawings featuring Moire patterns

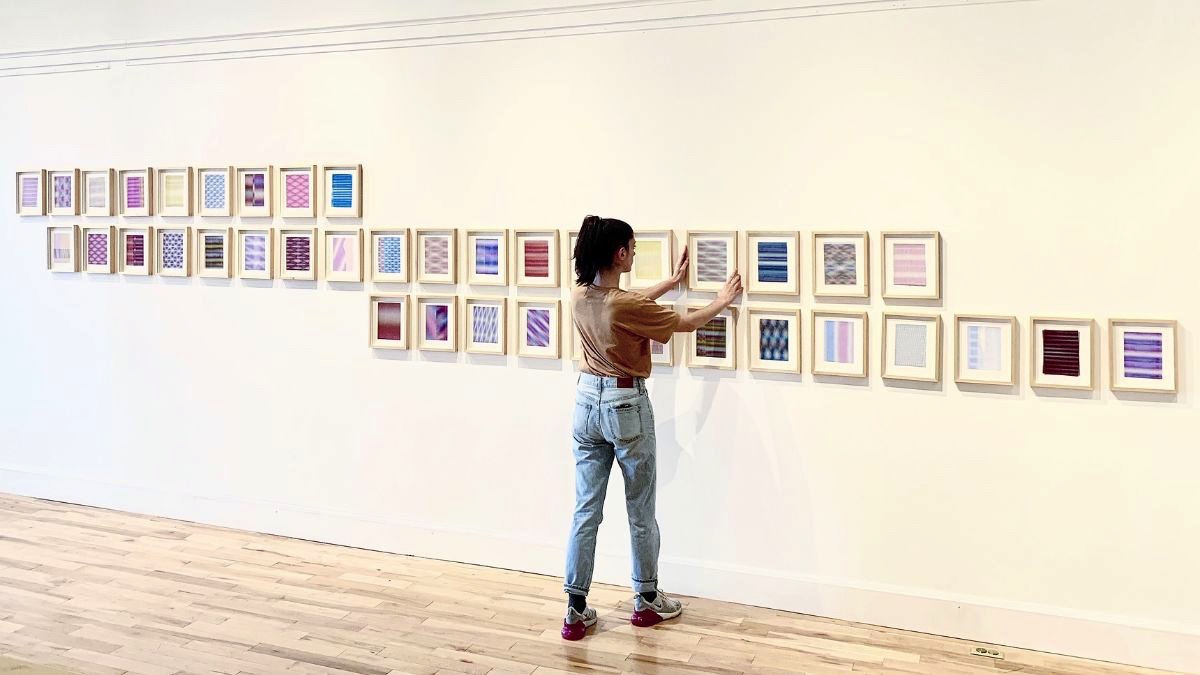
Vincent Pidone is an artist particularly interested in Moire patterns, making the AxiDraw a tool well suited to him. You can find him on instagram, and he has a show opening this week.

I have a show of my recent artwork opening August 17th in Hudson, New York. The show will be up through October. All of the work consists of Moire drawings, some hand drawn, but most of them were done with my Axidraw. (Everything in the photo above was done with Axidraw.)

I am always intrigued to see artists building on each other’s work. In the piece above, Vincent took artwork from Justin Lincoln and added colors and layers with the AxiDraw to make it into something new. Here’s Justin’s original:

Vincent has also experimented with using his AxiDraw for dispensing paint.

He has shared the software and hardware details of the project on hackaday.io.


Vincent’s show, focusing on his recent Moire pieces, is opening this Saturday, August 17th at Walnut Hill Fine Art in Hudson, New York, and will be up through October. Even if you aren’t able to make it to his show, you can follow him on instagram.

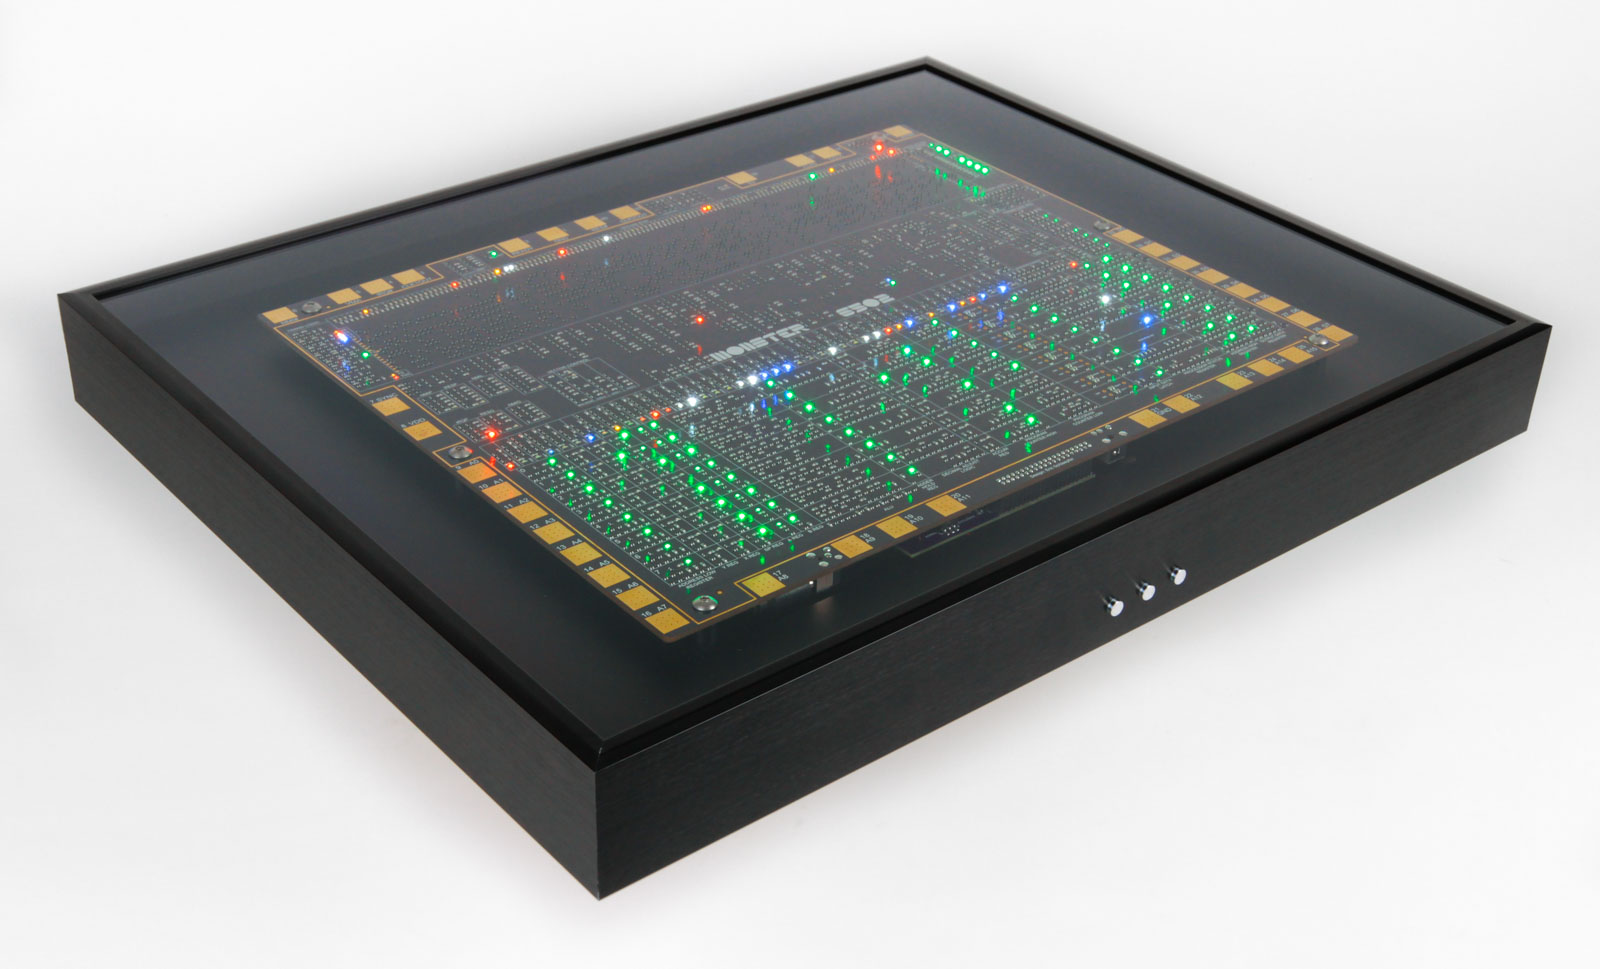
MOnSter in a box

MOnSter 6502 in enclosure

For the past couple of years we have been working towards a public launch of the MOnSter 6502, our working transistor-scale replica of the famous MOS 6502 microprocessor.

One of the biggest pieces of the puzzle has been how to present it in such a way that shows off its beauty but also lets you see it in action. Here – finally – is the result of that effort: An elegant shadowbox frame with hidden electronics and integrated buttons.

If you’d like to see the MOnSter and its new prototype enclosure, this weekend is the perfect opportunity: we are exhibiting it at the 2019 Vintage Computer Festival West, August 3-4 at the Computer History Museum in Mountain View, California.

MOnSter 6502 in enclosure

Where to go from here? If everything goes well, we’ll be launching the MOnSter this fall. Stay tuned!

From the mailbag: a happy plot

Paper on clip easel in front of AxiDraw that reads

Technical support can be a challenge, and often a successful outcome is one where you don’t hear back because everything is working. Sometimes, though, you get an extra special confirmation that you’ve fixed the issue. Thank you to Nick Z. for sending this AxiDraw plot in after we resolved a hardware problem!

New EggBot Software Version

We are pleased to announce a major revision for the EggBot software with several significant improvements. It is now updated to support Inkscape 0.92. We have also streamlined the EggBot menu within Inkscape and updated the example set.

We have a new SVG reordering utility, written from scratch. In addition we have improved the Hatch Fill extension, which can now provide neat connections between the endpoints of the hatching, for fast, efficient filling.

We also have a brand new version of Hershey Text, which converts full blocks of text rather than just single lines.

The EggBot documentation has been improved and updated to reflect these changes.