In our annoucement article about the EggBot Electro-Kistka — the hot wax dispenser for the EggBot — we noted that it can be challenging to reposition an egg after taking it out to dye the egg between wax layers.
As an alternative suggestion, reader Dan commented:
Could you leave the egg in the EggBot and paint on the first layer(s) of dye with a brush? Then dip the egg for the last layer to get the ends covered.
We just stumbled across a post from last year by WidgetNinja about using our post about CNC halftones to make Tie Fighter ASCII art using his CNC router. He used two-tone plastic mounted on plywood and carved it with a 60 degree v-carving bit. It looks great!
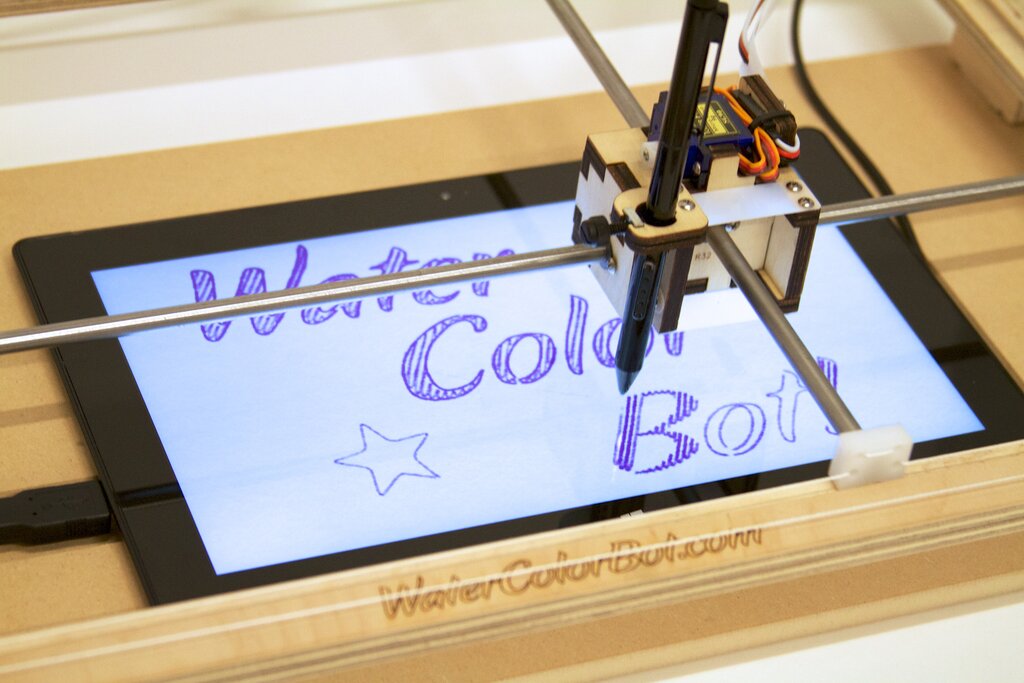
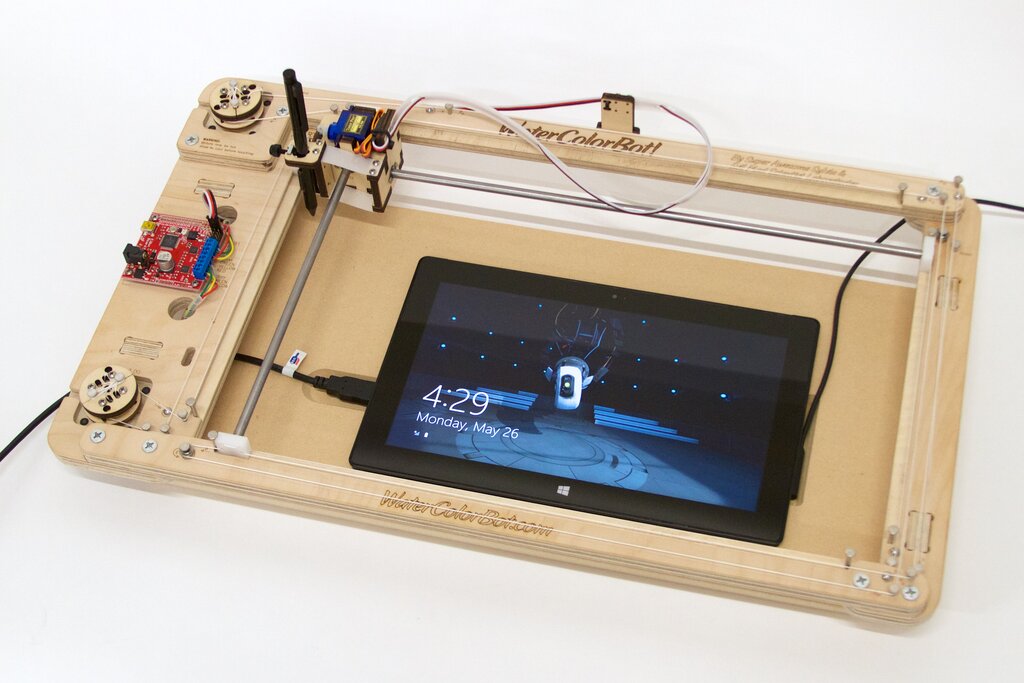
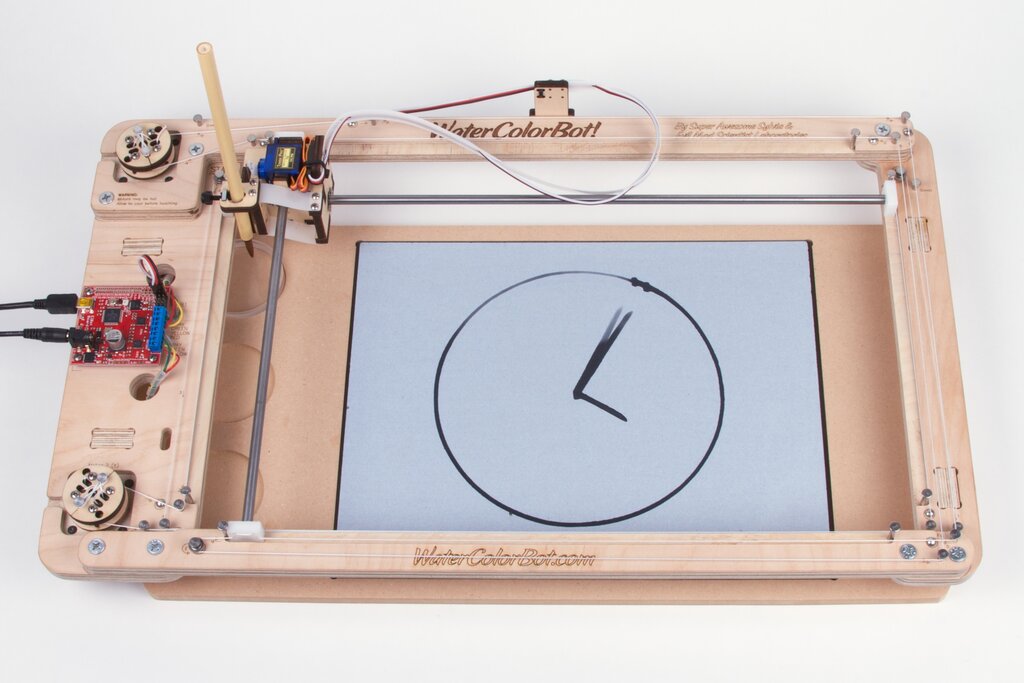
About a year ago, I started working on a project that used robotics to control a Surface Pro tablet. Not long after I started, I got my first glimpse at the the WaterColorBot on display at Maker Faire Bay Area 2013. The WaterColorBot is designed to carry a paintbrush over a piece of paper, raising and lowering it as needed to paint a picture. The movement and software control is similar to CNC router with special design modifications to make it lighter, cheaper and easier to control. A CNC router has to move heavyweight cutting bit with friction so needs expensive motors, rails, and belts. The WaterColorBot, on the other hand, needs only to move a paintbrush in a low friction environment.
I was instantly sold on the idea of using a WaterColorBot to control the Surface. I backed the Kickstarter, waited for my bot to arrive, and started working on software. When the WaterColorBot arrived, I was not disappointed. The assembly was quick and I was robotically painting in no time.
With the big mechanical and electronic solutions solved, my attention turned to the tablet. The Surface Pro is rare among tablets in that it uses a digitizer that allows extremely precise tracking with a stylus along with “hover” and “right-click” functionality. It does not need to be electrically grounded like a stylus for a screen that only supports capacitive touch. I was certain that the Surface Pro was the way to go, but not quite how it was going to be held together. The project was about to take a another serendipitous turn.
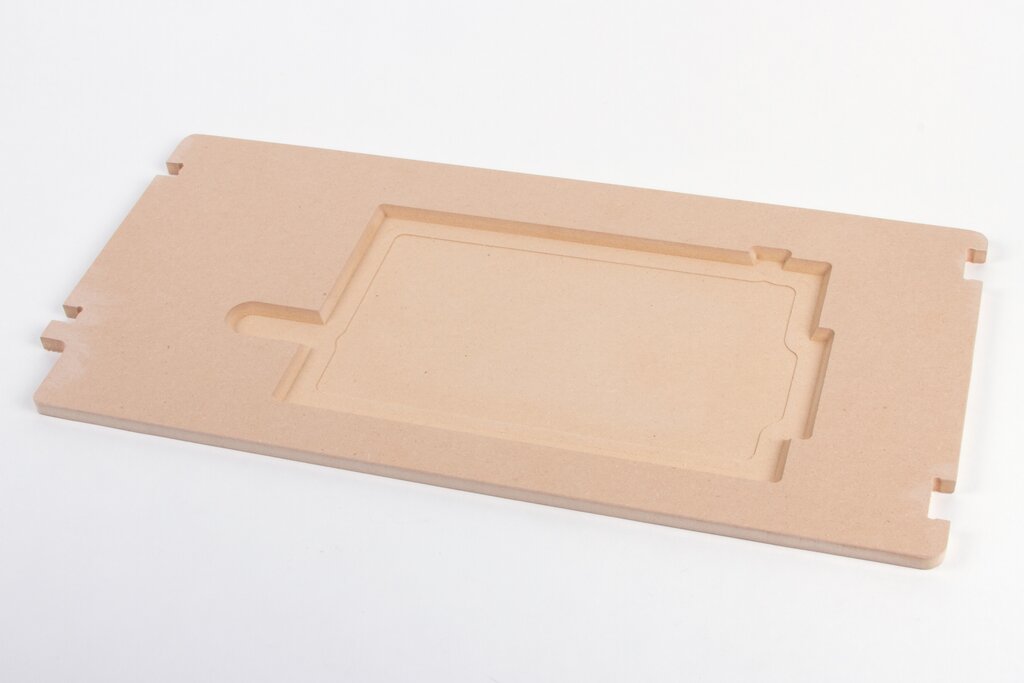
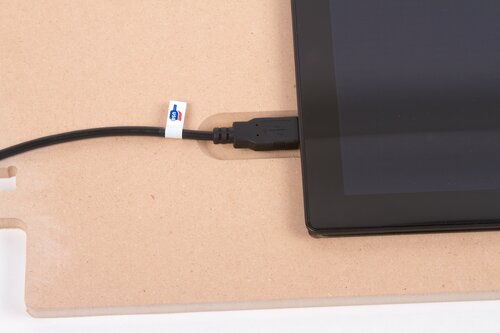
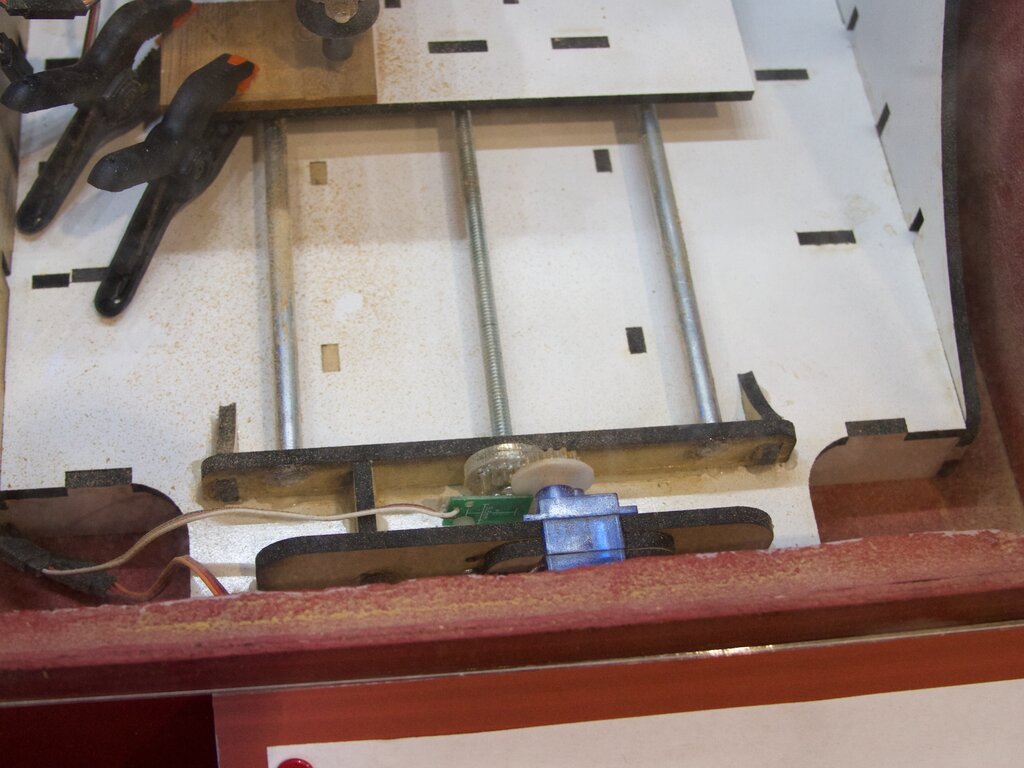
The custom-cut spoilboard
At this point, I shared my enthusiasm with Windell and Lenore of Evil Mad Scientist and they gave me a unique offer: Stop by the Evil Mad Scientist shop and together we would make a custom cut spoilboard (lower deck) fitted to mount the Surface Pro 2. Wielding digital calipers and other measurement and software tools, Windell came up with a design that held the tablet firmly and had extra space cut out for the charger, power button, and USB cable.
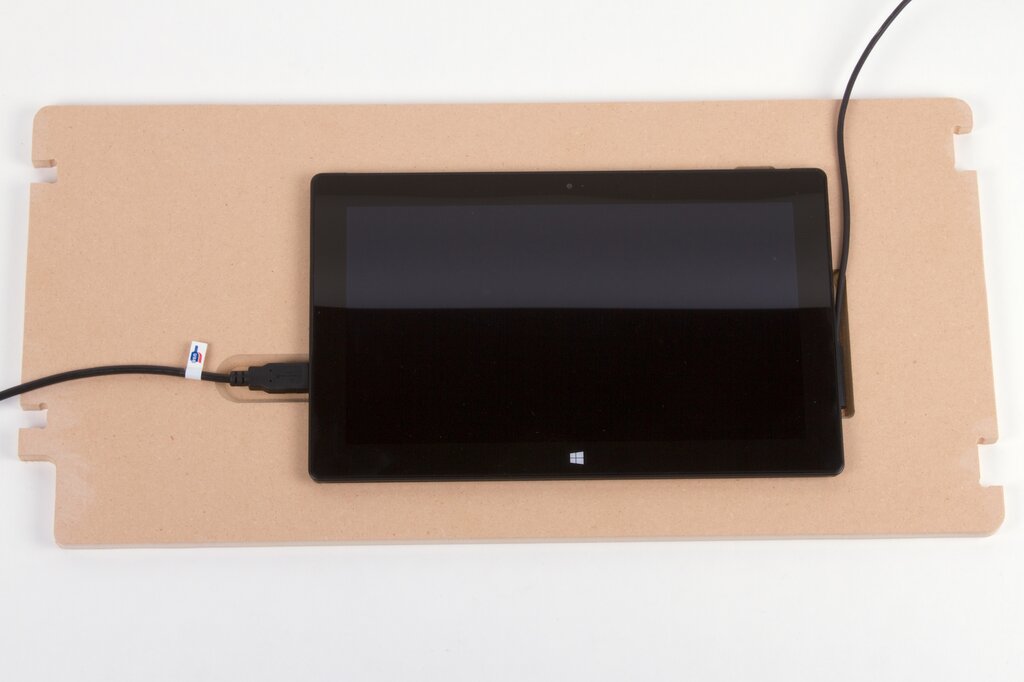
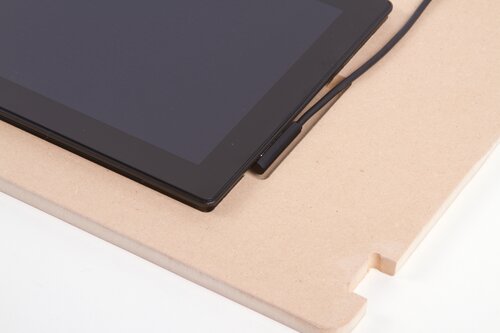
The area beneath the tablet has a lip and a lower recessed area. This design reduces wobble and makes it look even better. On the topic of machining – I got a few lessons in how larger CNC machines work. Windell showed me some design considerations in software and gave me a safety briefing about the CNC router itself. This thing can cut fast.
After a little sanding, we fitted the tablet, spoilboard, and WaterColorBot together. Having the co-creators of the WaterColorBot with me on this journey was priceless, as we can see from the final assembly. The first spoilboard we cut matched perfectly and the tablet is held firmly in place.
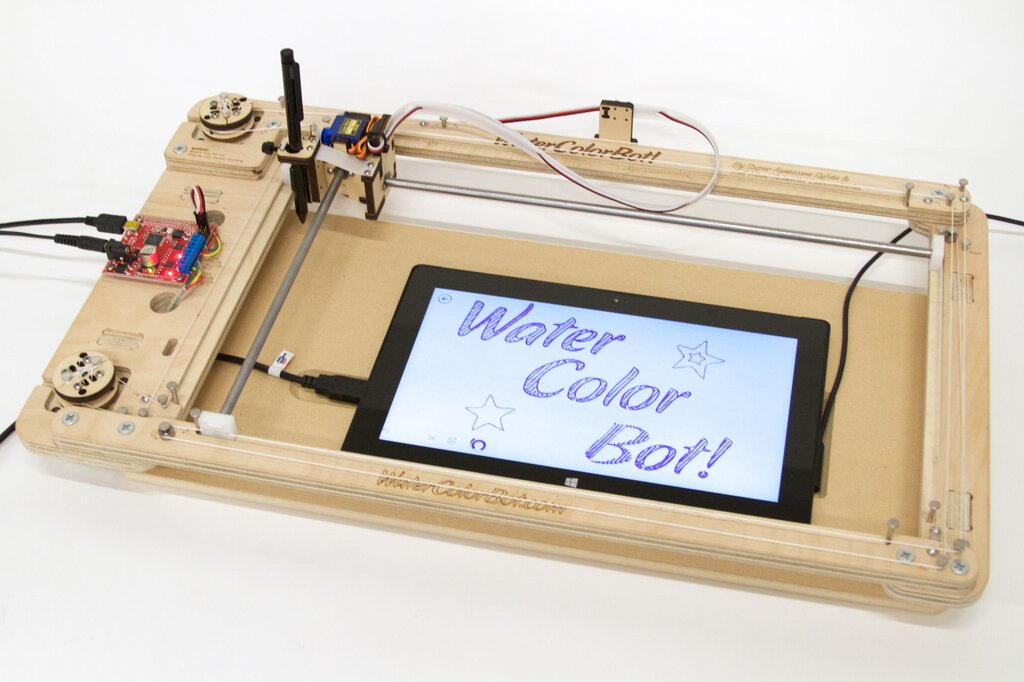
With enthusiasm fueled by seeing it all fit together, we decided to tell the WaterColorBot to do some painting. Windell loaded up an example sketch in Inkscape and, with only a minute to calibrate the stylus height, we were drawing!
The software running on the Surface Pro is called FreshPaint and we chose a simple marker tool. In the video, you’ll hear a laughter break where the Surface picked up the floating toolbar in the app and dragged it around the screen.
Given a little time, we could have taught the WaterColorBot to change brushes and colors in FreshPaint, but our goals for the day were met. The light weight and low friction of the Surface stylus is perfectly matched for use on the WaterColorBot. A custom fitted spoilboard means the Surface will always be at the exact same place on the X/Y plane, greatly simplifying future software development. Next project: Teaching the robot how to see!
(Full disclosure: My day job is Systems Operations with Yammer, a Microsoft company. This project and use of the Surface Pro 2 is not affiliated with Microsoft in any way nor did they influence the project with sponsorship or exercise any editorial control. If they had, I’d try to talk them into contributing a Surface Pro 3! “Surface” is a trademark of Microsoft Corporation.)
James “techninja” Todd has just released Hershey Text JS, a port of the Hershey fonts to JSON, capable of being rendered quickly via JavaScript & SVG.
The Hershey fonts a classic set of “engraving” or “stroke based” (as opposed to outline based) fonts that are excellent for use with all kinds of physical cutting, drawing, and painting machines. Several years ago we introduced the Hershey Text extension for Inkscape, and you can find a more in depth introduction to the Hershey fonts in that article. Hershey Text JS is adapted from our Inkscape extension, and provides easy access to the font data for programmers who prefer to work in javascript.
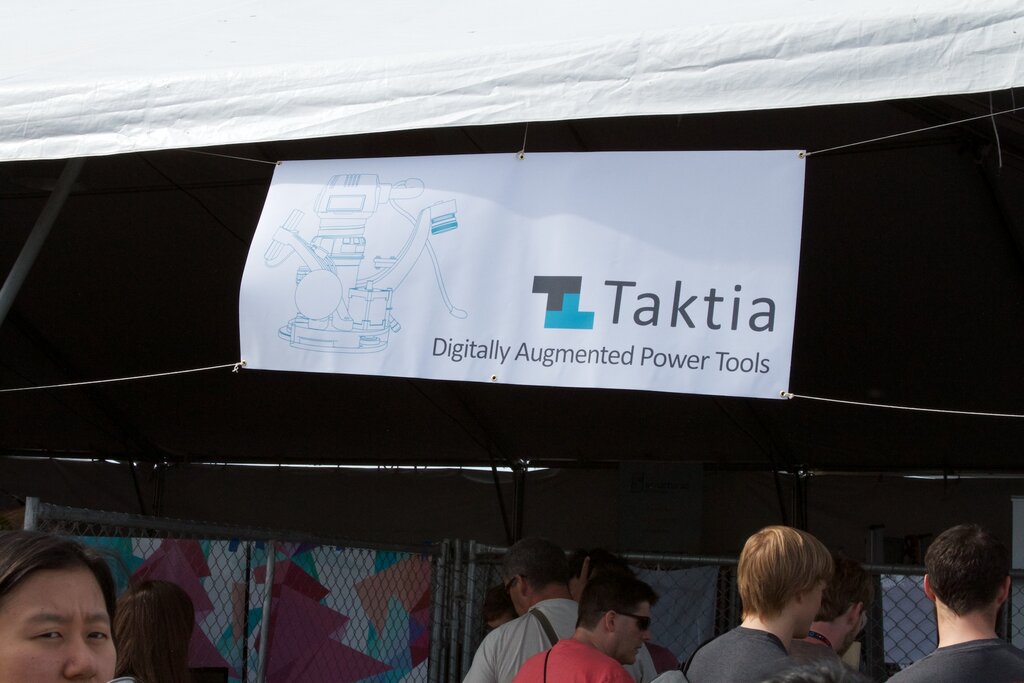
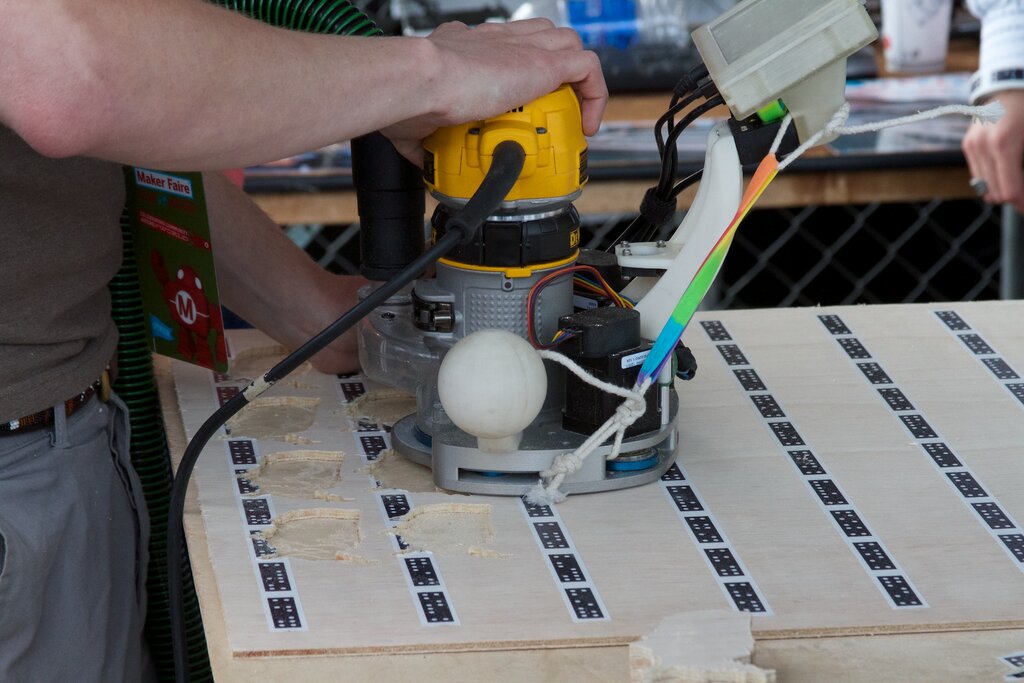
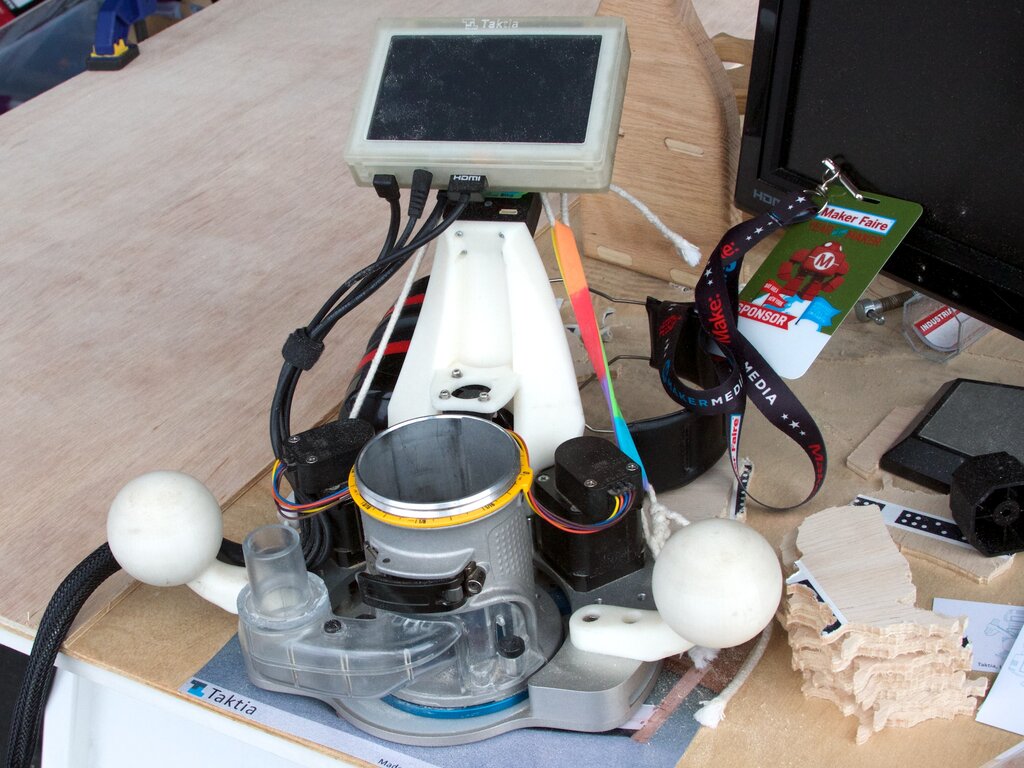
One of the most exciting new technologies that we saw at Maker Faire was from Taktia, a startup making augmented-reality power tools. They were showing off their semi-automated handheld wood router.
The router sits in a robotic cradle with a computer vision system and a screen. The human guides the router by hand, keeping its center within a 1 inch diameter circle shown on the LCD screen. As the human moves the router, the cradle makes fine corrections to put the router bit exactly where it needs to be, allowing a non-expert to cut precise, complex shapes, while only moving the router along a coarse path.
In the photo above you can see some wooden shapes that visitors were cutting out, by only moving the router freehand, while letting the robotic cradle do the hard work. We can certainly imagine other tools getting the same “robotic upgrade” — this startup will be worth watching.
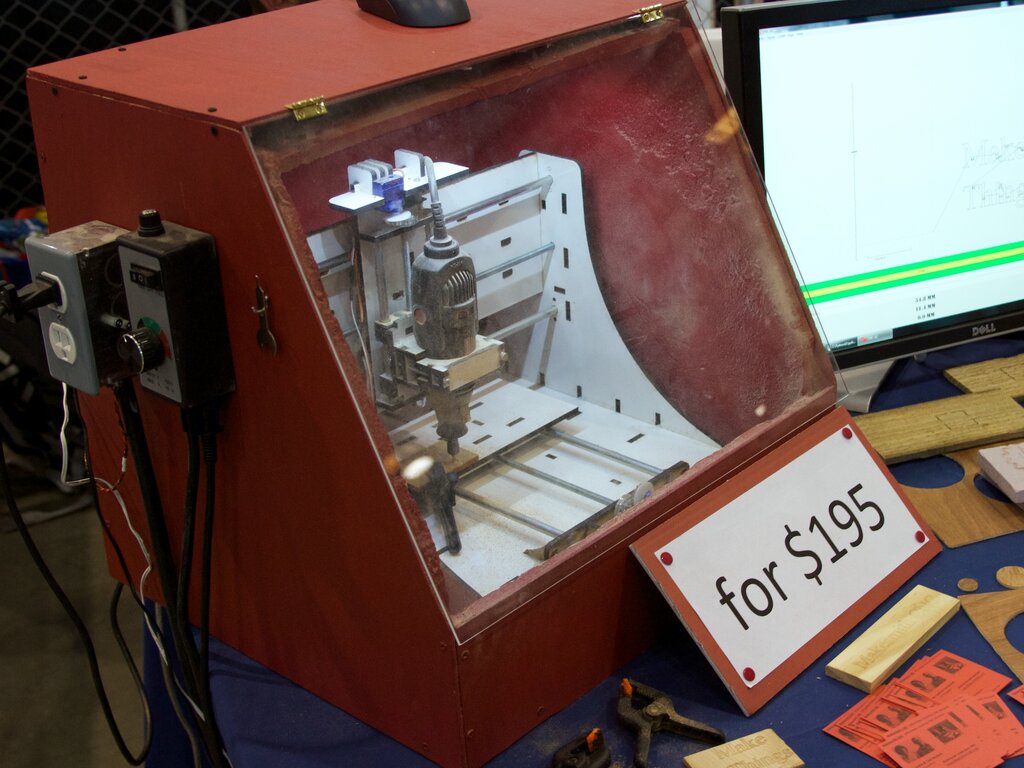
Let’s file this under “intro machines.” The Makesmith CNC, currently available on Kickstarter for just $195 including everything but the Dremel tool. It makes very clever use of appropriate technology: Three tiny hobby servo motors, modified for continuous rotation, turn gears that turn the lead screws (well, all-thread) to drive the XYZ stage. An magnetic encoder monitors the rotation, making a high-resolution, closed-loop control system. No bushings, melamine-coated MDF parts, Arduino control. Planned for future open source hardware+software release, too.
Perfect? Nope, but the creators of the project seem to be keenly aware of its abilities and limitations (many discussed here), and oh does it have affordability on its side.
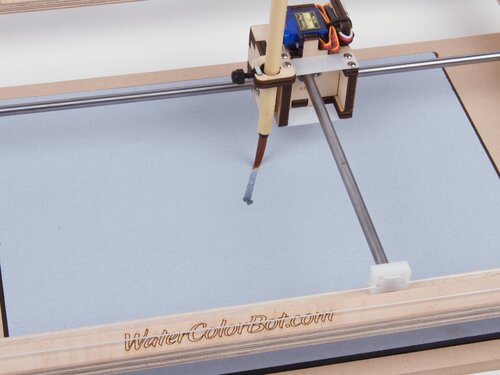
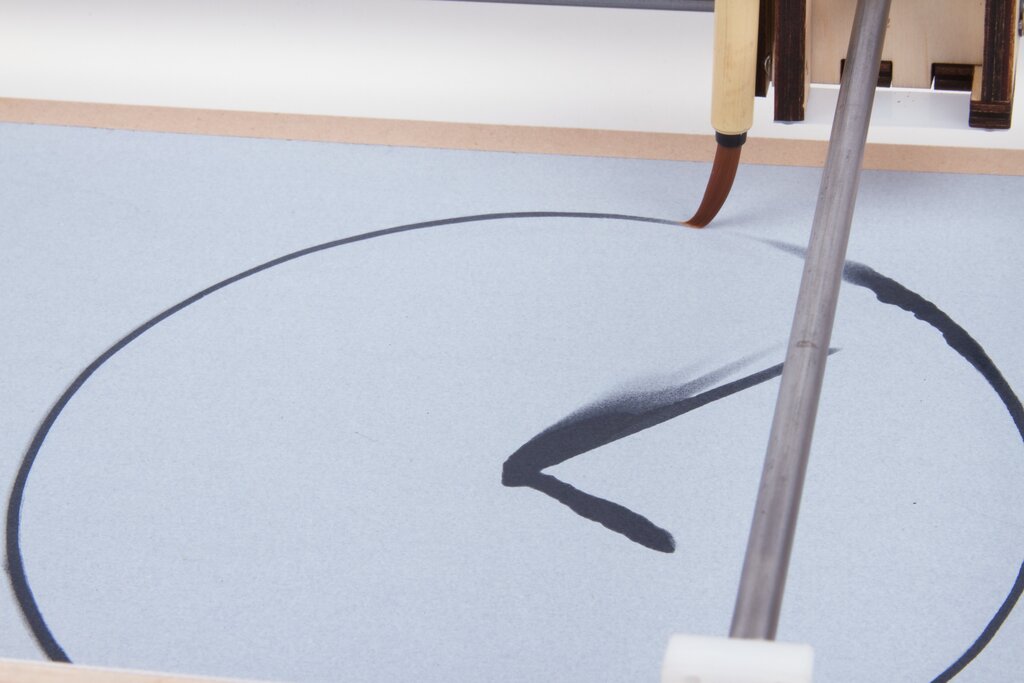
We built a evaporating-hand water clock using a WaterColorBot fitted with a Buddha Board. The Buddha Board is a black board with a gray ceramic coating that becomes transparent when wet, so you can paint on it with plain water to make black marks that disappear as the water evaporates. (And, it fits nicely in a WaterColorBot with the appropriate jig.)
As a clock, once a minute it draws the minute hand, then the hour hand, and finally the outline of the clock face.
As the water evaporates over the course of a few minutes, the old minute hands fade away. It’s a neat effect.
With Maker Faire coming up next week, @techninja42 suggested that Maker Faire Bingo would be a great way to get ready! With the help of some friends, he put together a site where you can grab a bingo card to play during your visit to Maker Faire. We tried it out with the WaterColorBot, but you can use your preferred automated printing method to make your own, or maybe even find a robot at Maker Faire to draw it for the ultimate Maker Faire Bingo!
Send your maker bingo suggestions to @mfbingo for inclusion in the bingo card generator.
After letting StippleGen2 crunch the numbers for a while I imported the resulting vector graphic file into inkscape and generated the G-code so that I could use my laser cutter to cut the image into a black paper. 2 hours and 23 minutes later I had a 20×20 cm piece of paper with about a 1000 holes in it and it looks awesome! Would be perfect for a lamp shade or just nice to put up in a window and let the sun shine through. I can highly recommend StippleGen2 it’s super easy and a lot of fun.