Category Archives: CNC

The Egg-Bot Electro-Kistka

Hardware 1
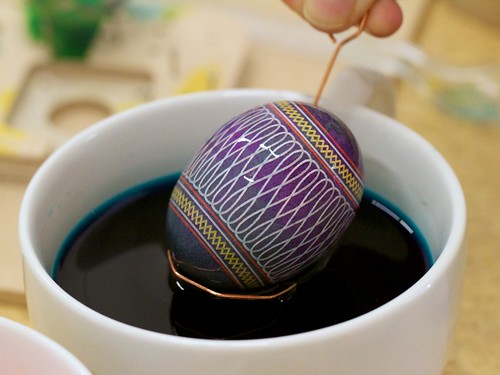
Pysanky eggs

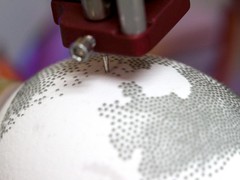
We’re pleased to announce the availability of the Egg-Bot Electro-Kistka: An electric hot wax pen designed to be used with the EggBot. A kistka is the wax tool used in the traditional wax-resist and dye (batik) method to produce colorful eggs in the same fashion as Ukranian pysanky.

We would like to acknowledge that this is not by any means the first time that anyone has strapped a kistka to an EggBot— We wrote about Ann’s DIY version a few months ago, and we’ve seen other versions (both manually heated and electric) in YouTube videos dating back several years.

Hardware
 Hardware 2 Hardware 4

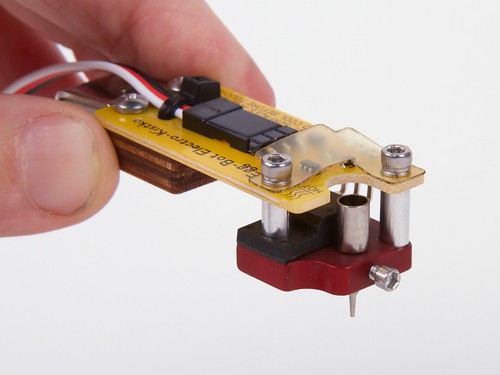
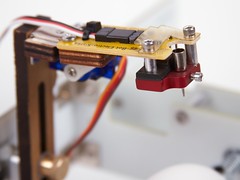
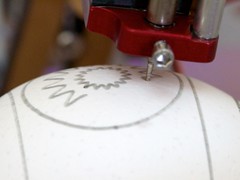
The Electro-Kistka consists of two main parts, connected by a cable: A heater assembly that gets mounted to the EggBot’s pen arm (in place of the usual pen holder), and a power control board that sits behind the EggBot.

The power control board is relatively simple: it accepts input from a plug-in power supply, and has an adjustment pot so that you can set the power level of the kistka.

The heater assembly has two parallel surfaces that you can see in the pictures.  The upper is a yellow circuit board with control electronics, and the lower red part is a machined aluminum heater block that holds the actual kistka tip.

Hardware 3 Hardware 6

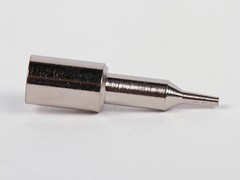
The kistka tip (right) has a small wax reservoir at the top and a smaller-yet point on the bottom that feeds molten wax onto the egg surface through gravity and capillary action.

Designing a good kistka tip is an art unto itself, and we are using field-proven kistka tips, wax, and other accessories from Folk Impressions, manufacturers of the excellent “white handle” electric kistka.  The tips are interchangeable and a number of sizes are available. For all of the examples shown here, we’re using only the #2 (medium) tip that comes with the kit.

Process: two-tone

The basic wax resist process is as follows: Apply wax to the parts of the egg that should remain the present color, and then dye the entire egg a different color.

Twain 1 Twain 2
Twain 4 Twain 5

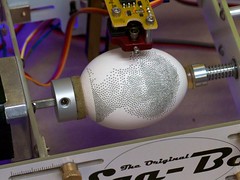
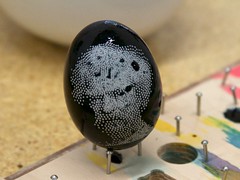
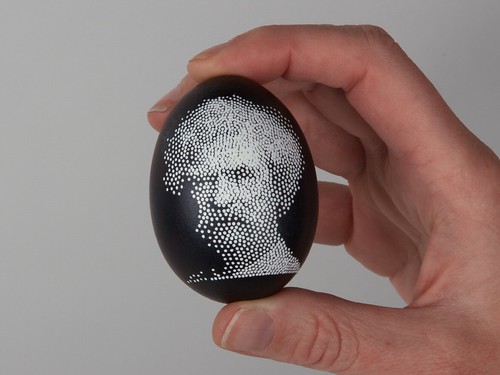
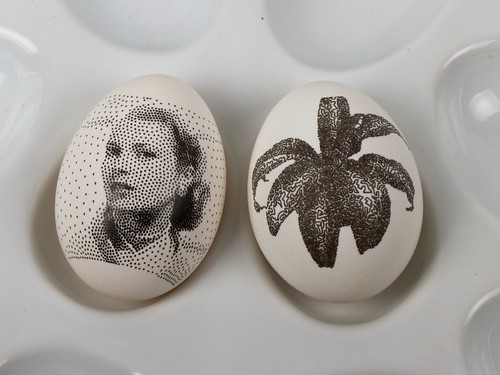
For a simple two-tone image — white on black — we started with Mark Twain, one of our example images from the StippleGen project.  From a user standpoint, drawing wax onto the egg works exactly the same way as using a felt tip marker in the EggBot — it’s just a different tool that does the drawing.  The wax itself is black-colored beeswax, which is nice because you can see it against the egg.

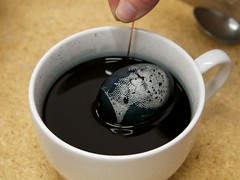
After the EggBot finishes, we dip the egg in dye for a couple of minutes, and leave it to dry on a grid of little nails.

Twain 7

Once the egg is dry, we remove the wax with a heat gun on the low setting (a glorified hair dryer…) and a tissue. With the black wax gone, the contrast is stunning. (If you are interested, here is how it looks before the wax is removed.)
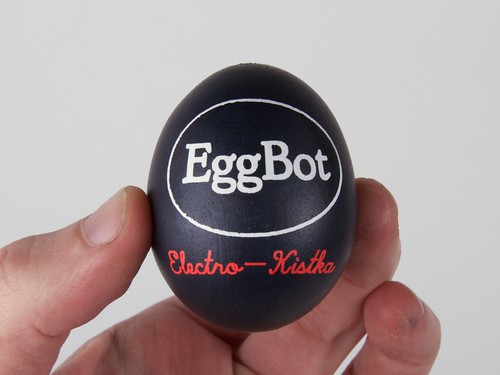
Eggbot Logo 1 Eggbot Logo 2

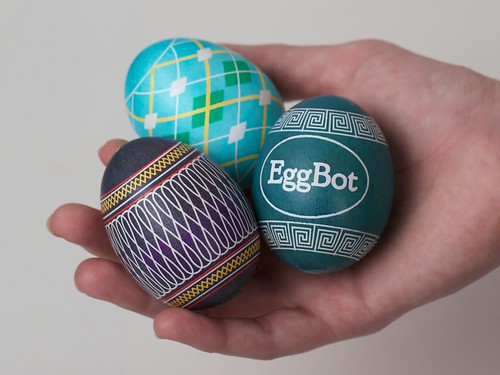
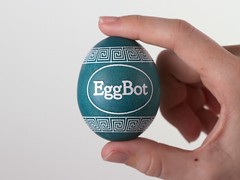
Another example of a two-tone egg.  Alternately, you could dye the egg before the wax resist first goes on (say, yellow), and then dye it blue afterwards. The end result would be yellow lettering on a blue background.
Process: Multicolor

overkill 1 overkill 2
overkill 3 overkill 4

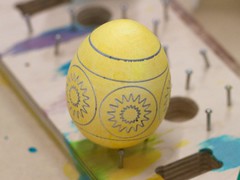
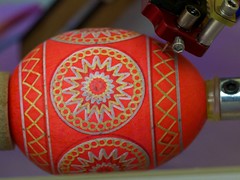
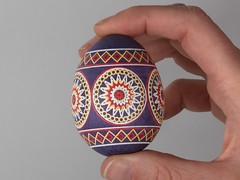
Making multicolor eggs uses the same process, but with added complexity.  For this example, we applied wax resist on a bare (white) background, and then dyed the egg yellow and allowed it to dry (upper right).  We then applied a second layer of wax, dyed the egg red and allowed it to dry.  Finally, we applied a third layer of wax (lower left), dyed the egg blue, and allowed it to dry.  The results after removing the wax (lower right) show the white, yellow, red, and blue areas — not bad!

A caveat: It is harder than it looks.  While two-tone eggs are straightforward, we have found it to be challenging to precisely reposition an egg after removing it for dyeing. Thus, it takes considerable patience and experience to produce multicolor eggs with good registration between subsequent color layers.  We’d be interested in exploring better ways to do this.

traditional 2
Still, maybe it’s worth the effort.

MoreEggs 4

The Egg-Bot Electro-Kistka begins shipping this week.

Open Source Beehives

The Open Source Beehives project is currently running a crowdfunding campaign with the goal of gathering information from sensor equipped hives throughout the world to help solve bee population problems like colony collapse syndrome. The sensors can also be used by individual beekeepers to monitor the health of their hive.

Even without the sensors and the citizen science, their hive designs are beautiful.

The MarshMallowMatic

Marshmallowmatic

Introducing the MarshMallowMatic: the world’s first dedicated CNC marshmallow toasting machine— capable of custom marking and toasting of marshmallows under robotic control.

The MarshMallowMatic is built from a special, modified version of our Ostrich Eggbot kit, fitted with a compact oxy-fuel torch:

Marshmallowmatic

The oxy-fuel torch can produce a 1″ (2.5 cm) long flame, with temperature in excess of 5000 °F (2760 °C).  “And wow, can it toast marshmallows!”

MarshmallowmaticMarshmallowmatic

Help Bring PancakeBot to Bay Area Maker Faire

Pancakebot

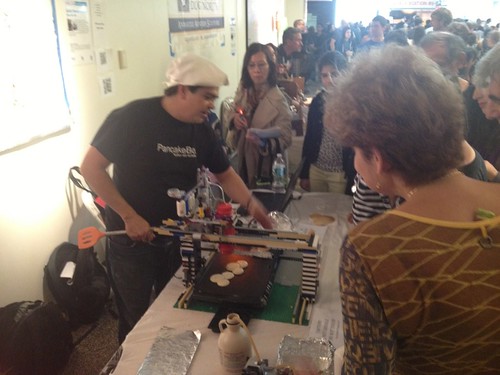
Miguel, the great guy behind PancakeBot, a CNC pancake printer made out of Lego, is running an Indiegogo campaign to help bring the whole family all the way from Norway to the Bay Area Maker Faire. We met Miguel at the New York Maker Faire last year, and got a chance to see PancakeBot in action.

Even if you can’t support the campaign, you should check out the video to see the machine in action, cheered on by enthusiastic young pancake aficionados. And come to Maker Faire in May, where we’ll hope to see Miguel and family with the awesome PancakeBot.

Digi-Comp II: First Edition

dcii_9

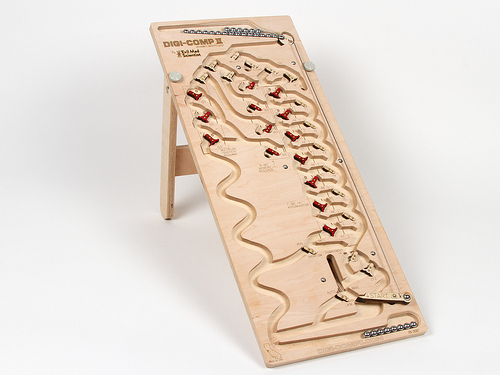
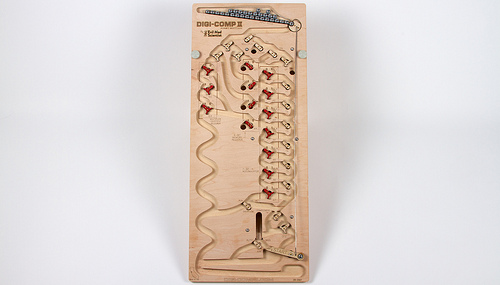
We’re pleased to finally announce availability of our brand new, long-awaited kit, the Digi-Comp II: First Edition. It’s a modern, fully-operational recreation of the original Digi-Comp II— the classic 1960?s educational computer kit —CNC routed from hardwood plywood.

The Digi-Comp II is a binary digital mechanical computer, capable of conducting basic operations like adding, multiplying, subtracting, dividing, counting, and so forth.  These operations are all conducted by the action of balls rolling down a slope, directed by mechanical switches and flip flops, and all powered by gravity.

We’ve been working on project for over two years now, and so we’ve written before, in some detail, about how the Digi-Comp II works, and what kinds of things you can do with it. We’ve written about our larger than life version of the Digi-Comp II, which uses 8 Balls.  We showed off that version at the 2011 and 2012 Bay Area Maker Faires and made a demonstration video to show how it works.   We have also written about our smaller wooden prototypes that we displayed at the 2011 Maker Faire New York.
 

dcii_2

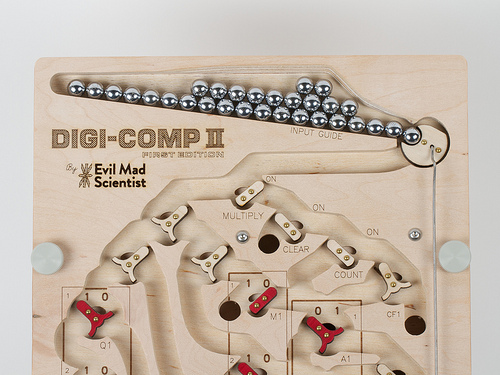
Our new version, the “First Edition,” is a descendent of the latter.  As compared to the “2011” model, it has a huge number of refinements— including an improved ball feeder that both fits 30 balls at a time (so you don’t need to refill during most calculations) and is jam resistant, a more compact and reliable start lever, better labeling, better flip-flop design, and internal baffles that slow the balls down, to prevent them from flying out of the machine.
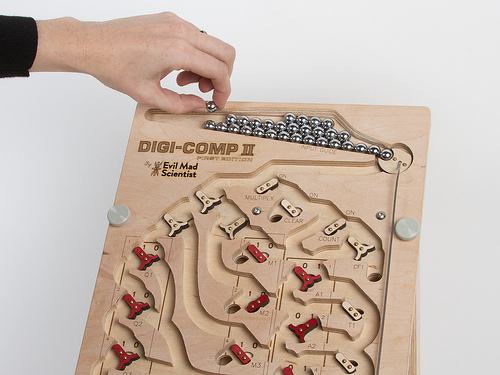
 

dcii_10

Many of these improvements were made possible by slightly reducing the size of the balls that we use.  Whereas the “2011” model used ½” ball bearings, the First Edition uses standard 11 mm pachinko balls, which are easily available, shiny, and rust resistant.  The fact that they are slightly smaller has allowed us to shrink some of the main circuitry, to allow for that larger ball feeder, to use thinner flip flops, and to fit the full machine into the same 10×24″ envelope that we had aimed for, which is considerably more compact than the 14×28.5″ size of the original.
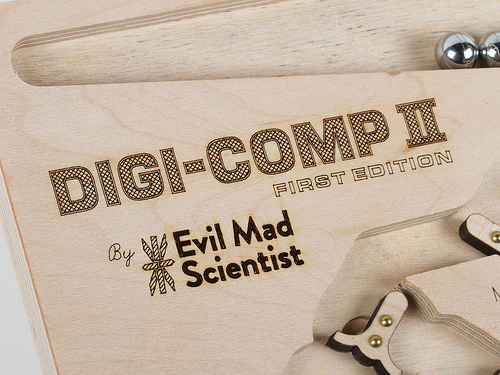
 

dcii_3

One of the nice things about keeping the size under 24 inches long is that we can fit the entire top deck of the Digi-Comp II into our 12×24″ laser engraver— so that we can directly laser engrave markings onto the playfield.  And while it’s nice to be able to write out DIGI-COMP II in huge letters, the more important application is actually adding the individual markings by the flip-flops and registers:
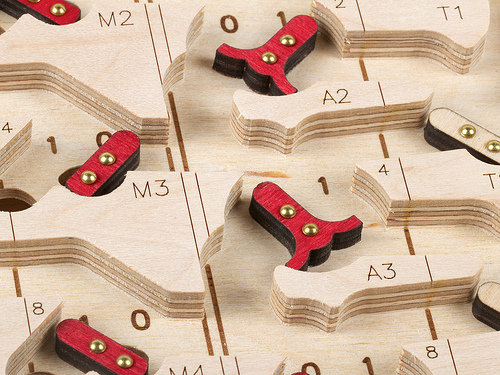
dcii_6

You may notice that the laser marks are very sharp on the “mesas” of the playfield, and less sharp but more bold down below.   This is an intentional effect, created by laser engraving the playfield in a single pass, with the laser focussed just below the level of the “mesas.”  On previous versions, we’ve either lasered the two parts independently, fully in focus at each depth, or focussed the laser halfway between the top and bottom— which leaves the engraving to look uniform, but less sharp, at each depth.   But this method seems to create exactly what we want:  sharp up top where it’s easier to read, and bold down below where it’s harder to see.
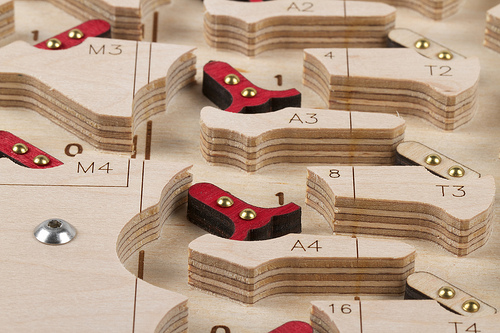
 

dcii_5

The playfield itself is made of 1/2″ thick maple-faced veneer-core all-hardwood plywood.  This is a rock-solid material that is about as far from “hardware store” plywood as you can imagine.  We use a CNC router to cut the pivot and limit holes for the flip flops and to carve the channels— roughly 3/8″ deep —where the balls can roll.  The CNC router is precise enough that when we cut the channels for the balls, we evenly split one of the veneer layers, ending up with a clean inner surface.  The Digi-Comp II also has a lower deck, below the playfield, that supports the clear-register and complement functions.  The lower deck is carved in the same way, but does not have any laser engraving.
 

dcii_12

The lower deck is attached below the upper deck by six screws that come down from the top to meet six wing nuts below.  Between the two layers are 3/16″ spacers that keep the decks uniformly separated.  It turns out that it’s actually important to use six screws; our earlier prototypes tended to jam up when the spacing between the two layers wasn’t controlled well enough.

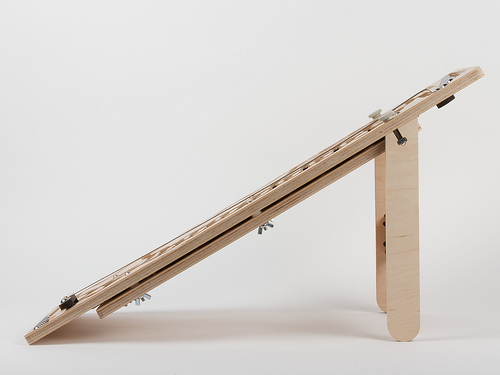
One of the other improvements is that the “First Edition” kit has a very sturdy stand, as shown above.  The laser-cut stand on the “2011” model was flimsy, and the simple dowels on the original 1960’s kit were not much better.   The new stand is a glued assembly made of two rigid legs and a crossbeam, made of the same remarkably-hard plywood as the rest of the machine.  It can be attached to or detached from the playfield with the two fat thumbscrews.  It holds the playfield at an even 30° from horizontal, such that the top sits about 12 ½ inches above your desk top— a particularly good angle for viewing the playfield.  The stand is actually reversible, so that you turn it the other way and raise the playfield only about 20° from horizontal, giving the option of a slower speed of operation.  If you want to go faster instead, you can overclock the Digi-Comp II by putting a book below the stand to increase the angle.
 
dcii_1

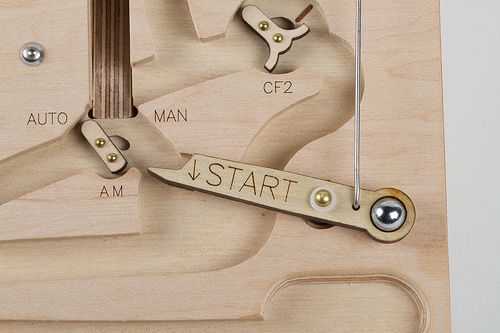
The new ball release mechanism has been fine-tuned and greatly simplified.  We recently showed off a little video demonstrating how this part of the machine works.  The start lever— now nicely labeled —is made of laser-cut poplar, has a brass rivet as its bearing and a glued-in pachinko ball as a counterweight.  When pulled down by a human or a rolling ball, it pushes a stainless steel rod that moves the ball release at the top of the machine to release the next ball.
 

dcii_11

Finally, it’s worth noting that this is called the “Digi-Comp II: First Edition” for a reason: We are planning others.

The original 1960’s Digi-Comp II kit was made of thin vacuum-formed plastic (what we more often refer to as “coffee drink lid material”), supported by a sheet of masonite and fitted with injection-molded flip-flops and switches.  Our CNC-cut wooden versions are much more substantial, but also cost a lot more to make, both in terms of raw materials and fabrication time.  We’ve been slowly working towards what we hope will be a happy medium: a Digi-Comp II made of (more substantial) vacuum-formed plastic, reasonably sturdy, and at a more modest cost.  We still plan to release a version like that, hopefully within the next year.  This has been a long journey for us— making wonderful machines mostly because they are wonderful machines —and we’re very happy to release our first one into the world.


The Digi-Comp II: First Edition is now available to order at the Evil Mad Scientist Shop.

Vector engraved stipples

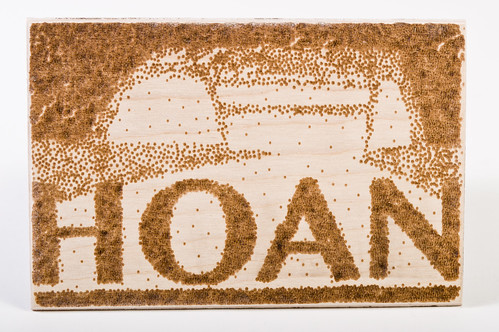
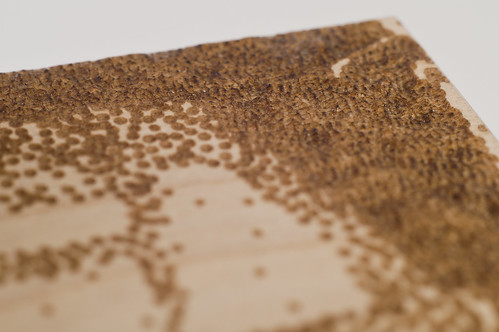
Laser-etched Hoan Bridge

Over at rasterweb, Pete has been playing with StippleGen2 to create artwork with the laser engraver at the Milwaukee Makerspace.

Laser-etched Hoan Bridge

StippleGen’s output consists of lots of tiny overlapping circles and this piece was made by using vector engraving, where the laser traces out each circle individually. In some places, the lasered marks overlap many times, leading to a new and unusual surface texture. In the closeup above you can see the ridges and valleys formed by the overlapped engraved areas. Go check out his article for the rest of the story about the project!

CNC Art from StippleGen 2

Lasercut cardboard

These two real-world examples of CNC Art made using StippleGen 2 come from Bruce Shapiro, who created them at The Mill. Above, a stippled portrait of Einstein is laser cut into cardboard, using light stipples on a dark background. Below, a paper mask was applied to a piece of wood, v-carved with a CNC router, spray painted, and then the mask was removed. This time, a light background with dark stipples was used.

Wood: masked and painted

The same source image was used for both, although the image is mirrored for the wooden portrait.

It’s great to see some examples of what StippleGen can do out there in the real world. If you have any examples of your own to share, we’d love to see them in the Evil Mad Science Auxiliary pool on flickr.

Photos by Bruce Shapiro used with permission.

StippleGen 2

StippleGen 5

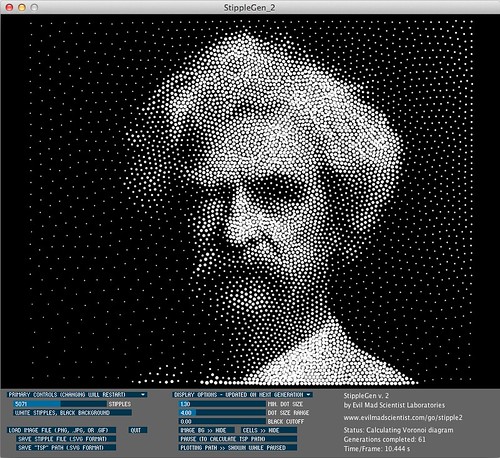
Two months ago, we introduced StippleGen, a program that can generate stipple diagrams and “TSP path” art from images, using Adrian Secord’s algorithm of weighted Voronoi stippling.  It’s a great (and free) tool for turning a photo into CNC-ready artwork, for use on the Eggbot or in other contexts.

twain5kw-newframe

Today we’re announcing a new verison, StippleGen 2. As with the earlier version, StippleGen 2 is free and open source software, written in the Processing development environment. It comes ready to run on Mac, Windows, and Linux, and it is available for download now.

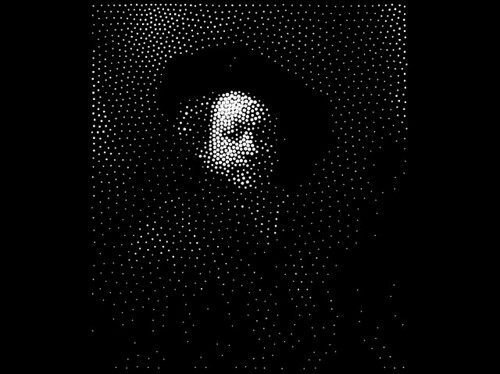
StippleGen 2 comes with three new features: A gently redesigned set of controls that makes life easier on tiny laptop screens, an inverse color scheme— as illustrated above —so that you can now calculate white stipples on a black background, and comprehensive documentation on our Wiki.

newgui

The controls in StippleGen 2 have been redesigned and streamlined. They are also overall a bit thinner so that the full screen (and all of the controls) can now be viewed on an 11″ MacBook Air, without reducing the size of the main display area.

rembrant2kw

In the first version of StippleGen, the image was always computed with black dots on a white background. For most images that have a light-colored background, this is a good choice.  However, if you have an image with a dark background, you may find that nearly all of your stipples are used to just darken the backdrop, leaving less detail available in the foreground of the image.

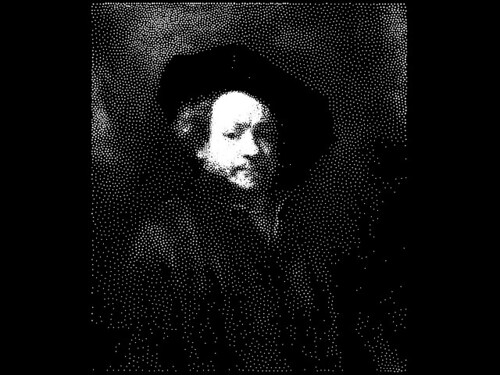
StippleGen 2 gives you the option to draw with black stipples on a white background or white stipples on a black background. By using a dark background here, you may be able to recognize Rembrandt in just 2000 white stipples.

rembrant10kwhite

It does, of course, look better with a larger number of points.

apollow10kblackapollow10kw-newframe3

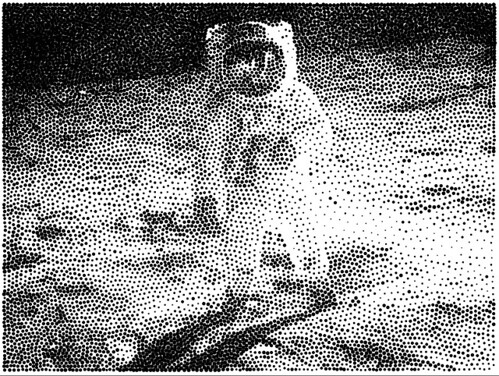
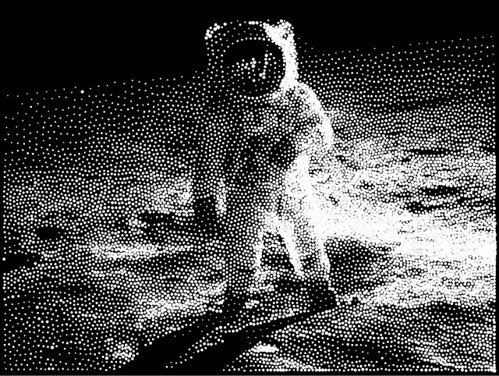
For images with a lot of black and a lot of white, it can be hard to choose which is the better scheme.

However, as this is tool to generate applied artwork, the choice is often made for you in advance.  If you are drawing with a black pen on a white egg, you’ll want black stipples.  On the other hand, if you’re carving into a black panel, white stipples might be the better choice.


hopper7600w
starry10kw

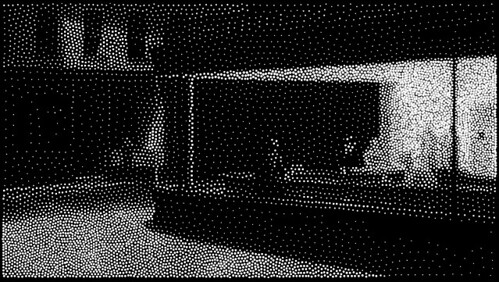
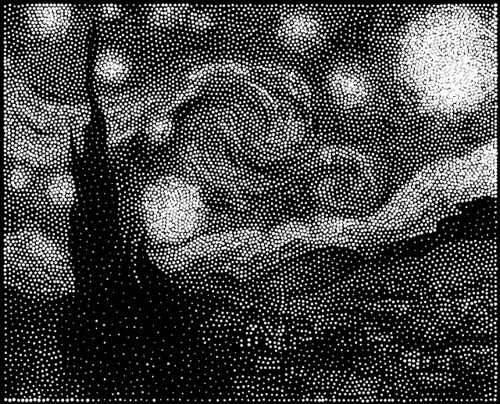
And here are a couple of other “test images” that we’ve been running in the new color scheme.

plant10k_vor

And finally, we have written up comprehensive documentation for StippleGen 2, hosted on the Evil Mad Science Wiki.

StippleGen 2 is free and open source software, now available for download here.
Go try it out for yourself!

CNC halftones with ASCII art

ASCII CNC 23


ASCII CNC 21

Recently we have seen some fantastic DIY examples of CNC image carving with traditional halftones and alternative versions with regions generated with reaction-diffusion equations. More impressively, all of this is now possible with freely available, homegrown software released by the people behind those projects (Here and here.)

Seeing these examples reminded us of another “classic” method of making halftones: ASCII art. In what follows, we walk through the process of using making CNC halftones for engraving or carving from both vintage and automatically generated ASCII art. Continue reading CNC halftones with ASCII art