Category Archives: Electronics

A new Kraftwerk-inspired LED tie kit?

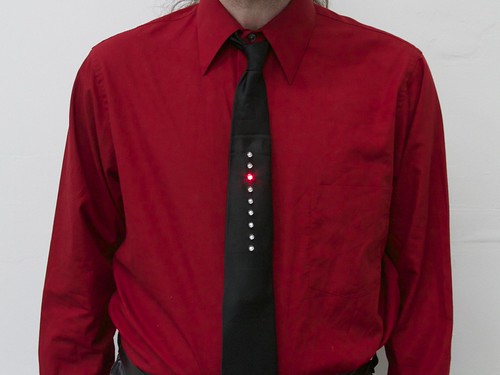
LED Tie - 28.jpg

Well, almost— With a breath of new firmware, our Larson Scanner kit takes us on a trip to the late 1970’s.

In the old videos of electronic music pioneers Kraftwerk performing their classic The Robots, a prominent prop is the animated LED necktie worn by each member of the band. If you haven’t seen this, or it’s been a while, you can see it right here at YouTube. (Additional viewing, if you’re so inclined: Die Roboter, the German version.)

The Kraftwerk tie has nine red LEDs in a vertical row, and one lights up after the one above it in a simple descending pattern. And what does it say to the world? One thing only, loud and clear: “We are the robots.” Now, if you’re anything like us, the most important question going through your head at this point is something along the lines of “why am I not wearing a tie like that right now?

larson3

The good news is that it’s actually easy to make one. And the starting point? A circuit with nine red LEDs and just the right spacing: our open-source Larson Scanner kit. With minor modifications– a software change and dumping the heavy 2xAA battery pack–it makes a pretty awesome tie. In what follows, we’ll show you how to build your own, complete with video.

Continue reading A new Kraftwerk-inspired LED tie kit?

Octolively: Digital interactive LED surfaces

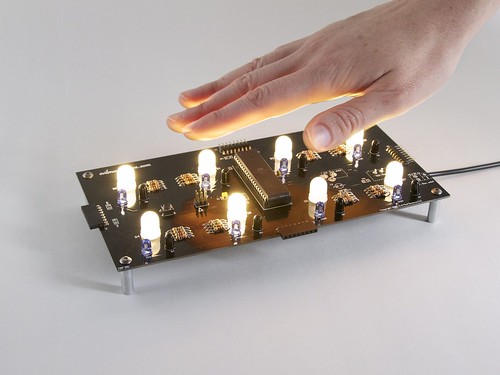
Octolively Array: 8 inches wide

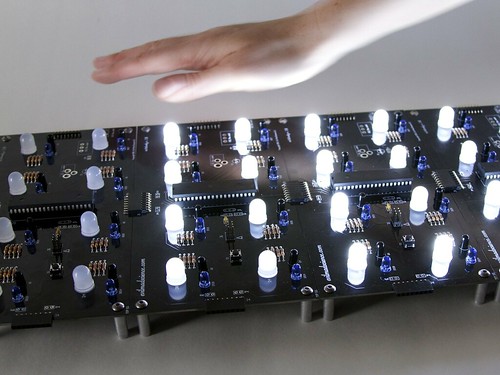
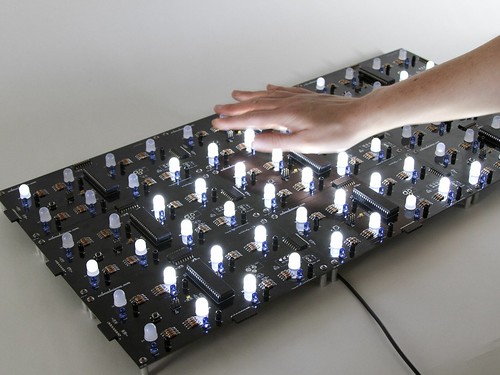
Octolively is an all-new, open source interactive LED surface kit that we’re releasing today. Octolively features high resolution– an independent motion sensor for every LED, stand-alone operation, a variety of response functions, and easy scaling for large grids.

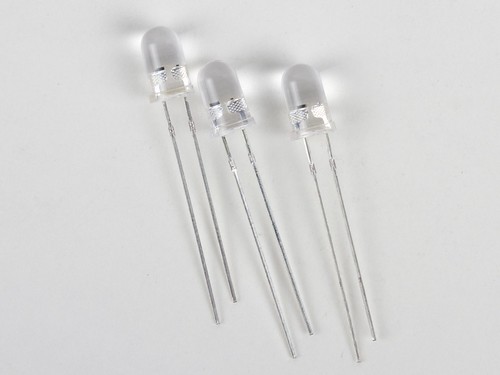
Warm white (left), Regular "cool" white (right)

Octolively represents our fourth generation of interactive LED surfaces.

Long-time readers might recall the original Interactive LED Dining Table, the infamous Interactive LED Coffee Tables, or the third-generation, not-very-creatively-named Interactive LED Panels. All of these surfaces were based on fully-analog circuitry with large circuit boards and a fairly high ratio of LEDs to sensors– typically 20:1.

Octolively: single unit, powered down-2

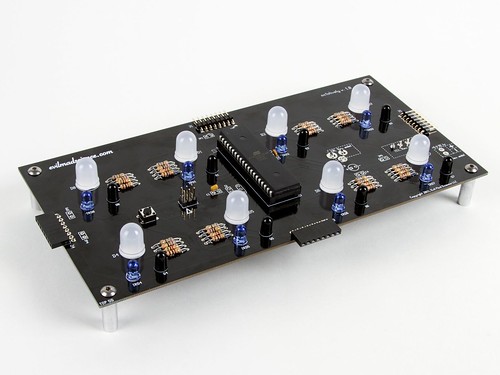
Octolively, by contrast, is based on smaller, lower-cost circuit board modules, “only” 4×8 inches in size. Part of the reason for this is so that there’s more flexibility in making arbitrarily shaped arrays. Arrays can now be as skinny as 4″ wide, or as wide as you like.

Each module features 8 LEDs and 8 independent proximity sensors– one for each and every LED. The LEDs are (huge) 10 mm types, and that chip in the middle of the board is an (also huge) ATmega164 microcontroller.
Each sensor consists of an infrared LED and phototransistor pair, which– together with polling and readout from the microcontroller –acts as reflective motion sensor. The LEDs are spaced on a 2-inch grid, and the edge connectors allow boards to be tiled seamlessly.

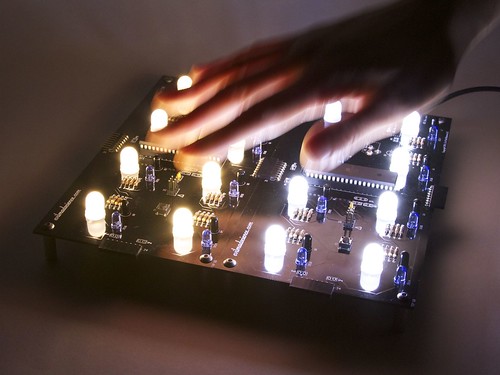
Because the circuit is now primarily digital, it’s easy to store a variety of response functions in the microcontroller. Our standard firmware contains 8 different response functions– fades, ripples, shadows and sparkles, which you can change with a button press. As it’s an open source project, we’ll expect that (in time), others will become available as well.

Octolively: 3x3 grid of boards

And, because the entire circuit is self-contained on the module, the surface scales effortlessly– you get very high resolution over huge areas without bandwidth bottlenecks, and no need for a central computer.

Of course, static pictures don’t do much justice for interactive LED surfaces. (We’ve embedded our video above. If you can’t see it here, click through to YouTube.)

Octolively, warm white LEDs

And doesn’t that look good with warm white LEDs?

Octolively begins shipping next week. Additional details– including the datasheet and documentation links –are available on the product page.

Does this LED sound funny to you?

flickerLED - 01

flickerLED - 02

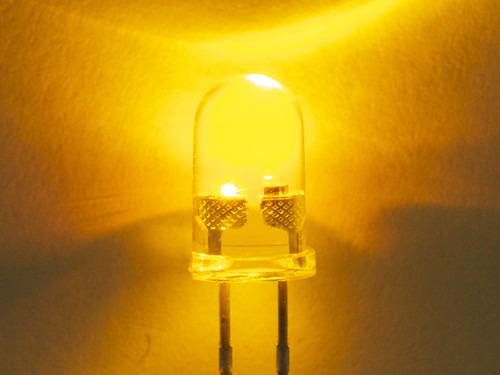
At first glance, these might appear to be normal 5 mm (“T-1 3/4”) clear lens ultrabright yellow LEDs. However, they’re actually “candle flicker” LEDs— self-flickering LEDs with a built-in flicker circuit that emulates the seemingly-random behavior of a candle flame.

In the close-up photo above, you can actually make out the glowing LED die on the left side, and a corresponding-but-not-glowing block on the right: the flicker circuit itself. In what follows, we’ll take a much closer look, and even use that little flicker chip to drive larger circuitry. Continue reading Does this LED sound funny to you?

ISP Shield Kit, version 2.0

ISP Shield 2.0

Earlier this spring, we released our open-source ISP Shield for Arduino. After using them for a while, we’ve found a few ways to improve the design, so today we’re releasing version 2.0.

ISP Shield 2.0

The ISP Shield is an Arduino “shield” (daughtercard) that makes it easier to use your Arduino as an AVR ISP programmer. It can be used to burn bootloaders onto new AVR chips, from directly within the Arduino programming environment, either in the on-board ZIF socket or on an external target board. More generally, it can also be used as a general-purpose AVR ISP programmer, using avrdude with the programmer type specified as “avrisp.”

ISP Shield 2.0

One of the tricky things about using the ISP shield is that there is a known incompatibility between Arduino-as-ISP and Arduino boards that have auto-reset capability. Version 2.0 of our ISP shield design fixes this, by adding the ability to temporarily disable auto-reset on the Arduino. Auto-reset override is an optional, jumper-selected feature that can be turned on and off.

(The other jumper shown above allows you to select whether or not the ISP shield provides 5V power over the ISP interface, a handy feature for programming chips on simple target boards.)

ISP Shield 2.0
The ISP Shield 2.0 is also our first printed circuit board to feature the OSHW logo— the first of many, we hope. :)

The ISP shield kit is available at Evil Mad Science, and complete documentation is available at the Evil Mad Science Wiki.

Solving an old surplus mystery

mystery

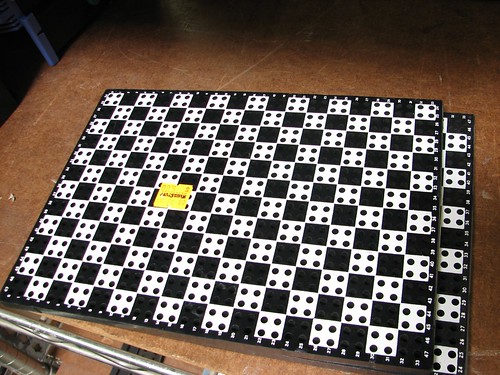
Several years ago, we came across this interesting artifactat one of our local electronics surplus shops, and couldn’t really make heads or tails of it. But after the passage of the aforementioned several years– along with several dozen interesting suggestions from our readers –we haven’t been able to get much closer to an answer.

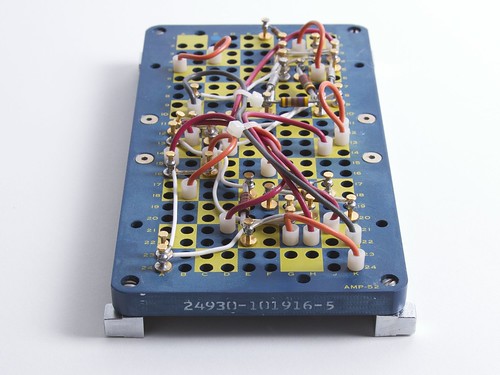
But then, at this month’s Electronics Flea Market, we came across what appears to bea related chunk of hardware:

Ampboard - 2
Continue reading Solving an old surplus mystery

Some gems from the 555 Contest

This spring, we’ve had the honor to help judge the 555 Contest organized by Jeri Ellsworth and Chris Gammell.

Now that the scores have been received from final-round celebrity judges Hans Camenzind and Forrest Mims, Jeri and Chris will be announcing the results of the contest live on uStream, today (Wednesday April 20) at 9 pm EST.

To help get you in the mood for the results, here are just a few of our favorites that you may not have seen, in no particular order– hopefully some of these will be amongst the winners!

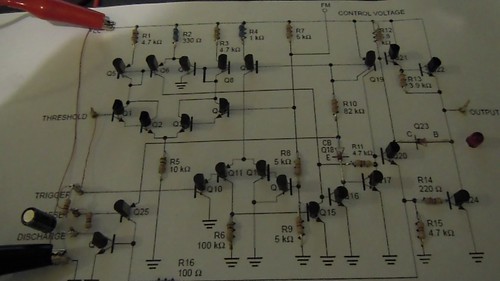
A beautiful working model of a 555 constructed of discrete components installed in the Encyclopedia of Integrated Circuits.

DSCN1232

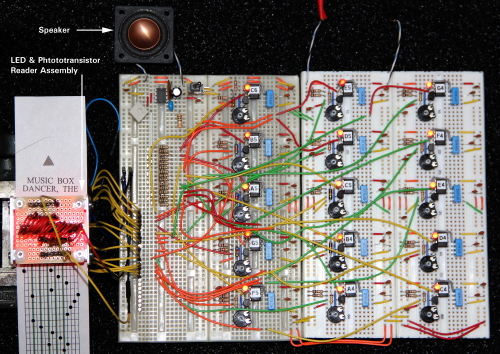
555 Timer based Music Box Player


LED Dominoes

Flashus Bulbus, an array of blinking bulbs

555 Adding Machine by Alan Yates

555 AM Radio by Eric Schlaepfer:


Rather brilliant 555-based POV display by Michael Noland, writes out “555” in space, using nothing but 555s:

This Atari Punk Sequencer just rocks; check out the video.


Pavel Hanak built the most pure 555 circuits that we’ve ever seen: Astable Multivibrators Built Solely From 555s. No external resistors or capacitors, just the internal resistance and capacitance of up to 20 additional 555s. (Clearly an insane genius!)

So that’s just a taste of all the awesomeness from this contest– we hope you’ll tune in
live on uStream, today (Wednesday April 20) at 9 pm EST to see the winners.

ISP Shield Kit

ISP Shield

The Evil Mad Science ISP Shield is a new open source hardware kit that we’re releasing today.

It lets you use your Arduino (or shield-compatible clone, such as the Diavolino) as an AVR ISP programmer, for example to burn bootloaders onto “raw” AVR chips, directly within the Arduino programming environment, either in the provided ZIF socket or on an external target board.

You can read more about this process here.

The circuit is designed to be compatible with the “Arduino as ISP” option in recent versions of the Arduino IDE. It is based on a number of prior hardware implementations, most closely the version by Andre Knoerig at Fritzing.

Complete documentation, including assembly instructions, design files, and basic usage information is available on the Evil Mad Science Wiki.

Geek Books!

Snip, Burn, Solder, Shred

We recently received review copies of four relatively new books from No Starch Press. Snip, Burn, Solder, Shred is a collection of technically oriented how-to projects covering a lot of the same ground that we cover in our projects here; sewing projects, music projects, electronics projects and others.

Lego Idea Book

The other three books are Lego Technic Idea Books: Fantastic Contraptions, Simple Machines, and Wheeled Wonders. And these are a phenomenal collection of assemblies and subassemblies providing the kind of masterful insight into Lego construction that comes from many years of careful study.
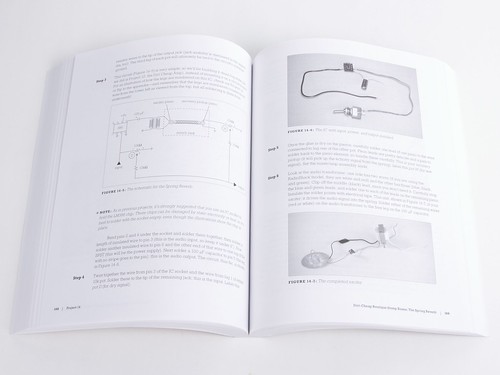
Snip, Burn, Solder, Shred

Snip, Burn, Solder, Shred by David Erik Nelson is largely descriptive, with diagrams and pictures sprinkled throughout. It covers an amazing range of activities and skills, including sewing, glueing, woodworking and soldering. There’s even a nice how to solder section.

Snip, Burn, Solder, Shred

Interestingly, none of the electronics projects requires programming. Shred refers to music, as many of the electronics projects are audio based. Many of the non-electronics projects are also musically inclined, but there is plenty for everyone in this book, from boomerangs to rockets.

Snip, Burn, Solder, Shred is a good introduction to making stuff, and is clearly oriented toward doing things with kids. It would be nice if it had full-color photography. Some of the projects have supplemental material which is worth checking out on the Snip Burn Solder Blog.

Lego Idea Book

The Lego books, by Yoshihito Isogawa are slim and nearly wordless. The main exposition happens in the table of contents, where the symbols that head each section are described.
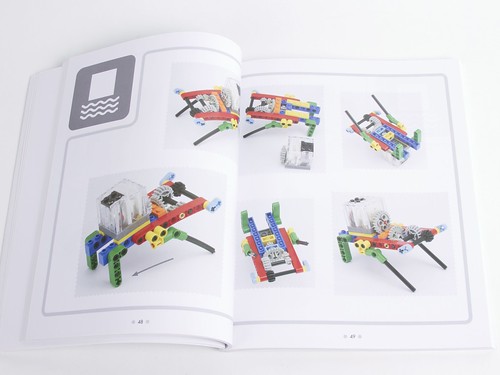
Lego Idea Book

The body of the books unfold with beautiful full-color photography. The contraptions are cleverly constructed of different colors to make the mechanisms and assembly clear.

Lego Idea Book

Many of the assemblies seem obvious in retrospect, but the thought that went into them is deep and clear.

Lego Idea Book

Not all of the assemblies are obvious at first glance, and many are quite complicated, like this gear reduction assembly that allows two speeds in addition to direct gearing. For anyone who loves Lego, prototypes in Lego, or loves mechanical assemblies, these books are definitely required viewing, and we’re not sure how we lived without them for so long.

(Full disclosure: we received these review copies from No Starch Press, and Evil Mad Science is mentioned favorably as a resource in Snip, Burn, Solder, Shred as a resource. That could have influenced our opinion. Also, we like Legos.)

AVR Basics: Reading (and writing) flash contents

Programming on a target board

From our forums comes this interesting question:

   “Is it possible to download the contents of an ATmega168/328, essentially backing it up so that it can somehow be restored later?

For example: Let’s say I have lost the source code to a very useful program currently residing on a 328, but I need to flash it with a different sketch temporarily, then restore that original sketch. This would be useful in the case that the chip was soldered directly onto a board – a big mess to try to replace.
Is this possible in some way, perhaps by altering an ISP programmer?”

The answer is that yes indeed, it is possible– with a couple of exceptions that are worth mentioning. And on occasion, it’s even very useful. Continue reading AVR Basics: Reading (and writing) flash contents

Fall Field Trips!

Tailgating for electronics guys

First up: the last Electronics Flea Market of the year is tomorrow, Saturday, October 9 in the morning at De Anza. We’ll be there, and if you’re anywhere near here, you should be, too!


RoboGames 2006

Coming up soon: Combots Cup V at the San Mateo Event Center on Saturday, October 23 and Sunday, October 24. Combots is the annual heavyweight robot combat championship.

“This event highlights the best combat robot teams in America and their 220 pound flame-throwing, blade-spinning, titanium shearing robots of destruction! Whether you’re a sports fan or techno geek, ComBots puts on the best robot events in the world! If you missed seeing fighting robots at Maker Faire this year, or are longing for RoboGames, here’s your chance to see them again.”

We’re thrilled to announce that ComBots is offering EMSL readers a 20% discount on ticket prices (adults normally $20, kids $15). Coupon is valid for advance ticket purchases until Oct 20th. Buy tickets here and use the coupon code EMSL-1337 for your discount when you check-out!

We’ll be there all day on Saturday, so come say hi!


Pumpkin?

That same weekend: East Bay Mini-Maker Faire is on Sunday, October 24 at the Park Day School in Oakland. We’ll be bringing our Egg-Bots and showing off a few of their Halloween related applications.

We hope to see you there!

Robogames 2006 photo by Scott Beale / Laughing Squid under cc-by-nc license.