
@revjaydub posted on twitter:
Added Q-Tip outriggers to our bristlebots for stability & fighting.


Eric wrote in to say:
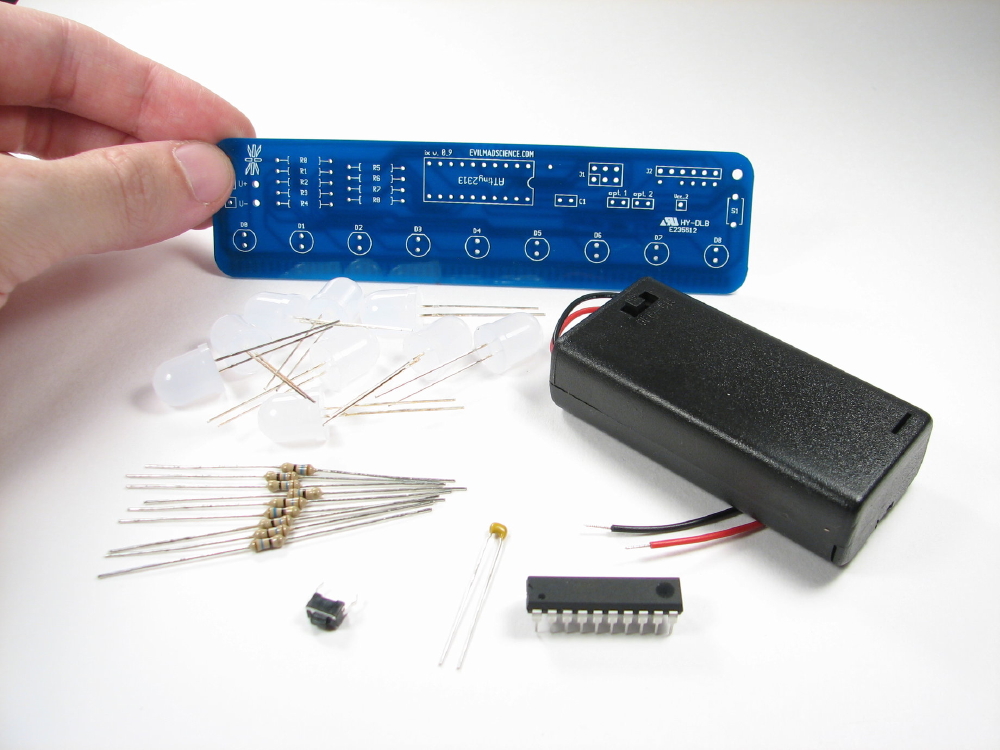
It was fun. It was fun to build the Larson Scanner. It was fun because I successfully put it together and it worked as designed. It was so fun I’ll do this again!
In the mid 70’s I attempted to construct a Radio Shack short wave radio kit with a soldering gun. That’s right, I used a soldering gun. Believe it or not, it worked … as a battery heater upper.
Thank you for the helpful instructions and well designed kit. It’s nice to know that 40 years after my last kit, I can drop the battery killer nickname.
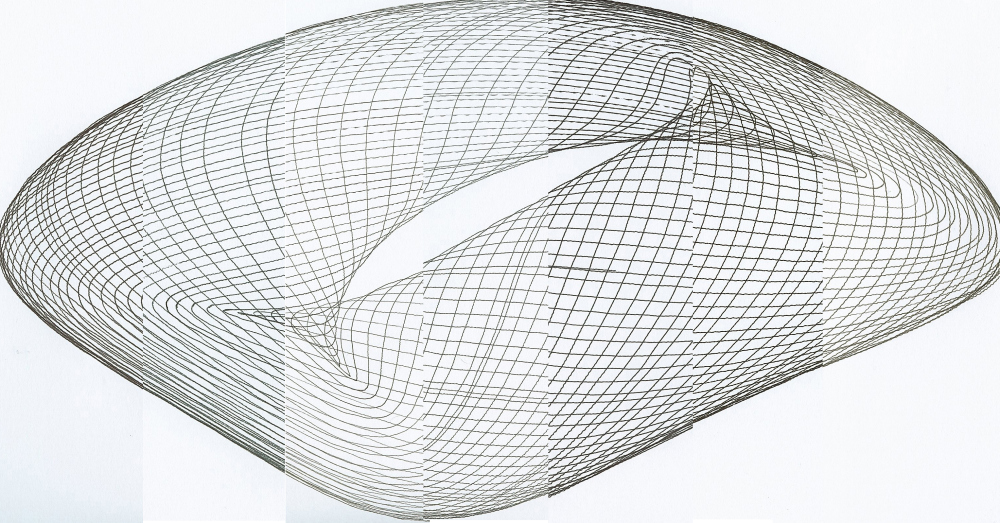
Jenslabs has published a thoughtful and thorough evaluation of a number of currently available rollerball and gel pens. He tested them using his Circlon machine.
One thing that anyone who as ever built a drawing machine realizes, is that to get quality results you need a quality pen. There are millions of pens out there, but after a little trial and error I realized that rollerball pens or pens with gel ink are the best pen types for my machine. Both rollerball and gel ink pens use a water based ink that is less viscous then the oil based ink used in ballpoint pens. The Circlon machine sometimes move very fast, so the pen has to be able to release enough ink to make solid lines even at high speed.

This is an excellent resource for folks with other drawing machines, such as Egg-Bots and WaterColorBots. We’ve linked to it from our page about choosing pens for the Egg-Bot as well.
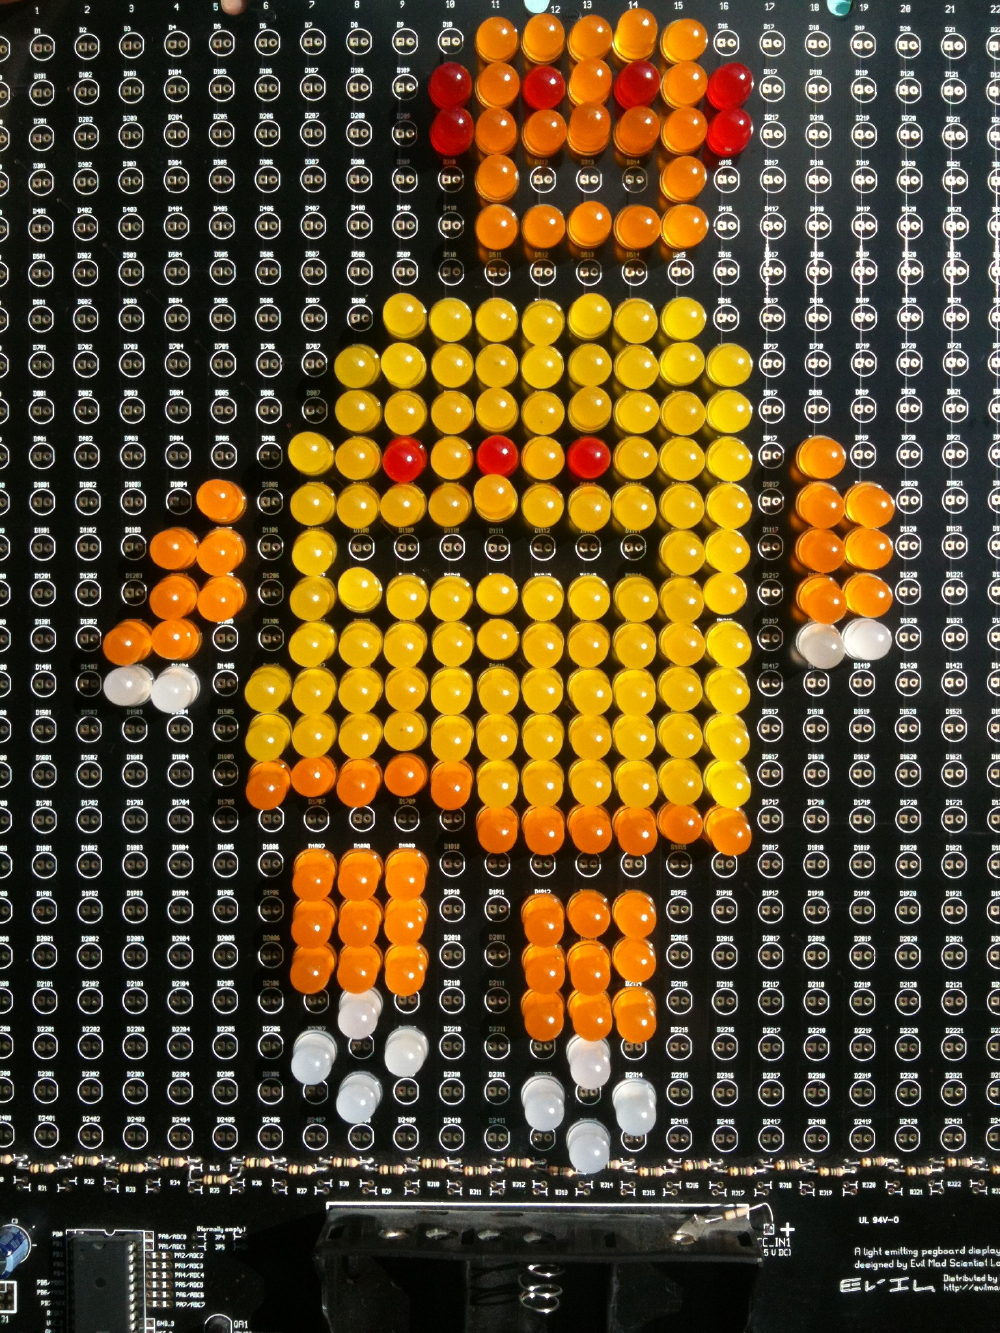
Krummrey shared an LED Robot Sign tutorial on Instructables using one of our original Peggy boards. (Peggy 2 would work for this, too.)

I don’t solder the LEDs in. That way I can just pull them back out and make a new sign when I get tired of the current one.

That big pile of LEDs looks like so much fun! He also posted some more sign designs at the end of the instructable.
Our friends at the Exploratorium Tinkering Studio are currently teaching a free online course, Tinkering Fundamentals: A Constructionist Approach to STEM Learning. The six-week course has already started, but you can still join.

After seeing our recent post on dyeing in eggs in place with the Eggbot, Ragnar posted instructions in the forums for an alternative egg dyeing technique.

It involves pre-installing a plastic dyeing bag at the time of positioning the egg in the Eggbot. Full instructions (with more photos) are in the forum post. Thank you for demonstrating this technique, Ragnar!
![]()
In honor of National Women in Engineering Day, the Make blog is profiling women in the maker community this week, including me!
…this week we’d like to bring you profiles on women who are roboticists, artists, designers, programmers, and makers of all kinds over the next few days, and we’ll be making an effort to make sure that the women in the maker movement get their fair share of the spotlight as we build our maker community in the future.

In our annoucement article about the EggBot Electro-Kistka — the hot wax dispenser for the EggBot — we noted that it can be challenging to reposition an egg after taking it out to dye the egg between wax layers.
As an alternative suggestion, reader Dan commented:
Could you leave the egg in the EggBot and paint on the first layer(s) of dye with a brush? Then dip the egg for the last layer to get the ends covered.
Well, let’s try and see how it turns out!

We just stumbled across a post from last year by WidgetNinja about using our post about CNC halftones to make Tie Fighter ASCII art using his CNC router. He used two-tone plastic mounted on plywood and carved it with a 60 degree v-carving bit. It looks great!
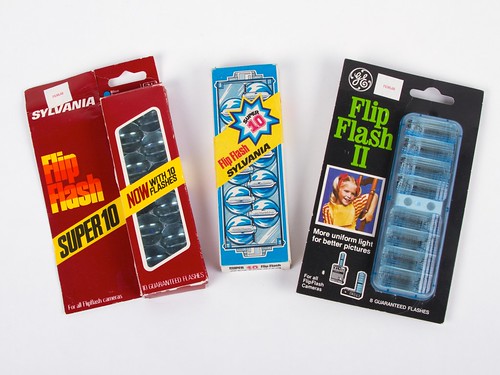
Once upon a time, cameras did not come with LED illumination or even xenon strobes, but rather with a socket that could fire a one-time-use flashbulb.
An advance from this was the “flip flash” cartridge which held 8 or 10 flash bulbs, ganged up so that you could take one photo after another, without pausing to swap bulbs. Each time that you took a picture (exposing actual film!), the next flashbulb in the cartridge would fire.
But you might ask a tricky question here: How does it know which bulb to fire next?
Continue reading Ingenious 1970’s Technology: The Flip Flash
