Category Archives: Engineering

Mystery components!

MysteryComponent1
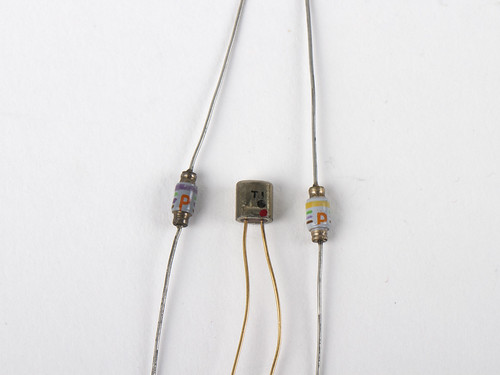
While picking out interesting vintage diodes at the electronics flea market, we came across a couple of components— possibly also diodes because of where we found them —of types that we have never seen before.  And we can’t resist a good mystery.


MysteryComponent4

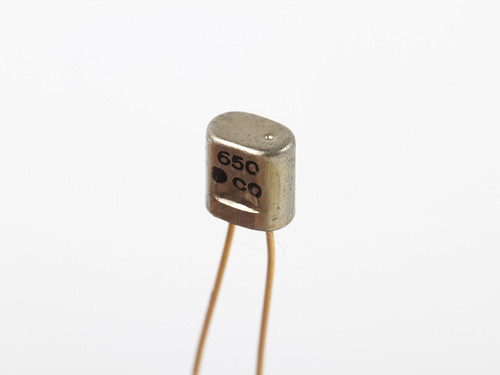
First, there’s this little two legged can, marked with 650, a black dot, and CO on one side. The other side (as you can see in the photo above this one), is marked T 1 and has black and red dots.


Secondly, a couple of things that look kind of like resistors:
MysteryComponent6

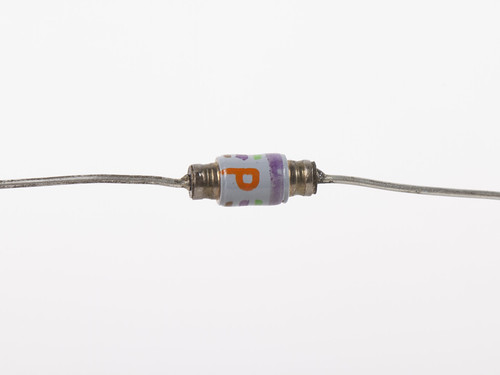
They are very small, only about the size of 1/4 W resistors.  They are marked with a red capitol letter “P” and a set of four colored stripes. The “P” marking interrupts the three narrower bands in both cases.

MysteryComponent8
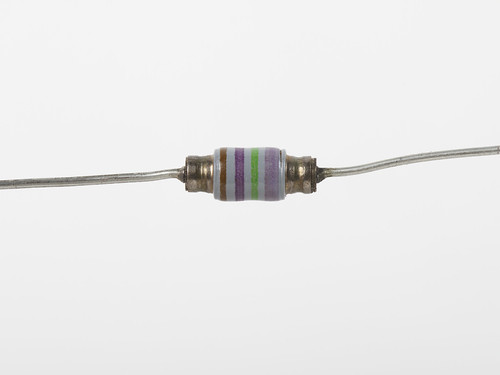
Here’s a good look at the color bands: brown, violet, green, and then a broad yellow.  (We could be reading this wrong; is the broad stripe supposed to be read first?)

MysteryComponent7
This one has brown, violet, green, and then broad violet.

So, what are they?  We don’t actually know, but if you do, or if you have a good guess, we’d love to hear it!

Evil Mad Scientist at Maker Camp

Maker Camp Banner

Maker Camp is a virtual DIY camp for teens created by the folks at Make Magazine and Google. It’s free and open to all on Google+. I am excited to be participating in Maker Camp this week as the guest camp counselor on Thursday, July 26.

Electric Origami

The activity I’ll be leading will be Electric Origami. Schedule, materials lists and how to join the camp are all on the Maker Camp site and Make’s Google+ page.

Maker Camp Banner

I’m looking forward to hanging out with the campers! I’ll be posting the direct link to the broadcast and hangout as soon as it is posted on Thursday.

Update: Introductory information has now been posted for the Make G+ hangout, which begins at 12 noon, PST.

Update 2: The stream is up, link is here!  And, there’s a youtube stream, too!

Interesting Diodes from the Electronics Flea Market

Diodes from the eFlea

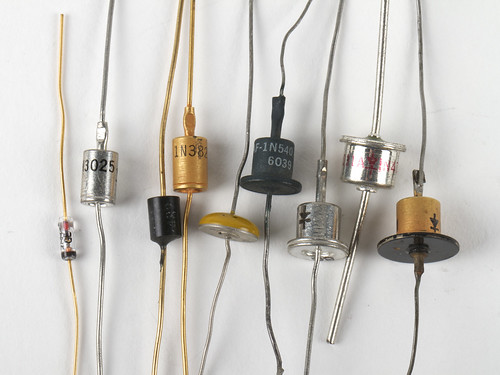
We have written before about the the Silicon Valley Electronics Flea Market, one of our favorite places to go treasure hunting. At this weekend’s flea, we came across a cache of beautiful old diodes, including some in rather unusual packages.

Continue reading Interesting Diodes from the Electronics Flea Market

CNC Art from StippleGen 2

Lasercut cardboard

These two real-world examples of CNC Art made using StippleGen 2 come from Bruce Shapiro, who created them at The Mill. Above, a stippled portrait of Einstein is laser cut into cardboard, using light stipples on a dark background. Below, a paper mask was applied to a piece of wood, v-carved with a CNC router, spray painted, and then the mask was removed. This time, a light background with dark stipples was used.

Wood: masked and painted

The same source image was used for both, although the image is mirrored for the wooden portrait.

It’s great to see some examples of what StippleGen can do out there in the real world. If you have any examples of your own to share, we’d love to see them in the Evil Mad Science Auxiliary pool on flickr.

Photos by Bruce Shapiro used with permission.

StippleGen 2

StippleGen 5

Two months ago, we introduced StippleGen, a program that can generate stipple diagrams and “TSP path” art from images, using Adrian Secord’s algorithm of weighted Voronoi stippling.  It’s a great (and free) tool for turning a photo into CNC-ready artwork, for use on the Eggbot or in other contexts.
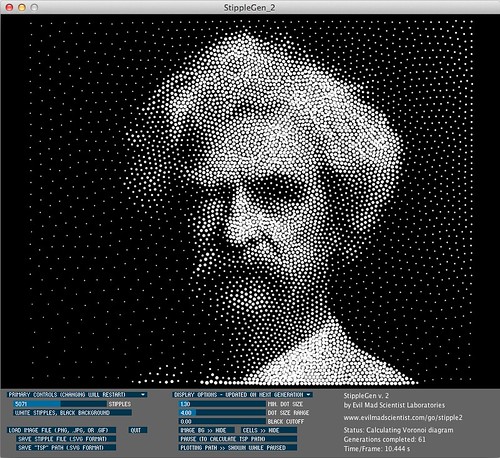
twain5kw-newframe

Today we’re announcing a new verison, StippleGen 2. As with the earlier version, StippleGen 2 is free and open source software, written in the Processing development environment. It comes ready to run on Mac, Windows, and Linux, and it is available for download now.

StippleGen 2 comes with three new features: A gently redesigned set of controls that makes life easier on tiny laptop screens, an inverse color scheme— as illustrated above —so that you can now calculate white stipples on a black background, and comprehensive documentation on our Wiki.

newgui

The controls in StippleGen 2 have been redesigned and streamlined. They are also overall a bit thinner so that the full screen (and all of the controls) can now be viewed on an 11″ MacBook Air, without reducing the size of the main display area.
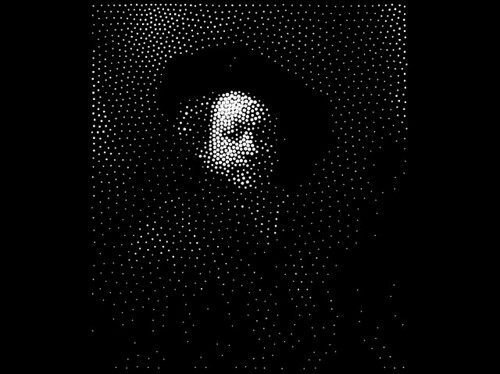
rembrant2kw

In the first version of StippleGen, the image was always computed with black dots on a white background. For most images that have a light-colored background, this is a good choice.  However, if you have an image with a dark background, you may find that nearly all of your stipples are used to just darken the backdrop, leaving less detail available in the foreground of the image.

StippleGen 2 gives you the option to draw with black stipples on a white background or white stipples on a black background. By using a dark background here, you may be able to recognize Rembrandt in just 2000 white stipples.

rembrant10kwhite

It does, of course, look better with a larger number of points.
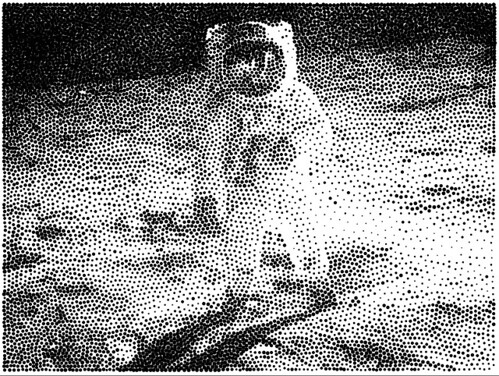
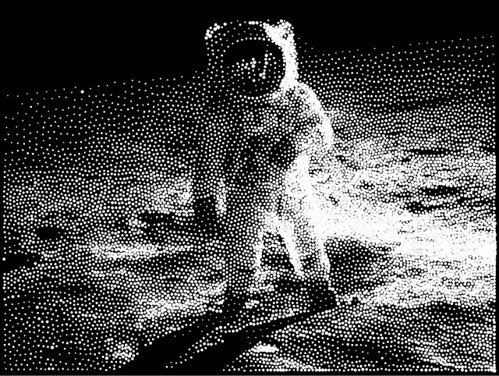
apollow10kblackapollow10kw-newframe3

For images with a lot of black and a lot of white, it can be hard to choose which is the better scheme.

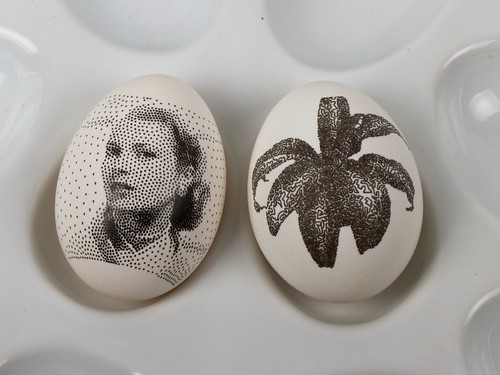
However, as this is tool to generate applied artwork, the choice is often made for you in advance.  If you are drawing with a black pen on a white egg, you’ll want black stipples.  On the other hand, if you’re carving into a black panel, white stipples might be the better choice.
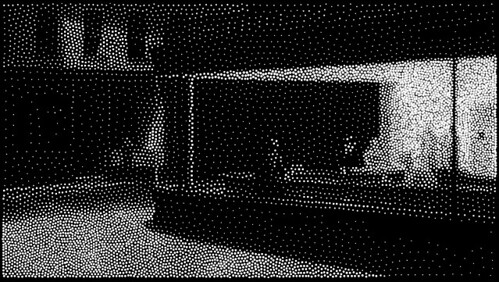
 

hopper7600w
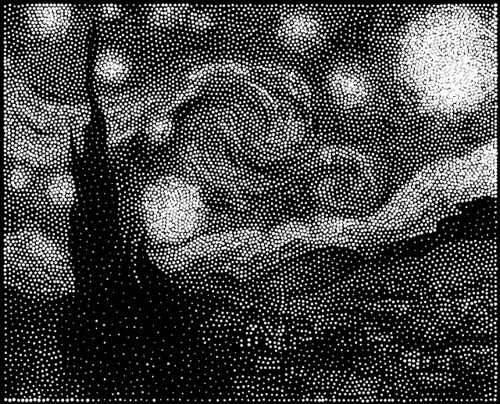
starry10kw

And here are a couple of other “test images” that we’ve been running in the new color scheme.

plant10k_vor

And finally, we have written up comprehensive documentation for StippleGen 2, hosted on the Evil Mad Science Wiki.

StippleGen 2 is free and open source software, now available for download here.
Go try it out for yourself!

Robot Party & Trivia!

Robot Party @ Evil Mad Science

The ROBOT PARTY is Thursday (today!) at 8PM ET / 5PM PT! In addition to everyone showing off their robots, we will be doing some trivia tonight! Also giving away a couple of Evil Mad Science prizes: a Diavolino and a Larson Scanner! Perfect for evil robot brains… :)

If you have a robot, join the hangout on Google+ HERE! Be sure to leave a comment on one of the posts so we can add you to our circles for the party.

Thanks to the new Google+ Hangouts on Air feature being available to everyone, if it works out we won’t be streaming to ustream as the viewers will be able to watch it live on Google+!

What is the Robot Party?
The Robot Party is a weekly Google+ hangout that brings together robot builders from all over to share their robots, knowledge, and ask questions! It is for all age ranges, young or old, just bring your robot!

Hope to see ya at the Robot Party! ;)

Robot Party Extravaganza!

Robot Party Lets Make Robots Seeedstudio Evil Mad Science

The ROBOT PARTY is tomorrow (Thursday) at 8PM ET / 5PM PT! This is a very special edition broadcasted LIVE from Evil Mad Science that is celebrating the fantastic website LetsMakeRobots and their recent version 4 fundraiser! If you donated to their v4 fund before May 1st, then you were entered into a drawing to win 5 fabulous prizes from seeedstudio!

But the fun doesn’t stop there! How are we to determine who will win these prizes? With a robot of course! Read on more!

Continue reading Robot Party Extravaganza!

Basics: Blink an LED with an AVR

AVR Blink Blog Post

Getting an AVR to blink might seem like an incredibly difficult task compared to the usual Arduino blink, but it really isn’t! In this post we will be uploading a basic blink example to an ATtiny2313. This is perfect for projects where using an Arduino would be over the top. So let’s get started!

Continue reading Basics: Blink an LED with an AVR