Category Archives: Engineering
Peggy goes wild
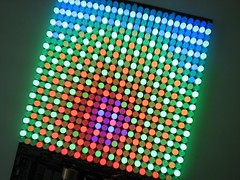
The Peggy 2 board is not small by PCB standards, but it was just not big enough for a couple of folks.
 MonsieurBon built a Giant LED Board based on the Peggy 2 circuit with a 30 x 30 display area. Here’s his photoset and video on YouTube.
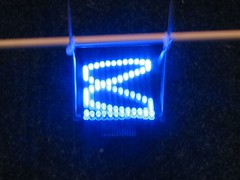
 Dave took his Peggy 2 and mounted his LEDs off board for his u:moon project. Here’s the project page and video and photos.
You can read about more Peggy 2 projects in our earlier story, The Peggy Strikes Back.
More Tennis for Two
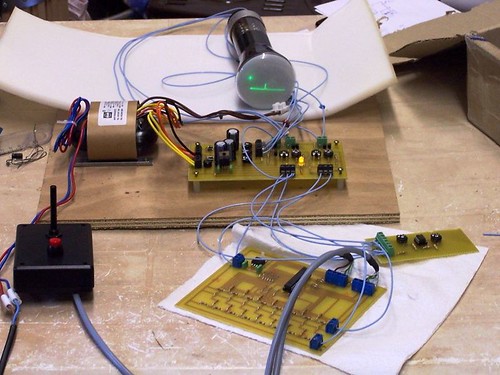
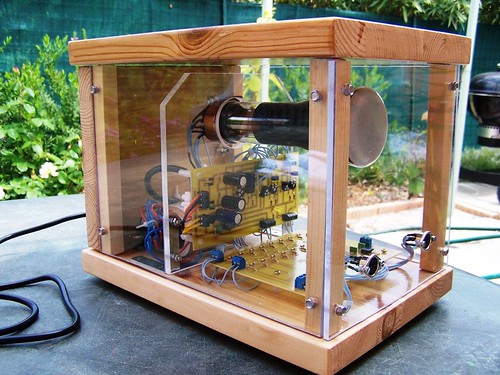
Romain saw our post on our Tennis for Two project and decided he wanted to make his own. He ordered a preprogrammed microcontroller from us and got to work. Once he was done, he was kind enough to share build photos and circuit diagrams with us.
Since he was starting with a bare CRT rather than a full scope, he built a wood and plexiglass enclosure which shows off the electronics very nicely.
We’re glad to see really retro gaming getting the attention it deserves!
TGIMBOEJ: One year later

One of the big projects that we launched in 2008 is The Great Internet Migratory Box Of Electronics Junk, a pay-it-forward style hardware sharing program for electronics.
Since our original article, TGIMBOEJ (pronounced Tig-Ihm-Boh-Edge) has somewhat taken on a life of its own. In that article, we set up simple guidelines for how to pass the box along, and in the interim we have taken a “laissez-faire” approach, watching and learning from the successes and troubles with that model.
Our mostly-hands-off approach to supervising TGIMBOEJ has worked remarkably well in some respects. There are upwards of 40 circulating boxes now, which have passed through hundreds of hands. And, hundreds of other people have signed up on our wiki site tgimboej.org as potential recipients.
On the down side, the mean free path of many of the boxes has been far too short– some have made it just one hop before stopping.
In talking to folks about the boxes that got stuck, we identified three main stories (all of which point us towards fairly obvious solutions):
1: “I sent it to some guy, but I haven’t heard anything since then.”
2: “Oh yeah– I’ve been meaning to ship it for some time.”
3: “I got this box and I don’t know what to do with it.”
So now, it’s time to get serious. First, we’ve been contacting the last known recipients of the stalled boxes, and trying to get more of the existing boxes back into circulation. Second, we’re relaunching the tgimboej.org wiki site with a wholly new set of participation instructions and procedures.
To keep boxes in circulation longer, we’re now encouraging that boxes should be sent to people who have specifically requested to participate— i.e., people who are familiar with how the project works. We’ve also introduced language in the revised instructions that will guide participants to keep an eye on their box, even after it leaves their hands.
To further alleviate the potential problem of people ending up with boxes but not knowing what to do with them, we’re standardizing the printed materials that go into each new box.
Gone are the cute but scrawled little notebooks, replaced by two neat PDF forms– one to log the progress of the box, and the other with detailed instructions on how to participate.
Finally, we’re launching eight new TGIMBOEJ boxes this week, which — along with the others that are coming back into circulation — will help to increase the number and rate of box exchanges.
So now it’s your turn. If you would enjoy trading electronics with like-minded individuals, this is becoming a great time to participate in The Great Internet Migratory Box Of Electronics Junk.
To get started, please read about how it works on the TGIMBOEJ wiki, and if you’re game, add your name to the list of Box Requests.
Meggy Jr RGB Twitter Reader
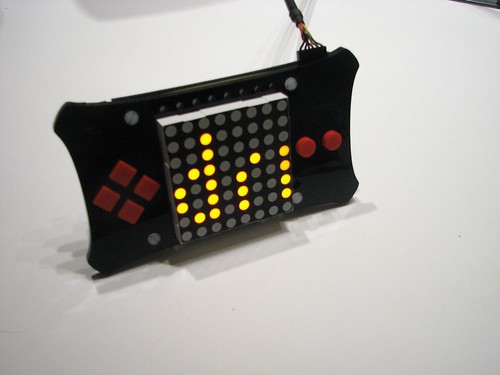
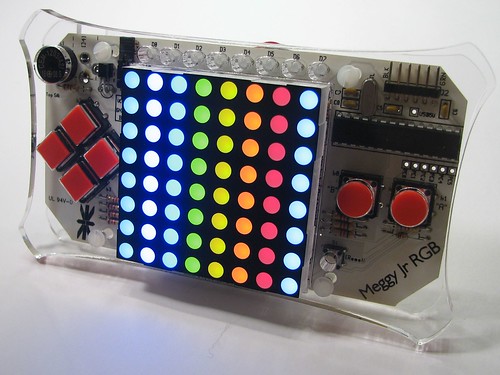
We’ve turned Meggy Jr RGB into a multicolor scrolling LED twitter reader. It’s a handy external ambient data device that displays things recently written by your friends on twitter.
This project was inspired in part by the excellent Twitter LED Scroller by David Nichols. The big idea is that we use a host computer to run a Processing application, which periodically checks Twitter for updates, and then sends “scrolling” data, one column at time, to the external LED display.
Continue reading Meggy Jr RGB Twitter Reader
Evil Mad Scientist Laboratories: Year 3
Happy birthday to us! Evil Mad Scientist Laboratories is now three years old.
To celebrate, we’re rounding up our most interesting projects from this past year.
Quick projects and observations:

The monetary density of things

Contact Lens Case Small Parts Tray
Simple LED Projects:

Quick, easy, temporary, and beautiful LED garden lights
Food Hacking:

South Indian Restaurant Menu Decoder

Improved Custom Message Hearts
CandyFab
Papercraft
Electronics Projects

Interactive LED Dining Table Circuit

Dark detecting jack-o’-lantern
Kit Projects
Crafty Projects
Microcontroller Projects

Tennis for Two, a video game from 1958

Scariest Jack-o’-Lantern of 2008
Geek Design
(Whew!)
Basics: Serial communication with AVR microcontrollers
One of the distinguishing characteristics of beginner-friendly microcontroller platforms– Arduino, PICAXE, and a few dozen others– is that they neatly wrap up and hide the nuts-and-bolts details of interfacing with the hardware.
Like everything else, it’s a blessing and a curse. The benefits are clear: A new user who has just acquired an Arduino can plug it in, blink an LED, and have a working demonstration of two-way serial communication in just a few minutes.
The drawbacks are a little harder to see. When you just use one line of initialization that calls a “library,” it’s easy to overlook exactly what’s involved: how many lines of code have invisibly been added to your program? What memory structures have been allocated? What interrupts are now going to disrupt program flow and timing? There’s also a portability issue. We often hear from people who got started with Arduino but now want to explore other AVR microcontroller systems, and don’t know how or where to start the migration process.
In what follows we discuss a minimal setup for serial communication with AVR microcontrollers, and give two example implementations, on an ATmega168 and on an ATtiny2313. While this fundamental “AVR 101” stuff, we’re approaching the problem (this time) from the migration standpoint. Suppose that you had an Arduino based project, where you relied on serial communication– using the library functions–between that hardware and your computer. From there, how would you migrate to a stand-alone AVR microcontroller with similar functionality, or even to a different microcontroller?
Continue reading Basics: Serial communication with AVR microcontrollers
Fabbing at Maker Faire
CandyFab managed to infiltrate a couple of the other 3D printing projects at Maker Faire this past weekend. That’s me above, at the MakerBot booth, in my brand-new MakerBot shirt, explaining MakerBot to some Maker Faire visitors. Below, Kenji’s Fab at Home sports a brand new CandyFab vinyl racing sticker. CandyFab itself performed like a champ, printing candy and raising blood sugar levels all weekend while we talked shop with all the other fabbers.
Tiny portable AVR projects: ATtiny2313 breakout boards

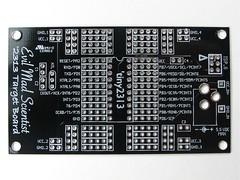
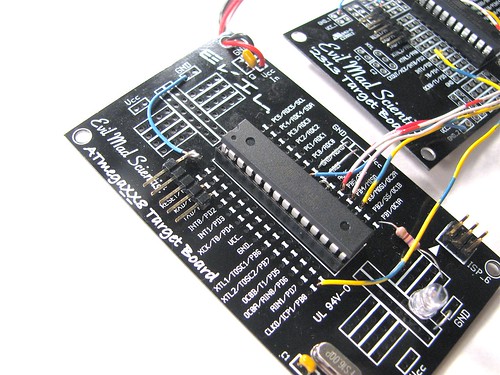
We use a lot of our ATmegaXX8 “business card” breakout boards for the ATmega168 microcontroller. We also still wire up a lot of minimal target boards to use the ATtiny2313 microcontroller, so here’s the missing piece: A simple breakout board for the ATtiny2313.
Continue reading Tiny portable AVR projects: ATtiny2313 breakout boards
The CandyFab 6000
Today we are relaunching the CandyFab Project with a new logo and a new wiki site, wiki.candyfab.org.
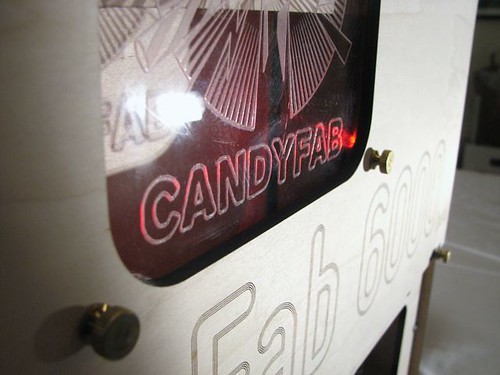
But more importantly, we are unveiling this new machine, the CandyFab 6000:
It’s a brand new CandyFab– still in beta. A clean break, designed from the ground up with almost no parts in common with the original, the CandyFab 4000. All new mechanics. All new electronics. All new software. Smaller but still big: the build volume is more than 10 liters, but it’s now small enough to fit on a desk top.
Here’s one of the first objects that we fabbed on the CandyFab 6000: a drilled sphere, about two inches in diameter and layer thickness of 1/15 inch. There’s plenty of room for improvement, and finally we have a machine that can be improved.
The machine is designed so that it can be made from scratch– i.e., without dumpster diving for old HP pen plotters. Three axes of quadrature-encoded DC servo motor control. Timing belts and acme lead screws. Food-safe sugar containment. The body is made from laser-cut plywood with acrylic highlights and stainless steel hardware. (Steampunk-compliant brass thumbscrews where appropriate, too.)
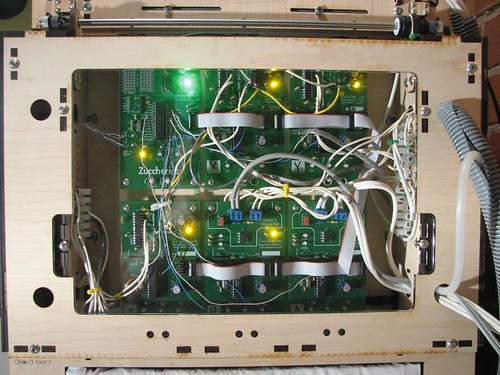
The new modular electronics control platform is called Zuccherino— that’s italian for “Sugar cube.” One Arduino-compatible circuit board per axis. (Our prototype above shows X,Y,Z, Heat, and Air axes, plus a master board.)
It’s an expandable system for all kinds of motion control projects, and we’ll be making kit versions of all of the Zuccherino boards later this summer.
We’ve also got new cross platform control software — called CandyFabulous underway, and it’s looking sweet.
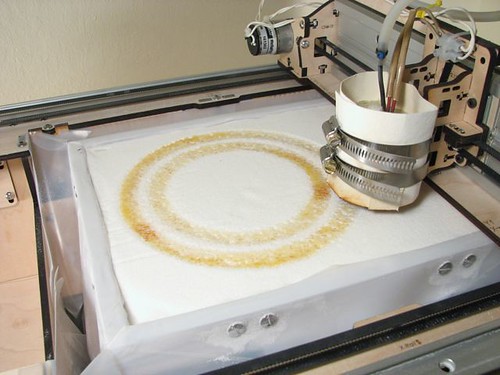
And… oh can it fab sugar. In the photo here we’re partway through printing an hollow torus eight inches in diameter.
Where from here? Check out more details at CandyFab Project.
Finally, you can see the CandyFab 6000 first hand– this weekend at Maker Faire! We’ll be showing it off at booth #293, in the Expo Hall.


