Category Archives: Engineering

Last minute Evil Mad Shopping and Projects

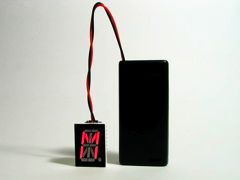
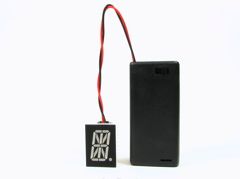
Lit up segments spell out the letter M   Segments visible

Time to make some LED Micro-Readerboards as ornaments for your tree this year? Watch the short video introduction to see what they do: display a message one character at a time.

This is one of the open-source holiday electronics projects that we released last year. Our up-to-date build instruction are here, including source code. We also have an FAQ about this project, a page of technical data about it, and a discussion forum if you need help with it. The version 2.0 kits (which are still available at the Make Store) use a seriously awesome ultra-high brightness, deep red 16-segment alphanumeric display for long battery life.

As of today, you can also buy the LED displays alone– just the thing for your own custom microcontroller project, alphapov display, name tag, or ornament.

[Product Page]

Jellybean versus the mechanical mouse
Next, the Interactive LED Panel Kits (as seen in the interactive LED coffee tables that we designed with Because We Can) now come with these beautiful black printed circuit boards. Pictured above, JellyBean combats a mechanical mouse on a table made with a special-order kit that has all green LEDs.

Quite a few of these tables have now been built and there’s even a new instructable from Deadly Computer about the process of building one. During the past month we’ve slowly caught up with the huge waiting list to get a kit, so it’s much easier to get one now. We have even made up some extras of the most popular kit combinations (8 panel with all blue LEDs or blue + white LEDs), which are available in stock to buy right now, shipped to arrive before Christmas to US addresses.

[Product Page]


bugStickers

Finally, we have some new multipurpose stickers for sale. Quite possibly the best gift in the world for the software developer in your life.

“These handy stickers will increase the visual appeal of many different items. If you happen to take them to any big box electronics stores, please bring your camera and post pictures in the Evil Mad Science Auxiliary.” We’re waiting for those action shots.

[Product Page]

A Simple and Cheap Dark-Detecting LED Circuit

Components   Complete

Stupidly bright.

Here’s a simple problem: “How do you make an LED turn on when it gets dark?” You might call it the “nightlight problem,” but the same sort of question comes up in a lot of familiar situations– emergency lights, street lights, silly computer keyboard backlights, and the list goes on.

Solutions? Lots. The time-honored tradition is to use a circuit with a CdS photoresistor, sometimes called a photocell or LDR, for “light-dependent resistor.” (Circuit Example 1, Example 2.) Photoresistors are reliable and cost about $1 each, but are going away because they contain cadmium, a toxic heavy metal whose use is increasingly regulated. There are many other solutions as well. Look here for some op-amp based photodetector circuits with LED output, and check out some of the tricks used in well-designed solar garden lights, which include gems like using the solar cell itself as the sensor. (Our own solar circuit collection is here.)

In this article we show how to build a very simple– perhaps even the simplest– darkness-activated LED circuit. To our LED and battery we add just three components, which cost less than thirty cents altogether (and much less if you buy in bulk). You can build it in less than five minutes or less (much less with practice).

What can you do with such an inexpensive light-controlled LED circuit? Almost anything really. But, one fun application is to make LED throwies that turn themselves off in the daytime to save power. Throwies normally can last up to two weeks. Adding a light-level switch like this can significantly extend their lifetime.

Continue reading A Simple and Cheap Dark-Detecting LED Circuit

LED Mini Menorahs:: Open source kits

Holiday motivation

All cynicism aside, one of the cool things about the holiday season is that it often provides a good excuse to play with lights.

Hanukkah in particular has been a festival of lights for more than a dozen centuries longer than there have been lights on Christmas trees. History notwithstanding, Hanukkah still lags behind Christmas in the transition from traditional light sources like candles towards microcontroller driven arrays of LEDs. While that may be simply due to the relative flammability of dry pine trees versus that of metal menorahs, the irony is that Hanukkah– unlike Christmas– actually requires observers to light up specific lights in a specific order, which is exactly the sort of thing that you want a microcontroller for.

Can’t find an open-source LED menorah at your local big box store? Not to worry!
Make one yourself from our instructions, which include source code for the AVR microcontroller (we use an ATtiny2313). Complete soldering kits to make your own– no programming needed– are also now available in quantity at our new web store.
(Note: While I cringe every time that I see Christmas displays up before Halloween, we aren’t actually too early in this case. Hanukkah starts on the evening of December 4th this year.)

Weekend Projects with Bre Pettis: Make a Joule Thief

Weekend Projects Podcast!
In this week’s Weekend Projects video podcast, Make Magazine’s Bre Pettis and I show you how to make a Joule Thief. The PDF file that goes with the podcast is here (450 kB PDF file).

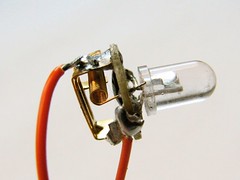
So whatsa Joule Thief? It’s a little wisp of a circuit that allows you to drive a blue or white LED from a low voltage. Normally, if you want to light up a blue or white LED you need to provide it with 3 – 3.5 V, like from a 3 V lithium coin cell. But a 1.5 V battery like a AA cell simply will not work. But using the Joule Thief, it works like a charm. Not only does it work with a brand new battery, but it works until the battery is nearly dead– down to 0.3 V. That’s well below the point where your other toys will tell you the battery is dead, so it can steal every last joule of energy from the battery (hence the name). To learn how to make one, watch the video, which is available in a variety of formats.

The original site where we learned about the Joule thief shows you how to make a miniature version of this circuit, such that you can fit it in a tiny flashlight. However, in the video we show you how to make it big, large enough (1) to make with clumsy hands and (2) that you can see what we’re doing.

After the jump, some detailed photos of how the coil is wound in case you need more detail than in the video.

Continue reading Weekend Projects with Bre Pettis: Make a Joule Thief

Make a Robotic Snap-O-Lantern!

Snapper - 02.jpg

Snapper - 06.jpg Snapper - 07.jpg Snapper - 09.jpg Snapper - 06.jpg

The Snap-O-Lantern is a robotic mini-pumpkin. Normally, it just sits there, in disguise as a boring old pumpkin. But, every twenty seconds he comes to life. His LED eyes turn on, his jaw slowly opens, and then SNAPS shut– and he goes back into stealth mode.

What’s inside? A small hobby servo motor, driven by an AVR microcontroller. This is a minimal microcontroller project, and is very straightforward if you happen to already have a setup for programming one. We’ll walk through the carving, setup, programming, and electronics. This is an open-source project, one of the world’s first “gpl-o-lanterns”; source code is provided.

Continue reading Make a Robotic Snap-O-Lantern!

MiniPOV Cylon firmware

MiniPOV3 Cylon   MiniPOV3 Cylon head-on

The MiniPOVs were created by AdaFruit Industries. They Rebelled. They Evolved.
And now, they may be invading your front porch.

It’s an open secret that here at evilmadscientist we go both ways: analog and digital.

So, here is yet another way to get a Cylon pumpkin circuit– a useful component for halloween. (Yes, you can do KITT too, we won’t stop you.) We’ll spare you the carved pumpkins and dive right into the details.

There seem to be a lot of MiniPOV kits out there. If you’ve got one, this is a fast way to make a passable slowly-scanning eye.

Note that we are not using the “POV” part of the MiniPOV– you don’t need to wave your pumpkin back and forth; it really is just a slowly-moving image.

(You can get a MiniPOV direct from Adafruit or from the Make store, probably in time for the big day.)

This is a one minute project for some of you (you know who you are), but if you are really starting from scratch there isn’t any giant time advantage to going doing it this way instead of analog.

Once you have a working minipov, the first step is to download the firmware (4 kB .ZIP file) and unzip it. If you are programming the MiniPOV3 directly through its serial port,
pop open a terminal and move to the directory. Type (with a return after each line):

make all

make program

And… that’s it.

(If you have a GUI for programming AVRs and know how to use it, you can of course use that instead of programming through the terminal.)

If you are using some other AVR programmer or are programming a bare ATtiny2313 without a MiniPOV at all, you will need to edit the header of the included makefile to reflect the type of AVR programmer and the port where it is located. (And then, proceed with the instructions above.)

While this makes a pretty good looking pumpkin, there is still room for improvement in the firmware– the motion is reasonably smooth but doesn’t yet capture the incandescent fade that the analog versions do. I’ll leave it to the community to improve this firmware; if you have some better code, let me know and I’ll help roll it in.

Update:
Tim Charron sent in a greatly improved version of this program– please give it a try.


You can find more pumpkin related projects in our Halloween Project Archive.

Halloween projects and Texas

This week the lab staff is heading off to Austin, Texas, our former stomping grounds and site of the other Maker Faire this year!

As we noted earlier, we’ll be doing a demonstration of how to build an excellent Bat Costume out of an umbrella and a hoodie. However, our primary project there will be our booth: High-Tech Pumpkins, where we will show up to a dozen (fingers crossed) halloween-themed projects, TSA willing. (Thank FSM it’s Austin, not Boston.)

While we get everything together this week, our publishing schedule will be a little wonky. However, halloween is just around the corner, so it’s time to dust off a few projects from our halloween archives!

Headless horseman   
How to hack LEDs into Lego minifigures for Halloween (Link)


FSM Costume - 01.jpg   
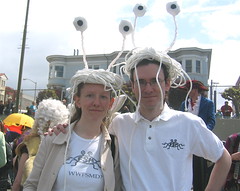
Make a Flying Spaghetti Monster Costume (Link)


   Croc Costume - 10.jpg
Crocodile Costume (Link)


Attaching long wires 2   
Easy Itty-Bitty Blinky LED Jack-O’-Lantern (Link)


Dalek Body-- under construction   
A Robotic Dalek Pumpkin (Link)


See also:

Time to Make a Cylon?

Make: HalloweenStarburst

Yay! We finally got our copy of the Make: Halloween Edition.

This special issue is actually available in two different covers, but we particularly like thisversion because of that little starburst: “Make an LED Jack-O’-Lantern!”

On page 60, you can find the article that we wrote about how to build the Larson Scanner (named after Glen A. Larson); a scanning eye for your old-school Cylon or KITT pumpkin projects.

Red Eye

The article is actually a slightly updated version of our project from last Halloween, Make A Cylon Jack-O-Lantern. Last year’s how-to is still online— and we have recently checked to make sure that all the parts on the parts list are still available.

Either way, let’s see those Cylons! If you build one, please post your pictures in the Evil Mad Science Auxiliary.

Interactive LED Coffee Tables: Update and kits!

PopSci_2007_10 Cool, our interactive LED coffee tables got a mention in the October issue of Popular Science!

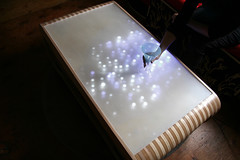
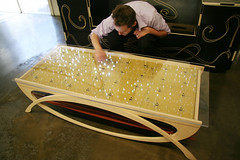
What’s an interactive LED coffee table? (Funny you should ask….) It’s a coffee table that has hundreds of LEDs in the top surface that respond to motion above the table. We have (finally) put together a movie to give you a better idea of how they respond to their environment. You can see the movie on YouTube or watch it embedded:

The complete tables are for sale from Because We Can, our partners in design on this project. There are presently two models, The Ripple (left) and The Wave (right):

the ripple   the wave

Since we first showed these off, we have had a lot of inquiries about how you can make your own table like this. We are now producing (very large) electronic soldering kits so that you indeed can make your own.

Our kits include the giant printed circuit boards, components, instructions, LEDs, and all other parts needed to build the electronic portion of the table tops. Constructed, you end up with what essentially amounts to a single extra-ginormous circuit board that can sit underneath the clear or frosted glass (or plastic) top of your own table. Interesting in getting a kit? Click here to read the details!

(Revised 11/16/2007).