Category Archives: Everything Else

Infra, a TV built from remote controls

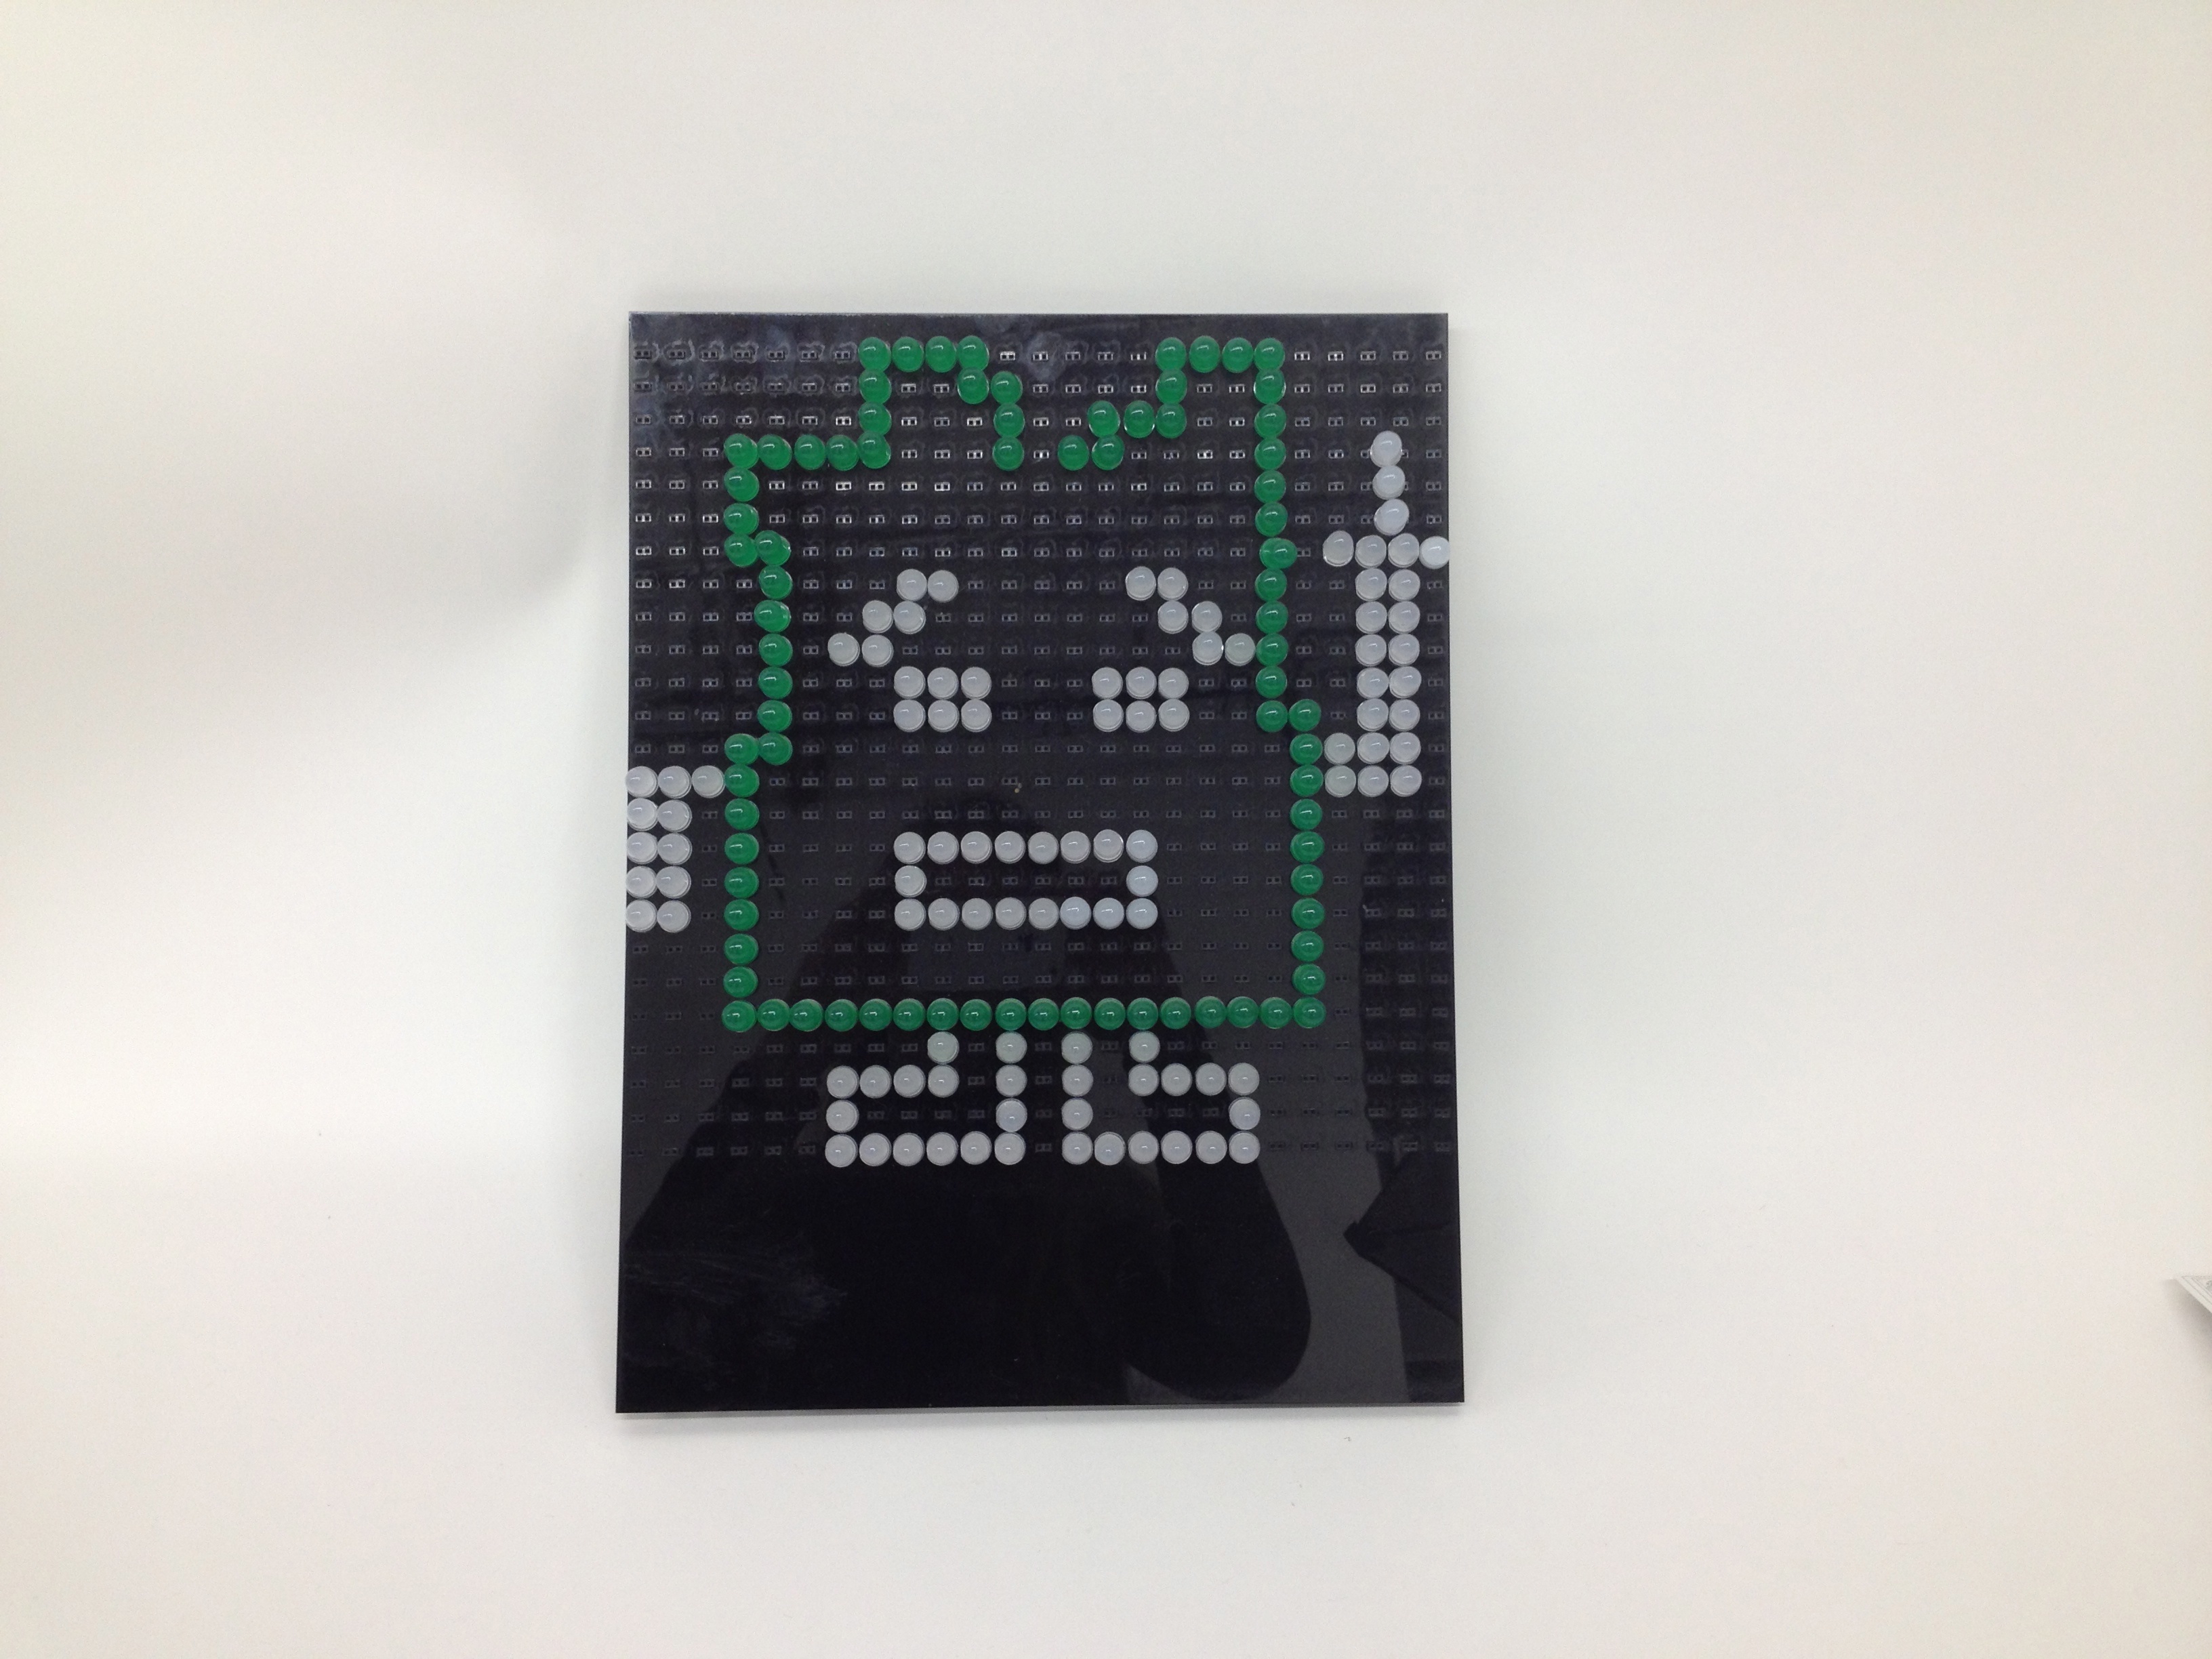
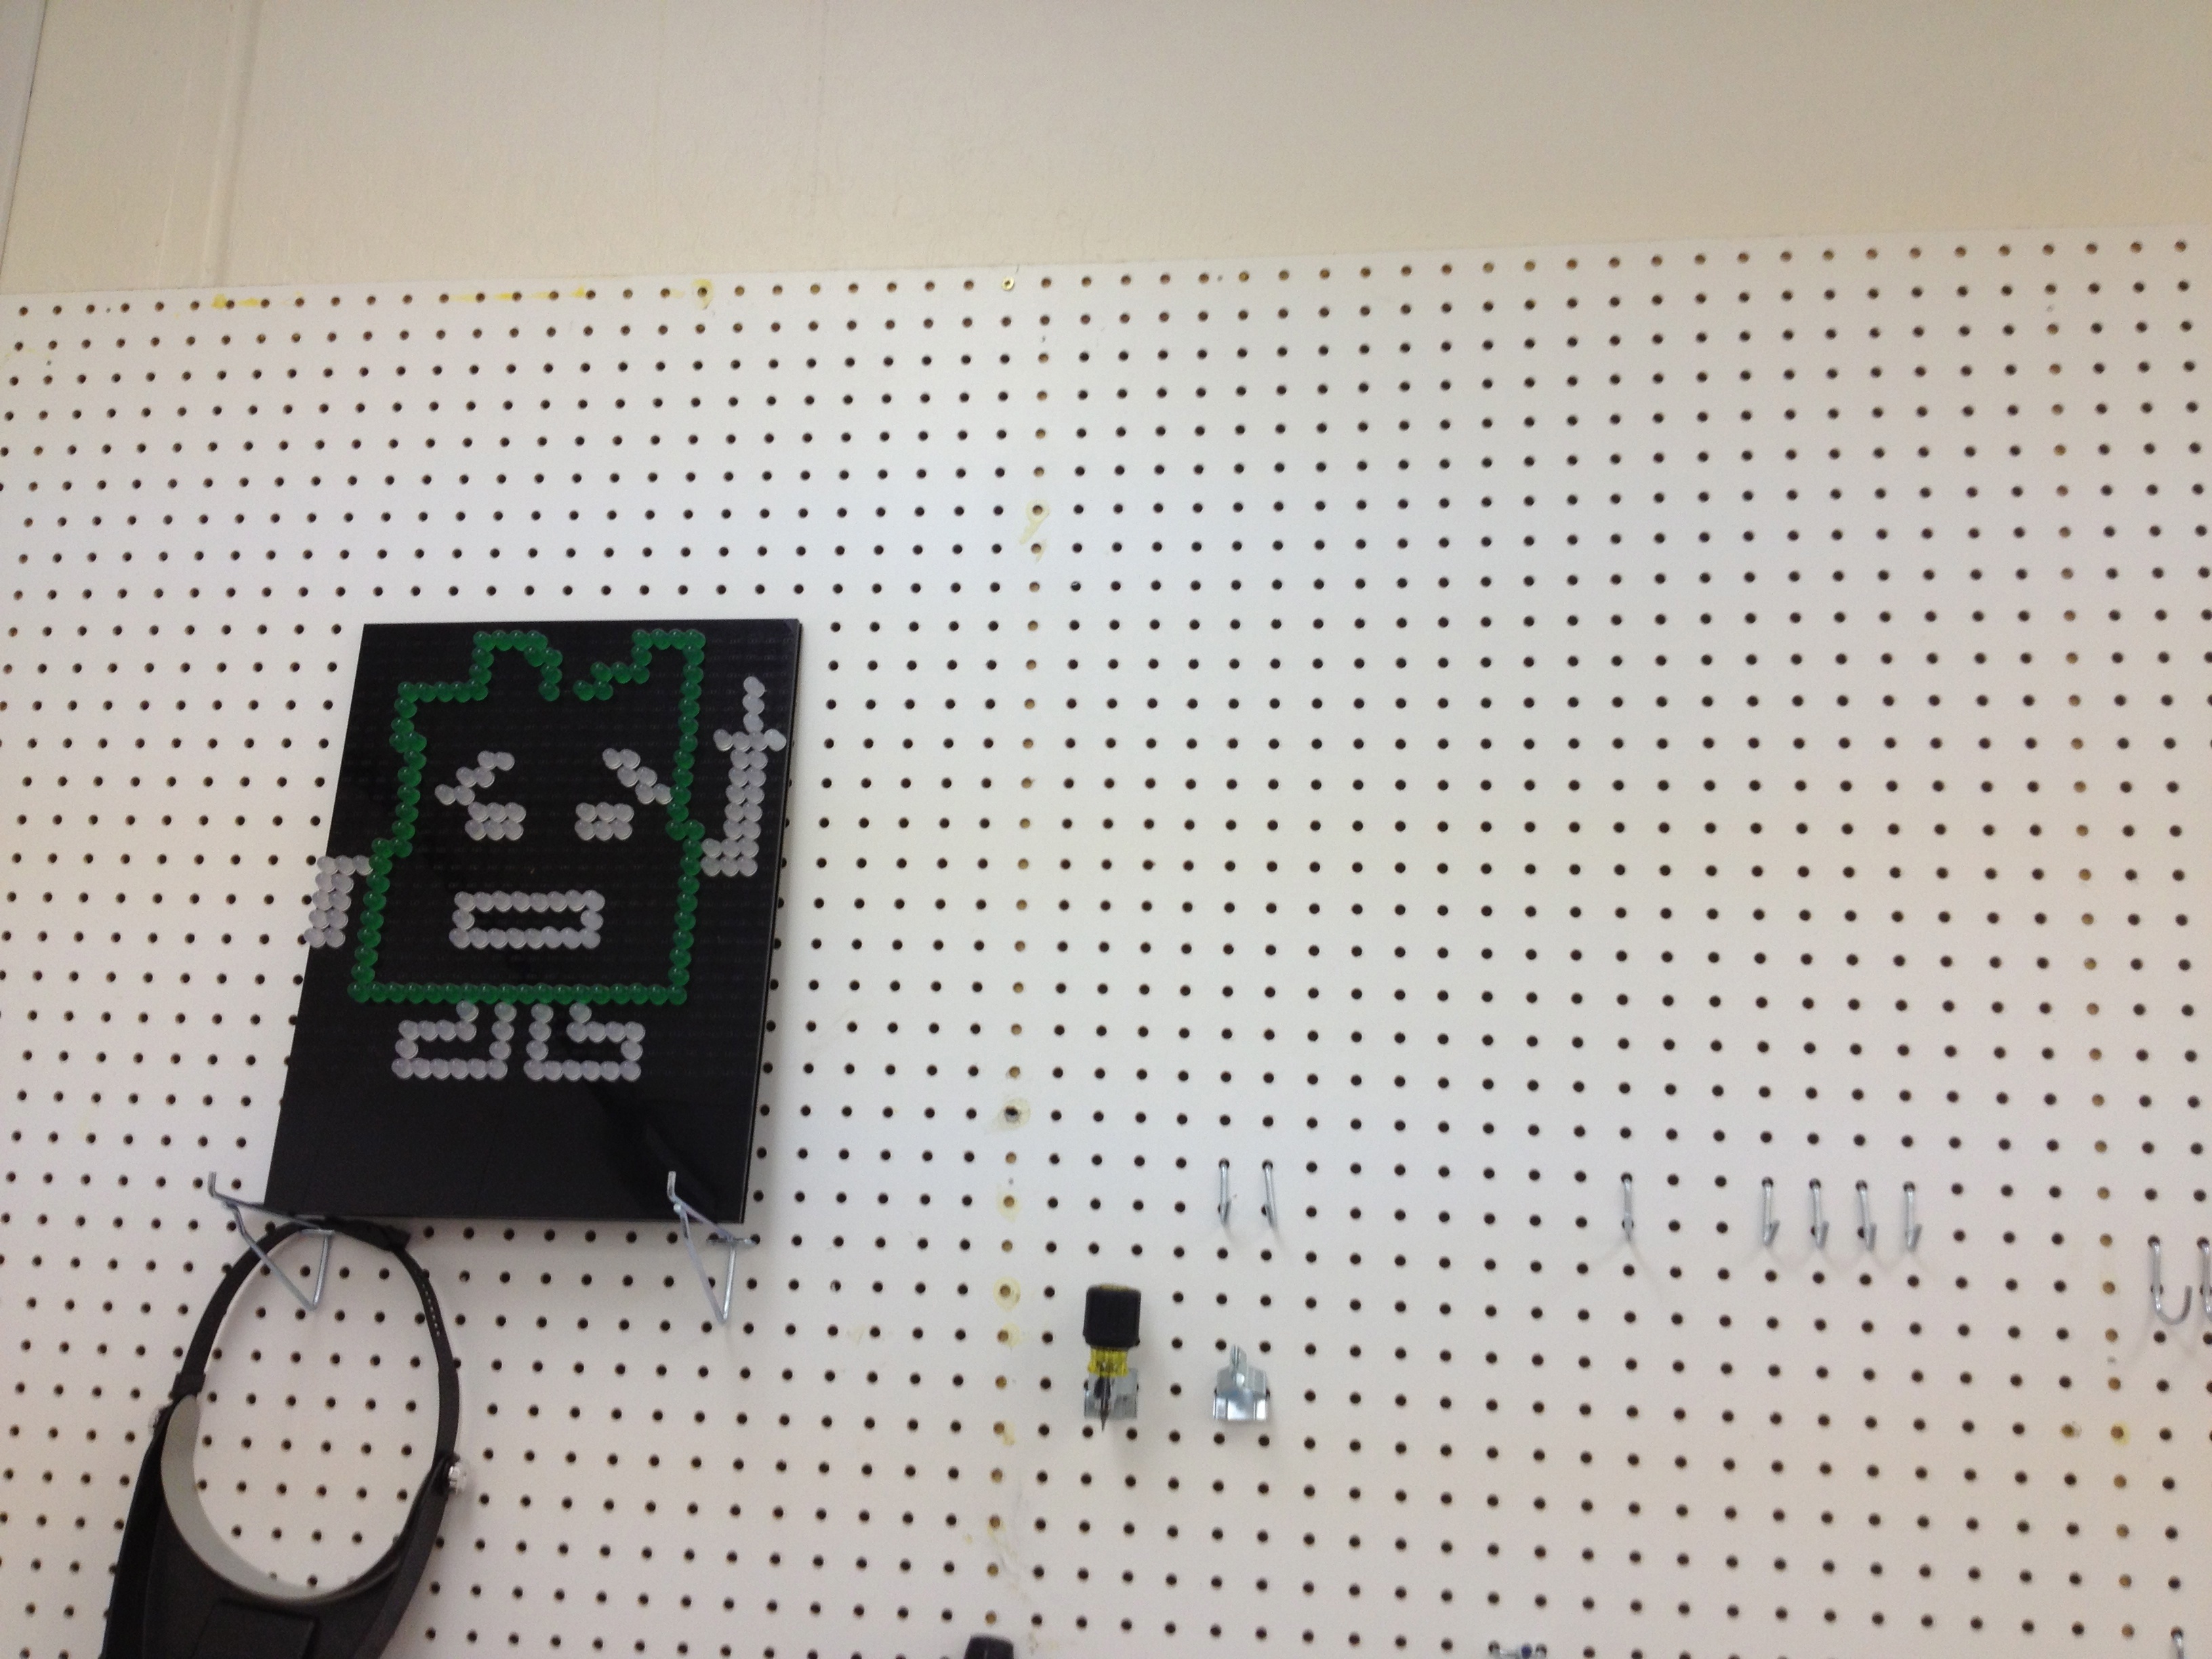
Chris Shen‘s first solo show just opened at 18 Hewett Street in London, and he shared with us about his piece, Infra, built using a Peggy 2:

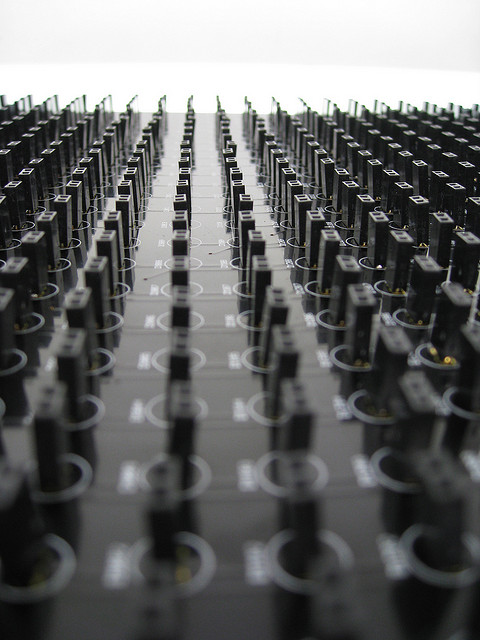
The idea was to build a infrared display out of old remote controls, using the existing infrared LEDs as pixels of a low-res display. 625 old remote controls are mounted in a metal frame connected by individual wires to a modified Peggy 2 that runs the whole installation.

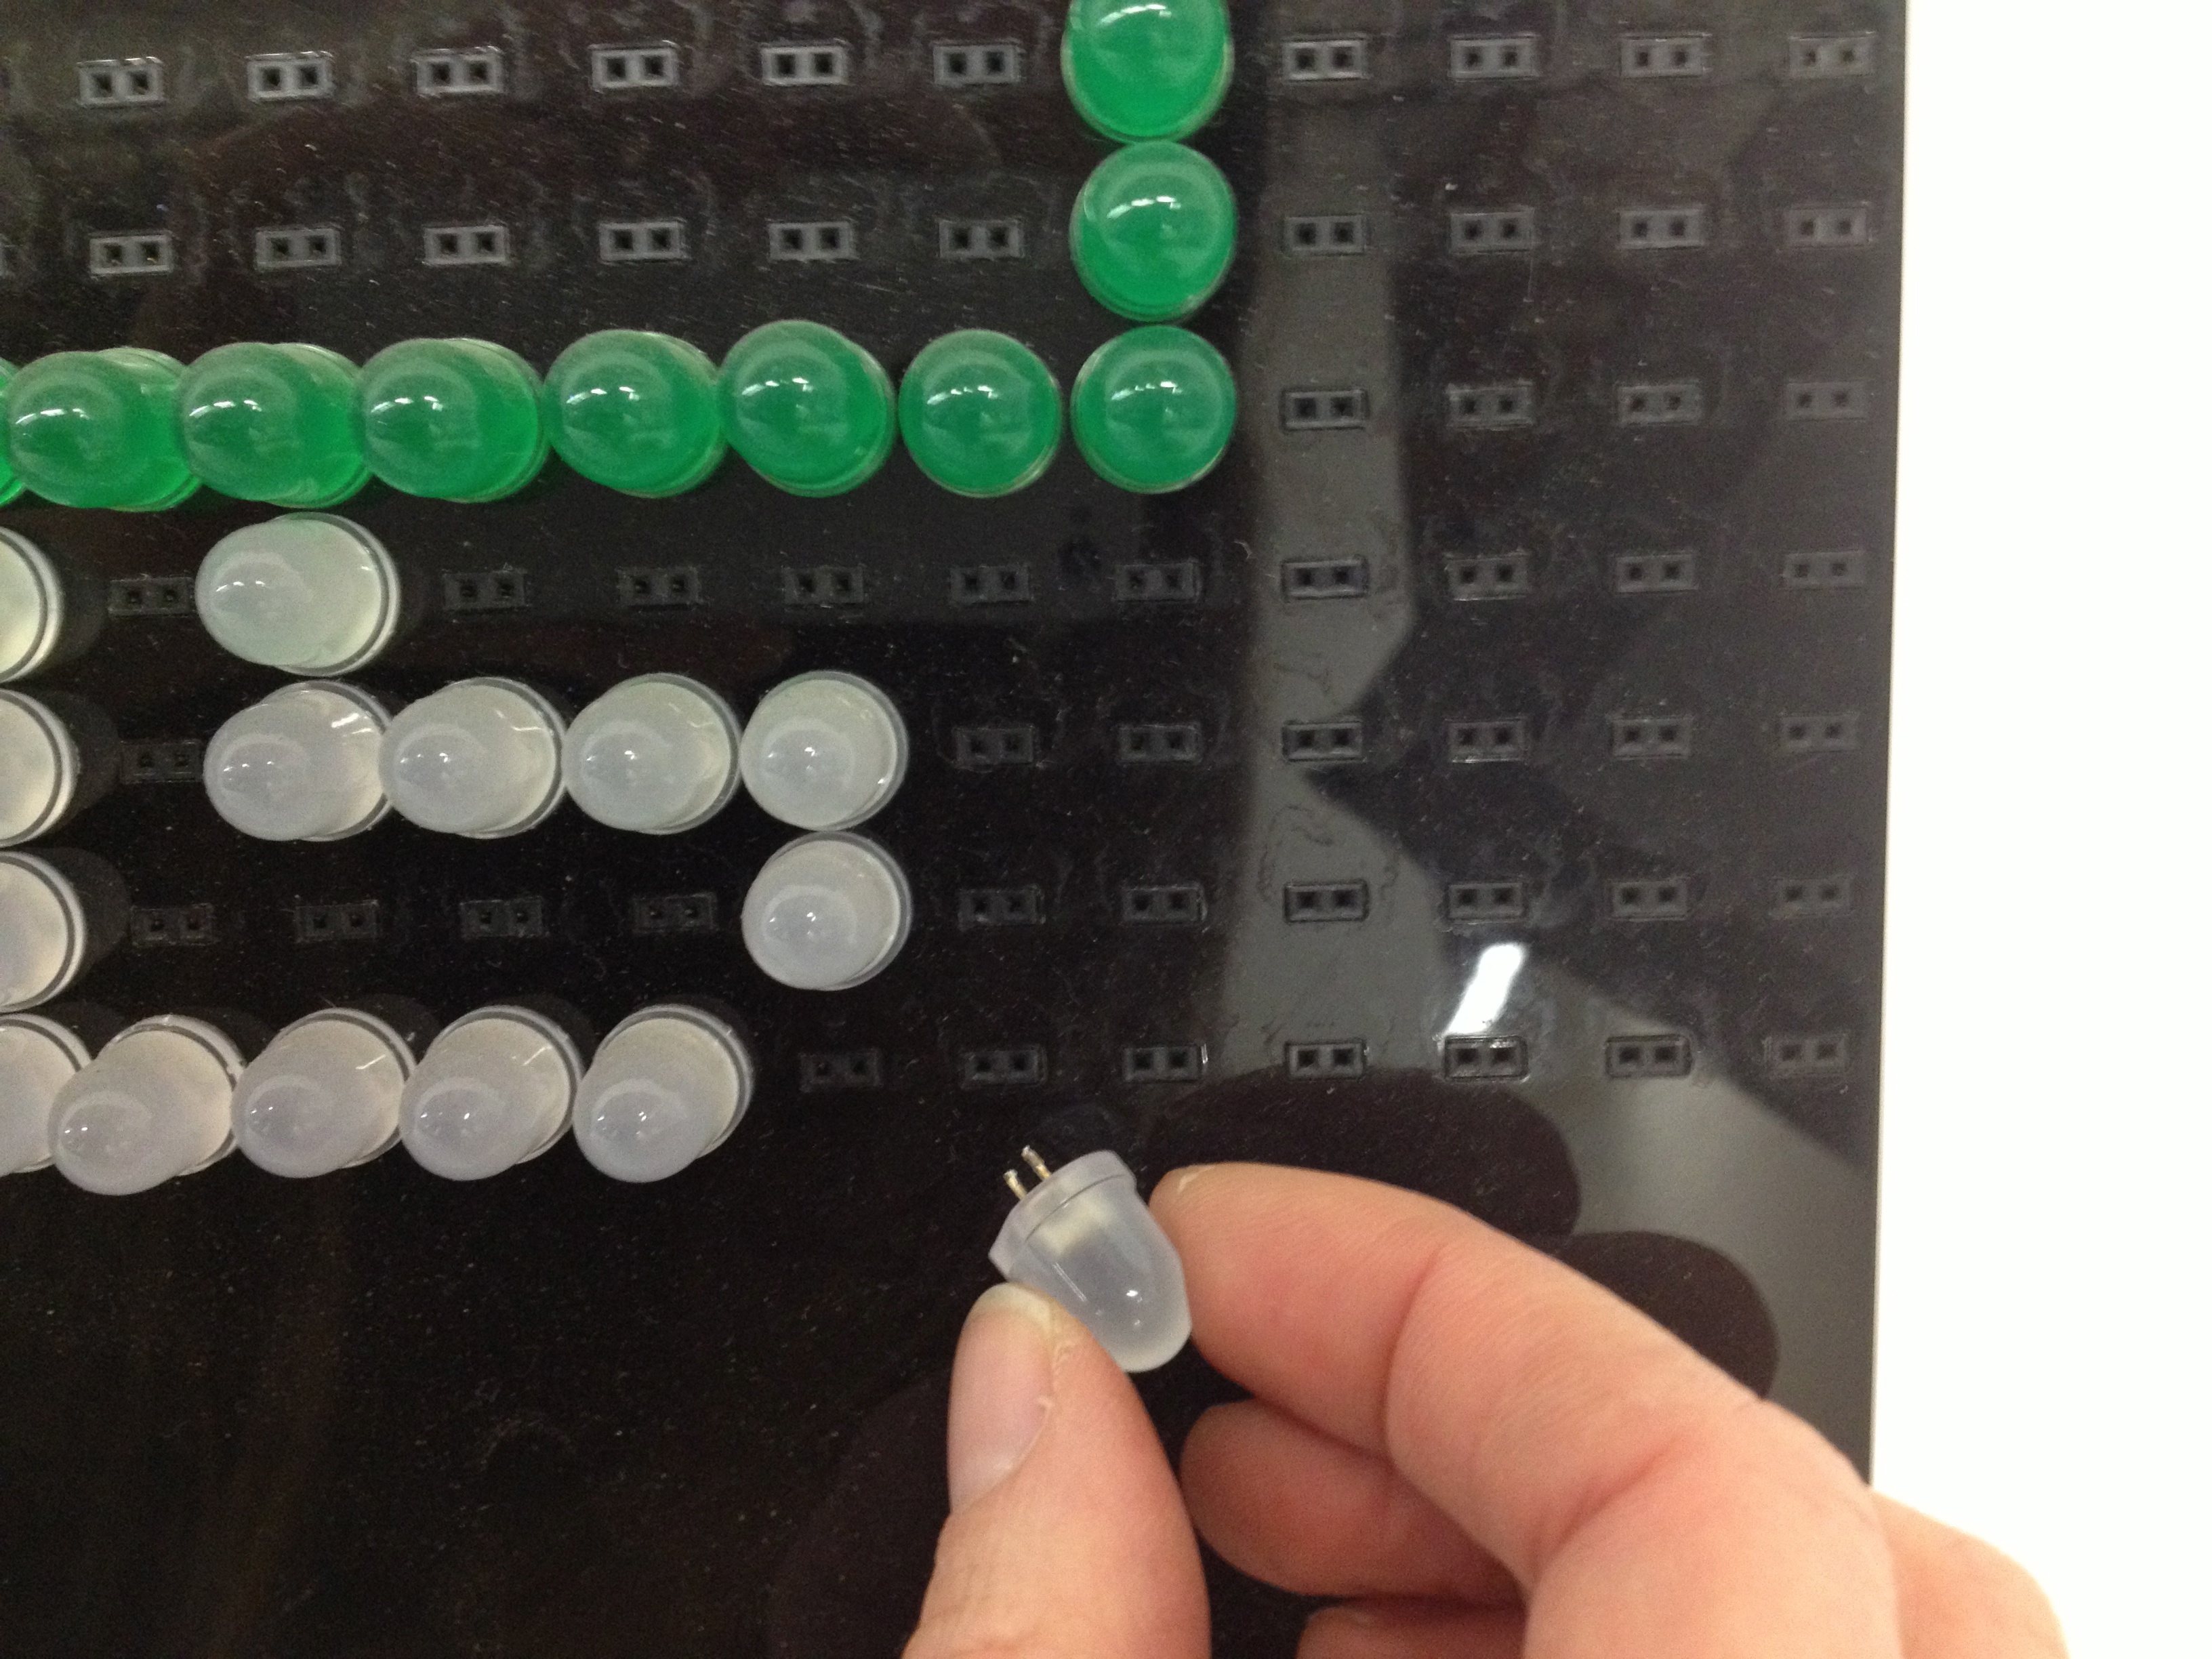
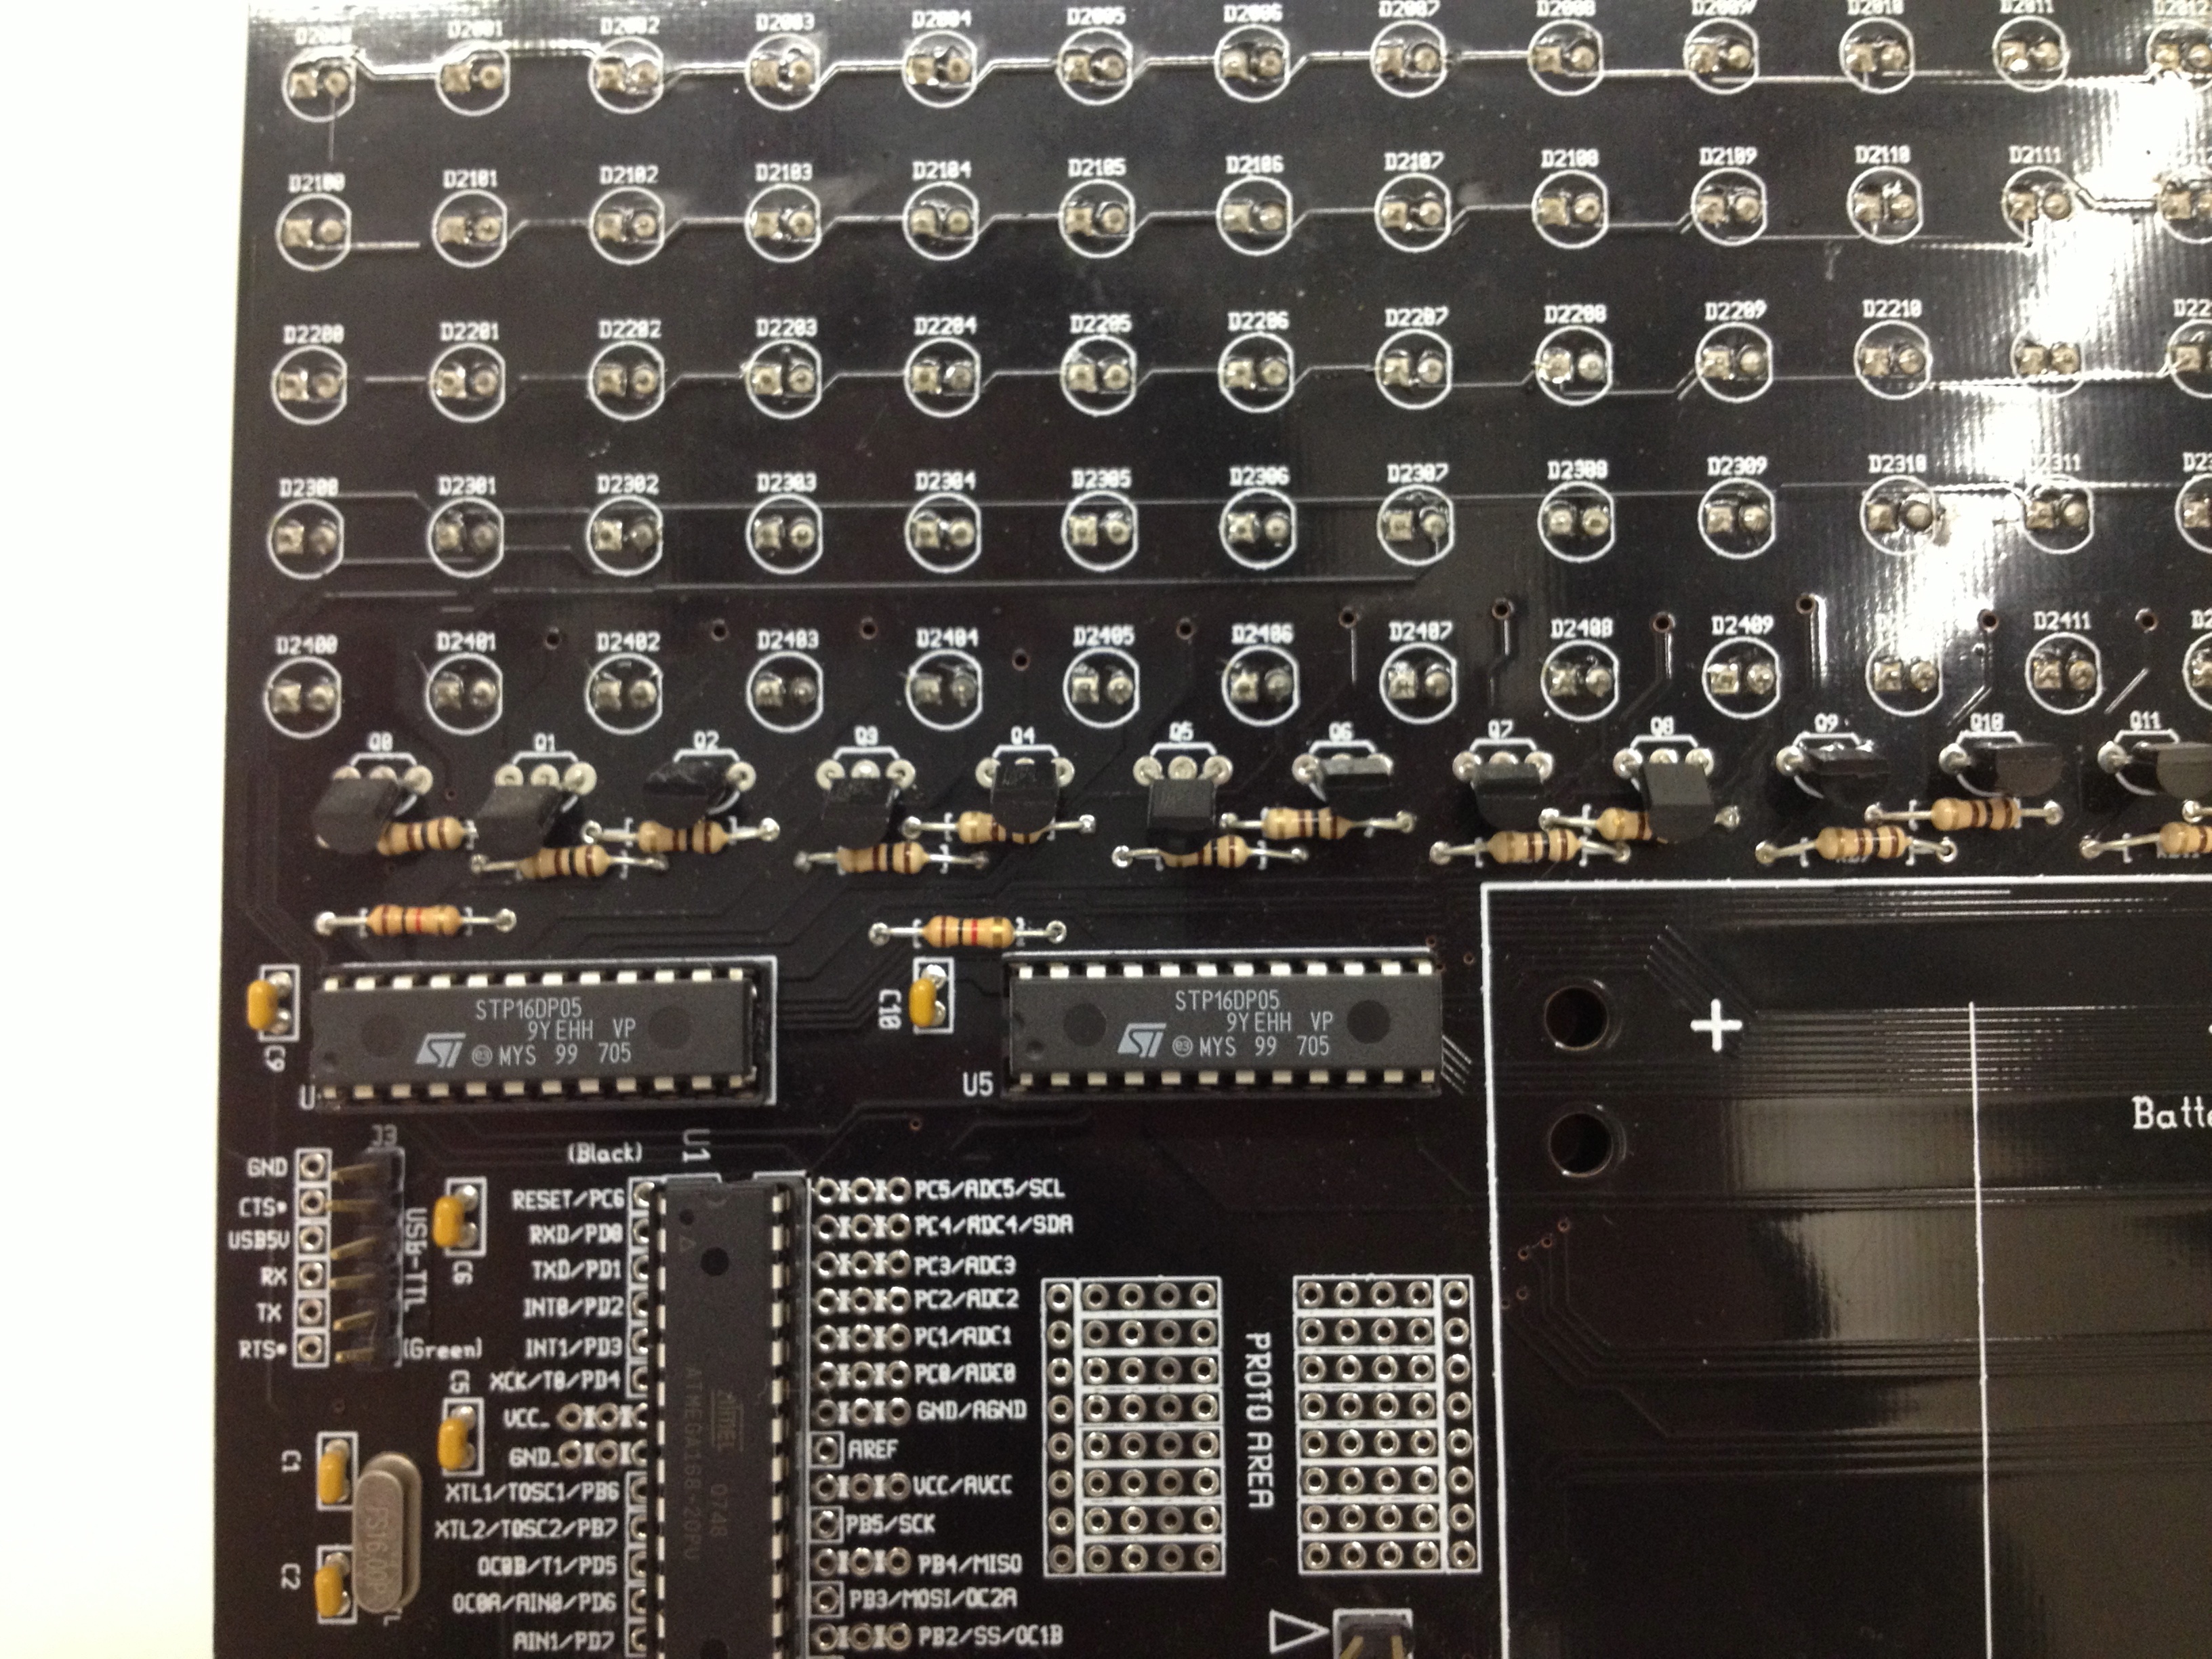
The main change to the Peggy was to solder molex headers instead of LEDs: this is to allow the wires to be easily plugged in and out of the board which is necessary when dismantling and reassembling the piece. Yes, all 625 remotes are numbered so they can be removed from the frame for transportation! The current and voltage was also adjusted fo IR LEDs as opposed to visible LEDs.

While researching, the main thing I was looking for was the ability to play video (live) on a low-res matrix. I looked into various ways of doing this but once I found the Peggy 2 kit it gave me confidence to go ahead with building Infra because of the open-source nature,  existing work done by Windell, and Jay Clegg’s video Peggy mod.

I connect all the remote controls via 500 meters of speaker wire to the Peggy, held into the frame by a simple looped elastic band. The circuit is mounted to a sheet of acrylic as the circuit bowed with all the wire attached. Each remote had to be opened to solder the wire directly to the LEDs legs. The wire is then routed out through the back of the remote and closed back up.

Preparing all 625 remote controls was the most time consuming part, each was different and often not very clean especially once you get inside. Although looking at all of the remotes individually revealed another side to the project which I’ve documented through a small run of books.

Thank you to Chris for sharing about how you made your piece with us. His exhibit will be up through February 3rd, 2013, so if you’re in London, go see it soon!

Art Controller Automatic Cat Feeder

Our friend Jonathan Foote, after a disappointing experience with a commercially available timed cat feeder, hooked up one of our Art Controller relay boards to an automated candy machine and posted about the project.

Jonathan says, “The resulting hack will reliably and elegantly deliver meals to my favorite pet.”

RoboGames Call for Entries Open

Last Rites and the Electric Boogaloo

RoboGames is now accepting registration for the 2013 competition which will be taking place on April 19-21 in San Mateo, California. Registration deadline is April 1. They’ve also put out a call for papers, demos and talks for the academic symposium with a submission deadline of March 16.

Another related— and very important —event to register for now is BarBot, which will be held in San Francisco on March 1-2. This cocktail robotics exhibition is an amazing amount of fun, and serves as a fundraiser for RoboGames. Registration ends on February 22 for BarBot entries, so it’s now time to get to work on your advanced fluid handling systems!

Robogames 2012-3

At RoboGames, robot builders are rockstars and heroes. It’s one of the few places in our society where engineering and technical ingenuity is exalted in a way that is usually reserved for sports and movie stars. It is open to anyone to participate, and the community of robot builders is incredibly welcoming. They provide huge amounts of information and advice to new and experienced robot builders. There are over 50 different events to compete in, so there is a robot type for everyone.  And it’s not just combat: There’s robot soccer and sumo, navigation and weightlifting, painting and climbing, firefighting and hockey, maze solving, and the all-important bartending event.

IMG_0798

If you have ever thought about building a robot, now is the time. Build your bot and bring it to RoboGames, and maybe soon you’ll be the one autographing robot parts for admiring fans!

Update 1/23/2013: BarBot tickets are now on sale!

Photo credits: Last Rites and the Electric Boogaloo by Annie Blumenberg (CC-BY-ND), Yellow art robot by Patrick Giblin (CC-BY-NC).

Help Bring PancakeBot to Bay Area Maker Faire

Pancakebot

Miguel, the great guy behind PancakeBot, a CNC pancake printer made out of Lego, is running an Indiegogo campaign to help bring the whole family all the way from Norway to the Bay Area Maker Faire. We met Miguel at the New York Maker Faire last year, and got a chance to see PancakeBot in action.

Even if you can’t support the campaign, you should check out the video to see the machine in action, cheered on by enthusiastic young pancake aficionados. And come to Maker Faire in May, where we’ll hope to see Miguel and family with the awesome PancakeBot.

Another wild Peggy 2 project: Heddatron Robot

The folks at Chibots helped the Sideshow Theatre with building the robots for their 2011 production of Heddatron that was part of the Steppenwolf Garage Rep series. For the character Billy Bot, they used a Peggy 2 as a chest display panel which could be controlled remotely along with the rest of the robot actions and behaviors during the performance.

Don from Chibots wrote:

I got to assemble it (625 LEDs!), and made some modifications to the control circuitry to accommodate needs of the remote controls.  The robots were controlled via X-Bee Pro radio transceivers coupled to BahBot MCU boards. Of course, the solidly-designed Peggy 2 worked perfectly out of the box.

The production won a Jeff Award in the Artistic Specialization category for Outstanding Achievement in Robot Design and Engineering.

Billy Bot was even called on to help with a surprise wedding proposal after one of the shows, and you can see him in action briefly in the video above.

Awesome robot work, Chibots!

Photos courtesy the Sideshow Theatre Company.

Peggy 2 with sockets

Untitled

Paul Gerhardt of Lockitron built this awesome Peggy 2 (our LED “pegboard” kit), where instead of directly soldering in all of the LEDs, they’re mounted in sockets so that they can be moved around easily.  Now, this isn’t the first time that we’ve seen a Peggy filled with sockets, but— thanks to Paul’s clever trick —it is the first time that we’ve seen it done well.

Usually, when someone fills a Peggy up with sockets, it ends up looking something like this:
IMG_0381.jpg

As you may be able to see, the usual problem with installing an array of sockets this large is that it is very difficult to keep the sockets aligned neatly. Corey Menscher made a socketed Peggy for an ITP project, and his photo above demonstrates the problem.

IMG_0401.jpg

Once you add the LEDs, small offsets in socket alignment translate into larger angle variation in the LEDs that are put into them.  We’ve usually gotten around this problem by soldering the LEDs directly into the holes, so that the LEDs are flush against the circuit board and stay level and aligned.

Untitled

Paul solved the problem by making a laser-cut acrylic overlay that fits around the sockets, holding each one squarely in position, and also providing a level surface to push the LEDs against, so that they all stay level and aligned.

Untitled

A second trick that he used is to solder all of the LED sockets into the back side of the PCB, so as to avoid any height interference with other components.  So instead of LEDs, the on the “front” side of the Peggy, you just see the tail ends of the sockets.  Then, the acrylic overlay can be just at the height of the sockets for the entire board, giving the whole thing a clean, sleek look.

Untitled

To add just one more layer of awesome, he’s hanging his Peggy on a pegboard.  (Now, we just need to route power up through the holes.)   Thanks, Paul, for sharing your clever hack.

Resistor Color Code Tattoo

resistor tat

Our good friend Jimmie P Rogers— of LoL Shield fame, amongst many of us who love Arduino and LEDs —has a brand new tattoo of the resistor color code: Black, Brown, Red, Orange, Yellow, Green, Blue, Violet, Gray, White.  I’m pretty sure that Jimmy himself has known this color code since he was in diapers, but now he has an always-present chart that he can use as a visual aid while teaching electronics.  And at five inches across, it doubles as a ruler (albeit one that will grow less accurate with age).

So, that’s pretty neat.  But two things bring this above and beyond the “usual” coolness of a geek tattoo.  First, Jimmie designed it in Processing, and second, as an open source tattoo, you can download the source code on his web site.

And for those of us who may be a little less committed: Our own favorite mnemonic for the resistor color code is “Black Beetles Running On Your Garden Bring Very Good Weather.”

Puzzle Kickstarter is a Puzzle

Roy Leban of Puzzazz, a puzzle company, is running a Kickstarter campaign for a puzzle a month for a year. The unique thing about this campaign is that it is itself a puzzle. The project video includes a whole bunch of clues related to interesting and geeky people like Theodore Gray, Nolan Bushnell, and (gasp) me! The Kickstarter puzzle is free to everyone, whether or not you’re backing the project. However, if you like the puzzle, you may want to help out the project to get the full year of puzzles!

Twitter controlled Eggbotted LED Ornaments

AJ Fisher posted an incredibly thorough write-up about his Twitter/Raspberry Pi/Arduino controlled LED lit Eggbot decorated Christmas tree ornaments. Each ornament would light up when twitter keywords represented by their icons were being used.

In the words of a friend of ours, “It makes me feel as though there are people all over the world celebrating with their family and friends just like we are, and you’ve brought them all into the room with us” – and if that’s not what doing this sort of technology is all about then I don’t know what is.

The article includes techniques he used, links to his code, source vector art, and so much more.

From the mailbag: Choosing a soldering iron

Iron

Michael wrote in with a great question:

I currently have a cheapo soldering iron from radio shack. It’s great for making speaker wire and stuff like that. I am concerned that dealing with these delicate boards if it is the right tool. Do you guys have a certain one that you might recommend? If I accidentally break a board I’d like it to be for something cooler than I used a bad soldering iron.

The iron that you use makes a big difference in how long it will take you to build a kit. Using an ultra-low-end soldering iron can make it take much longer to assemble a kit, and will make mistakes easier to make.

Our favorite soldering irons are made by Metcal, but they start at a few hundred dollars, so they aren’t practical for everyone. If you’re lucky enough to live near an electronics surplus shop, they sometimes have used medium-high end workhorses like our backup and travel soldering iron shown above. Replacement parts are available for these, and they last nearly forever.

For a relatively inexpensive, but still reliable soldering iron for electronics, we recommend the WLC100 by Weller, which is about $40 new. Whatever one you end up getting, we recommend one of this design— a “pencil shape” soldering iron (not gun!) with a reasonably fine point tip, and a base that holds the iron and a wet sponge.

Happy soldering!