Category Archives: Open Hardware

OSHW Talk at 2014 Bay Area Maker Faire

Maker Faire 2014
Wearing my OSHWA hat, I’ll be giving a talk about Open Source Hardware at this year’s Bay Area Maker Faire:

Best Practices for Open Source Hardware in 2014
In the past year OSHWA, the Open Source Hardware Association, has worked with the community to develop a modern list of best practices for designing, releasing and building upon existing open source hardware projects. Windell Oskay, Vice President of OSHWA, will discuss recommended approaches, touching upon open source design tools, documentation, hosting, licenses, and other current issues. Time permitting, we will also take questions from the audience.

The talk is scheduled for Saturday, May 17, 4:45-5:00 pm. You can find the rest of the center stage schedule for Maker Faire right here.

Simple Relay Shield v 2.0

relay shield

A minor bump for one of our little open source Arduino add-ons. The Simple Relay Shield is an easy to use single-relay board that does one thing, and does it well: It adds a beefy little mechanical relay to an Arduino, which you control through pin Digital 4.

relay shield

Version 2.0 adds the ability — by popular request — to control it from a pin other than D4. Solder the jumper in the normal way (in location JP), and it works on pin D4. Hook it up to any other digital pin, say to D7, and now you have a relay on that pin. The Simple Relay Shield is available as a complete soldering kit or as a bare PCB, and you can find documentation on our wiki.

Open Source Beehives

The Open Source Beehives project is currently running a crowdfunding campaign with the goal of gathering information from sensor equipped hives throughout the world to help solve bee population problems like colony collapse syndrome. The sensors can also be used by individual beekeepers to monitor the health of their hive.

Even without the sensors and the citizen science, their hive designs are beautiful.

Basics: AVR Target Boards and Arduino Compatibility

Diavolino
Gary writes:

I have fallen in love with your Diavolinos – thank you!
My question: does the “Simple target board” allow for the 6-pin FTDI Friend hookup to upload sketches? This is quick and easy with the Diavolino. I’m new to reading circuits and stuff, and I cannot tell looking at the target board. It says to use in-system programmer, but I prefer to not buy another interface. Thanks!

Excellent question! It is certainly possible, but not as quick and easy.  Both the Diavolino and our ATmegaXX8 target boards boards use the same chip, usually the ATmega328P.  But, one might say that our ATmegaXX8 board is a simple AVR target board optimized for use with an AVR ISP programmer (like the USBtinyISP), whereas the Diavolino is a simple target board optimized for use with the FTDI interface.

XX8 Target Board

Versus a “bare” target board (with just the chip and power), there are four things that you would normally add, in order to use the FTDI interface to upload a sketch from within the Arduino environment:

Continue reading Basics: AVR Target Boards and Arduino Compatibility

MakerBeam Comes of Age

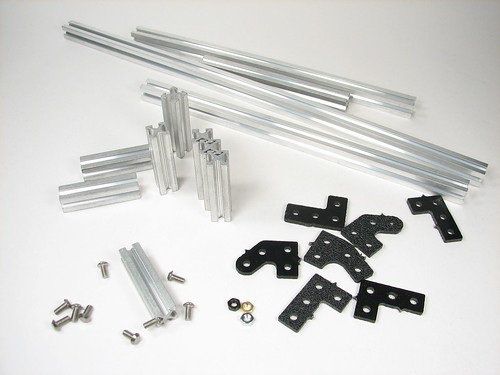
makerbeam pieces

Back in 2009, we helped support the launch on Kickstarter of MakerBeam, a miniature open source aluminum T-slot profile construction set. Just a few months later, we wrote about receiving our first batch of MakerBeam parts.  And while there were some good things that might be said about those first-batch parts, there were some not-so-good things as well. For example, custom screws that couldn’t really be tightened and fastening plates made of too-brittle plastic. With some improvement — stainless steel brackets — MakerBeam eventually found limited distribution in 2011 at Sparkfun in the USA and at MakerBeam.eu, but on the whole, it seemed to be fizzling out of existence.

But, things change, sometimes for the better.  In 2012, Terence Tam’s excellent OpenBeam (a slightly larger T-slot profile, also currently sold by MakerBeam.eu) came roaring out of the gate, reminding us of what great things one can build out of extrusion profiles.  Meanwhile, the folks from MakerBeam.eu took hold of MakerBeam and began to run with it — turning a languishing project into an open source hardware success story. They recently sent us a starter kit to review, and we have to say— we were blown away.
makerbeam 2014 20

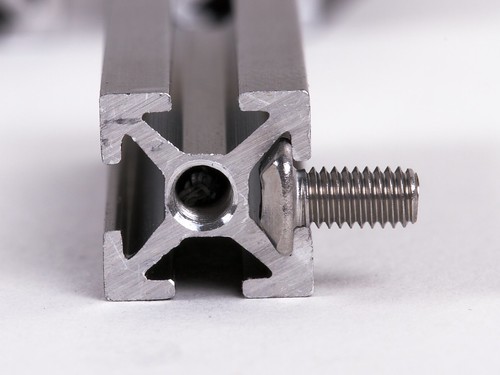
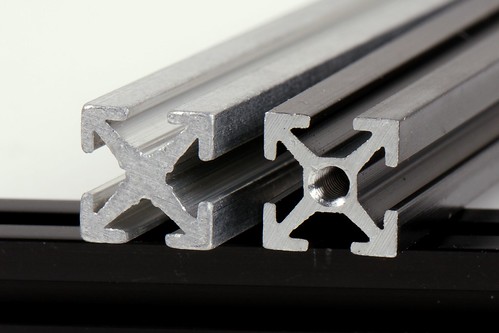
To begin with, they redesigned the profile itself.  The basic proportions are still the same (10 mm across), but the new shape has a thicker solid core that improves strength, and now allows the ends to be tapped. (The hole does not go all the way through.)  They also started having their profiles anodized, providing a harder outer surface, and tapping the ends.
makerbeam 2014 10 makerbeam 2014 11
makerbeam 2014 15 makerbeam 2014 16

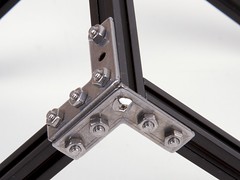
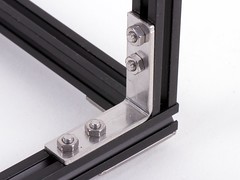
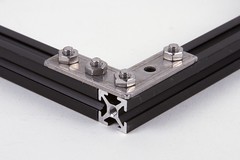
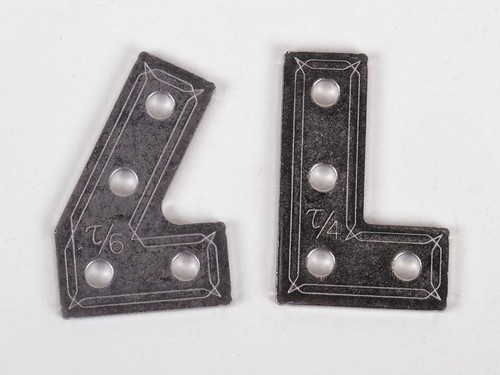
Next up: Nicely made stainless steel angle brackets and fastening plates.  Rock solid when bolted down, although (things being small) you may need to use several of them to get the kind of rigidity that you need for certain applications. We already had some of these shapes from the original MakerBeam makers.
makerbeam 2014 17

Silly: Some of the fastening plates (the ones designed by the original MakerBeam team) are inscribed with the angle in fractions of Tau, as in ?/4 instead of 90°.  Our guess: it’s certain to please many fewer people than it annoys.
 

makerbeam 2014 4
makerbeam 2014 5

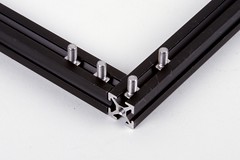
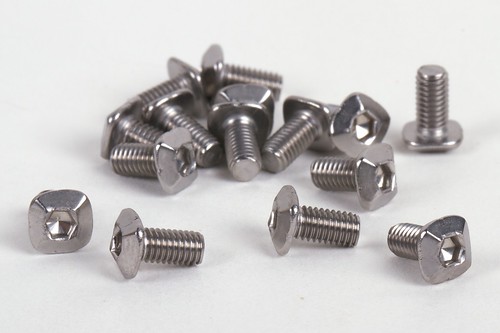
And, most important: A fastening system that really works.  These stainless steel M3 screws with modified pyramid-shaped button socket cap heads are simply fantastic.  They slide easily into and out of the MakerBeam slots, and lock into place perfectly with a simple hex nut on the exterior.

There are arguments to be said for and against putting screw heads in the channels, but if you’re going to do it, you had damn well better do it right. And, finally, someone is doing it right.  You can read about the evolution of the fasteners on the MakerBeam.eu blog, here, here, here, here, and here.
 

makerbeam 2014 18


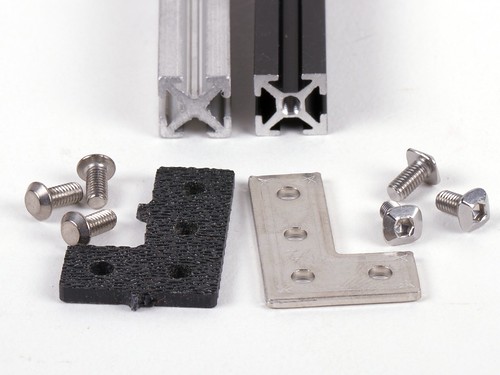
Old components, Left side:  MakerBeam profile 1.0, old-style screws, machined ABS fastening plate.
New components, Right side: MakerBeam profile 2.0, new screws, stainless steel fastening plates.
makerbeam 2014 8

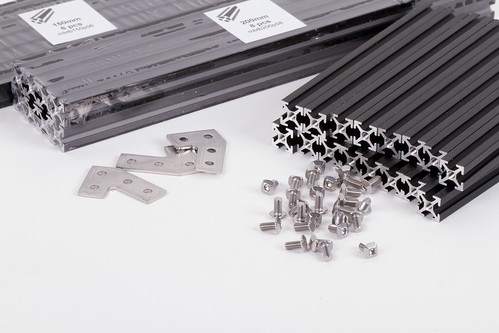
So, after nearly five years, MakerBeam has come of age, and finally fulfilled its promise of being a really nice miniature construction set.  Our congratulations and thanks to MakerBeam.eu for doing such a great job of this, and especially for making these sets available for everyone else.

Hackerspace Field Trip

Photo by David Prewitt

From the Lenoir News-Topic, middle school students got to build Egg-Bot derivatives at their local hackerspace:

“I think this is one of the best field trips I’ve ever been on,” one of the sixth-graders said, unprompted by any of the adults (or reporters) in the room. “This one, you actually build something.”

The Winch Cutting Jig

WinchCutter 5

In our recent article, The Making of the WaterColorBot, we walked through the manufacturing process of the WaterColorBot, in which we make use of a number of specialized jigs, with varying levels of complexity.  We also left a teaser:

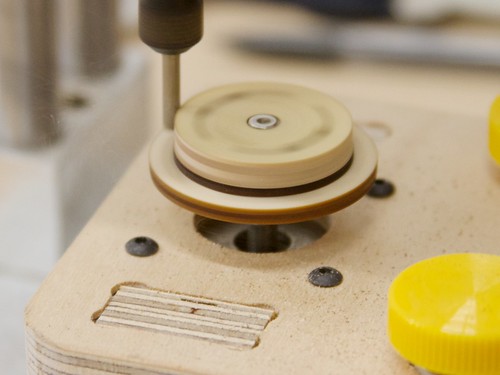
“The winch is also assembled from laser-cut wooden parts. The lower part has the shaft collar that mounts to the motor shaft, and the upper part has two halves that disassemble for cord management. It turns out that the winding-drum part of the winch needs to be quite round and concentric with the motor shaft for smooth operation– smoother than we can get with the laser. We solve this with our very-most-complicated assembly jig….”

And here it is.
Continue reading The Winch Cutting Jig

Decorating Christmas Ornaments with the Eggbot

ornaments

Despite what you might guess from the name, our Egg-Bot kit is not just for eggs.  In fact, it turns out to be a pretty freaking amazing machine for decorating and personalizing your own Christmas ornaments!

Today we’re releasing the “Eggbot Holiday Super Pak” — a set of Eggbot-ready holiday ornament designs to give you a head start.  The set includes the designs above and many more.  It’s free, available for download as part of our EggBot Example set (on our GitHub releases page), and will be periodically updated as we add more designs.

Read on for some additional tips and tricks for using ornaments in the Eggbot!

Continue reading Decorating Christmas Ornaments with the Eggbot