Coffee tools

Not long ago, I posted about roasting coffee. As a follow up, I’d like to share about the various coffee tools we use. I talked about some of these tools when I was a guest on Kevin Kelly’s Cool Tools podcast. We’ve learned about some of them from other Cool Tools posts and a variety of other sources, including Sweet Maria’s. I’ve included links for items I have sources for, but some items are relatively generic or from brick and mortar shops. I’ve sorted them into Roasting, Espresso, Home, and Travel sections below.

Note that these are not necessarily recommendations for everyone: they are what work for us. We have a pretty committed relationship with our coffee, and we understand that each coffee lover will have their own preferences and methods. Just because we do it one way doesn’t mean that we think the way you are doing it is wrong. Feel free to share your favorite tools in the comments!

—Roasting—

The Behmor 1600 roaster: this model is no longer in production, but continues to work well for us. You can get the newer version from Sweet Maria’s.

Wooden handled natural bristle pastry/basting brush: this is basically just a broom. After blowing the chaff out of the roaster, I sweep the interior walls and the surfaces of the chaff tray to remove remaining dust. You can get these from any cooking store or restaurant supply.

Quart sized plastic canisters: these are from Smart & Final, but could be obtained at any restaurant supply store. I use them for weighing green beans and storing roasted beans. They seal well and you can see what’s inside. I have two to make it easy to roast a new batch when I still have some in the previous canister.

Five gallon food service bucket: again from a restaurant supply shop. It holds about 25 pounds of green coffee beans, which is much more manageable than the 50 pound bag our coffee arrives in. The rest of the 50 pound bag gets sealed up and stored until the bucket is ready to be refilled. It seals well and has a nice handle for ease of moving it around.

Stool: lifts the roaster far enough off of the ground to make cleanup easy after roasting finishes, and I don’t have to bend over as far to pick up the roaster to carry it back inside when I’m done roasting.

—Espresso—

Quick Mill Silvano Espresso Machine: PID control, separate steam and coffee boiler, beautiful stainless exterior, generously deep drip tray. It has a lot of excellent features for the price. Fits four full-sized mugs on top for warming. Switching from a low end home espresso machine to this was like switching from a point and shoot camera to a DSLR.

Rancilio Rocky Doserless Burr Grinder: one of the most important tools for espresso is the grinder. If you don’t get an even grind, it will be nearly impossible to make good espresso. Available from Sweet Maria’s and Chris’ Coffee.

Small cup and measuring spoon: the Rocky grinder is known for dispensing clumpy grounds. To combat this we grind into a cup and then scoop it out into the portafilter basket, which lets us break up the clumps.

Stainless portafilter: most portafilters are made of chrome plated brass and the plating can wear down over time. Stainless portafilters are easy to clean and you never run the risk of exposing your espresso to the lead in the brass. The handle of ours is tilted downward slightly, which means the basket is conveniently nearly level when the portafilter is resting on the spouts and handle.

Coffee distributor/leveler: we saw an OCD branded one of these in use at our favorite coffee shop and wanted one immediately. It evenly spreads the grounds across the top of your basket when you spin it. Such a beautiful design. The OCD price tag was a bit steep, so we went off-brand and got one that was much less expensive and is still very effective.

Tamper: ours has a nice handle and good heft.

Tamping mat: we have a very small counter for our setup, so this one works really well. It props up the portafilter while you fill it, gives you a solid surface for tapping to settle the grounds as well as for tamping.

Bottomless portafilter: a bottomless portafilter is useful for learning better espresso technique, but can make a ridiculous mess if your grounds aren’t perfectly distributed or tamped. I got one and used it consistently for a while, but now use the stainless portafilter all the time. I keep my backflushing basket in my bottomless portafilter so that it is easy to do my routine cleaning and backflushing of the espresso machine. The bottomless has a lower profile than ones with spouts and fits neatly in the utensils drawer below the espresso machine.

Steaming pitcher: we have a medium sized steaming pitcher. It works well for us since we don’t have much counter space and because we are usually only making coffee for one or two people.

Dishrags: I keep a stack of dishrags handy for wiping down the steam wand.

Cafelat knockbox: this one is easy to clean, sturdy and doesn’t slide around. It’s also easy to empty.

—Home—

Bodum French press: we drink cappuccinos during the week, but on the weekend, we use a French press for coffee at home. It’s reliable, low cost, and makes really good coffee.

Glass stirring rod: rather than use a metal spoon which might scratch the glass of the French press, or a wooden spoon, which can be unpleasant to clean, we use a glass stirrer. We have some candy striped ones from the post-holiday sale section of Williams-Sonoma, and we have some intended for chemistry lab use that aren’t as decorative but are just as useful. In addition to an initial stir, it’s helpful to fluidize the grounds before you press the coffee.

Capresso grinder: French press coffee isn’t as demanding on the grinder as espresso is. The Capresso is a much lower cost (and lighter weight) burr grinder, and it works fine for this job. Coffee grounds sometimes get caught behind the drawer, which gradually works its way out from the vibration of the grinder. So long as you clean it out regularly, it doesn’t cause a problem.

Electric kettle: you can get very fancy ones with different heat settings for that precise just below boiling temperature that is perfect for French press. Or you can get a simple one like ours.

—Travel—

Aeropress: we don’t often travel where there isn’t coffee, but for things like camping, we still need coffee. The aeropress can be tedious for making more than one cup, but the cleanup is easy, and other than a way to heat water, you don’t need anything else. If we know we’ll have electricity, we’ll bring along our electric kettle.

Plastic bags: A zipper bag is convenient for storing the filter rounds so they don’t get wet. I also bring along an extra zipper bag for ejecting the Aeropress puck into after brewing, especially if we’re camping and there aren’t nearby trash facilities.

Vacuum sealer: I pre-grind, measure and vacuum seal our coffee grounds when we travel. This keeps the grounds fresh, tidy, and compact for packing, as well as convenient for brewing.

Travel mugs: We have some Aladdin brand stainless steel vacuum insulated mugs that we’ve had for approximately forever. The plastic lid screws into the metal mug firmly and prevents spills. They keep warm for a very long time. They have a wide enough top to hold the Aeropress. They are also narrow enough to fit into almost any cup holder, including the ones in our Prius that are inline rather than side by side. A bonus is that one has a pattern of raised bumps and the other has gently recessed striped swirl pattern so even if you are driving and don’t want to look down, you can tell that you’re picking up the correct mug.

Looking back at Maker Faire

maker faire ribbons being displayed in a cabinet

It has been reported that Maker Media is shutting down and that Maker Faire is at its end. Evil Mad Scientist has its roots in Maker Faire, and has been presenting there from the very beginning, so it seems fitting to look back at our Maker Faire projects now.

For the very first event in April of 2006, we brought the Interactive LED Dining Table that we built when we moved to the bay area. The attendees were incredibly engaged by it and we had multiple people express interest in making one. In addition to bringing our table, Windell gave talks on atomic clocks and using POV-Ray. We were incredibly inspired by the amazing projects we saw. One exhibit that helped push us in the direction of our 2007 Maker Faire project was the incredible 3D printed sculptures by Bathsheba Grossman.

For the second Maker Faire, we brought the CandyFab 4000, a 3D printer that printed objects out of granulated sugar. We even printed one of Bathsheba’s designs with it. It was made from hacked together pen plotters and a car jack, and used woodworking, sewing, laser cutting and a variety of other fabrication methods.

For the Bay Area Maker Faire 2008, we brought a host of projects. We were working on a revision to the CandyFab project, and brought our work-in-progress for that. We also brought an assortment of our blog projects from the year. We hosted a BristleBot workshop in our booth: a table filled with motors, batteries, toothbrushes and tools. Our collaboration with Because We Can to make Interactive LED coffee tables was on display. By then we also had kits in the Maker Shed.

For the Austin Maker Faire 2008, we held workshops on making bat costumes from umbrellas and High-Tech pumpkins.

By the 2009 bay area event, we had the CandyFab 6000 completed: it was built from scratch with no scavenged parts, and produced food-safe output.

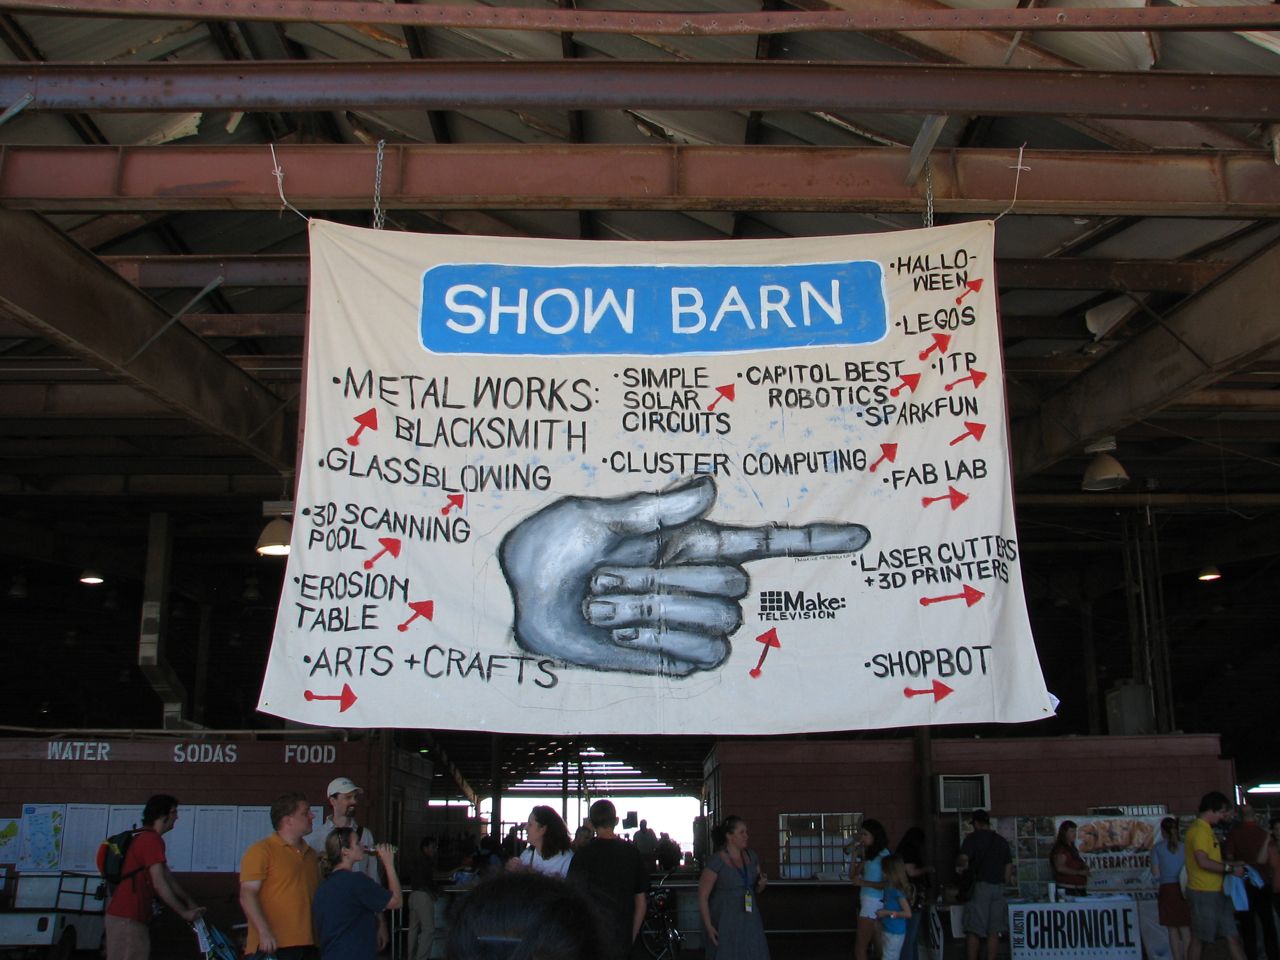
For Austin in 2009 we brought some simple solar circuits. The Austin event being close to Halloween made it perfect for projects like a microcontroller-driven, dark-detecting, solar-powered programmable pumpkin.

For Bay Area 2010, the Friday before Maker Faire was designated education day, and we did another Bristlebot workshop. For the Faire itself, we brought our Tabletop Pong game. We were also starting our collaboration with Bruce Shapiro on the EggBot which was there, too.

In 2010 both Detroit and New York were started. For Detroit, we exhibited the EggBot with Bruce next to an optical player piano roll reader which triggered car lock solenoids to play a digital piano.

In New York, we brought Interactive LED Panels in addition to EggBot, but EggBot was what caught the eye of the Martha Stewart show producers who were scouting Maker Faire for show ideas. They ended up doing a whole show featuring projects from Maker Faire, including the EggBot.

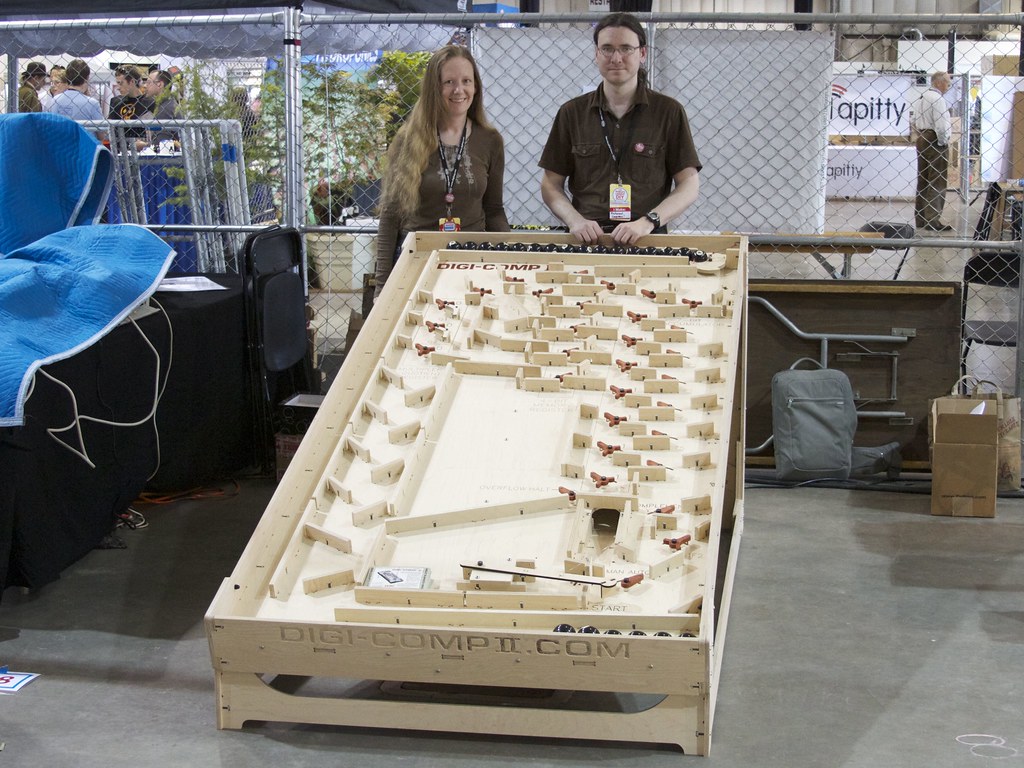
In 2011 we built a large scale recreation of the Digi-Comp II binary mechanical rolling ball computer from the 1960s. It was a huge hit. We taught so many people about binary math. We were working on it right up until the faire, with friends over to help us assemble it, and then disassemble it to fit it in pieces into our Prius to take it to the faire.

We took the prototype of our small scale Digi-Comp II recreation to New York.

The big Digi-Comp II was so much fun that we took it to bay area in 2012 as well. Our friend Schuyler spent much of the event running the machine and getting better at binary math.

In New York, we demonstrated our kits in the Maker Shed, giving talks about EggBot and showing many blinking LED things.

In 2013, we brought a new collaboration to the Bay Area Maker Faire: the WaterColorBot. Our friend Zeph, who had been coming to Maker Faire since being a baby, also took it to RoboGames and the White House Science Fair. (Aside: we’re super proud of Zeph, who just graduated from high school last week.) Part of what has been amazing about Maker Faire has been working with the young makers.

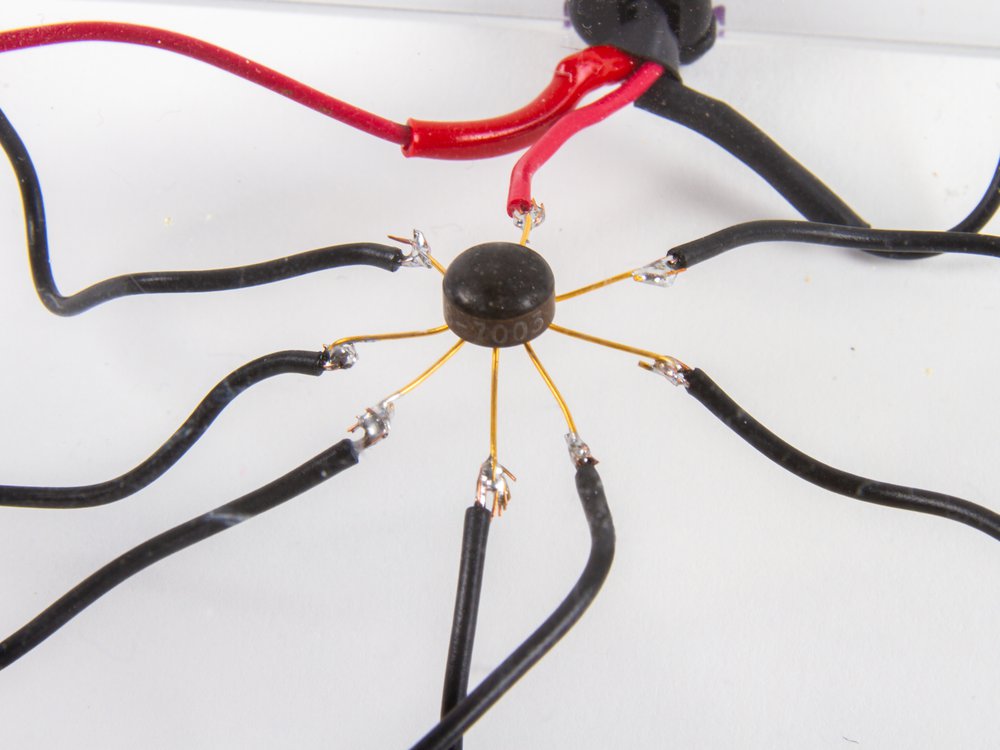
For New York, Atmel invited us to exhibit in their booth. We brought our Octolively modules, which use an ATmega164 microcontroller and is a descendent of our first maker faire project. We also brought along our then new Three Fives kits.

At Bay Area 2014, Windell gave a talk on Open Hardware Best Practices, and I hung out with the amazing Meredith Scheff-King with a bunch of soft circuit projects.

In New York that year, I was on AnnMarie Thomas‘s Making Makers panel, and Windell participated in the Let’s Make Robots booth.

For Bay Area 2015, Windell had just published The Annotated Build-it-Yourself Science Laboratory and gave author presentations about the book. I hosted a panel looking back at Ten years of Maker Faire with a bunch of the keystone figures from the event over the years, including Stephen and Fritz of Diet Coke and Mentos fame. The robotics team we were mentoring was also exhibiting that event with WRRF.

For the 2015 New York Maker Faire, Windell again gave author presentations, and I helped out with the MakerEd booth.

We brought perhaps our most elaborate collaboration to Maker Faire Bay Area in 2016. This was the debut event for the MOnSter 6502, a transistor-level recreation of the MOS 6502 processor, masterminded by Eric Schlaepfer. We were also at that time collaborating on the AYAB project, to provide modern interfaces to vintage knitting machines. It was on display in the booth for the Machine Knitters Guild of the San Francisco Bay Area. Windell also did another author talk.

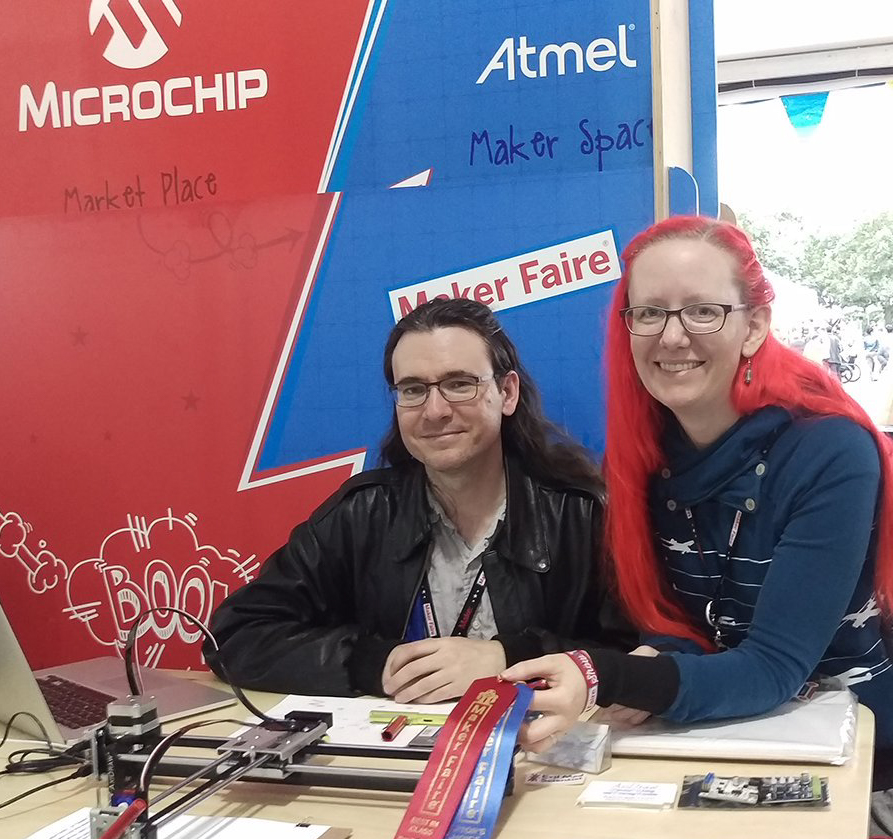
In New York, Microchip invited us to exhibit in their booth, and we brought the AxiDraw, which runs on a Pic microcontroller.

For Bay Area 2017, AYAB returned with the machine knitters, and the MOnSter 6502 came out to play with a new, more capable machine to work in, along with demo programs to show it off.

2017 also featured the New York debut for the MOnSter 6502, and east coasters had their first chance to play with it.

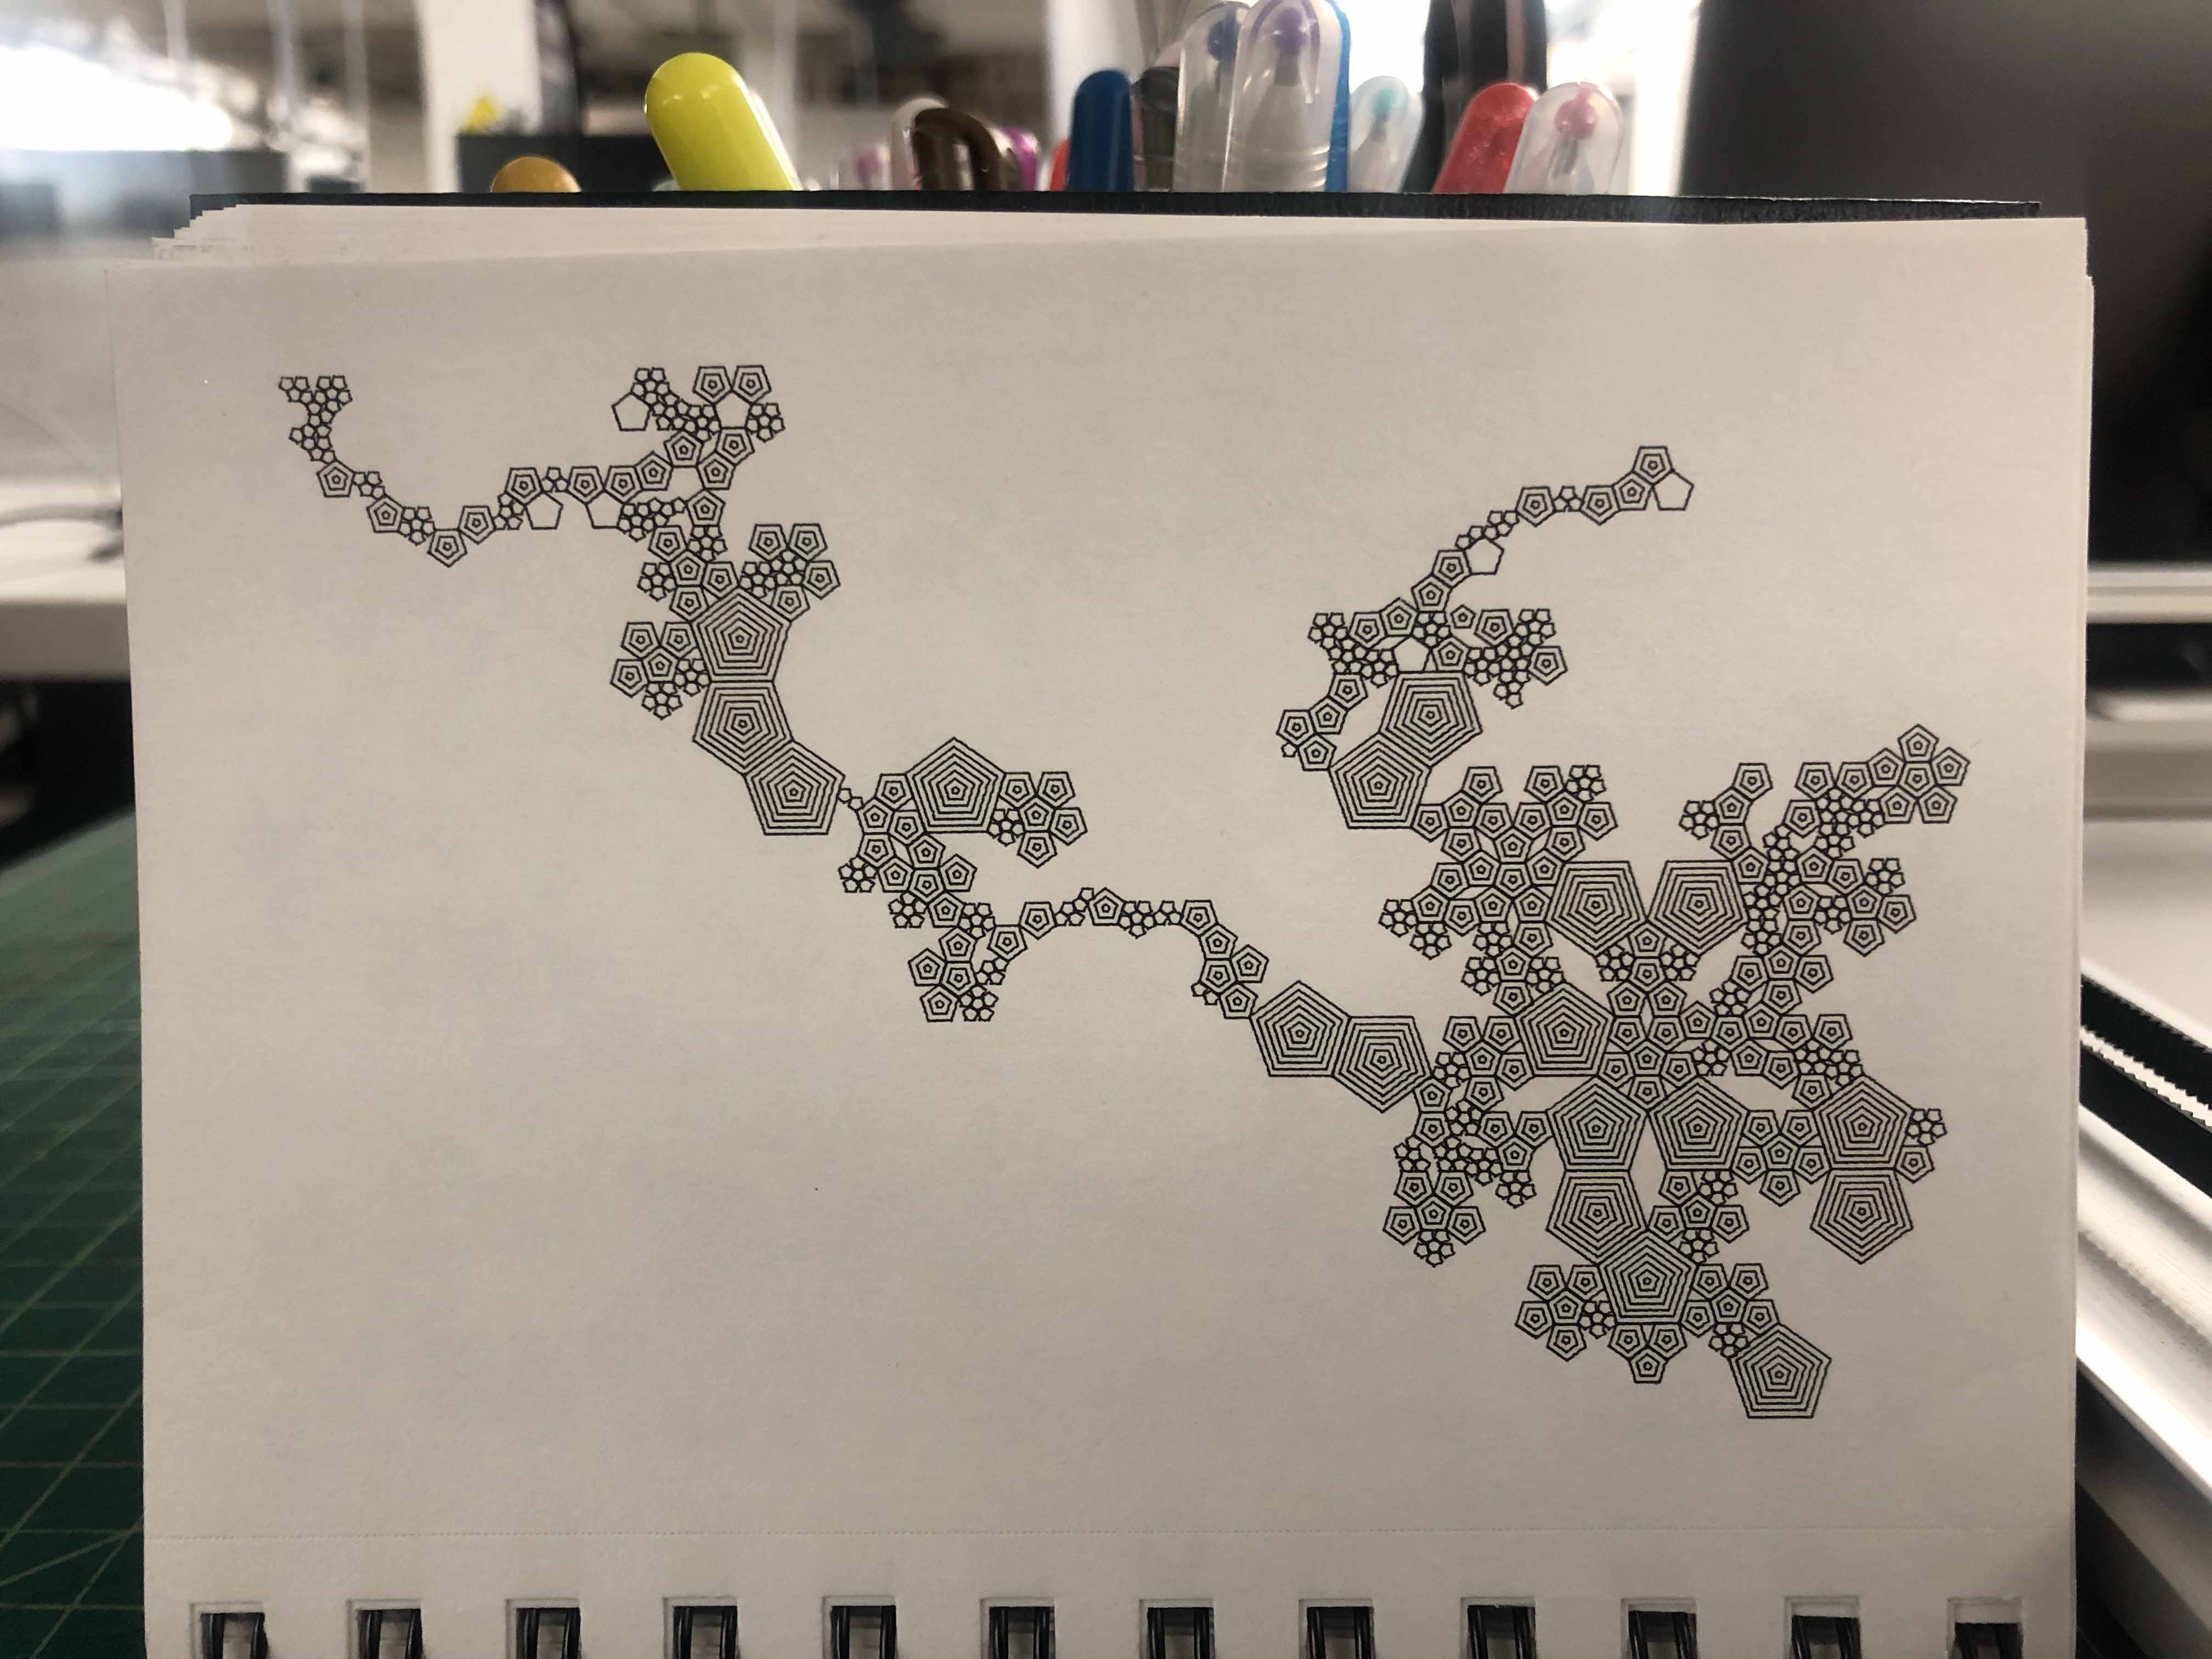
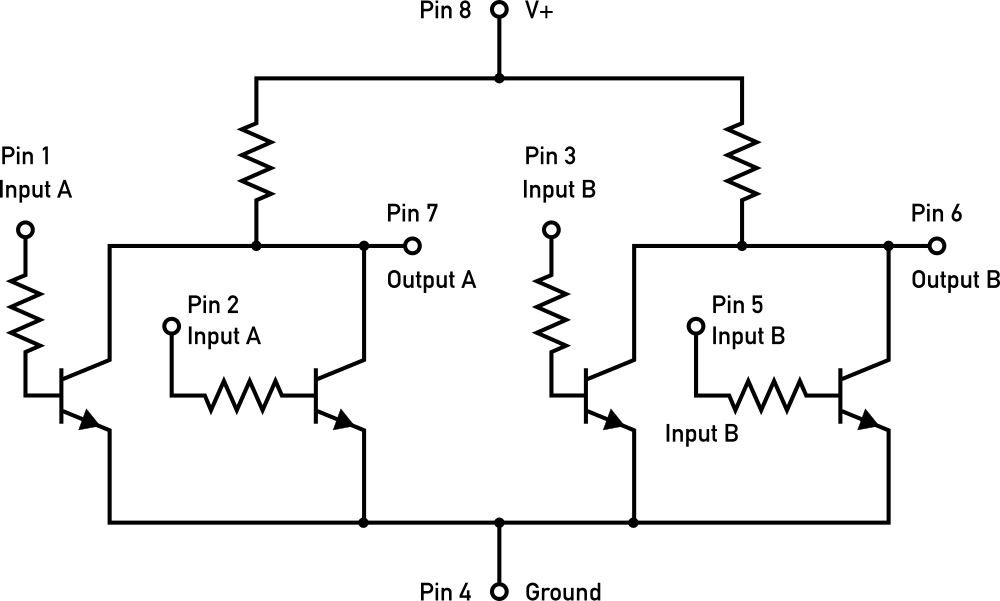
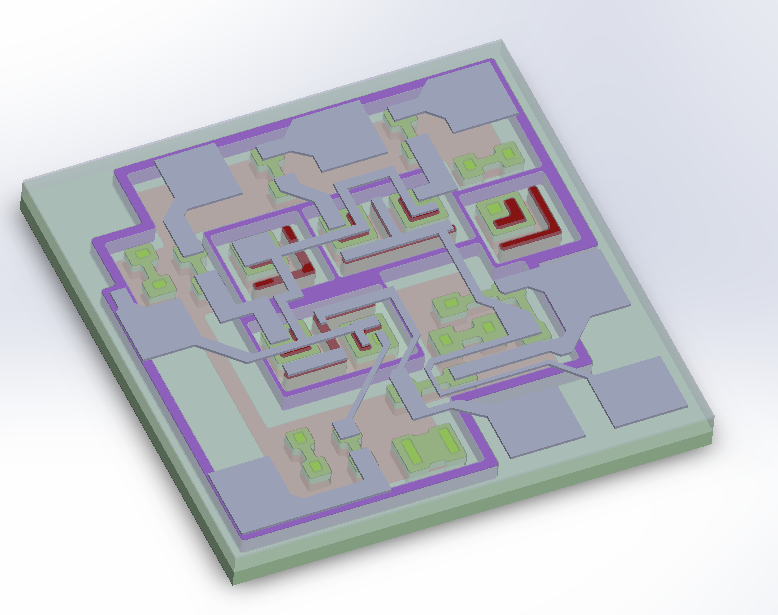
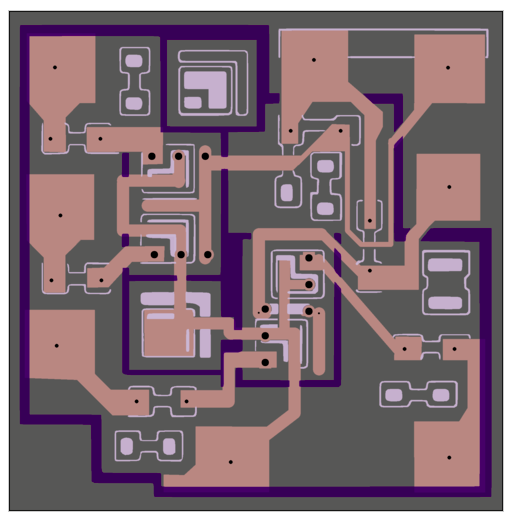
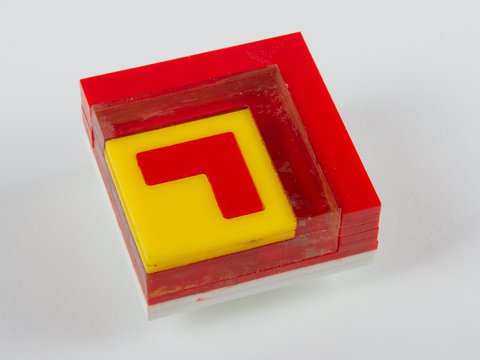
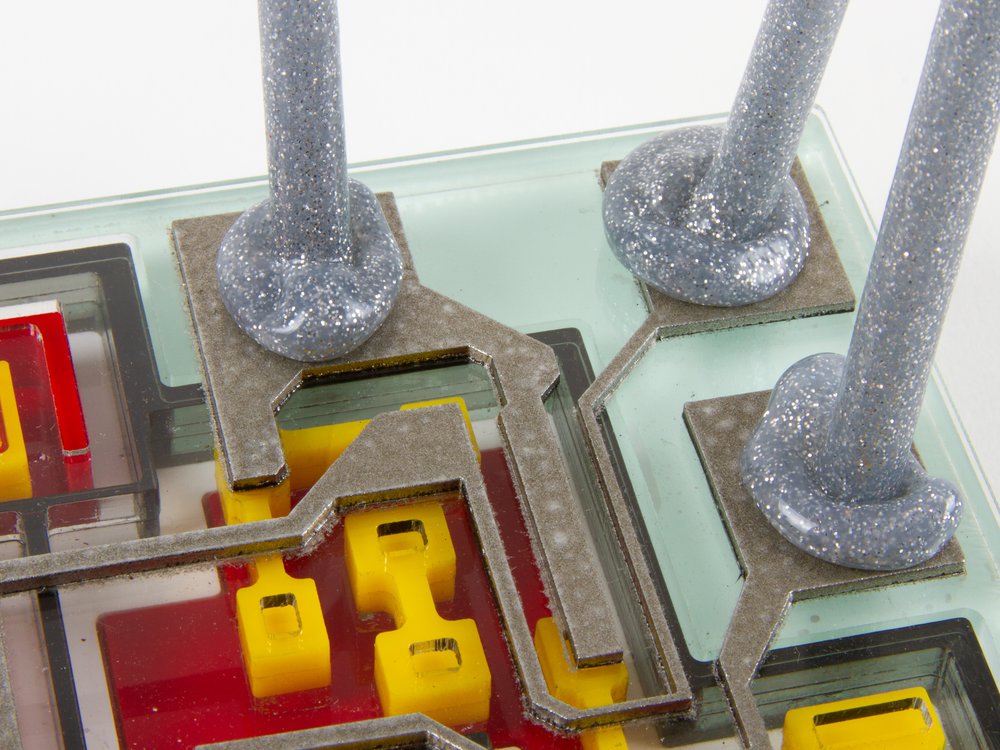
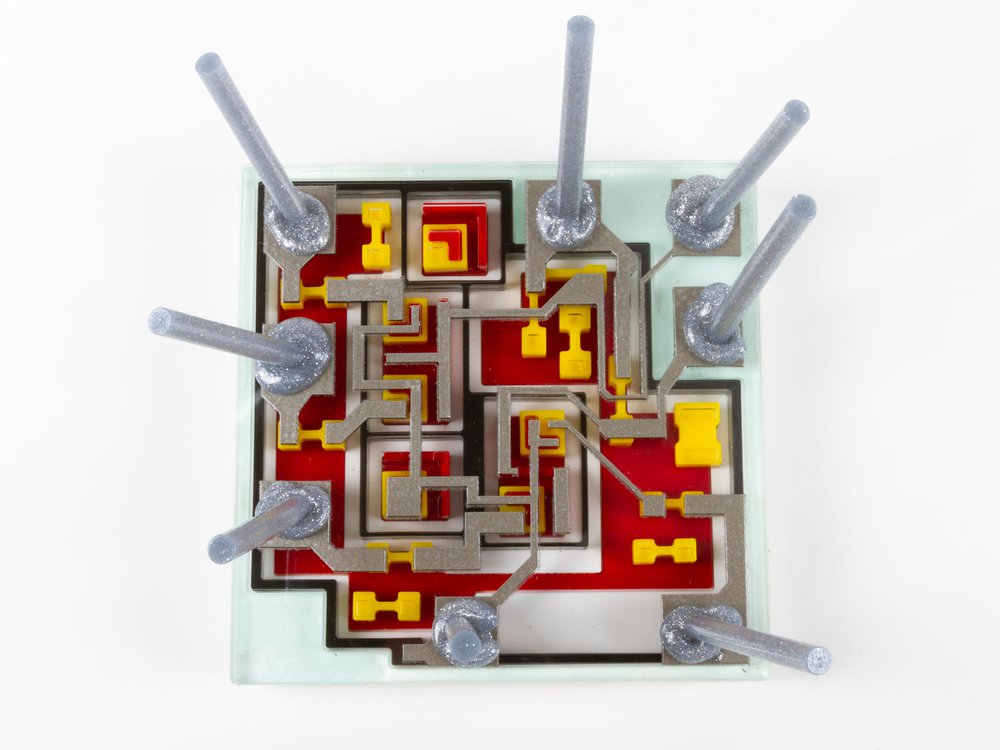
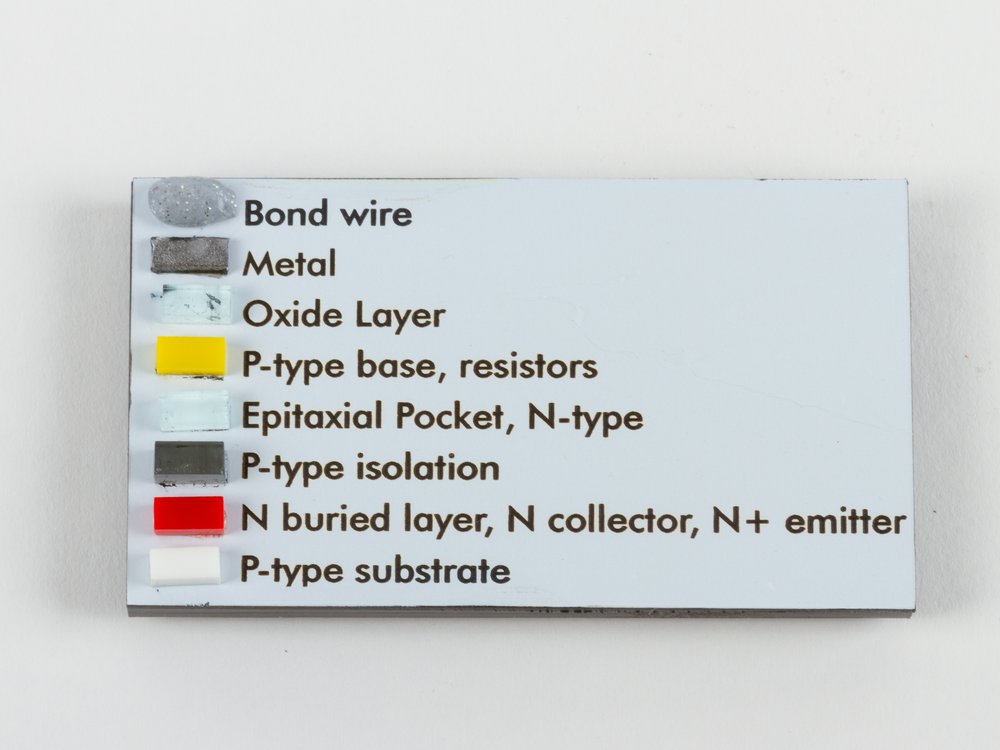
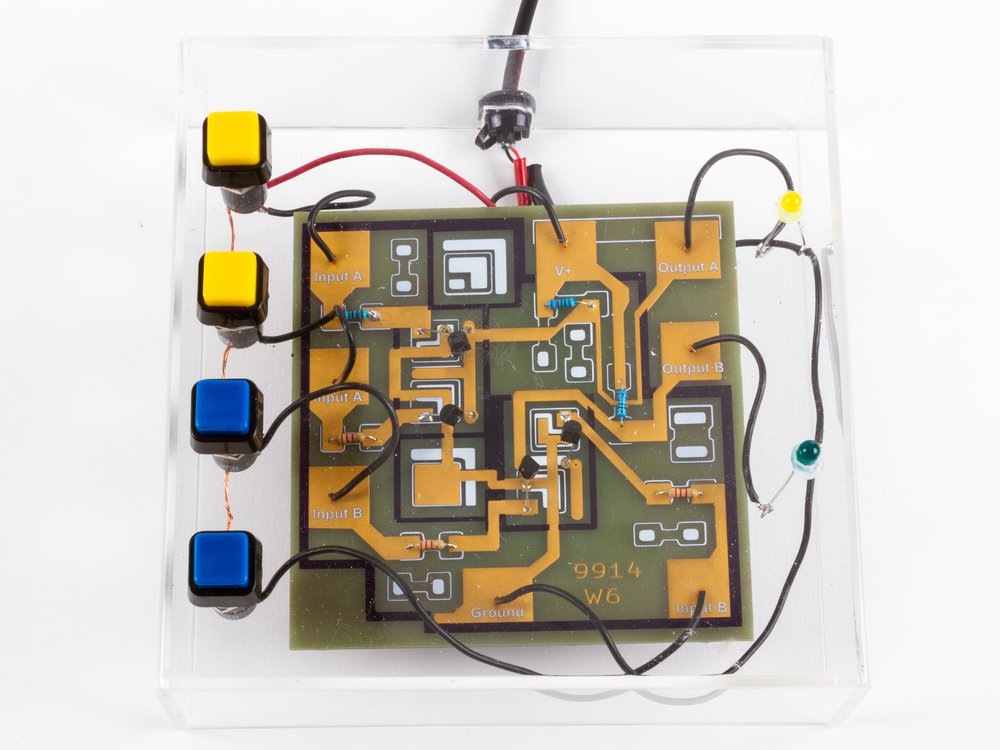
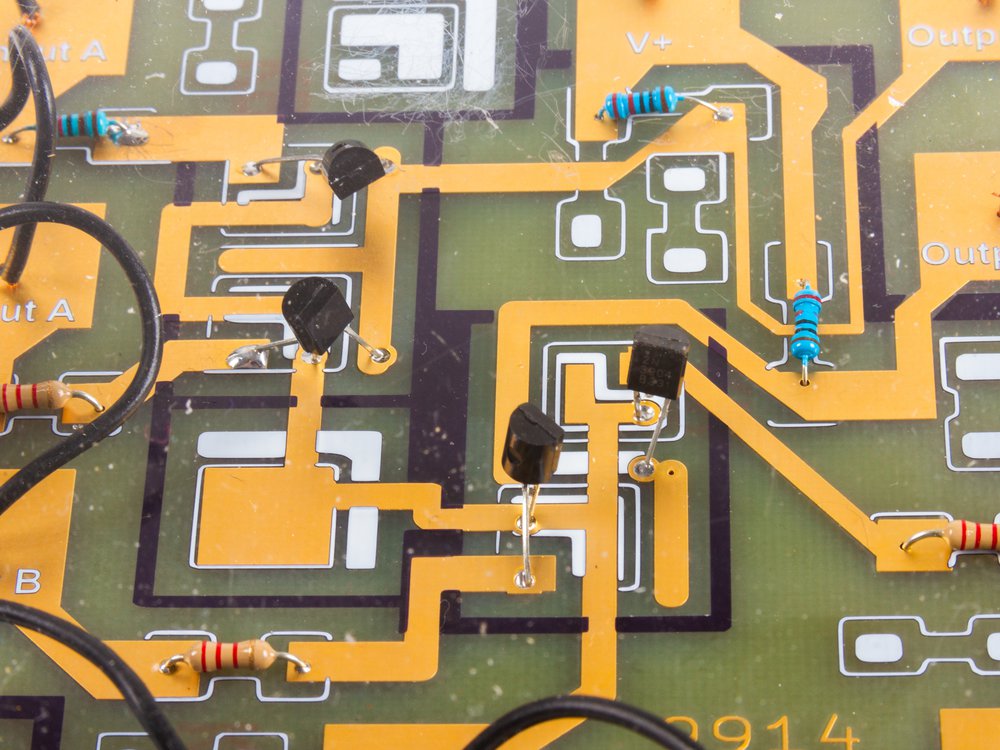
For Bay Area 2018, we endeavored to make the small visible: we brought microscopes and decapped ICs for our Uncovering the Silicon project. Many people got to see inside of chips for the first time. We brought interesting looking chips as well as popular ones like the MOS 6502, the NE555 and the μA741. We also brought along large scale examples of some of the decapped chips, including the MOnSter 6502 and the Three Fives and XL741 kits.

At an earlier Maker Faire, our friend Matt Stultz hosted a Peanuts-style “Ask a Maker” booth. Inspired by that, but wanting to reach a larger audience, I hosted an Ask A Maker panel at Maker Faire New York 2018. I was privileged to host a great panel of folks, including Matt, Sophy Wong and Jimmy Diresta.

Last month at Bay Area Maker Faire 2019, we brought together a dream team of makers to hone the Uncovering the Silicon project into a beautiful tutorial of what is inside integrated circuits. Mike Szczys of Hackaday got a great video of Windell explaining it, and if you haven’t seen it yet, it’s well worth a watch.

This brief walk through of our Maker Faire projects is by no means a complete history of our Maker Faire experience. We’ve attended many mini-Maker Faires. We’ve written for and been written up in Makezine and other maker publications. Our Maker Faire projects have gone amazing places outside of Maker Faire. We’ve made more friends, connections, and collaborations than we can possibly list here. And those will go on.

Astronomy Outreach at the Fremont Peak Observatory

Observatory building on top of hill with trees behind

For the last year and a half, we’ve been volunteering with the Fremont Peak Observatory Association (FPOA). It is located in Fremont Peak State Park, just above the mission town of San Juan Bautista, which is where Hitchcock’s Vertigo was filmed.

Lenore with telescope behind

Challenger (behind me in the picture above) is the name of the main telescope at FPOA. It is a 30 inch diameter Newtonian telescope on an equatorial mount, built by telescope maker Kevin Medlock. It is a lot of fun to move a big scope like this around to point it at different things in the sky. It is great for looking at deep sky things like galaxies, nebulas, and star clusters.

The members are incredibly welcoming and dedicated to amateur astronomy and science outreach. The organization has free (except for the state park parking fee) public programs on Saturday nights from March to October when there isn’t a full moon. The schedule for upcoming programs is posted on the website.

telescopes set up on pads

During public programs, we set up some of the smaller telescopes that belong to the observatory, and members sometimes bring their own telescopes to set up. This means there are usually multiple telescopes pointing at different things to see, and even folks who can’t use the ladder for the big Challenger telescope will be able to look to the stars.

Observatory building and sunset

It is a joy to be there the first time someone sees Saturn or Jupiter, or even the moon through a telescope. There is something special about seeing those things with your own eyes. The sky is dark enough—in part due to the ocean fog frequently socking in the towns below—that the viewing can be spectacular, and later in the year the Milky Way streaks across the sky.

Some members bring their gear up to the observatory to do astronomical imaging. We haven’t done any astrophotography other than cellphone photos through the eyepiece that don’t do justice to the view you get. We’ve seen incredible views of the planets, the Andromeda Galaxy, the Hercules Globular Cluster, the Ring Nebula and many other wonders. And perhaps best of all, we’ve had the privilege of sharing those views with visitors.

Linkdump: May 2019

Lego turing machine

Uncovering the Silicon: μL914

At the 2018 Bay Area Maker Faire, our project Uncovering the Silicon showed off a number of simple and complex integrated circuits (with rather large feature size) under the microscope. We had a great time helping visitors look at the features and get a glimpse of what’s inside those black box integrated circuit packages. To take this to the next level for this year’s Maker Faire, we decided to try and close the loop; to take one simple integrated circuit and elucidate its workings well enough that visitors to our booth will be able to see every single component of the circuit, understand their function, and relate it to the macroscopic behavior of the chip. For this, we picked what turns out to be a rather obscure chip: the Fairchild μL914, which is a dual 2-input NOR gate. This chip belongs to the resistor–transistor logic (RTL) family.

uL914 IC closeup in circuit

Here’s what the chip looks like. It’s in a funny old “glob-top” can package with eight leads.

pinout

Here’s the pinout; there are two NOR gates in the chip, plus power and ground.

uL914 IC package circuit with switches and LEDs

Ken Shirriff built a circuit with the chip to demonstrate its functionality. When we push either of the two buttons for one of the gates, that LED will turn off.

Schematic

Here’s the schematic diagram, adapted from the original datasheet. If you look at the left side, if either of those inputs goes high, the transistor pulls the output low.

uL914 dual 2-input NOR gate die photo

John McMaster decapped a few of the chips and sent us a die photo. He made a video about the process — no small feat. We’ll be bringing one of these bare chips and a microscope (equipped with both eyepieces and a camera) to Maker Faire.

For the macroscopic scale, we approached visualizing this circuit from a couple of angles: the physical structure of the chip, and the electronic structure of the circuit.

uL914 die model render

Eric Schlaepfer used the die photo to model the structure of the chip in CAD.

uL914 PCB version

Simultaneously, Ken designed a printed circuit board version for use with discrete components that maintained the same structure as the IC.

Individual transistor acrylic model Individual transistor acrylic model

Working from Eric’s CAD model, we built a single NPN transistor model from layers of colored acrylic. If you lift it up, and look through the transparent middle layers, you can tell that the emitter (red) is embedded into the top of the base (yellow) and does not go all the down way through it. (Transistors like these are planar: The emitter is above the base, and the base is above the collector.)

The top layer of this little model has labels for the collector, emitter and base. It is removable so that the layers of the model can be more easily inspected.

The model of the chip die includes a transparent cover representing the oxide layer, and that supports the metal layer with the wire bond pads on the edges.

One of the reasons that this particular chip is educational to look at is that there are a few unused components on the die. There are two unused transistors: one of them is unconnected, and the other is shorted. There are also several unused resistors (resistors are the dogbone shapes). The unconnected and unused components are easier to see, and provide a visual example that is useful for understanding what the connected components look like under the metal layer.

It is also fun to imagine what other circuits could have been made with different connections.

We glued most of the layers together, but left the top two layers removable so that it is easier to see the internal structure when the top is removed.

(Aside: we left out most of the epitaxial pocket material, because even though we used transparent acrylic to represent it, the layers of the components are much more visible without it present.)

Acrylic chip model top with metal layer

There are cutouts in the oxide layer where the metal layer connects to the circuitry below.

Acrylic chip model with hot glue bond wire example

One of the most noticeable things you see when you look at this type of IC under the microscope is the bond wires. We’ve used silver glitter hot glue sticks to represent them.

bond wire closeup

The glob of melted glue represents where the wire is bonded to the pad.

Acrylic chip model with hot glue bond wires

When you look straight down on the model with its glitter bond wires, it looks very similar to what you’ll see in the microscope.

Acrylic model legend

To round things out for our acrylic model, we made a physical legend to make it easier to identify all of the parts of the model.

uL914 discrete version switch and LED circuit

Once Ken got his PCBs back from our friends at OSHPark, he built it up with the same example circuit.

discrete circuit closeup

The PCBs turned out beautifully, and it’s great to see the familiar discrete packages on the enlarged circuit. Ken has published the PCB design on Github.

We hope to see you at Maker Faire this weekend!

Bonus: Ken laid out some hypothetical alternate metal layers to use the same die to create different chips.

Bonus video: Mike from Hackaday came to visit our project at Maker Faire and got a great video explanation of our project with Windell. He also wrote it up for Hackaday.

Featured artist: Sam Norton

There is a lively community of plotter enthusiasts in the drawingbots discord channel. One of those is Sam Norton, who goes by hurtle there.

Sam has been using the AxiDraw to paint with acrylics using WaterColorBot software.

a useful, but fairly unsuccessful little sunday morning plot to see how much detail would come across on a small picture.

tried again but a bit bigger, and possibly chose a better range of paint colours.

The discord has channels for works in progress, process discussions, as well as a gallery. This encourages the community to share works at various stages as well as early drafts or versions. These two paintings of the same subject have different palettes and sizes and give insight into the process.

Sam’s website features many of his hand paintings, and it is fascinating to see that he has taken some of the same subject matter and revisited it with the AxiDraw.

He has taken the same set of glasses and experimented both with paints and dipped india ink.

It’s fun to see how the same subject looks, not just with hand painted vs. AxiDraw, but also with different media. The ink behaves differently and the dipping process is so much fun to watch.

This chair is another example. The scale of these is quite different as well. The original is about 70 x 80 cm and the AxiDraw version is 25 x 35 cm. I enjoy the contrast in texture, precision and technique.

I will look forward to seeing more of Sam’s work, as the textures are fascinating, and the process of converting photographs to vector art is complicated by the added dimension of the paint palette. I’ll leave you with this closeup of the piece from the top of this article, which was taken by our previously featured artist, Bleeptrack, who received the piece through the drawingbots plotswap.

Thank you to Sam for generously sharing your photos and video clips!

Coffee Roasting for Fun

When we first started roasting coffee, we used the air popcorn popper method. We learned about it from Sweet Maria’s, which in addition to selling green coffee beans, has a wealth of resources for home coffee roasters. We gradually refined our method, even making a DIY coffee bean cooler. We also tried out a lot of different types of beans, buying samplers from Sweet Maria’s and making notes on which flavor profiles we enjoyed. Eventually we outgrew the batch size limitations of the popper method and we purchased what is the gold standard of home coffee roasting: a Behmor 1600.

The Behmor can roast up to a pound of coffee at a time, and does so reliably without fuss. Newer models are programmable, but this one has a few preset roasting profiles. I use the default one pound setting and normally roast about 0.9 pounds of coffee at a time. The canister I use for coffee weighs about 0.2 pounds, so when I put it on the scale (it’s handy having a shipping scale nearby) I aim for 1.1 pounds. This smaller quantity roasts a little faster than a full pound would, and I have a wider time window to stop the roast when it gets to the stage I like.

The green coffee beans (which smell grassy, a bit like fresh hay) go in the roasting cage which gets put into the motor socket so that it can be rotated to toss the beans around for even roasting. After putting in the chaff catching tray, I start the roasting process.

The chaff is the papery membrane around the bean that comes off during the roasting process. Roasting creates quite a bit of smoke, and even though the Behmor has a smoke-suppression afterburner to reduce the amount of smoke, I prefer to roast outside.

Roasting takes about 20 minutes and the cooling cycle takes another 12 minutes. Because this is basically a toaster oven and fire hazard, it should be monitored during the roast. I take advantage of this half an hour in the sun to call my dad or catch up with friends. It’s an enforced break in my usual routine when I get to listen to the local birds and enjoy the changes in the sky through the seasons. When the roaster is done, I pull out the chaff tray and it’s quite a mess.

Most of the chaff is collected in the tray, but there’s some still mixed in with the beans, and it gets pretty much everywhere when you bring the roasting cage out. This is another good reason to roast outside. The chaff will just blow away in the breeze and joins the leaf litter below the shrubs that line our little parking lot.

I shake the roasting cage repeatedly until the amount of chaff dwindles, and then I can put the roasted beans into the canister for storage until I need need them.

There’s still chaff in the roaster in spite of the chaff catching tray. I blow it out of the roaster and sweep it out with a small clean basting brush.

Once the roaster is cleared of chaff I put it away for the next time.

The coffee loses a lot of its moisture during the roasting process, and reduces in weight by about 10% or so. It also increases in volume.

We have two to three people drinking coffee and use about two to three pounds of coffee a week. The flavor of roasted coffee starts to deteriorate about six or seven days after roasting. Since I’m roasting as needed two to three times a week, it never gets past about four days old.

As our coffee bean usage increased, we started buying our coffee 20 pounds at a time, but eventually realized that even that was seeming to be a little frequent. We had settled on the flavor profiles we enjoyed most, so we started purchasing 50 pound bags from Sweet Maria’s wholesale site, the Coffee Shrub. Green coffee has a long shelf life when stored well, so this means we don’t have to think about it very often. When you buy for several months at a time, you need to be confident that you will be happy with it. When we first got started, we didn’t know what we liked well enough to commit to purchasing at that scale, but we’re pretty set in our ways now.

Occasionally someone will really enjoy a cup of coffee I make for them and will say that I should start a coffee shop. It’s a well-intended sentiment, and I take it as a compliment. However, starting a coffee roasting business or coffee shop would take away many of the things that I love about coffee roasting. I only roast the kind of beans that we like, and I only roast as much as we need. And I get to use roasting as an excuse to take a break from my other responsibilities and enjoy being outside in our beautiful weather here.

I still enjoy trying other coffees. I love going to my favorite coffee shops and having someone else make me coffee. I love trying new coffee shops. And I get a lot of satisfaction from the coffee that I roast, grind, and brew myself.

If you’re interested in home roasting, I highly recommend Sweet Maria’s resources. In addition to working with farmers around the world to source beans equitably, they share their deep knowledge freely. They have articles, tutorials, and videos. They hold workshops at their warehouse in Oakland, and will be presenting at Maker Faire as they often have in the past.

Featured artist: Bleeptrack

Bleeptrack is a generative artist who works in a variety of media, but we are of course particularly fond of her plotter work with AxiDraw. We were privileged to see her work displayed at the Plotter People meetup in San Francisco. One particularly cool and generous thing she has done a few times is to create and then share tools to generate artwork.

For her overflower project, you can use her generator which lets you set a few parameters and generate flowers which you can save as SVG files.

She has used overflower not just for plots but also for fabric printing and she has produced some beautiful bags for sale from the fabrics.

The label on this floppy disk (which was used with a vintage digital camera to store pictures) was made by plotting onto label stock with an AxiDraw, with a drawing from the 35c3 circuit generator, which

creates fictional electric circuits with a message inbetween the lines. The design is in the style of the event design of 35c3 (Chaos Communications Congress). The project was built to enable all participants to easily create their own decorative circuits and ended up ‘highjacking’ the original event iconography. During the 4 days of 35c3, the circuit generator was used hundrets of times and resulting images were displayed all round the event halls, stages, stickers, appearal and banners.

You can read more about the fictional circuit generator on its project page.

For her Bugs and beetles project the Beetle code is up on github and you can play with the generator.

She has used the generator to make stickers and connected the generator to a print-on-demand t-shirt shop (in Germany) so that you can have your own unique bugs on a shirt. Her beetlesbot twitter bot generates and posts a new beetle every 8 hours.

My favorite non-generative Bleeptrack plot uses the data from her vacuum as it mapped the space in her home. The robot motion is plotted within the floor plan of the house.

You can check out her other projects on her website and follow her latest on twitter and instagram. You can support her on patreon and check out her merch page.

AxiDraw in the Classroom

One of the places we love to see the AxiDraw is in educational settings. It can be used as an introductory tool for digital fabrication, it can be used for learning to code, and it can be used for exploring design or mathematics.

Saskia Freeke posted a beautiful series of 3D cube plots as well as link to her published processing sketches. She’ll be teaching with the School of Machines, Making and Make-Believe in Berlin this summer.

Julien Gachadoat also posted about using Processing. Shown above are
“Prints made by design students (L2) at Université Bordeaux Montaigne for the last course of the year on generative systems.”

Kris Swanson posted about using a Tinkercad to Inkscape workflow for AxiDraw for student projects.

Andrew Carle posted yet another workflow, using Beetle Blocks to AxiDraw. The plots above were made by his g10 math students.

If you’re using AxiDraw in the classroom or know of other resources for educators using AxiDraw, please post in the comments or send us a note! We’d love to hear how you’re using it and what tools you use.