Our automatic ice maker is on the fritz, so we’ve temporarily reverted to making ice in conventional trays. But, imagine our delight at opening up the freezer and finding this!
Several of our ice cubes apparently formed with long spikes on top. This is really *not* what you expect when you start out with liquid water in an ice cube tray. Snowcrystals.com has a fairly detailed explanation of how these things form, and it’s documented elsewhere as well. (Roughly speaking, supercooled water is pushed up through a hole, somewhat like magma forming a volcano.) It’s relatively easy to form these in your freezer if you start with distilled water, but occasionally– as in our case –they do occur with regular tap water.Contest reminder!
We’ve seen a lot of great Arduino Halloween projects out there this year. A few of them have been submitted to our Arduino contest over at Instructables, and we’d love to see more. The entry deadline is Nov. 15, so you’ve still got time to send them in.
Speaking of contests, the Make Halloween contest deadline is here. Quick, get those microcontroller projects entered before midnight on Nov. 3!24 Hour Tombstones
Here is how to make your own cast concrete tombstones. These are easy, inexpensive, impressive and tough Halloween props, ready to spook in 24 hours.
Peggy-O-lantern
Lately we have been working on a new version of the PeggyDraw program, which is a program that lets you draw things that you want to display on the Peggy 2 for static images. The new version isn’t quite ready to show off this week, which is too bad because we like to put out our Peggies for halloween.
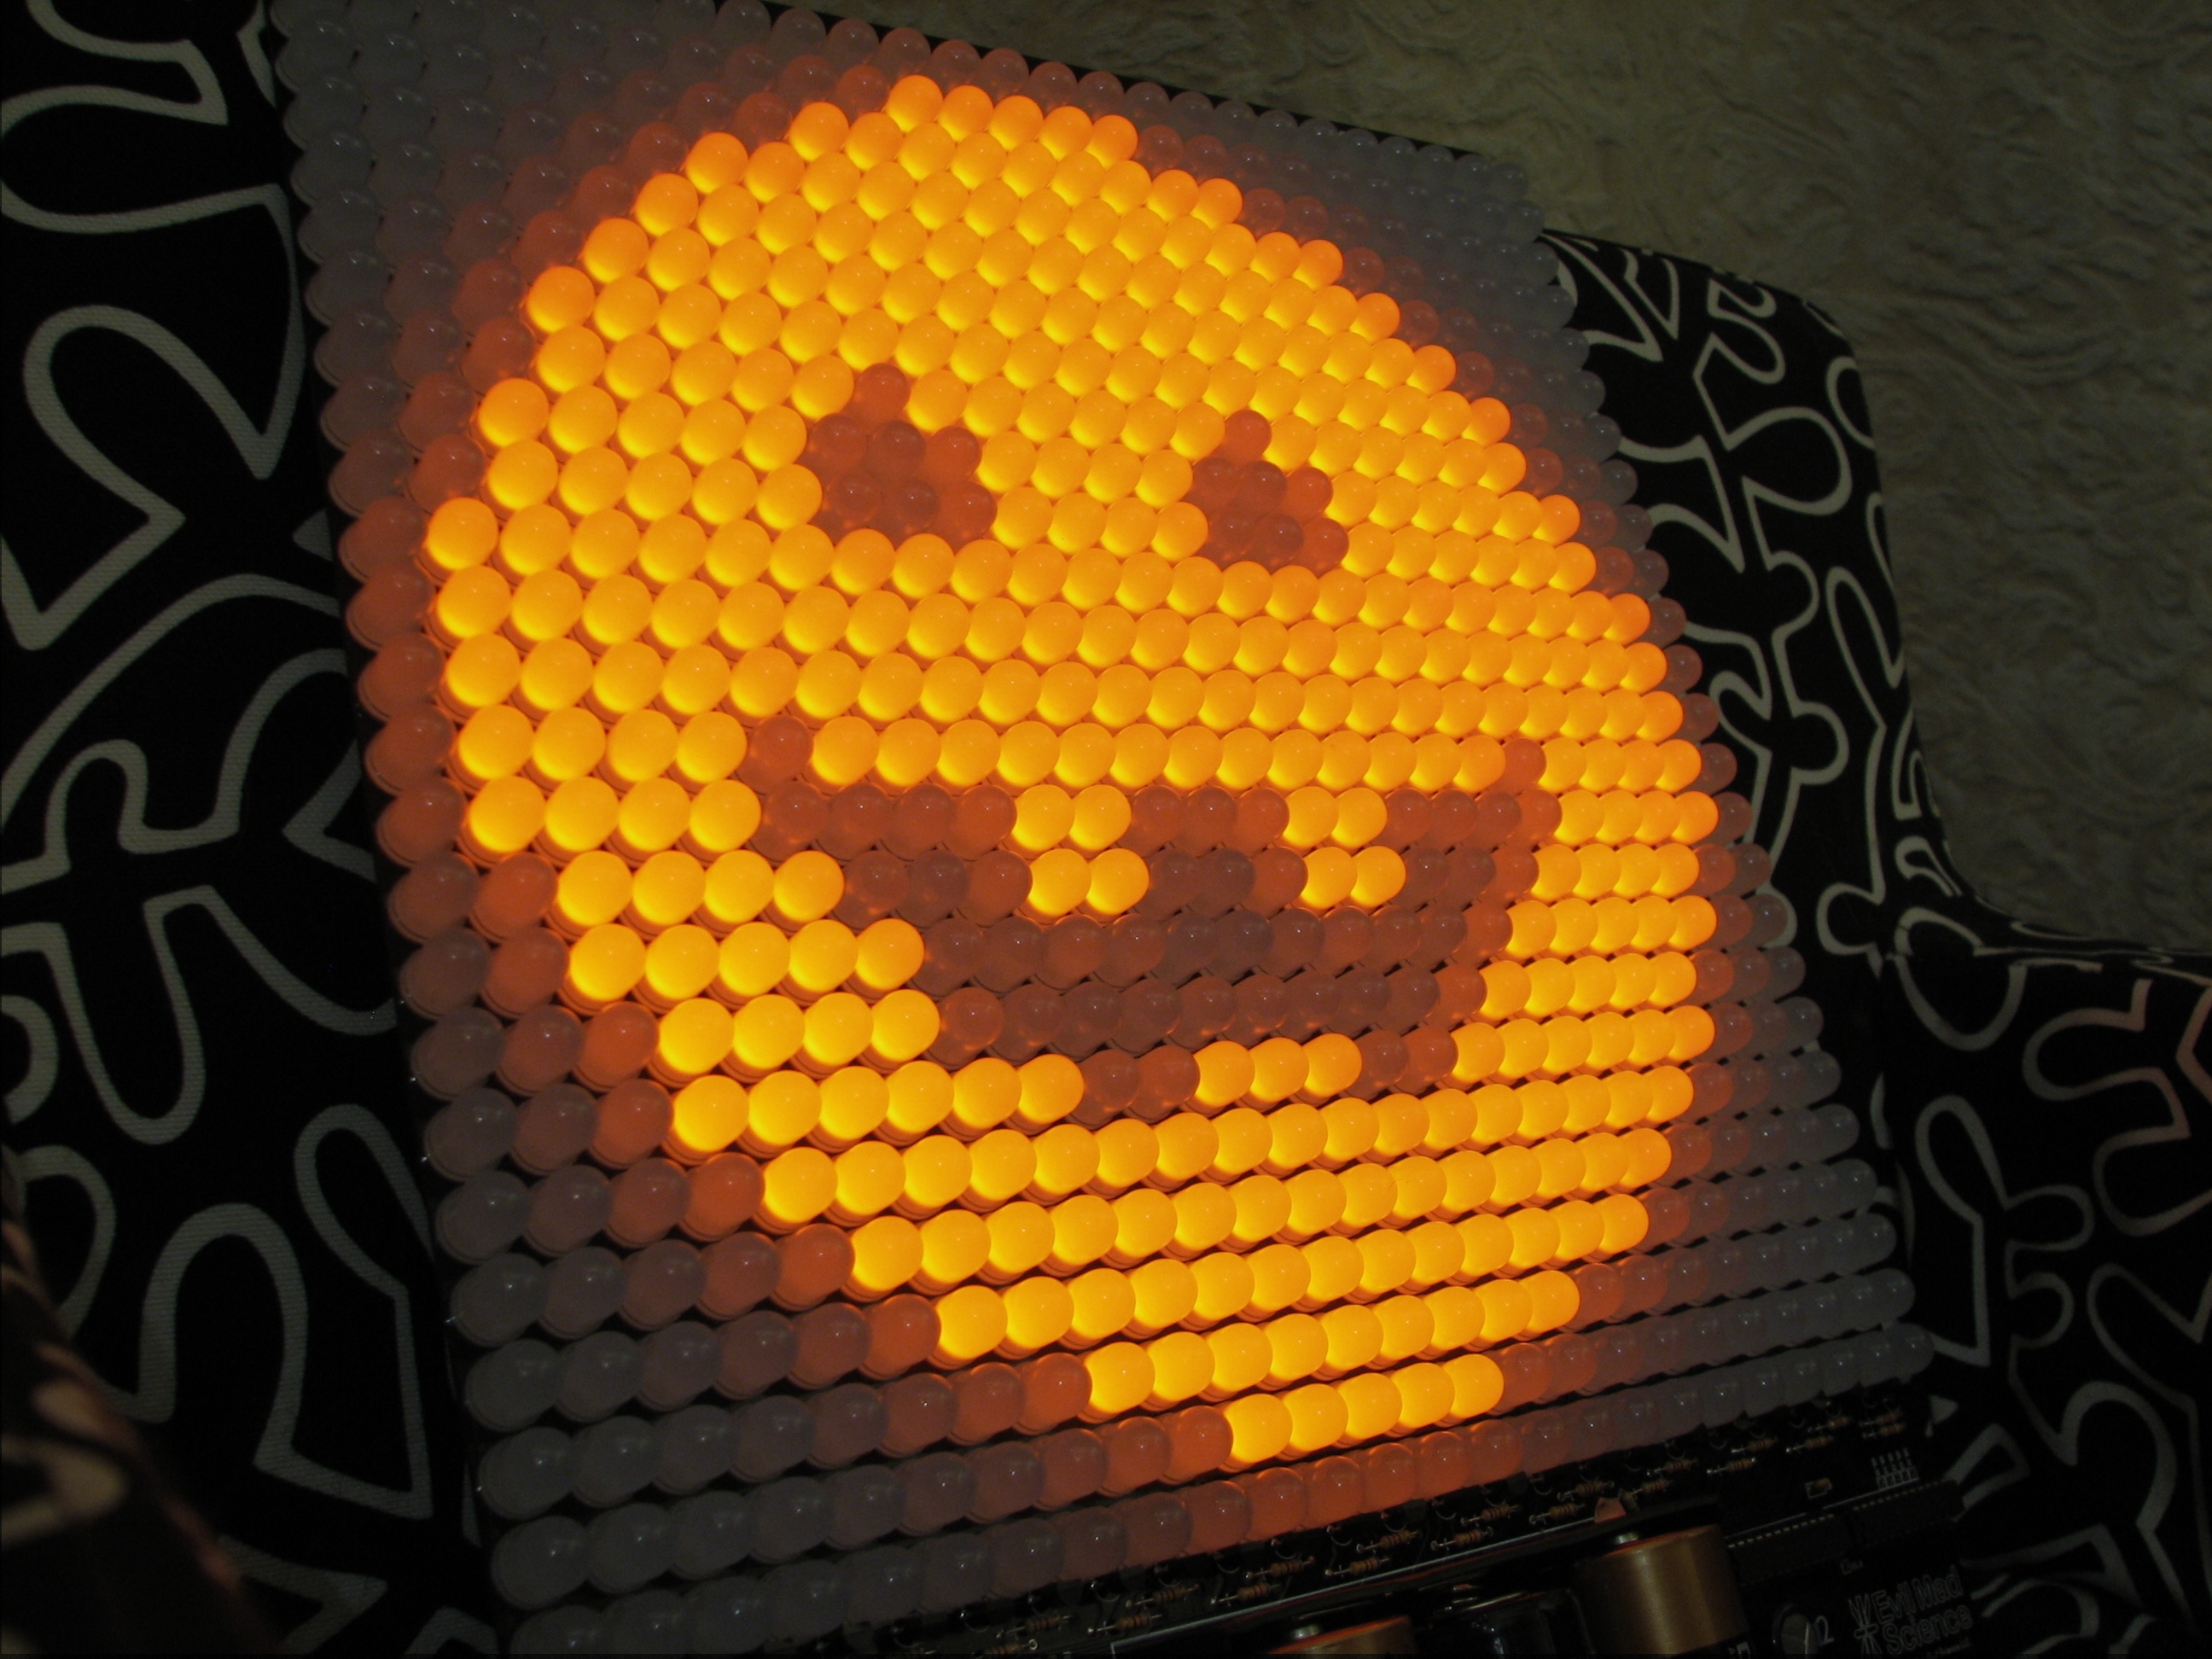
On the bright side, Mark Delp just sent in a program called bmp2peg that’s been added to the Peggy project at Google Code. It converts a (tiny) windows BMP file and generates an Arduino sketch that can run on the Peggy. (bmp2peg runs on windows, and also on linux if you recompile it, macs unknown thus far.) Both bmp2peg and the original cross-platform PeggyDraw can be used to put static images on the Peggy, or to generate static frames that you swap out in the code to build simple animations. The window-friendly pumpkin above was drawn as an image file, converted with bmp2peg, and installed on a Peggy 2 filled with orange LEDs.
Last year at halloween we took a different approach to the Peggy in the window. We took one filled with red LEDs, and every twenty seconds (or so) it would flash the letters “BOO” — huge and bright — and then go dark again. We took a little movie of this last year, showing how that works.
(The flickr video is embedded below — if you can’t see it, click through to see it.)
The video is very dark, but it’s accurate: our street really is that dark on Halloween. You have to walk slowly because you can’t see where the sidewalk is.
You can find more Halloween decor projects in our Halloween Project Archive.
Linkdump: October 2009
- Music of the long now
- Nesting Eyeballs
- Garlic Bread Dalek
- Another Dice Bag
- A good introduction to using solderless breadboards for electronics.
- Silly swirled frosting for cupcakes
- Yet more silly happy face math.
- Comic
bokbook grammar - Penrose floor tiles, with links to more.
- Make a drinking straw cruise missile
- “Building blocks” of lego robots
- Creepy soft sculptures by Melissa Sue Stanley
- The Prime Spiral
- Throbbing Oil
- Old school trick for making repeating tiled patterns.
Everyday science: Litmus candy
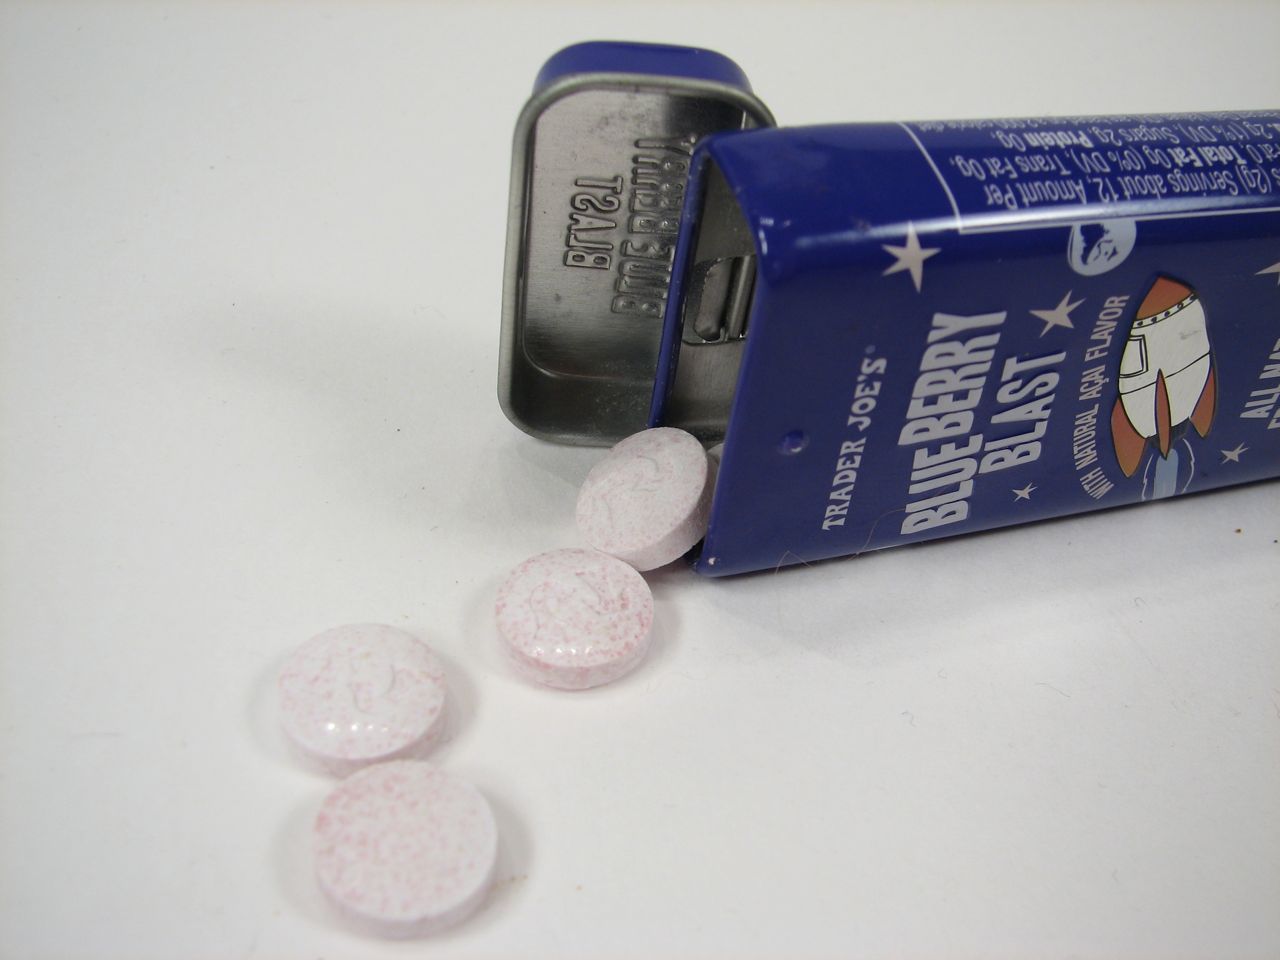
We picked up some of these blueberry/yogurt candies at Trader Joe’s, which didn’t really merit a mention until we looked at the ingredients list:
Well, now, that is interesting. The last ingredient in the list is red cabbage extract, “for color.” But… red cabbage is one of those pH-indicating substances (Link 1, Link 2), that happens to make a pretty good DIY version of litmus paper.
So… if these candies have red cabbage extract for color, do we really have litmus candy?
Continue reading Everyday science: Litmus candy
Q & A with MakerBeam
We mentioned MakerBeam in our September linkdump. At that time they had just launched, with the initial goal of raising $10,000 to begin extruding aluminum.
One month later, MakerBeam has just cleared their funding goal, and Evil Mad Scientist Laboratories is very happy to be one of the institutional sponsors that is helping them to get off the ground. Sam Putman, one of the MakerBeam founders, is here to answer some of the what, why, and how questions about this project.
Congratulations on reaching your goal!
Thank you, and thanks for your help! We can’t wait to see what EMSL is going to do with MakerBeam.
Tell us about your project!
Sure! MakerBeam is an open-source metal building system. There’s a technology called T-slot (example here) that is widely used for industrial automation, robotics and machine enclosures.
MakerBeam has defined a standard called Mini-T which is a miniature version of T-slot. It’s small enough to work as a model building system, and precise and strong enough to build real machines and robots with it.
You’ve chosen to do this as open hardware. Why?
Short answer: because we want it to succeed.
The usual model for starting a business like this is to design it, protect your IP, and use the proprietary IP to capitalize the company in exchange for some percentage of ownership. We’re turning that completely around: We are giving our designs away under Creative Commons licenses. To fund the manufacture, we’re offering various rewards to people who back the project, including Alpha and Beta kits for people who want to help us develop and grow. If someone lent us $10,000, we’d have to pay it back with interest or sell some part of the company. By raising the money in pledges, we can satisfy everyone who has pledged without taking a step that puts the project in debt. Since we don’t have to securitize that debt, we don’t have to have restrictive IP. It’s a win on top of a win. Also, we’re making components, like nuts and bolts or polished rods. We want people to use them without restrictions, and not be concerned that their supplier might change terms or go under. Anyone can extrude their own Mini-T, so the only way it’s disappearing is if the demand for it ceases.
Tell us about Kickstarter.
I love the Internet because it provides us with disruptive technologies faster than I can really process what’s happening. I wake up one morning and Wikipedia has gone from being an interesting experiment to the fount of all knowledge, or Facebook has found all my old high school friends for me, or Twitter has given the planet a short-attention-span nervous system.
Kickstarter is like that, and it’s just the beginning. The model is simple: creators put up projects, with a funding goal and time limit. Pledgers back projects in exchange for whatever rewards are offered, and if the goal is reached within the time limit, everyone’s accounts are charged and the project is funded. If not, no risk, no worries, no charge. So we put up a pledge page (link), got the word out, and now we’re going to be doing the project. Simple as that. This is game-changing in more ways than I can cover here, and once Kickstarter opens project creation to everyone, I think we’re going to see a massive migration of creativity, particularly in the arts, to Kickstarter. How about open source projects?Kickstarter and sites like it will make a huge difference for the FOSS movement. There must be thousands of projects that people would build if they could cover expenses.
A great example of what’s possible: someone builds a new piece of hardware, let’s say a controller, and publishes the schematics and some video of the controller in action. They could put the project on Kickstarter and raise the funds to have it manufactured. The key to making this work is to remember that your backers are investing in your project, but that the returns aren’t monetary. They are going to want to be involved and to get something that no one else will have. I think the best thing an open source project can offer is a chance to be involved in development. By offering Alpha and Beta kits, we’re giving people a chance both to play with the beam early and to help us develop everything that goes with it. A software project, for example, might be ready for Kickstarter when it has working code and an arm-length list of features that could be added. Backers who contribute significantly could pick the features the developers will concentrate on, while smaller contributors get a serial-numbered 3D print of the project mascot for their desk. We’re actively getting invites into the hands of open source developers, so if you want one, get in touch. [You can reach MakerBeam here.] How do you see MakerBeam fitting into the open hardware ecosystem?We’ve pictured it from the beginning as a basic component. The design is tweaked to allow circuit boards to slot right into the sides, which makes building simple enclosures easy. In general we think reaching into the box of MakerBeam is going to be a good first step in prototyping most stuff under two feet on a side.
We’re especially excited about collaboration with people working on robotics and CNC. We’re shipping an institutional kit to oomlout in the UK, which does awesome open-source robotics out of mostly laser-cut acrylic, and of course we’re hoping EMS finds MakerBeam useful in developing the CandyFab and everything that goes with it. We really hope this will release a lot of creative potential. The world of open hardware is blessed with an ever-growing array of sensors, precision servos and stepper motors, and controllers. When it comes time to make that into a robot, people are still reaching for the LEGO or cutting stuff with a laser. With MakerBeam they can just bust out an Allen wrench and get straight to work. Thanks, and congratulations again!Thank you! Our Kickstarter round (link) is open for another 10 days. Alpha kits are all sold, so the only way to get beam by Christmas is the institutional level. Beta kits ship in February and we’ll have those until pledges close.
We are aiming to sell to the public beginning at Maker Faire 2010 in May. We’re stoked and excited to see what people are going to build.Rovin Pumpkin
The Rovin’ Pumpkin’ is a simple robotic pumpkin, and a close cousin of the Snap-O-Lantern. Silently, it sits on your porch– camouflaged amongst the humble squashes.
After a minute, its green eyes start to glow, and it creeps… moving about one foot to the left… and stops. The eyes go dark again. It fades into the darkness. And it waits.
An interesting wafer
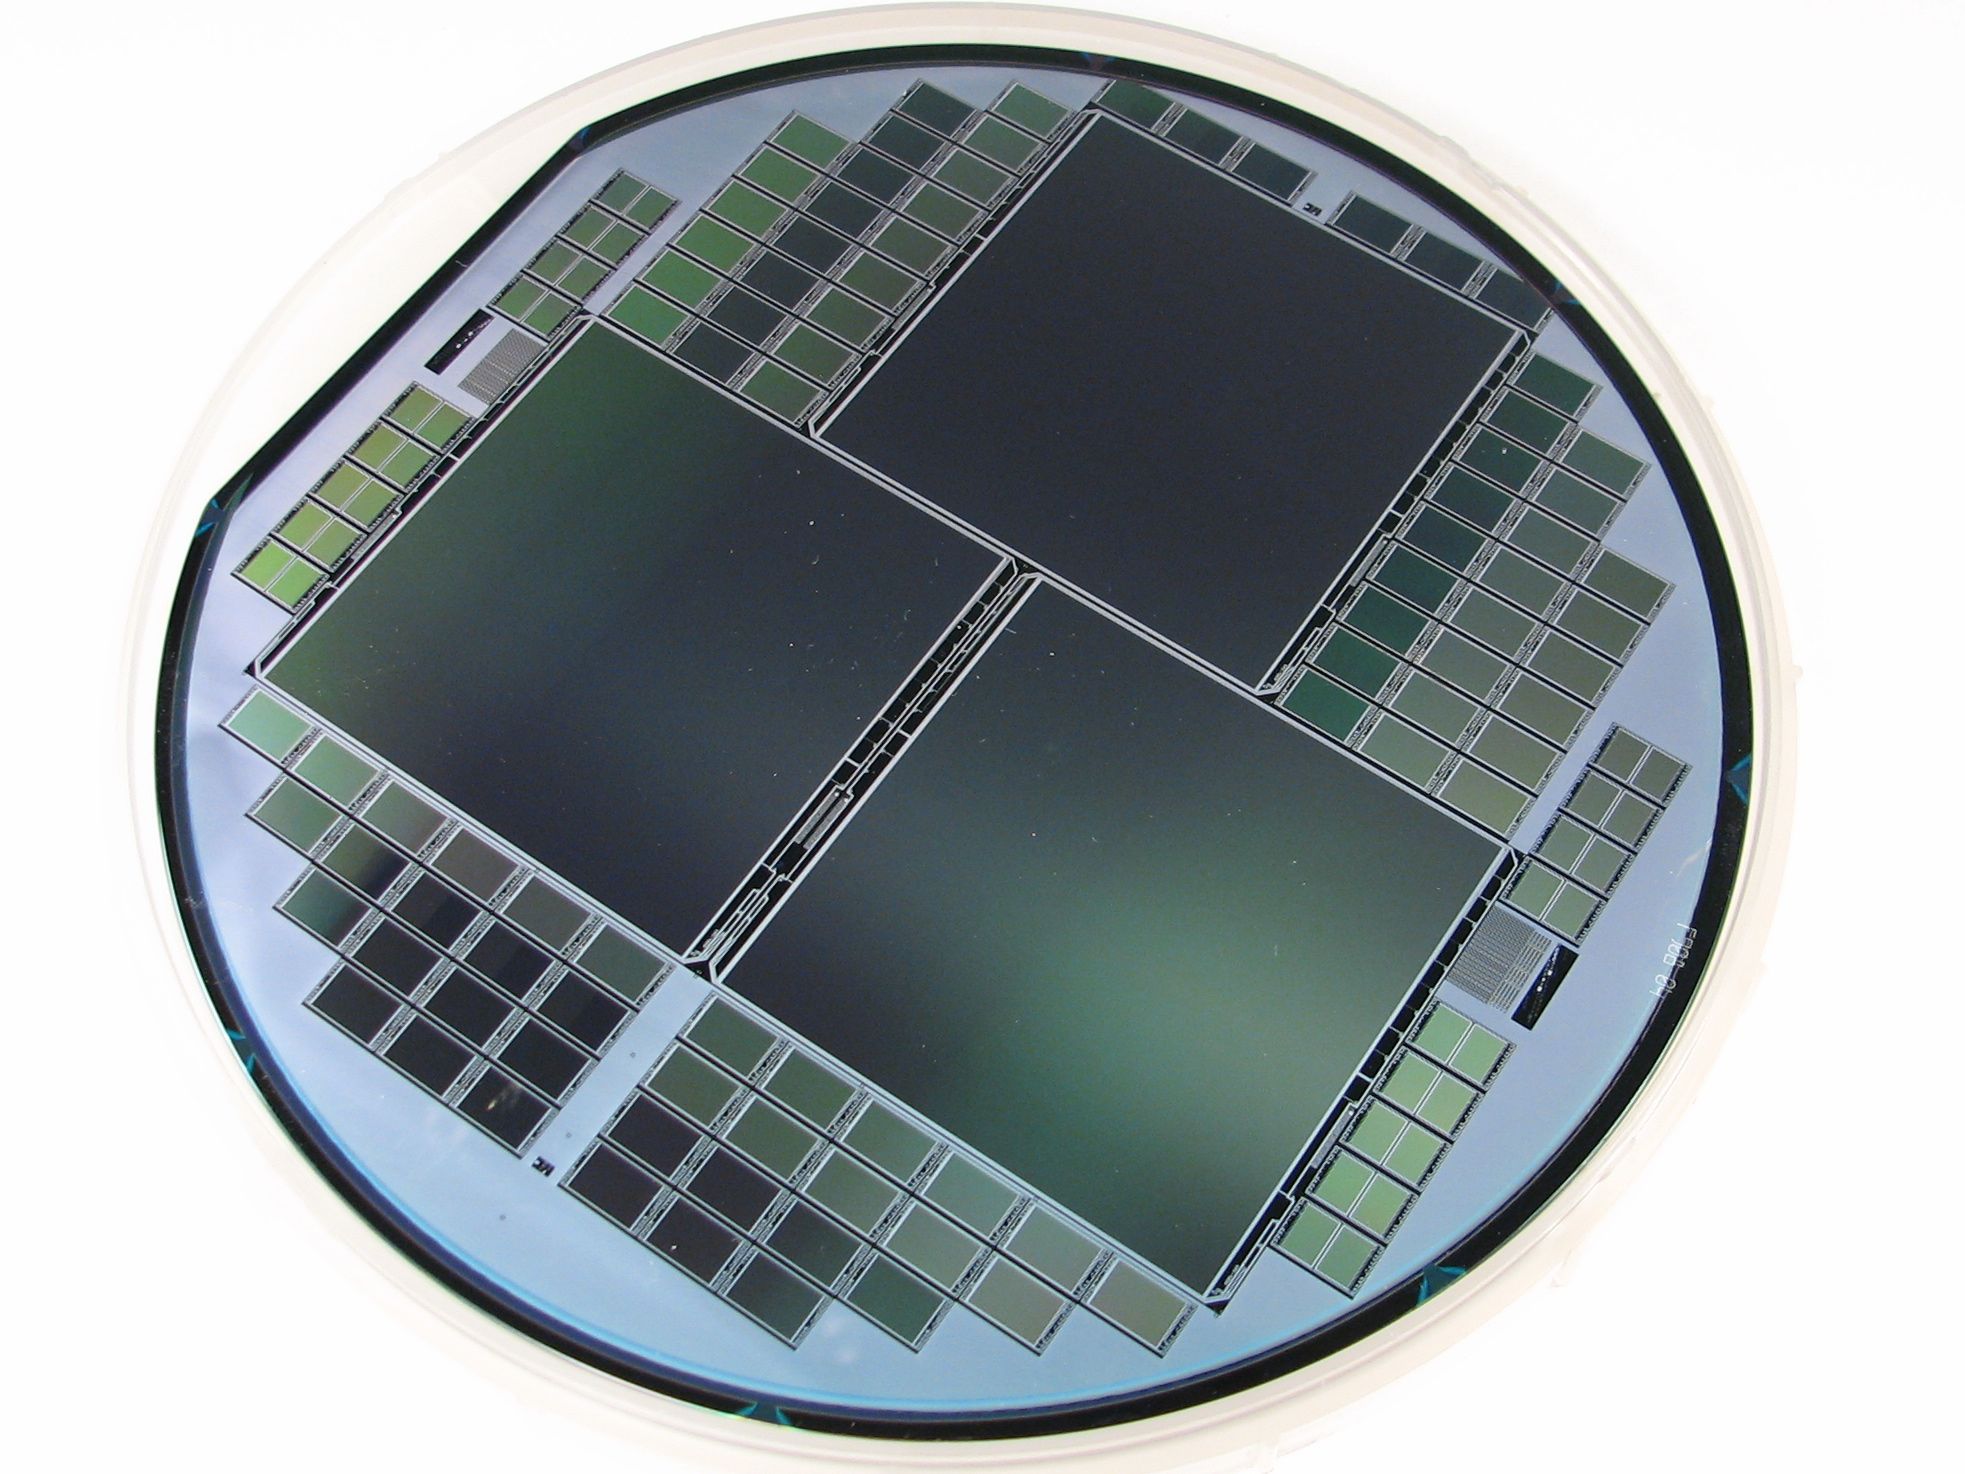
I picked up this interesting wafer at the silicon valley electronics flea market. So far as I can guess, these are some sort of image sensors. The manufacturer has cleverly divided the wafer up to make three different sizes of sensors at the same time– only three of the large ones, and many more in the two smaller sizes.
So, before I pull out the microscope and look for brand names, can anyone guess (or identify) *exactly* what we’re looking at here? For scale, the wafer is about six inches across. A few more pictures follow.
Continue reading An interesting wafer
Instructables Arduino Contest
Over at Instructables, we’re sponsoring an Arduino contest with prizes including Meggy Jr RGB kits. The rules are simple: use Arduino in your project! And by Arduino, we mean any project involving the Arduino IDE in some way. (And yes, you can use your Meggy Jr RGB or your Peggy 2 for this contest.) We look forward to seeing your projects and would love to see them in the flickr auxiliary, too.


