


- This C-17 is actually quite impressive.
- DIY Spider Catcher.
- Warping text to splines.
- 6174 is an interesting number. And so is 1729. In fact, some people claim that there is no such thing as an uninteresting number.
- Rat or mouse?
- Compact Marble Run, made in four hours.
- Math Midway traveling exhibit.
- Big switch lamp.
- Some thoughts on edible lasers.
- Hello Kthulhu.
- Had not heard of Haidinger’s Brush. Have you?
- We want superconducting maglev train sets. Now.
- Cloud wakes and vortices are visible from space. Did you know that an island can shed vortices in its wake?
- Crocodile locomotion.
Making a Frabjous

George W. Hart is a professor at Stony Brook and is one of our favorite artists, making a wide variety of stunning geometric sculptures. On his of his many works that has particularly captivated us for some time is a sculpture called Frabjous.
When we realized that George had posted a template for this sculpture we dropped everything, grabbed the cardboard and hot glue, and raced to build our own.
Continue reading Making a Frabjous
Basics: Serial communication with AVR microcontrollers

One of the distinguishing characteristics of beginner-friendly microcontroller platforms– Arduino, PICAXE, and a few dozen others– is that they neatly wrap up and hide the nuts-and-bolts details of interfacing with the hardware.
Like everything else, it’s a blessing and a curse. The benefits are clear: A new user who has just acquired an Arduino can plug it in, blink an LED, and have a working demonstration of two-way serial communication in just a few minutes.
The drawbacks are a little harder to see. When you just use one line of initialization that calls a “library,” it’s easy to overlook exactly what’s involved: how many lines of code have invisibly been added to your program? What memory structures have been allocated? What interrupts are now going to disrupt program flow and timing? There’s also a portability issue. We often hear from people who got started with Arduino but now want to explore other AVR microcontroller systems, and don’t know how or where to start the migration process.
In what follows we discuss a minimal setup for serial communication with AVR microcontrollers, and give two example implementations, on an ATmega168 and on an ATtiny2313. While this fundamental “AVR 101” stuff, we’re approaching the problem (this time) from the migration standpoint. Suppose that you had an Arduino based project, where you relied on serial communication– using the library functions–between that hardware and your computer. From there, how would you migrate to a stand-alone AVR microcontroller with similar functionality, or even to a different microcontroller?
Continue reading Basics: Serial communication with AVR microcontrollers
RoboGames Awards
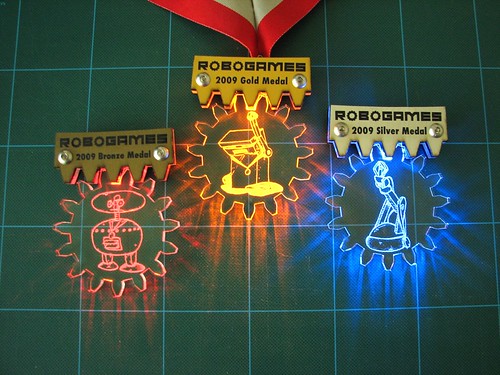
We’ve been helping out RoboGames with getting the award designs ready for next weekend. We just got the final prototypes done and handed over for production and we’re loving how they turned out! The awesome official artwork by Doctor Popular (below) features prominently on the medals, lit by throwie-style LEDs hidden between layers of acrylic. You want one of these around your neck, don’t you?

The event runs Friday-Sunday, June 12-14 at Fort Mason in San Francisco. Get your tickets now!
We’ll be bringing CandyFab to show off and lots of kits and pretty LEDs for sale. We hope to see lots of you there next weekend!
Fabbing at Maker Faire

CandyFab managed to infiltrate a couple of the other 3D printing projects at Maker Faire this past weekend. That’s me above, at the MakerBot booth, in my brand-new MakerBot shirt, explaining MakerBot to some Maker Faire visitors. Below, Kenji’s Fab at Home sports a brand new CandyFab vinyl racing sticker. CandyFab itself performed like a champ, printing candy and raising blood sugar levels all weekend while we talked shop with all the other fabbers.

Tiny portable AVR projects: ATtiny2313 breakout boards
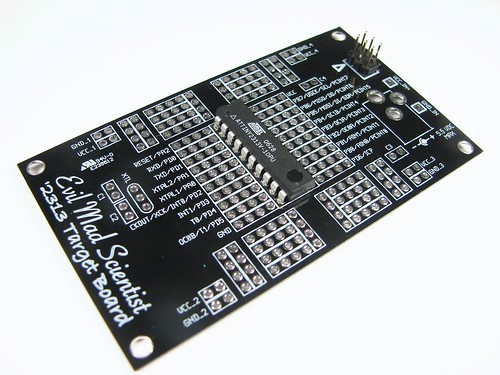
We use a lot of our ATmegaXX8 “business card” breakout boards for the ATmega168 microcontroller. We also still wire up a lot of minimal target boards to use the ATtiny2313 microcontroller, so here’s the missing piece: A simple breakout board for the ATtiny2313.
Continue reading Tiny portable AVR projects: ATtiny2313 breakout boards
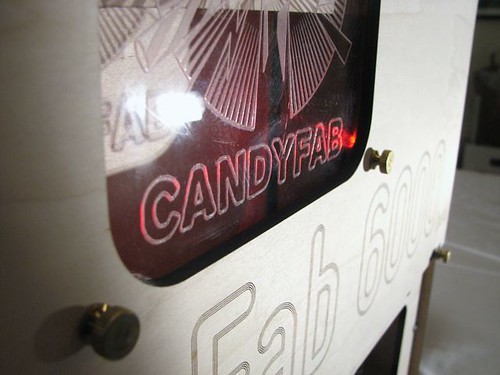
The CandyFab 6000

Today we are relaunching the CandyFab Project with a new logo and a new wiki site, wiki.candyfab.org.
But more importantly, we are unveiling this new machine, the CandyFab 6000:
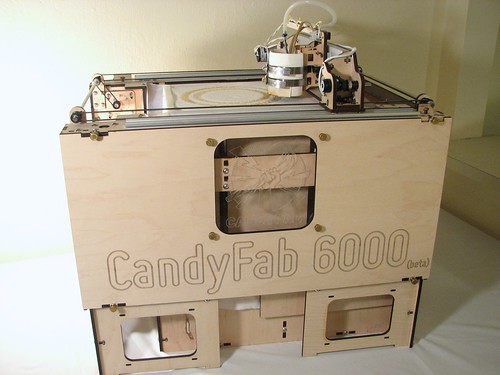
It’s a brand new CandyFab– still in beta. A clean break, designed from the ground up with almost no parts in common with the original, the CandyFab 4000. All new mechanics. All new electronics. All new software. Smaller but still big: the build volume is more than 10 liters, but it’s now small enough to fit on a desk top.
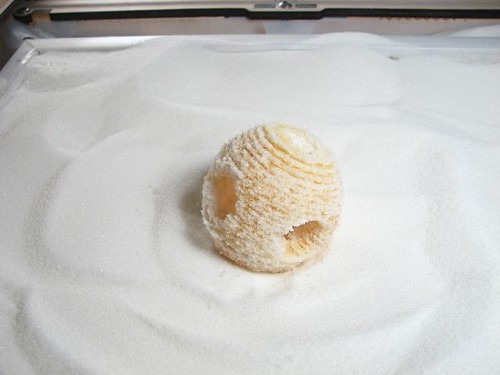
Here’s one of the first objects that we fabbed on the CandyFab 6000: a drilled sphere, about two inches in diameter and layer thickness of 1/15 inch. There’s plenty of room for improvement, and finally we have a machine that can be improved.
The machine is designed so that it can be made from scratch– i.e., without dumpster diving for old HP pen plotters. Three axes of quadrature-encoded DC servo motor control. Timing belts and acme lead screws. Food-safe sugar containment. The body is made from laser-cut plywood with acrylic highlights and stainless steel hardware. (Steampunk-compliant brass thumbscrews where appropriate, too.)

The new modular electronics control platform is called Zuccherino— that’s italian for “Sugar cube.” One Arduino-compatible circuit board per axis. (Our prototype above shows X,Y,Z, Heat, and Air axes, plus a master board.)
It’s an expandable system for all kinds of motion control projects, and we’ll be making kit versions of all of the Zuccherino boards later this summer.
We’ve also got new cross platform control software — called CandyFabulous underway, and it’s looking sweet.
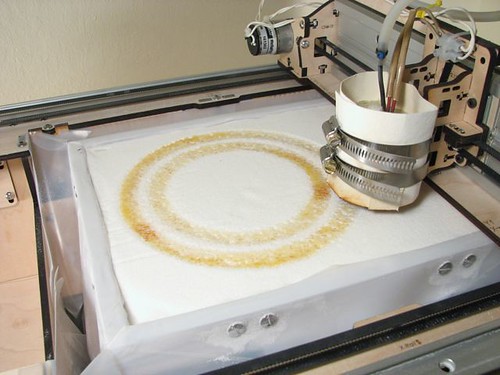
And… oh can it fab sugar. In the photo here we’re partway through printing an hollow torus eight inches in diameter.
Where from here? Check out more details at CandyFab Project.
Finally, you can see the CandyFab 6000 first hand– this weekend at Maker Faire! We’ll be showing it off at booth #293, in the Expo Hall.
Soft Circuit Merit Badge
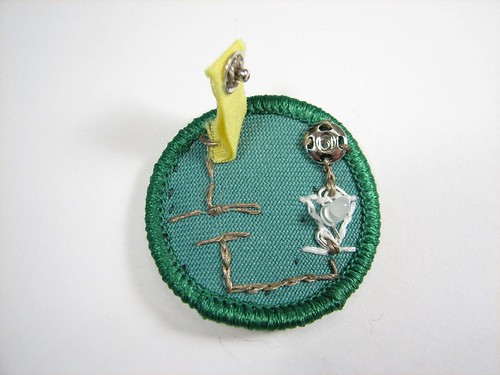
The proliferation of spoof, nerd, science, and electronics merit badges has demonstrated that geeks like to show off their skills and accomplishments. One skill is particularly appropriate for the format: soft circuitry. By building your own soft circuit onto an actual badge you can demonstrate your mastery.
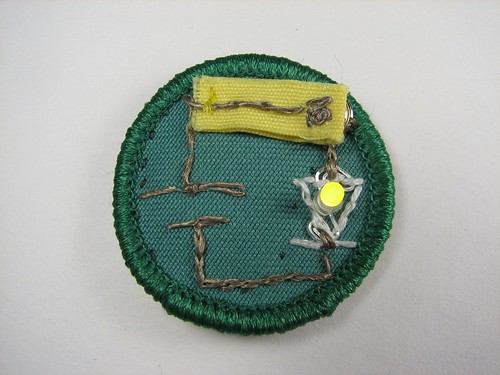
The size of the badge is just right for a simple circuit with a battery, a switch and an LED. The crowning touch is that the stitched circuitry can form the circuit diagram as well.
Linkdump: May 2009
- Hacker emblem
- Alien Autopsy
- I wanna banana lathe!
- marble elevators from the Exploratorium
- Cool Haus (via)
- The Best Comments
- Cute felt sting rays
- Windmill-charged toy car
- Frivolous Theorem of Arithmetic
- MISO, a free font.
- Overly simple balloon animals
- 3B printing?
- Chipmunks versus Star Wars
- Plushes by SukiSuki (Coming soon, but cool looking)
- Sumopaint: An in-browser graphics app.
- VHS Pinball
- Lego Photography Tutorial in Lego, no less.
- Yet another cat that hasn’t quite figured out what to do with the sewing machine.
Peggy on Make cover!

We’re thrilled to see Peggy 2 on the cover of Make Magazine vol. 18 which is showing up in mailboxes now and will be on shelves soon. We were especially excited to get our copy so we could see Windell’s article on making a one-ton servo motor out of an electric automotive jack.
Speaking of our friends at Make, Maker Faire is coming right up! We’ll be there again and hope to see lots of you in San Mateo on May 30 and 31. Discounted tickets are only available through May 20, so if you’re planning to attend, get your tickets soon!
