We are one

Staff photo

One year ago today, Evil Mad Scientist Laboratories went live. Happy birthday to us!

We originally started this blog as a means to help us document and organize our various projects. Since then we’ve seen writeups about our projects on more than two thousand other blogs, and even in a handful of print magazines. We’ve contributed projects to an art show, sparked some interesting collaborations, and built some of the wackiest machines that we ever have. In the course of these projects we somehow found excuses to buy three old HP pen plotters, 2.4×10^4 LEDs, a Macintosh SE, Marshmallow Peeps, and three hundred pounds of sugar.

What will the next year bring? Who knows! But, we’re looking forward to it.
Thanks for reading Evil Mad Scientist!

– Lenore & Windell


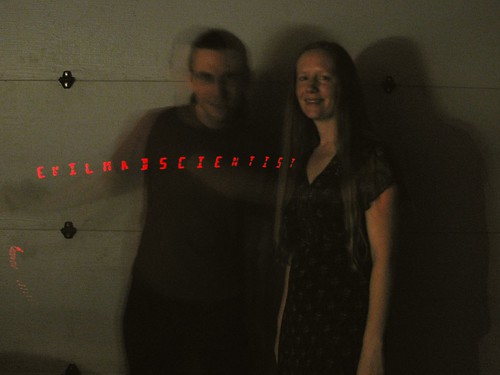
(Pictured above: An alphanumeric persistence of vision display. Source code, how-to and more photos coming next Wednesday.)

Slicing STL files in POV-Ray


We have been using POV-Ray to create 3D models and render bitmap slices that can be printed with the CandyFab 4000, our home-built 3D sugar fabricator. One thing that we could do to extend the usefulness of this procedure is to be able to take STL files as input, because STL is the de facto standard file format for 3D fab shops and the machines that do the fabrication. So, here’s how to do it: STL files can be converted to POV-Ray format, and from there we can use our usual bag of tricks to render the set of bitmap slices.


In this article, we explain that process in more detail: We’ll take an STL file, import it into POV-Ray using the stl2pov utility, and then set it up to render a series of slices. Our example file is the sculpture Metatron by Bathsheba Grossman, who has released the STL file for it into the public domain (with some interesting results). The picture above shows Metatron, as rendered in POV-Ray.


The first step is to get and install the stl2pov utility from the author’s page. It’s a cross-platform command line program. (Mac/Linux/Unix users, follow the instructions to compile the source. Windows users, go ahead and download the compiled binary.)


Next, we need an STL file to convert. If you have your own, you can certainly use that. To follow along using the Metatron STL file, go to http://www.bathsheba.com/downloads/ and download the file metatron.zip, a 3.1 MB .ZIP file. After decompressing, that yields metatron.stl, which weighs in at 6.6 MB.

Since we have the utility and the source STL file, we’re ready to perform the conversion. The output file after the conversion will be a large text file that can be awkward to work with. A solution that makes things easier is instead to make it into a POV-Ray .inc (include) file, so that we can simply edit a small POV-Ray wrapper that calls the included file that describes our complex object. To perform the conversion at the command line, execute the following code in the directory with metatron.stl:


stl2pov -s metatron.stl > metatron.inc

The “-s” option turns on smoothing, an option that I have found to increase reliability, and the command saves the converted output to a new file called “metatron.inc”. Unless your computer is really fast, go get some coffee and come back in ten minutes– the conversion can take a while. My file ended up at 28 MB — large enough that you may want to edit it in a dedicated text editor (emacs, vi, AlphaTK….), not the editor built into POV-Ray.


The contents of the new metatron.inc consist of a single definition of a POV-Ray mesh object made out of smooth triangles. It looks like this:

#declare m_Rhinoceros_Binary_STL___Jun_15_2005__ = mesh {
smooth_triangle { // #1
<-1.56964, 0.774161, -0.360695>, <-0.898199, 0.389497, -0.20379>,
<-1.59137, 0.732853, -0.338752>, <-0.910102, 0.368279, -0.189959>,
<-1.57298, 0.776465, -0.341074>, <-0.903134, 0.383962, -0.192153>
}
smooth_triangle { // #2
<-1.58513, 0.728167, -0.377533>, <-0.910933, 0.36028, -0.200995>,
<-1.56964, 0.774161, -0.360695>, <-0.898199, 0.389497, -0.20379>,
<-1.56618, 0.771805, -0.379959>, <-0.892874, 0.395758, -0.214829>
}

[Snip! Insert 28 MB of the same right here…]

smooth_triangle { // #138379
<0.486637, 0.670353, 0.431943>, <0.678163, 0.482259, 0.554546>,
<0.451365, 0.691581, 0.456294>, <0.669205, 0.482143, 0.565423>,
<0.480983, 0.649411, 0.456491>, <0.678073, 0.468723, 0.56614>
}
smooth_triangle { // #138380
<0.451365, 0.691581, 0.456294>, <0.669205, 0.482143, 0.565423>,
<0.427022, 0.675693, 0.497914>, <0.659582, 0.482502, 0.576319>,
<0.456994, 0.655713, 0.480073>, <0.669431, 0.473142, 0.572712>
}
} // end of mesh m_Rhinoceros_Binary_STL___Jun_15_2005__


The #declare statement in the .inc file tells us that it defines a POV-Ray mesh object called “m_Rhinoceros_Binary_STL___Jun_15_2005__”, and it is up to us to use it. Minimally, we need to call #include “metatron.inc” to get the file, and then place the object somewhere. Here is a complete code example, for a POV-Ray file (let’s call it “metatronSimple.pov”) that can draw the Metatron, given that the metatron.inc file is present:

//metatronSimple.pov

#include “metatron.inc”

background{color rgb 1 }

object{ m_Rhinoceros_Binary_STL___Jun_15_2005__
rotate 90*x

texture{ pigment{ color rgb <1,0.5,0> }
finish { ambient 0.15
diffuse 0.85
specular 0.3 } } }

light_source { <-20,100,20> color rgb 2}

camera {
perspective
angle 35
right x*image_width/image_height
location <-3,7,15>
look_at y*0.25
}


Since we can now render the sculpture, are we done? Note quite. There’s one little detail to worry about which is that the mesh object does not really have a defined inside or outside, which becomes a problem when you want to start slicing it up with boolean operations. The solution to this is to define what’s called an “inside vector” that tells POV-Ray where the inside of the sculpture is.
The vector is added just before the closing bracket of the #declare statement, at the very end of metatron.inc, like so:


inside_vector <-0.5, 0.68, 0.5>
} // end of mesh m_Rhinoceros_Binary_STL___Jun_15_2005__


With that modification, you can now use full constructive solid geometry operations on the imported STL object, including slicing it. As we described in the article about the CandyFab 4000, it’s a matter of rendering an animation in POV-Ray to automatically generate the slices. For each frame of the animation, we take the intersection of the object of interest with a thin, flat rectangle, which is raised up a little bit higher with each successive frame:


#if (overview)
object { m_Rhinoceros_Binary_STL___Jun_15_2005__ rotate 90*x }
#else
intersection {
object { m_Rhinoceros_Binary_STL___Jun_15_2005__ rotate 90*x }
box { < -50, 0, -50>, < 50, .10833, 50>
translate y*frame_number*0.10833 }
}
#end // end if


As you can see, we’ve also added a code “switch” (“#if (overview)”) that determines whether we’re slicing the object or just displaying it. Also note that the slice thickness can be chosen however you like; our 3D slices are 0.10833″ thick right now, so that’s the value that’s displayed here.

Of course, if you’re just displaying the object (not slicing), you might want to make it look a bit nicer. The rendering at the top of this article was made by adding a background, some texture, lighting, moving the camera, and was otherwise gussied in ways that you don’t want if you’re slicing up the object. These are all controlled by the same software switch (overview) which is at the beginning of this POV-Ray file, which is called “metatron.pov”. You can download this code example (along with metatronSimple.pov) here (3 kB .ZIP file).


Setting overview = 0 instead, we can now render the slices. Turn on animation, i.e., the clock variable, in POV-Ray, and set it to render 58 frames. You can use the lowest quality setting (Quality 1) and antialiasing should be turned off. Running that produces 58 separate bitmap image files; here is what a selection of four of those slices looks like:


Just looking at a few slices doesn’t really give you a flavor of what the whole object looks like, however. One trick to visualize it is to scan rapidly through the image slice files like a flip book. You can watch this little quicktime movie (53 kB) of doing just that to get the idea. If you watch a few times, it can give you good intuition into how the structure actually fits together.


So are we planning to render Metatron in sugar? Yes, but not yet– it’s a detailed sculpture and we need to improve our effective resolution (or total build size) before going there. We have, however, previously used the technique we’ve described here to fabricate Soliton, which is another one of Bathsheba Grossman’s sculptures.

Humane population control for feral golf balls

Natural environment
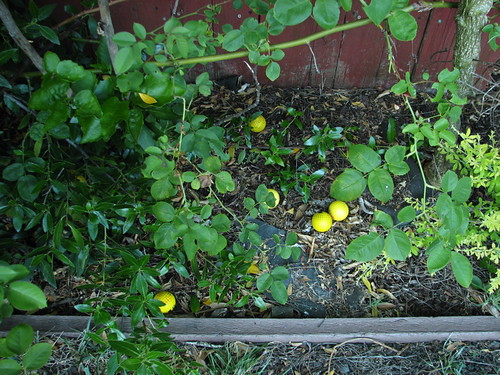
One of our neighbors is retired and, so far as we can tell, spends approximately twelve hours per day golfing. Golfing from his front lawn, that is. While he’s an agreeable fellow and we will not begin to question the motives or reason of someone that has this compulsion, we will simply observe that our neighborhood has an infestation of foam practice golf balls.

Beyond the many hundreds of balls that are successfully reclaimed each day, some dozens accumulate in the yards, bushes and hanging potted plants of our house and the houses of our other neighbors. They get stuck in the trees and bushes, confusing us when we go to pick lemons. People remember to shut the windows of their cars when they park. Sometimes it gets so bad they clog the gutters. You can even find them in places that they could have only gotten to after three reflections, leaving you quite puzzled. But, you get the idea.

Once behind a fence, they seem to have particular trouble getting out. (Especially if there’s a dog.) Case in point: This weekend we were at one of our (non-golfing) neighbors houses for a birthday barbecue. In the back yard, down below the little bushes, approximately twenty yellow balls were visible. I didn’t look hard; these were just the ones in plain view. When I pointed them out to our hosts, I learned that they had already thrown the day’s catch (a few dozen balls) back over the fence.

What do do? We decided to practice a humane method of dealing with pests: catch, tag and release.

The whole bandMany of the partygoers got involved in the process. Most of the balls were tagged with simple designs, but some were quite elaborate. We particularly liked this set (which we didn’t make), showing four foam balls as members of Kiss. We tossed them over the fence, and they disappeared early in the morning. We’re waiting to see if any of the tagged ones reinfest the yard, or if we get new ones every day.

If our golfing neighbor is sufficiently annoyed by people writing on his little foam balls, it may even be effective as a means of population control.


Resources for getting started with AVRs

This is a short list of resources for getting started with AVR microcontrollers. It’s intended as a supplement to intro AVR classes that we have given. We intend to periodically update this list; leave your suggestions for additions in the comments, please. (Last update: October 2012)

First of all, these GUI installers for the GNU AVR toolchain are really excellent: Two flavors for Mac and Windows:

CrossPack (Mac – recommended solution)

MHV AVR Tools (Windows – recommended solution. Also available for Linux and Mac)

On Linux and Unix-like operating systems (Macs included) you can also follow the directions given by bdmicro (330 kB PDF) for installing the components one at a time.

Almost certainly the best place to get started is at Ladyada’s AVR tutorial. It is extensive and up to date, and it will probably be kept up to date better than most of the other resources that we mention here.

A couple of other sets of instructions and reference guides:

Some notes on hardware:

A few interesting examples of AVR source code:

  • TV-B-Gone, the open-source version.
  • Gobs of other good examples at Ladyada.net
  • Procyon AVRlib by Pascal Stang. Open-source C libraries to do all kinds of things– some quite advanced.

Our own articles about and using AVR microcontrollers:

  1. An AVR-based Analog Plotbot with an E-Paper Display
  2. Quick and Dirty D to A on the AVR: A timer tutorial
  3. Fixing a bad frequency fuse bit on an AVR
  4. Resources for choosing a microcontroller
  5. Programming the Atmel ATtiny2313 in Mac OS X (only partly Mac specific– but mostly out of date. Some hints about programmers, programming, and target boards.)
  6. How to make high-tech LED decorations for the holidays
  7. LED Micro-Readerboard, version 2.0
  8. LED Micro-Readerboard, version 2.0: FAQ File (with hints about programming)
  9. Instructables: Micro-Readerboard Build
  10. Using AVR microcontrollers: Minimalist target boards
  11. The Adafruit Industries USBtinyISP kit
  12. Using an ADXL330 accelerometer with an AVR microcontroller
  13. AlphaPOV: An alphanumeric persistence of vision display
  14. MiniPOV Cylon firmware
  15. Make a Robotic Snap-O-Lantern!
  16. Peggy, A Light Emitting Pegboard Display
  17. Solid freeform fabrication: DIY, on the cheap, and made of pure sugar
  18. Meggy Jr RGB
  19. POV Lissajous figures
  20. Resurrecting Tennis for Two
  21. Business card breakout boards for ATmega48/88/168/328
  22. Scariest Jack-o’-Lantern of 2008
  23. Simple Solar Circuits
  24. The Mignonette
  25. Peggy 2.0
  26. Single Sided Circuit Board with an ATtiny2313
  27. Business card breakout boards for ATtiny2313
  28. Basics: Serial communication with AVR microcontrollers
  29. Giant 7-segment displays
  30. Deluxe LED Menorah
  31. The Larson Scanner
  32. The Rovin Pumpkin
  33. The Bulbdial Clock
  34. Using an ADXL335 accelerometer with an AVR microcontroller
  35. Mac Sleep Light Pumpkin
  36. Octolively Interactive LED panels
  37. ISP Shield for Arduino
  38. Reading and writing flash contents
  39. Sharing target boards
  40. On the design of the Bulbdial clock
  41. Diavolino
  42. Interactive Game of Life Exhibit
  43. Say Hello to xmega
  44. Blink an LED with an AVR
  45. The Art Controller

Using AVR microcontrollers: Minimalist target boards

USBtinyISP and simple target

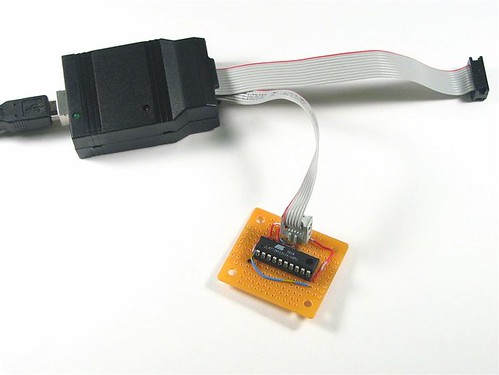
This is a quick how-to guide on making ultra-simple development boards for programming AVR microcontrollers. Most recent-vintage AVRs can be programmed through an ISP (in-system programmer) connection; all that is really needed is a place for the chip to sit and a way to connect to the programmer.

That’s where these minimalist AVR “target boards” come in. These little boards cost only about $2 and take only a few minutes to make.

It turns out that I build a lot of these because asking “how do you make a circuit to program the AVR?” is really the same as asking how you can program an AVR that is in a circuit. And, we might as well start with a simple circuit.
Continue reading Using AVR microcontrollers: Minimalist target boards

The Adafruit Industries USBtinyISP kit

USBtinyISP, assembled

This week I’ve been trying out a new low-cost AVR programmer from Adafruit Industries, and it looks like a winner. The USBtinyISP AVR Programmer is an open-source, USB, in-system programmer (ISP) that you can get as a kit for $22. The design is simple, straightforward and fairly easy to assemble. It also manages to incorporate a couple of important features that I have found to be missing from the low-end USB AVR programmer from Atmel, the AVRISP MkII, while coming in at only half the price.

Continue reading The Adafruit Industries USBtinyISP kit

Instructables: Micro-Readerboard Build

MAKEKits wrote up an article on Instructables about assembling and reprogramming our little LED Micro-Readerboards.

They suggest assembling the project with a socket so that you can take the microcontroller off and reprogram it in an external programmer.

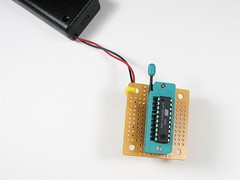
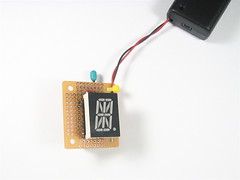
Another way to build it with a socket is how we’re demonstrating here, in this test fixture for the project.

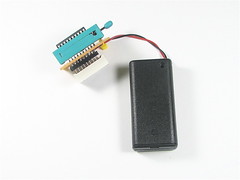
This setup has a tiny piece of perfboard that connects a 20-pin DIP ZIF socket and a socket for the 18-pin LED display. Thus, both the AVR microcontroller and the LED display are socketed, and can be easily removed. This fixture is used primarily to test programmed AVRs. Since the chips are swapped out regularly, the ZIF socket makes sense, even though it’s more expensive than a regular DIP socket.

ZIF Side   LED Side

Tester Board

LED Micro-Readerboard, version 2.0


LED Micro-Readerboard spells out MAKE

We’ve just finished updating the LED Micro-Readerboard (formerly the micro-readerboard LED ornament) to version 2.0. This version features longer battery life, the use of a standard common-cathode LED display, and a new set of phrases including optional holiday phrases. It’s an open-source project so you can download the code, order some parts, and go to town.We are also making it available as a kit, exclusively through the Make Store. The kit features a remarkable high-intensity LED display that enables vastly improved battery life.

Continue reading LED Micro-Readerboard, version 2.0