While there are a great many guides that teach you to solder (here is one fine example), we have found that there is a surprising lack of guides to help you with the opposite skill: How not to solder. This guide shows you some wonderful examples of how well circuits can come out when you disregard all of those other guides. Let’s get started!
To begin with: Make sure that your circuit board is “generally messy.” A messy board might have leads trimmed to various lengths and/or extra little bits and blobs of solder and flux everywhere. Not only will the extra little bits of solder occasionally cause short circuits, but the disarray will help to hide other issues that might be lurking, making them nearly impossible to diagnose.
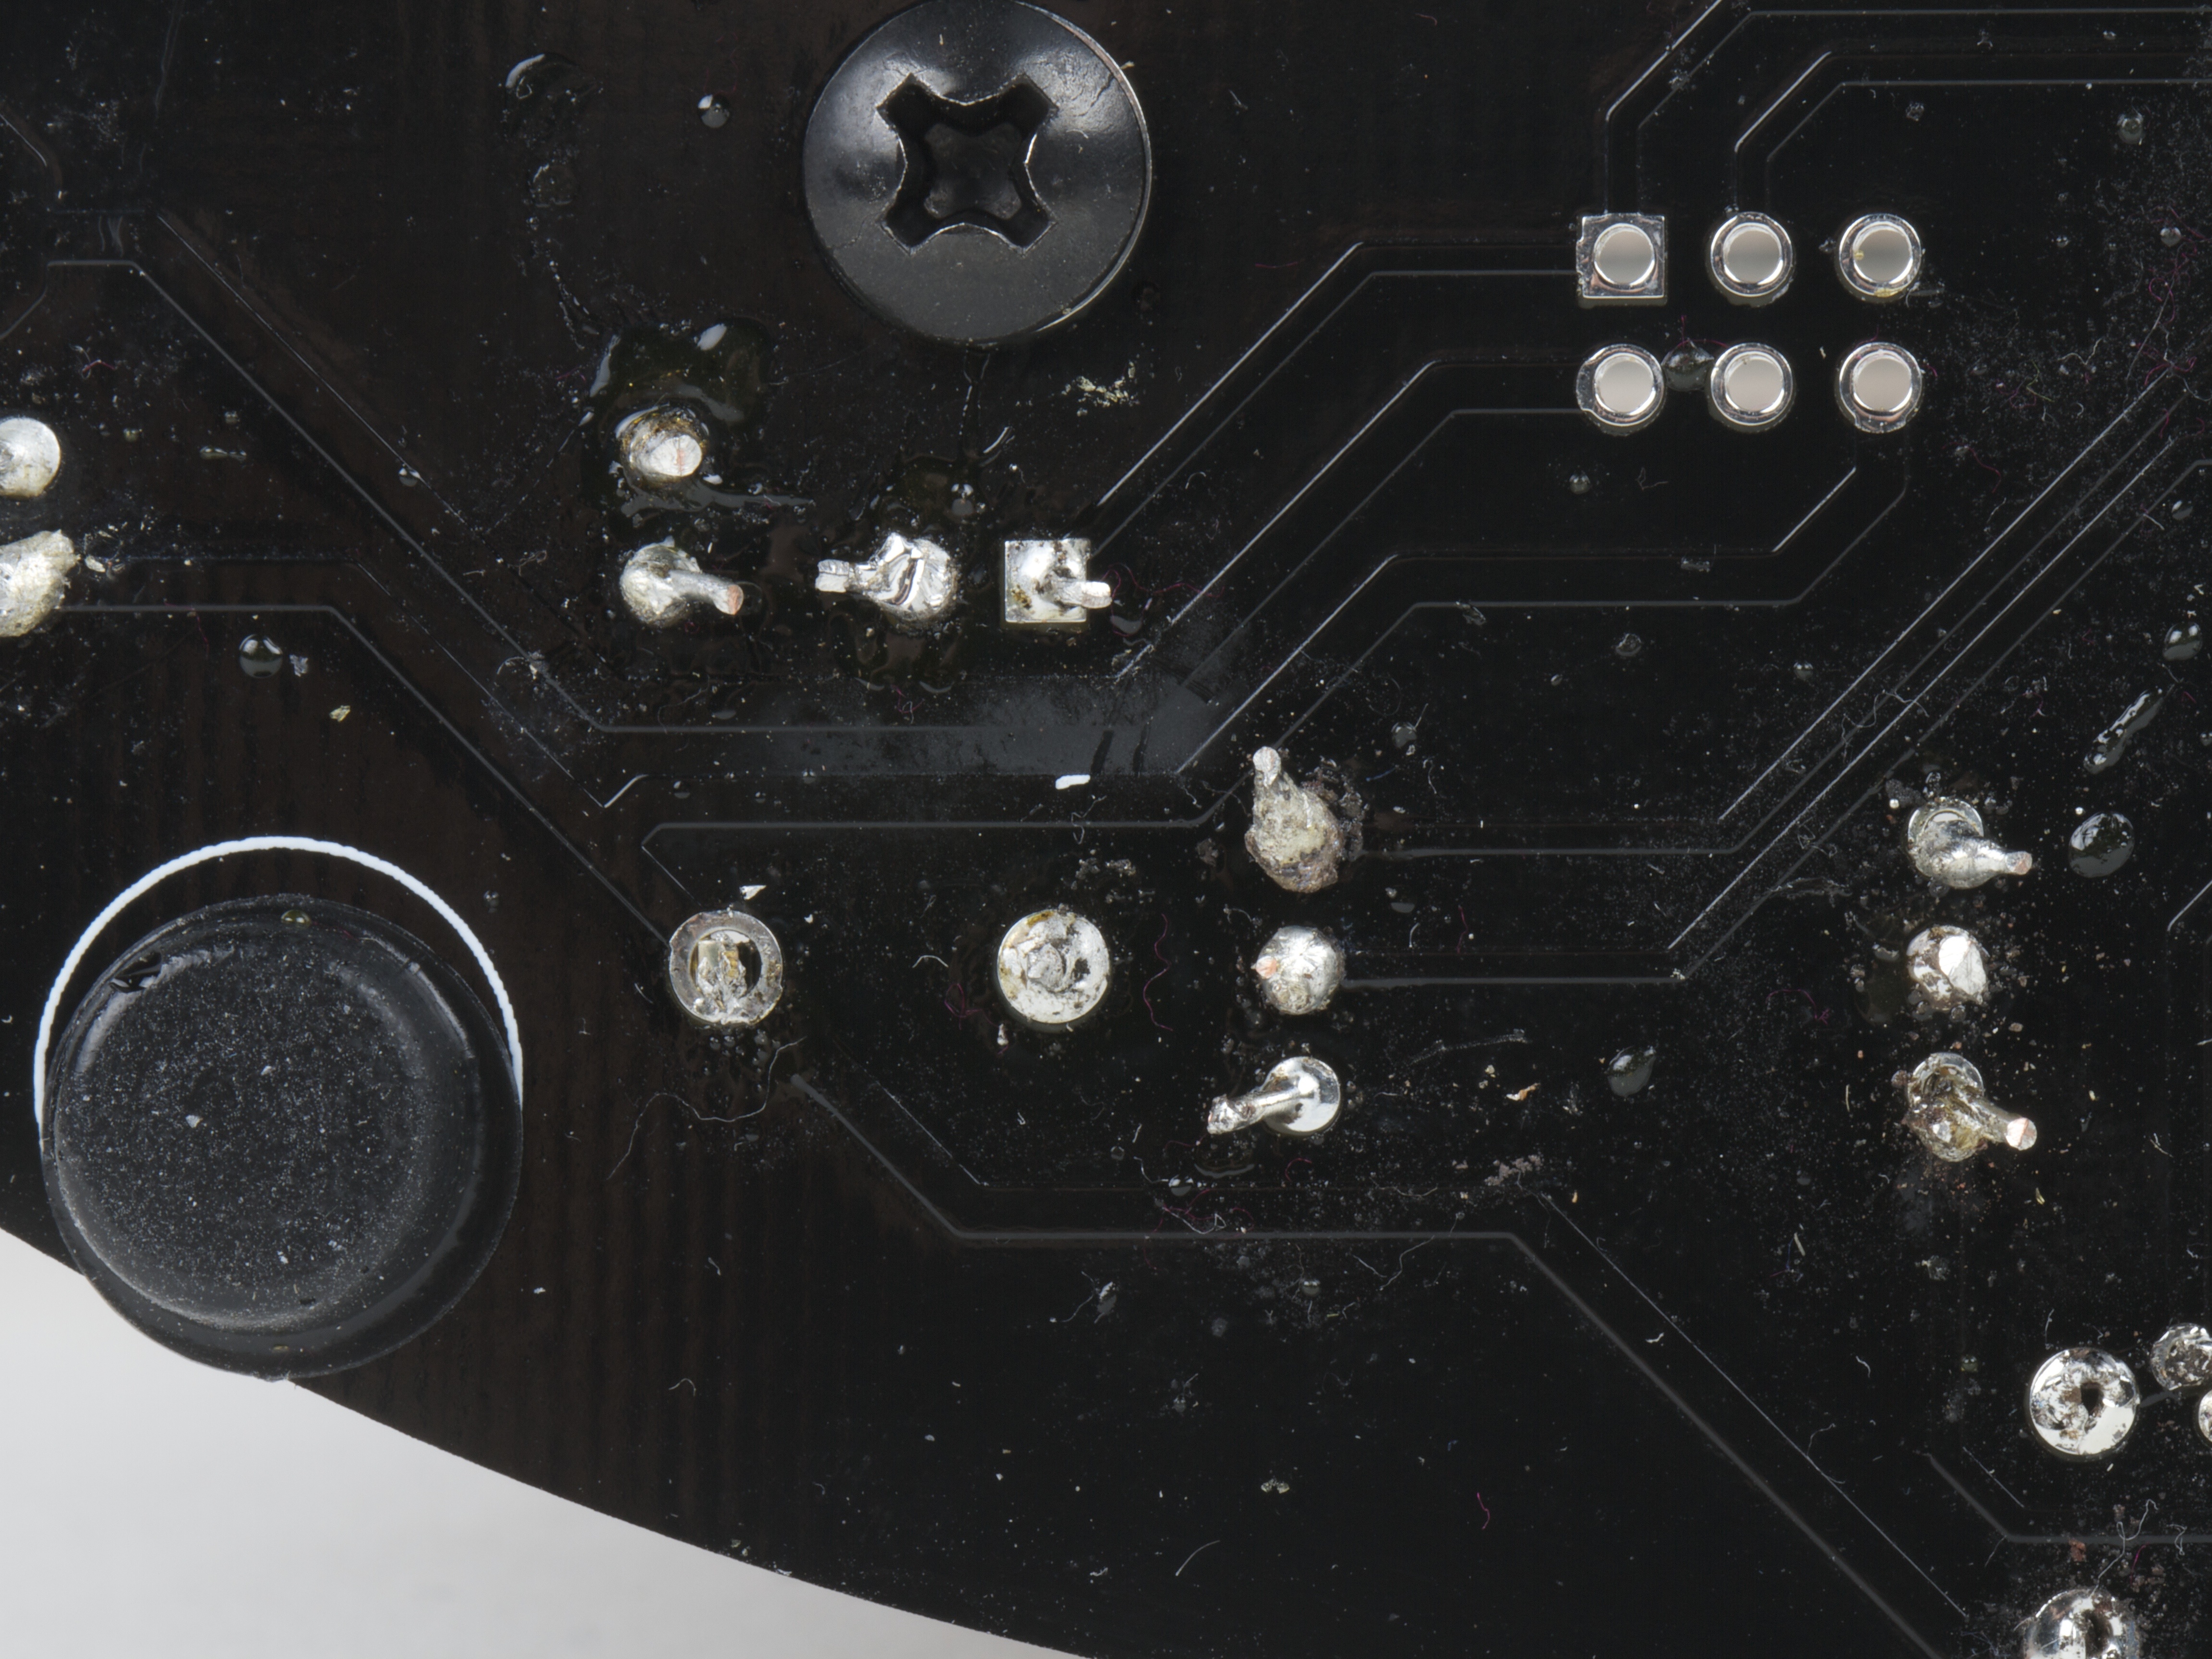
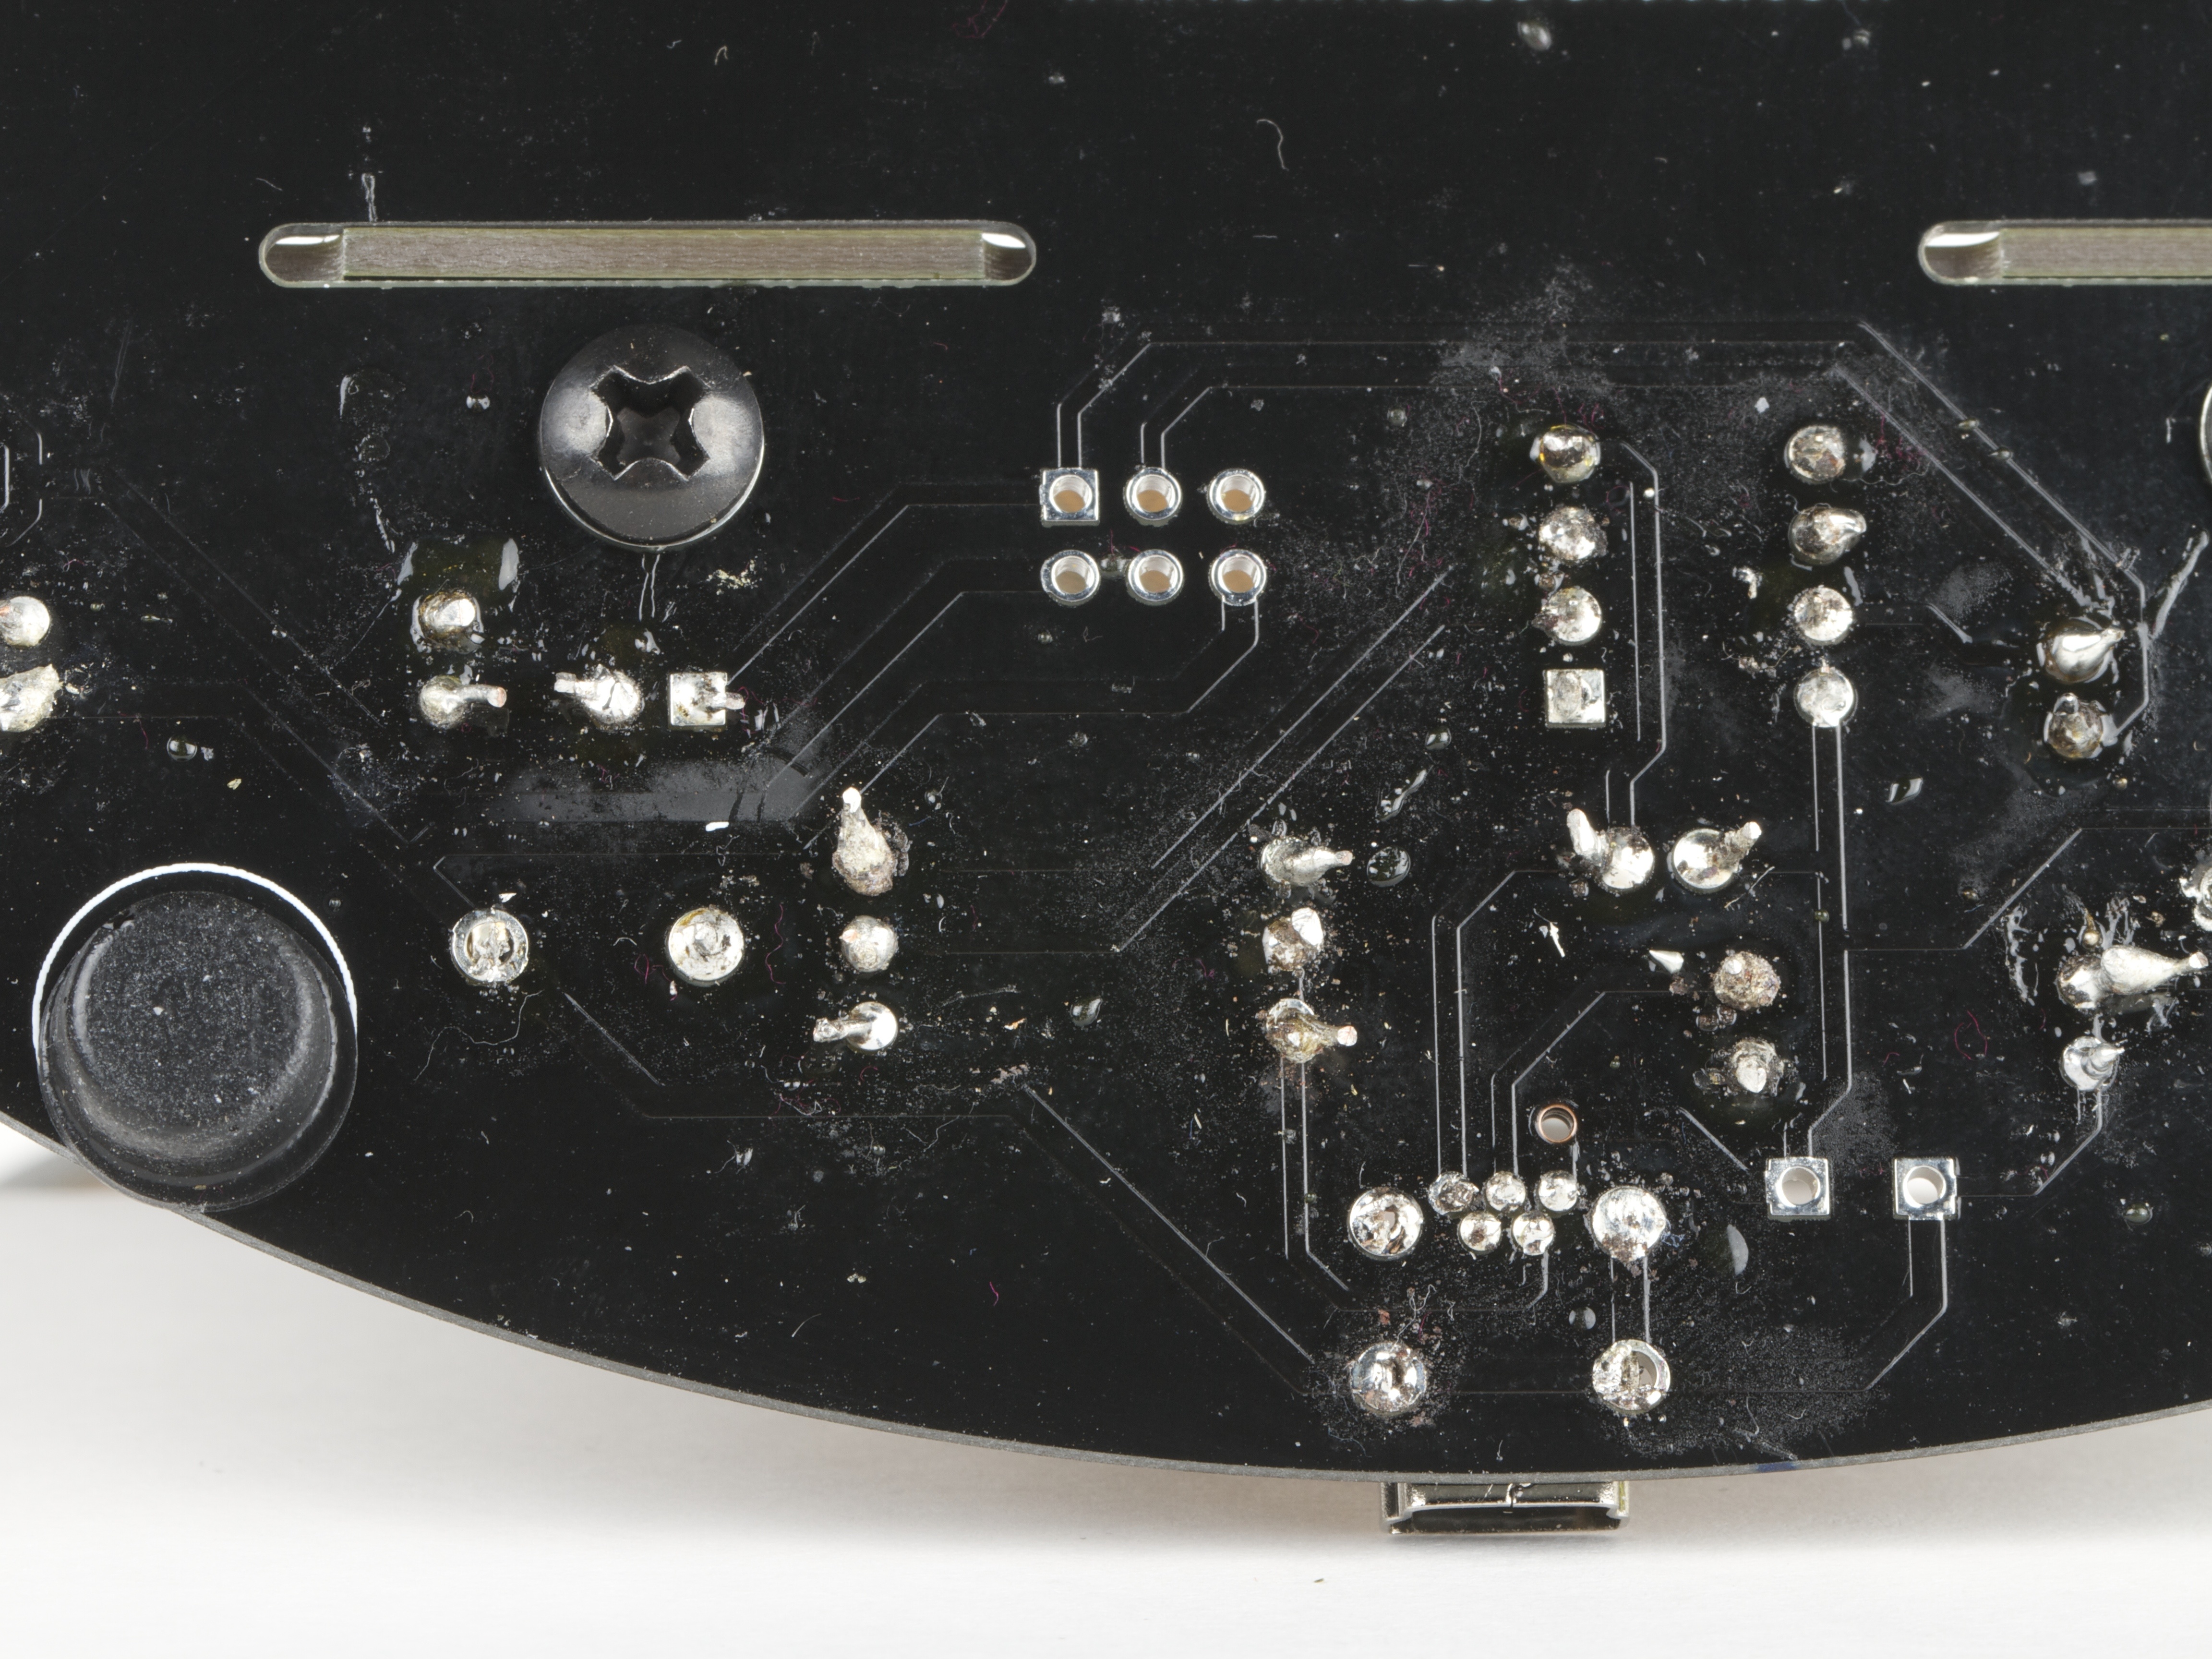
Zooming in on that same example, we can find incomplete solder joints like the one close to the rubber foot. A joint like this may look like it’s making an electrical connection, when in reality it may or may not be. These kinds of joints really are the best, because they can lead to intermittent connections that usually work. Intermittent connections are also a great way to prank anyone who likes to debug electronics. Think of it as making your own Annoy-a-tron!
While most of the solder joints shown here have a clean, smooth meniscus, there are also two fine examples of connections that have gaps in the solder joint. Gaps like these are essential to ensure adequate ventilation of the electronic components on the other side. Some people may tell you that joints like these may crack (or break off entirely) over time, but don’t listen to them.
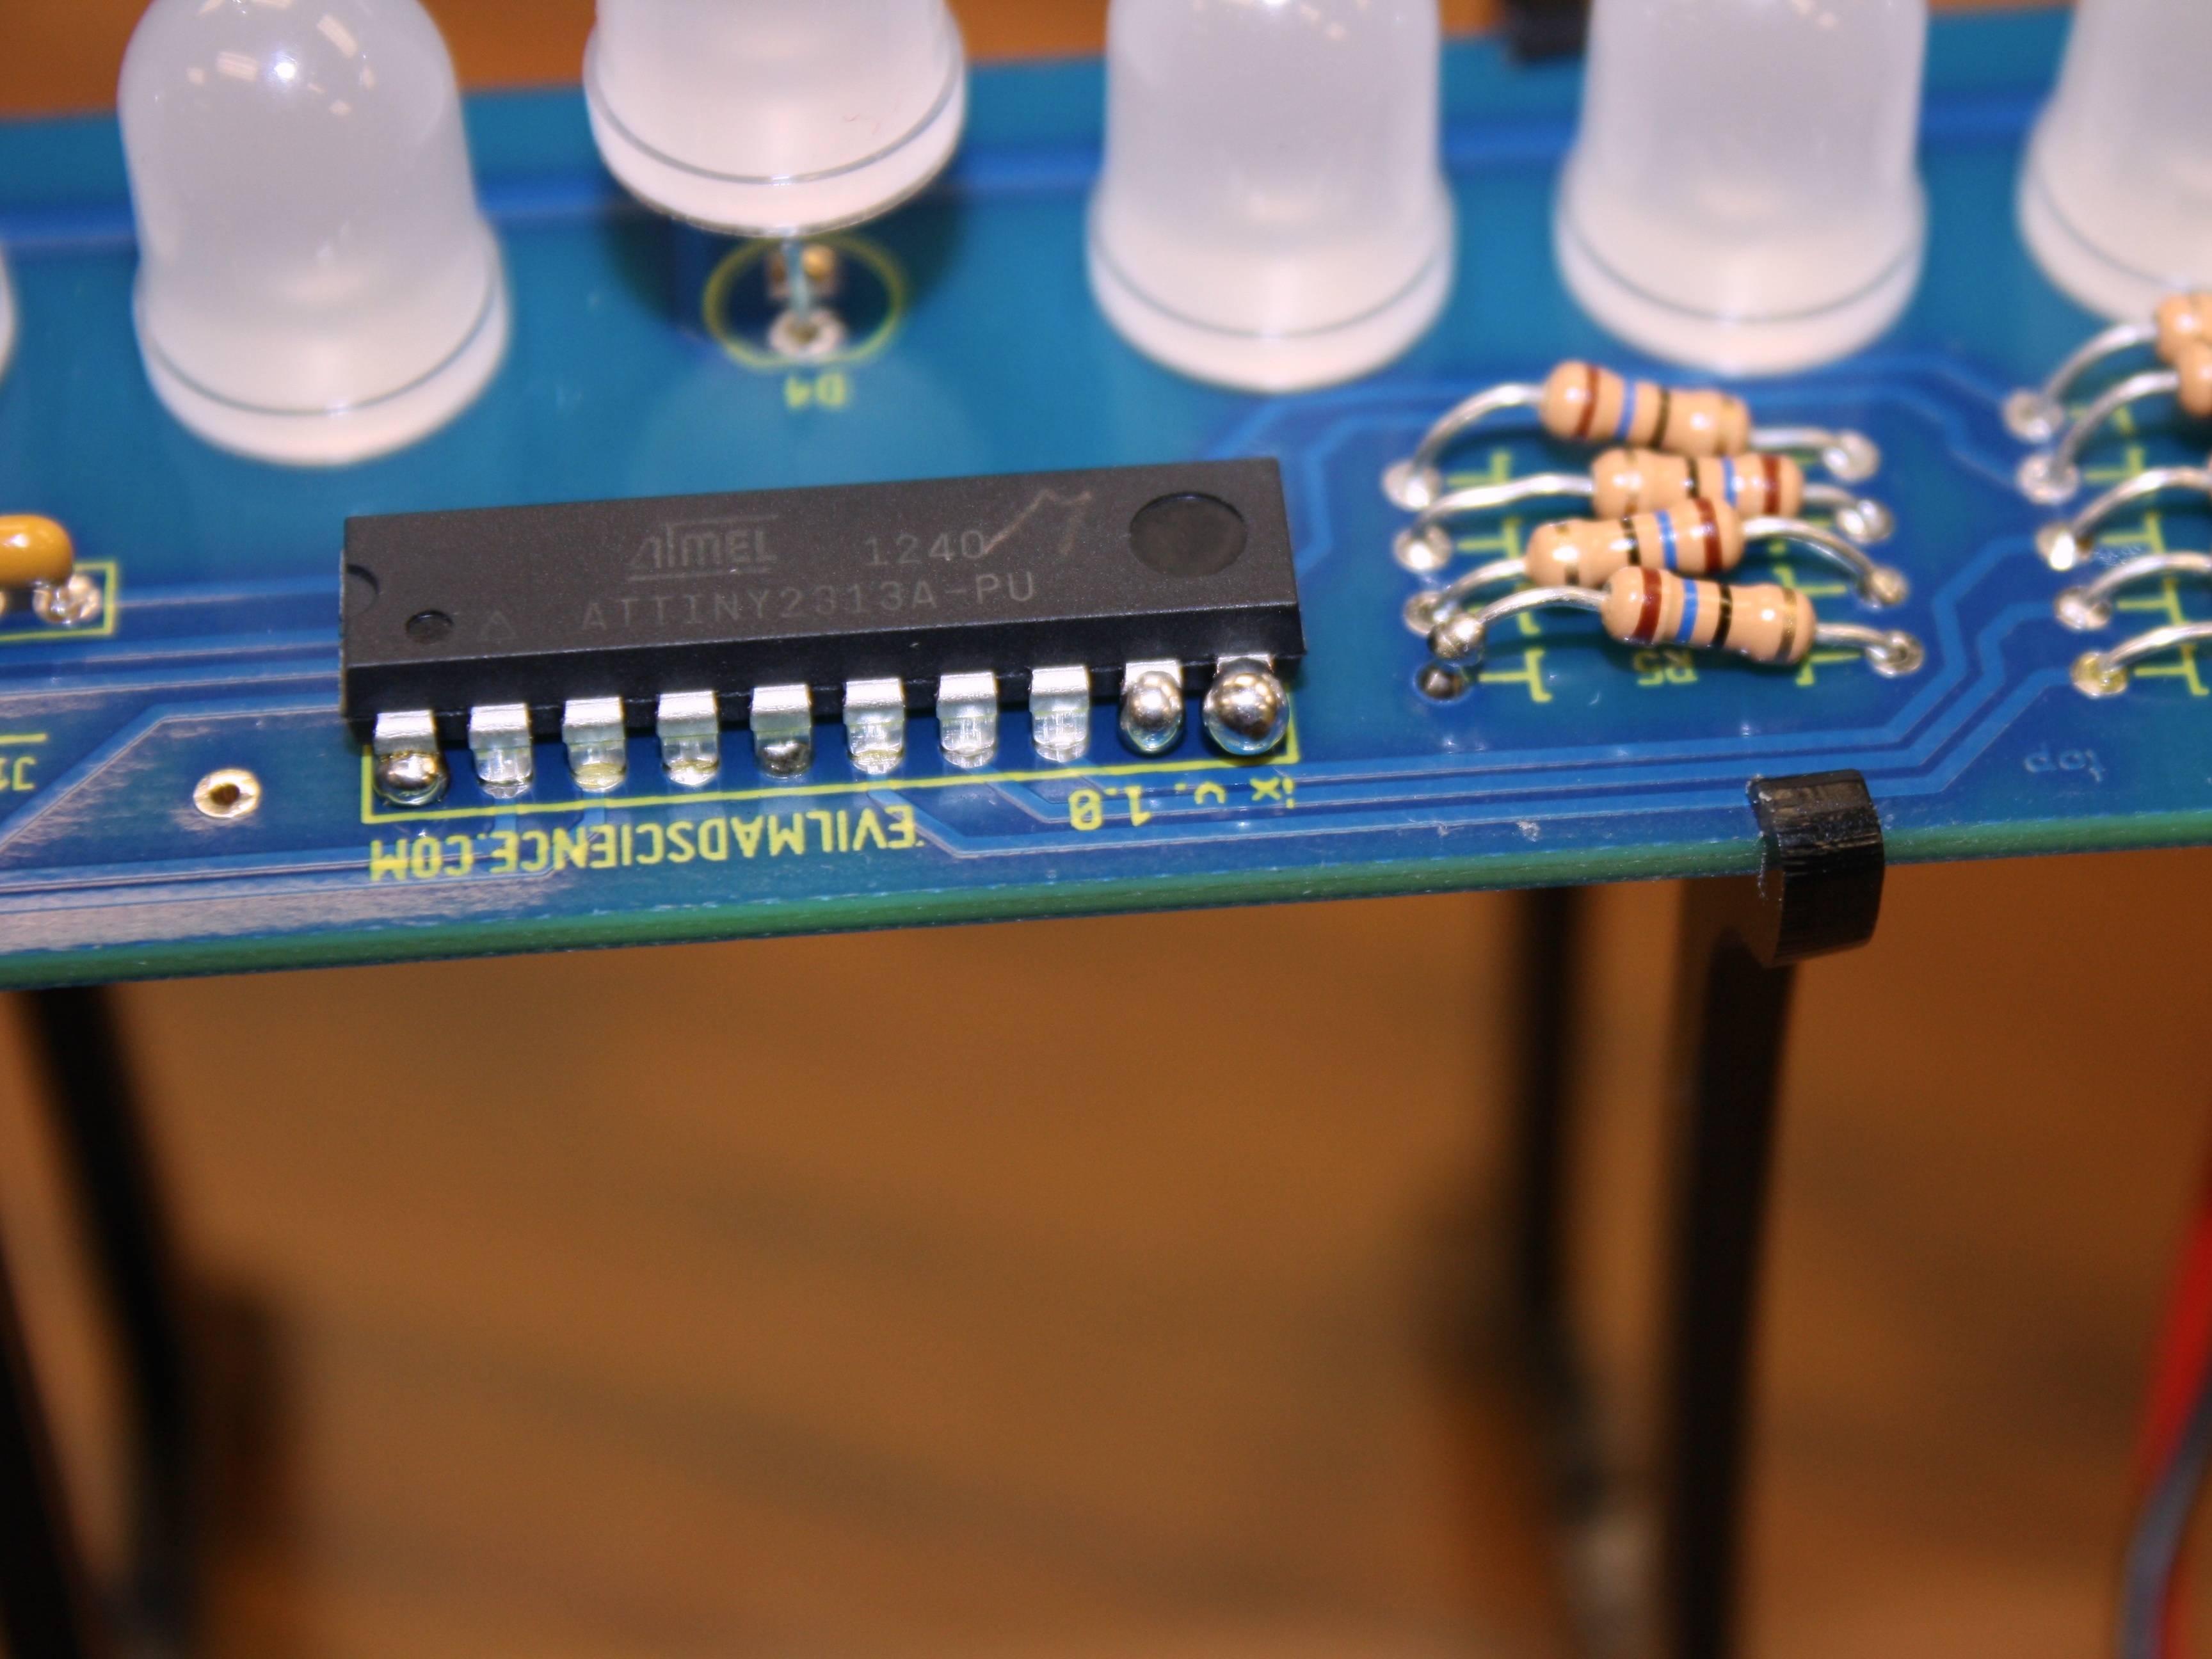
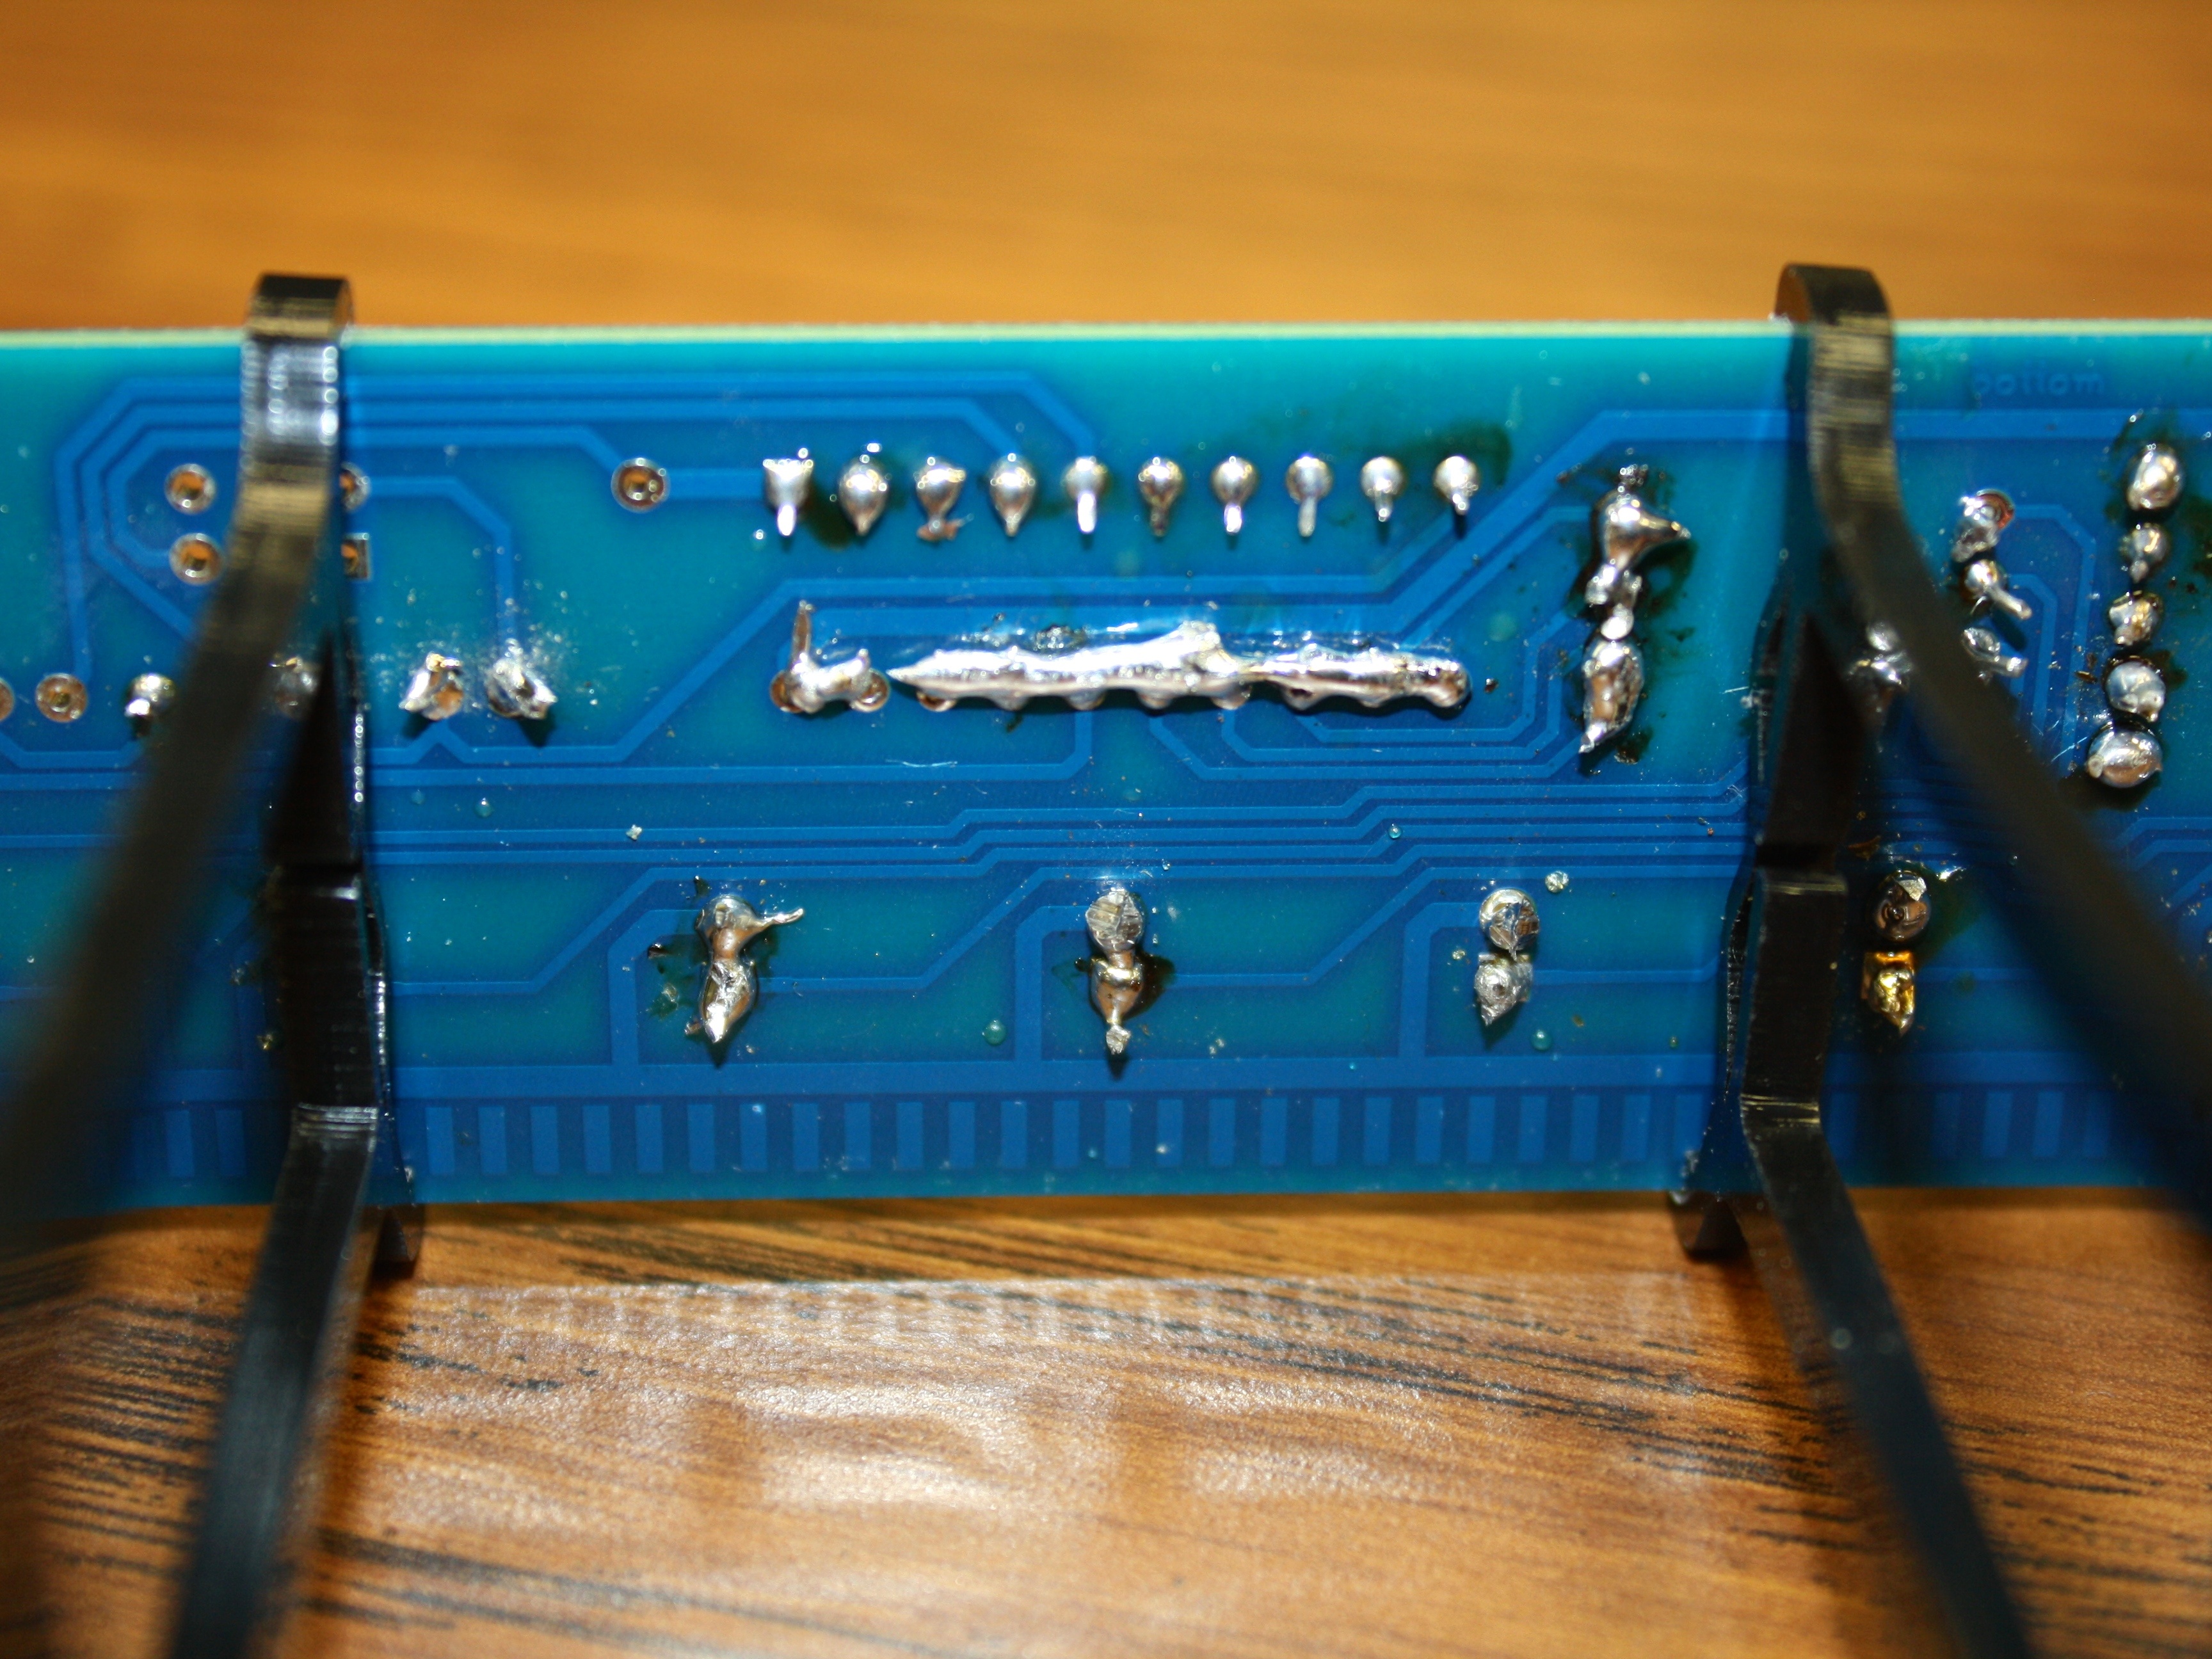
When soldering components from the bottom side of your circuit board, you can sometimes — if you feed enough solder into your solder joint for long enough — wick enough through the holes to form blobs of solder on the top side of the circuit board. You can see these blobs here on four pins of the chip, as well as on some of the resistor leads. These blobs are highly desirable because you can make a “trick” circuit board where all of the solder joints look good from the bottom side, but there are actually short circuits on the top side of the board.
If you hone your skill well enough (or just get lucky), you may even be able to create an “invisible” short circuit between two pins of a component, fully hidden beneath the component. We’ve seen “secret” shorts like these under both chips and discrete components like capacitors and LEDs.
As an added bonus, it usually takes quite a while to wick this much solder through a joint. Most soldering guides recommend that you limit the time that you heat a component to just a few brief seconds. If you ignore that to get this much solder in the joint, you may have the added outcome of overheating the component and damaging it beyond functionality. That way, even if someone were to find and remove the short circuit, the component still wouldn’t work.
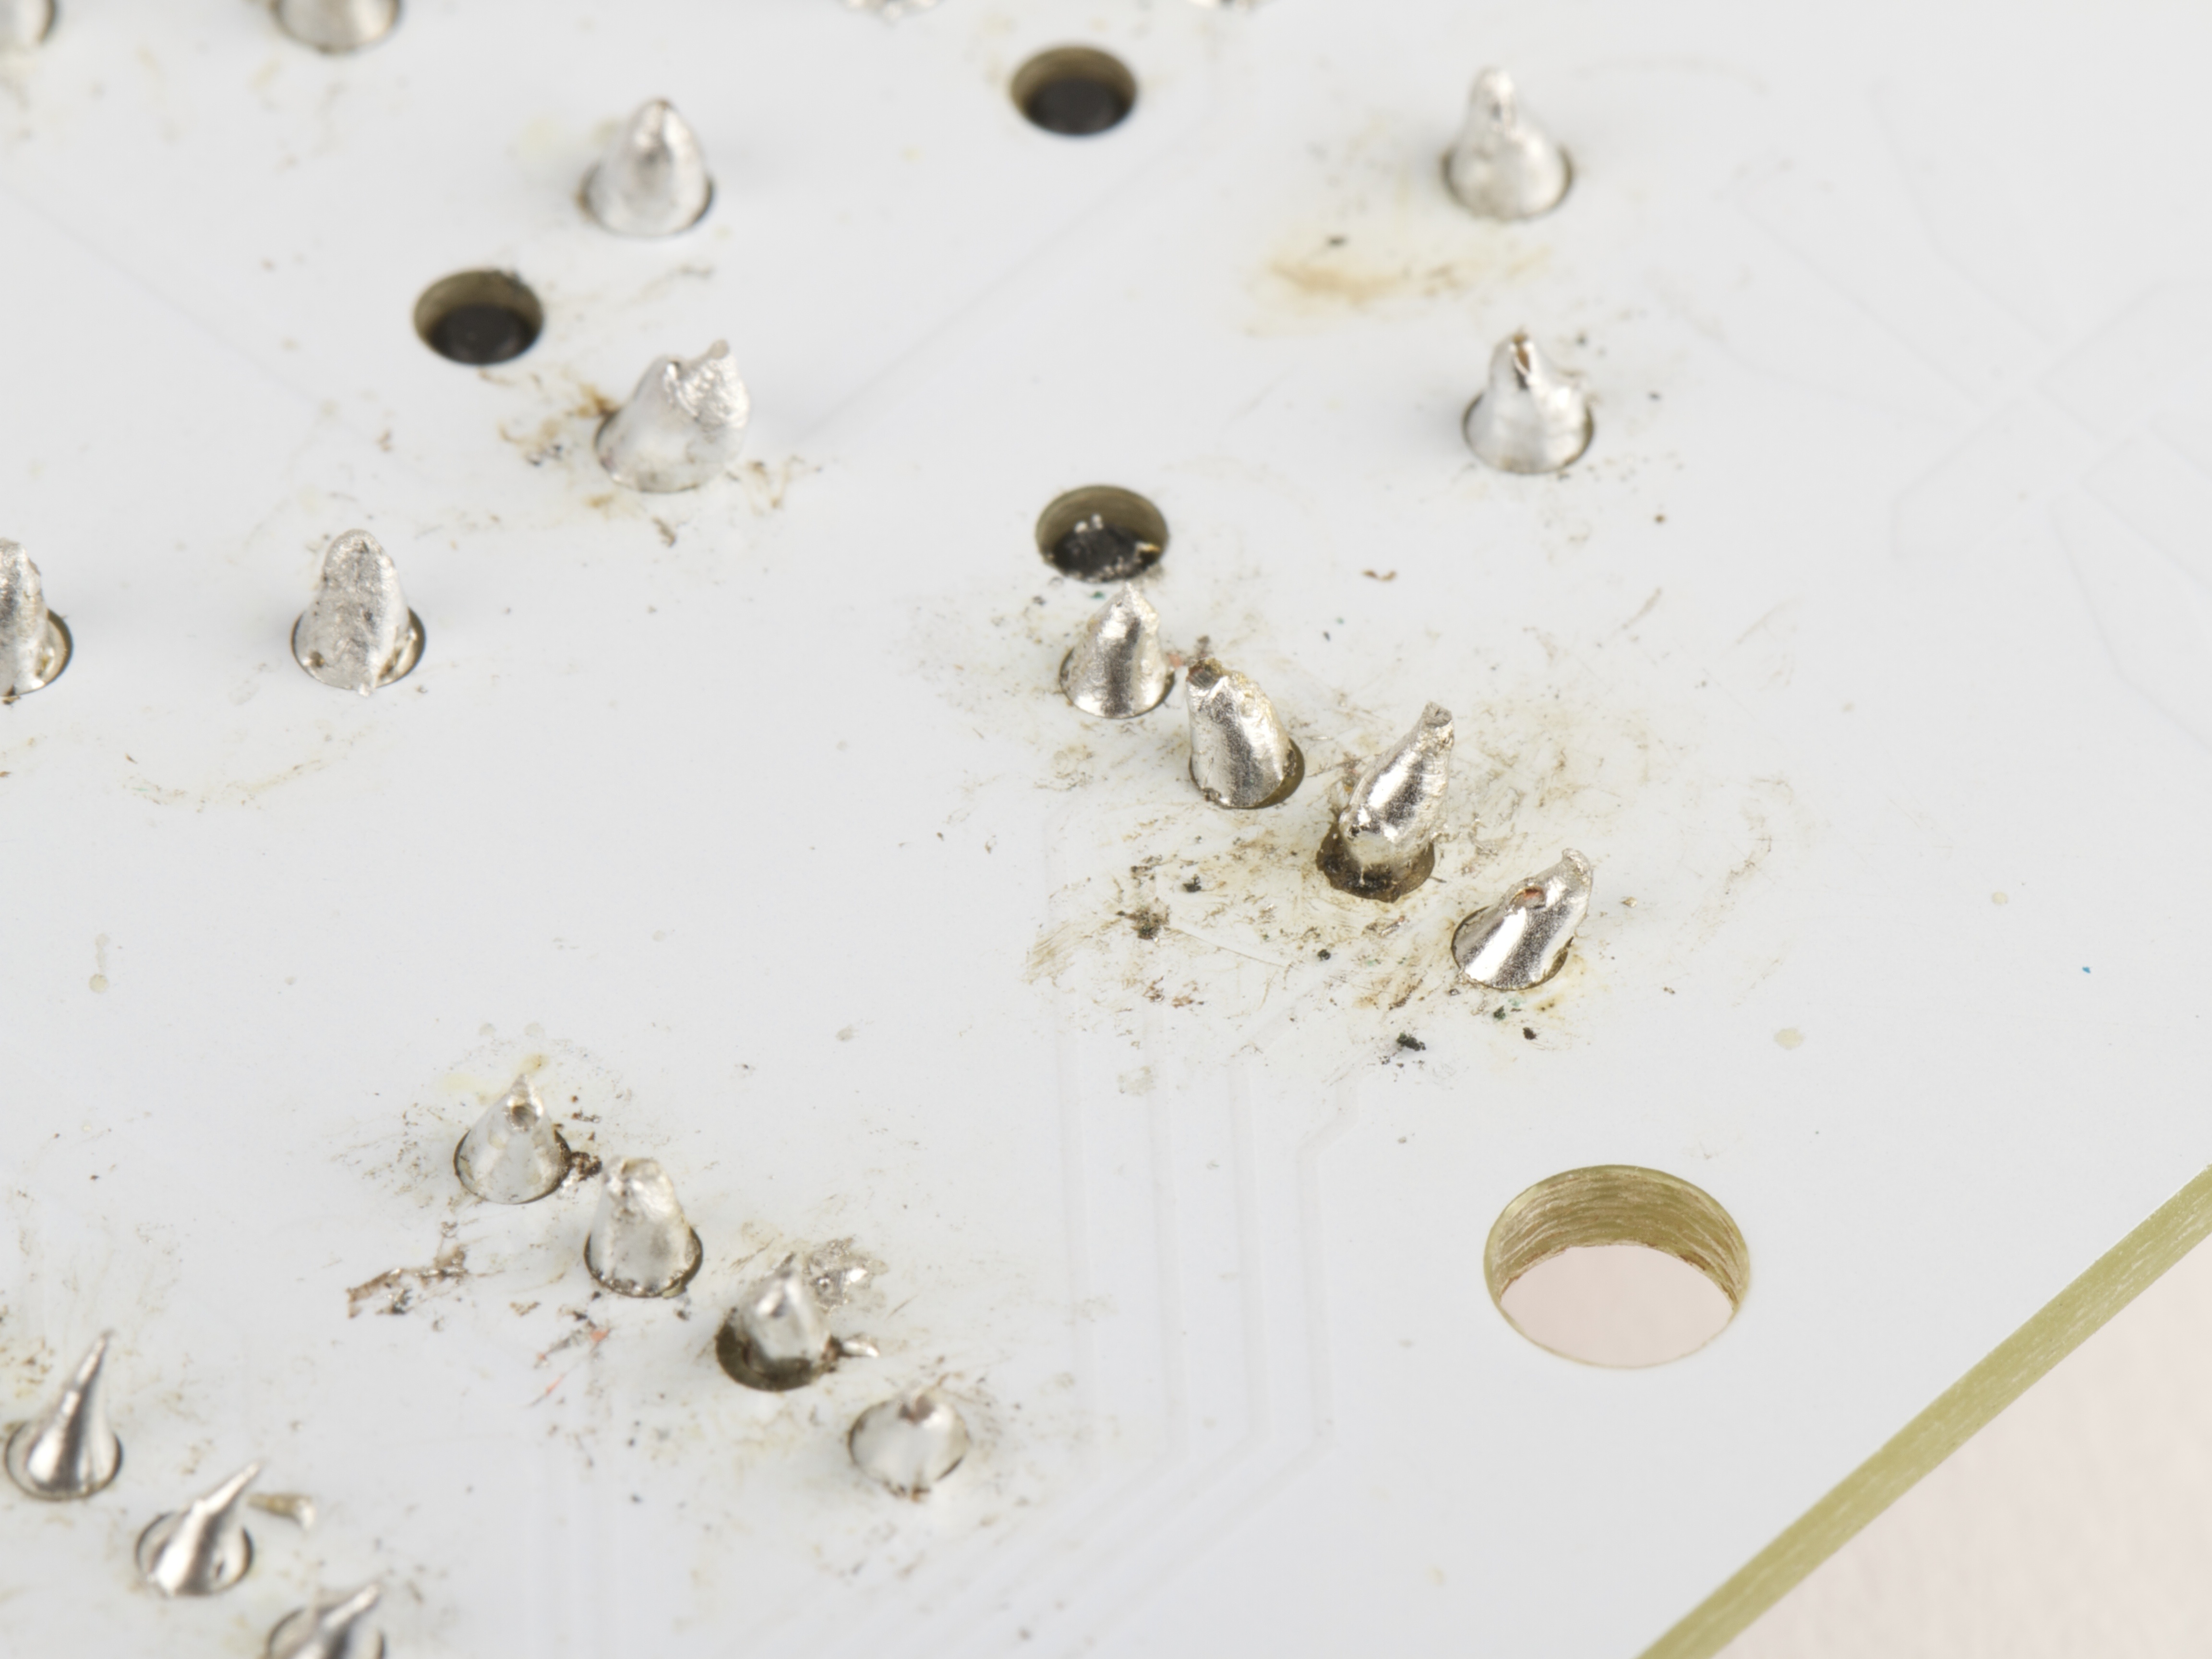
Expert mode! Going one step further, if you solder a given location on a circuit board for long enough or with enough pressure, you can actually delaminate the printed copper pad (trace) from the circuit board. The pad is usually a thin ring of copper around the hole with the pin that you’re trying to solder, or (on surface mount boards) simply a rectangle or oval of exposed copper that you solder to.
If you can manage to remove pads from a circuit board, then you remove the ability for a component to make electrical contact with the circuit board there. Sometimes, depending on the circuit, one can manually add a repair wire to fix the board. But in other cases, tearing off just a pad or two can destroy the circuit board beyond repair. (It’s also possible to break components this way, by overheating their leads.)
On single-sided circuit boards, you merely need to look at the pad once too many times to make it fall of. But on multi-layer (e.g., two-sided) circuit boards, pads tend to be resilient, so you’ve got to either heat them for quite a while or use pressure with the soldering iron to dislodge the pad. Again, this is “expert mode” territory, but the two most common techniques that we’ve seen for delaminating pads are (1) using a “cold heat” soldering iron (for which you may need to heat the joint for a very long time to get it to melt) and (2) repeatedly soldering and desoldering components at the same location.
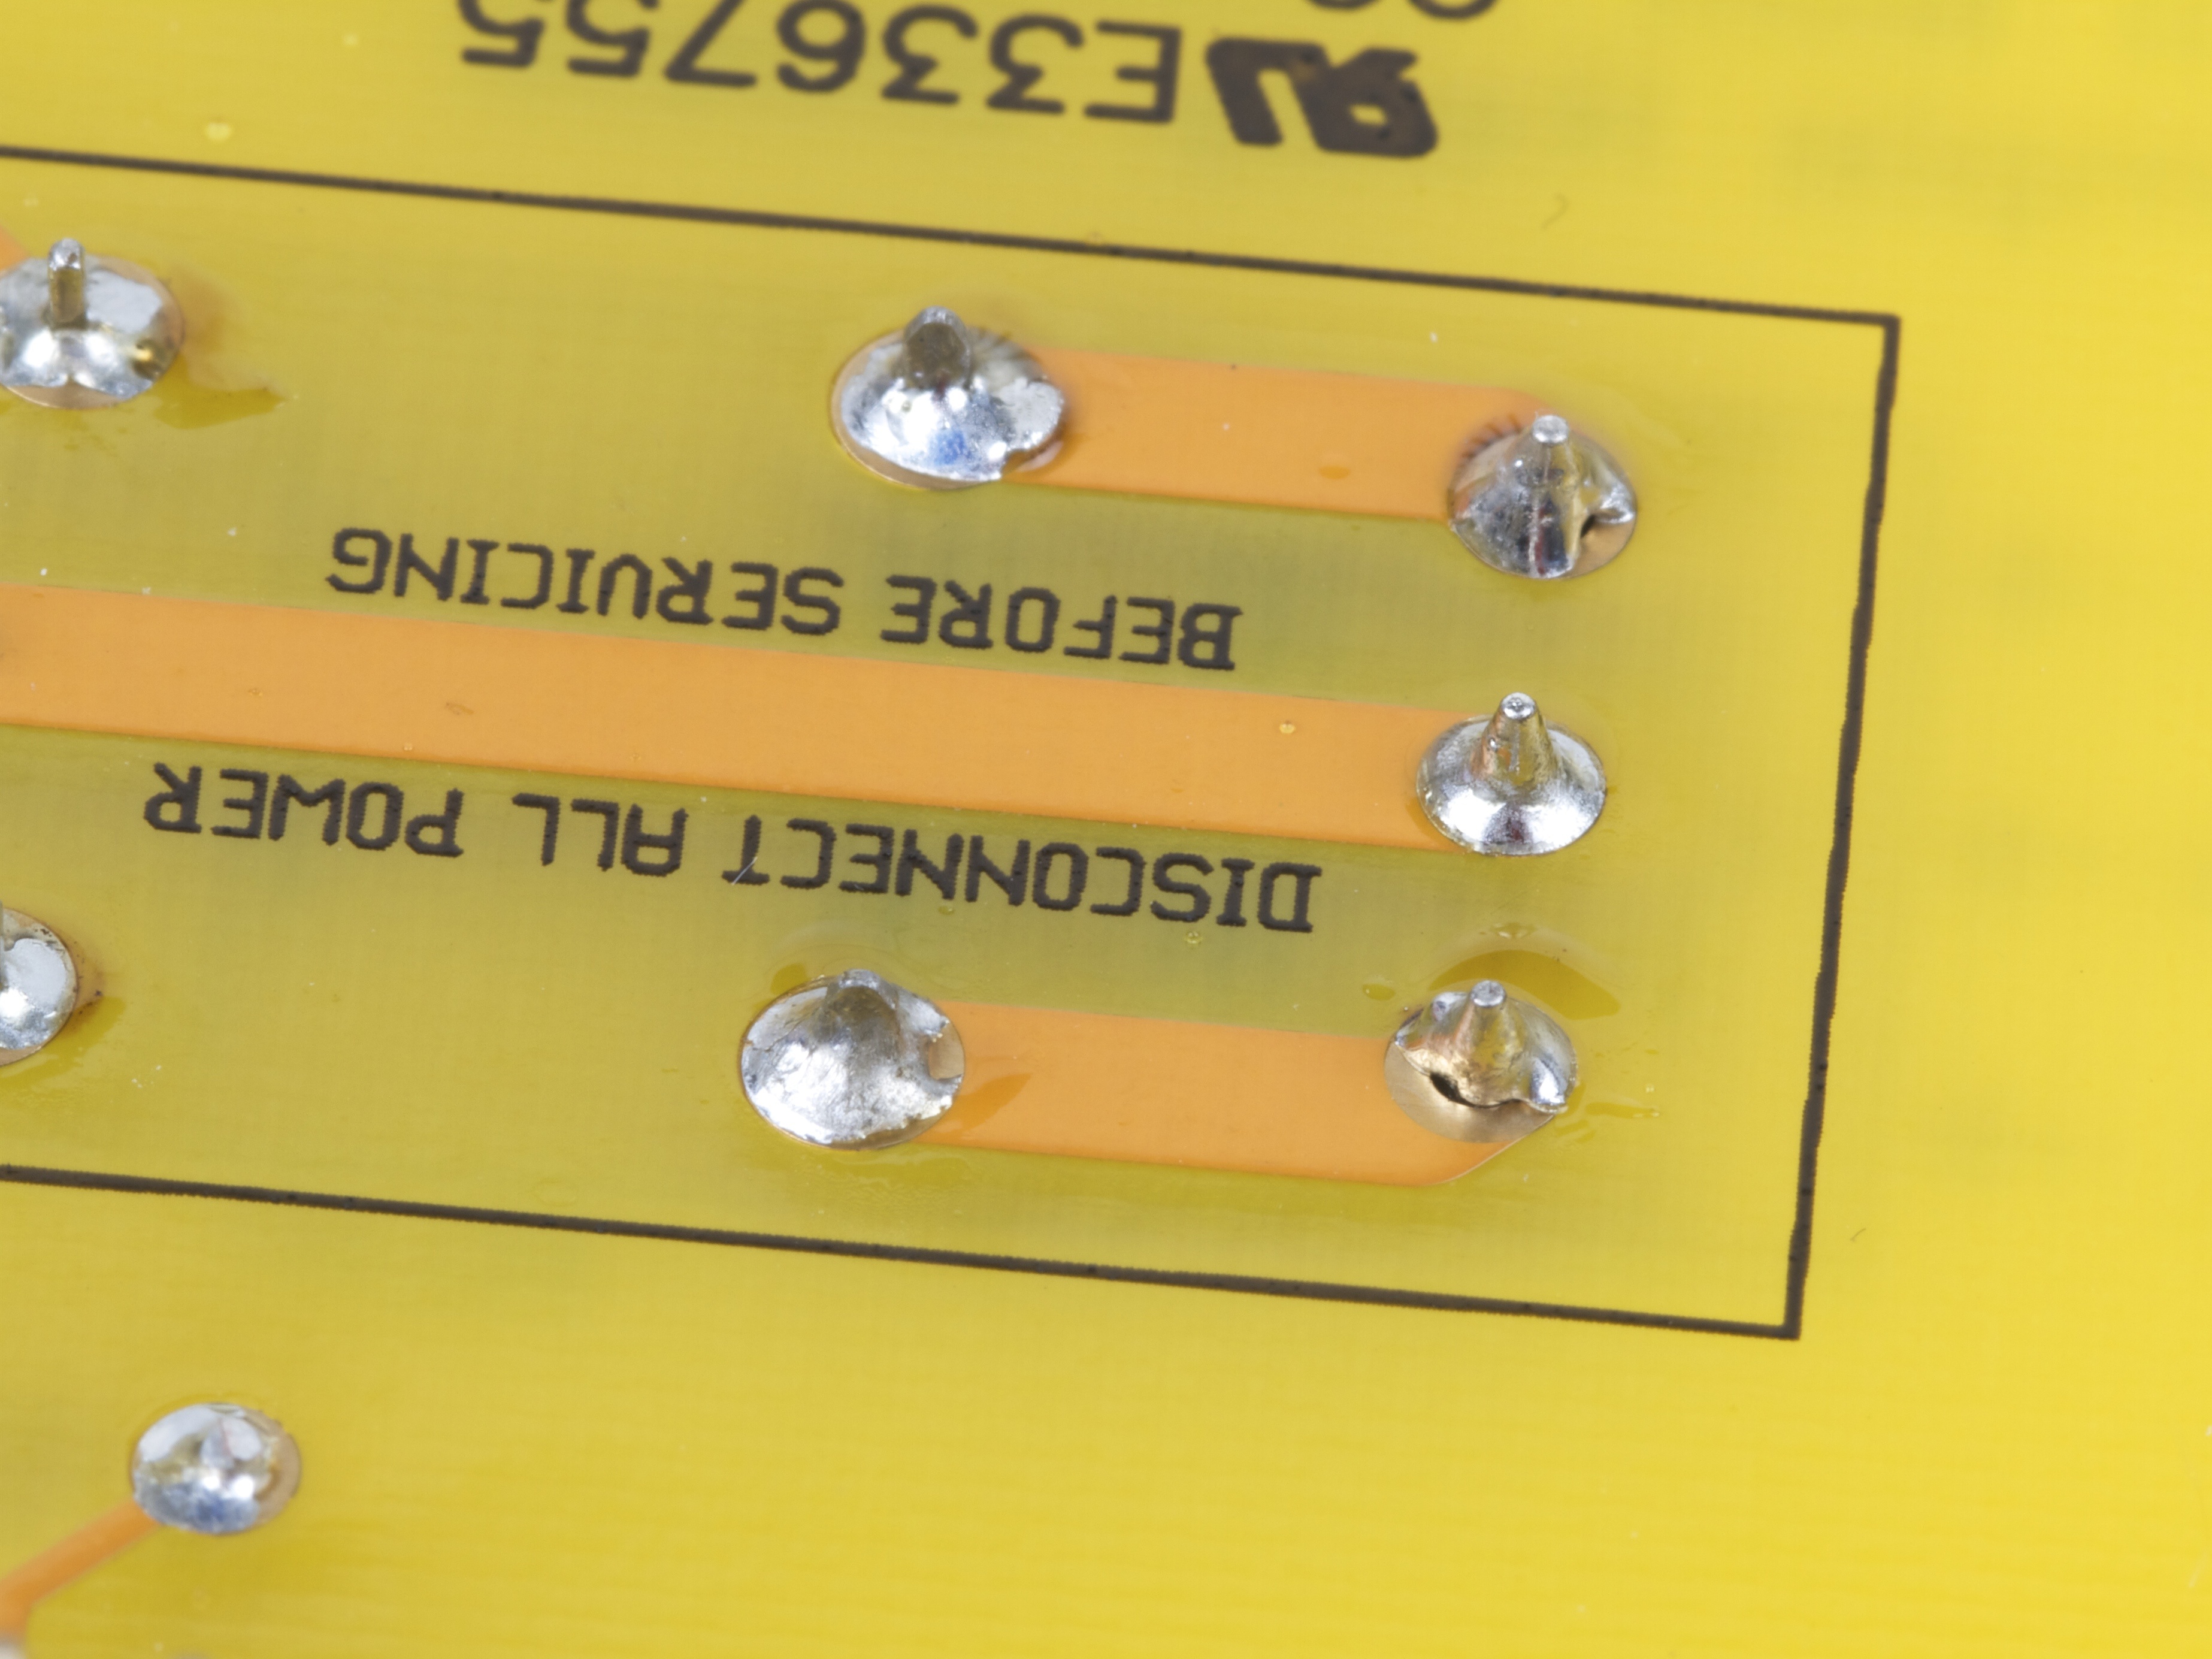
In the photo above, the pads have been torn off of the circuit board at two of the solder points (both ends of one resistor). Rather than having the solder flow down to a smooth meniscus there, the solder forms a blob that sits above a mysterious dark circle at those two points— the exposed circuit board substrate.
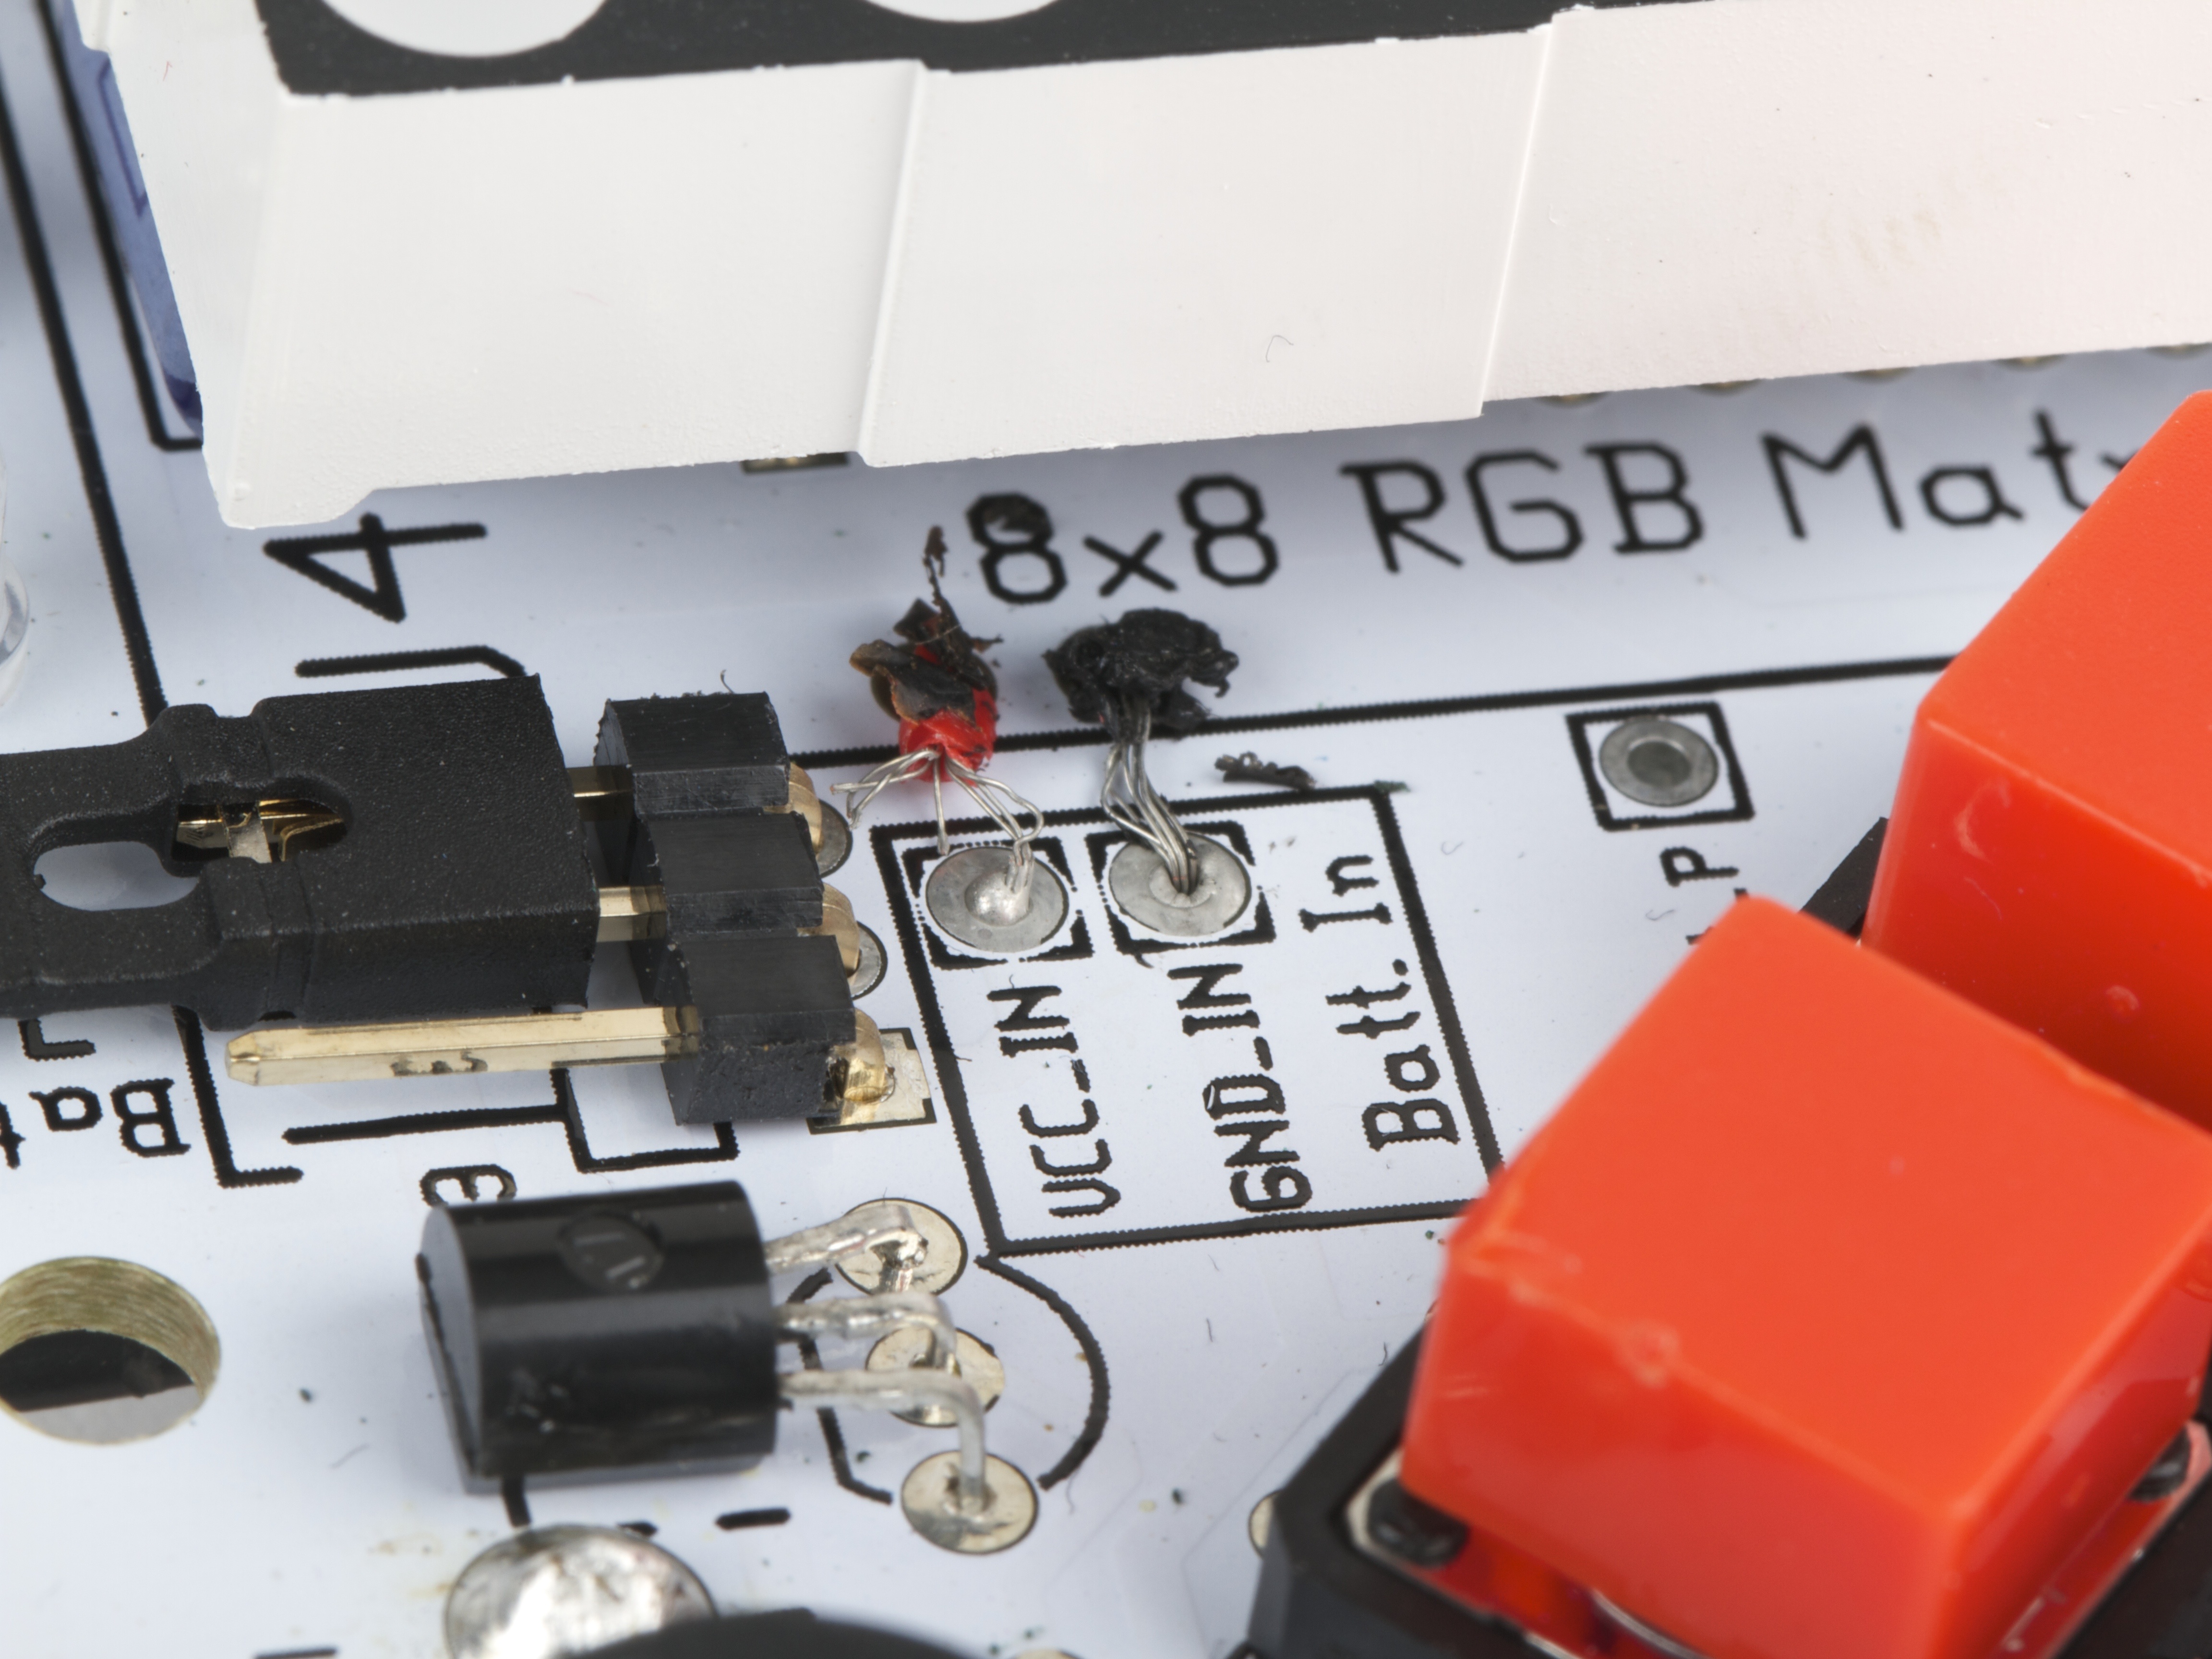
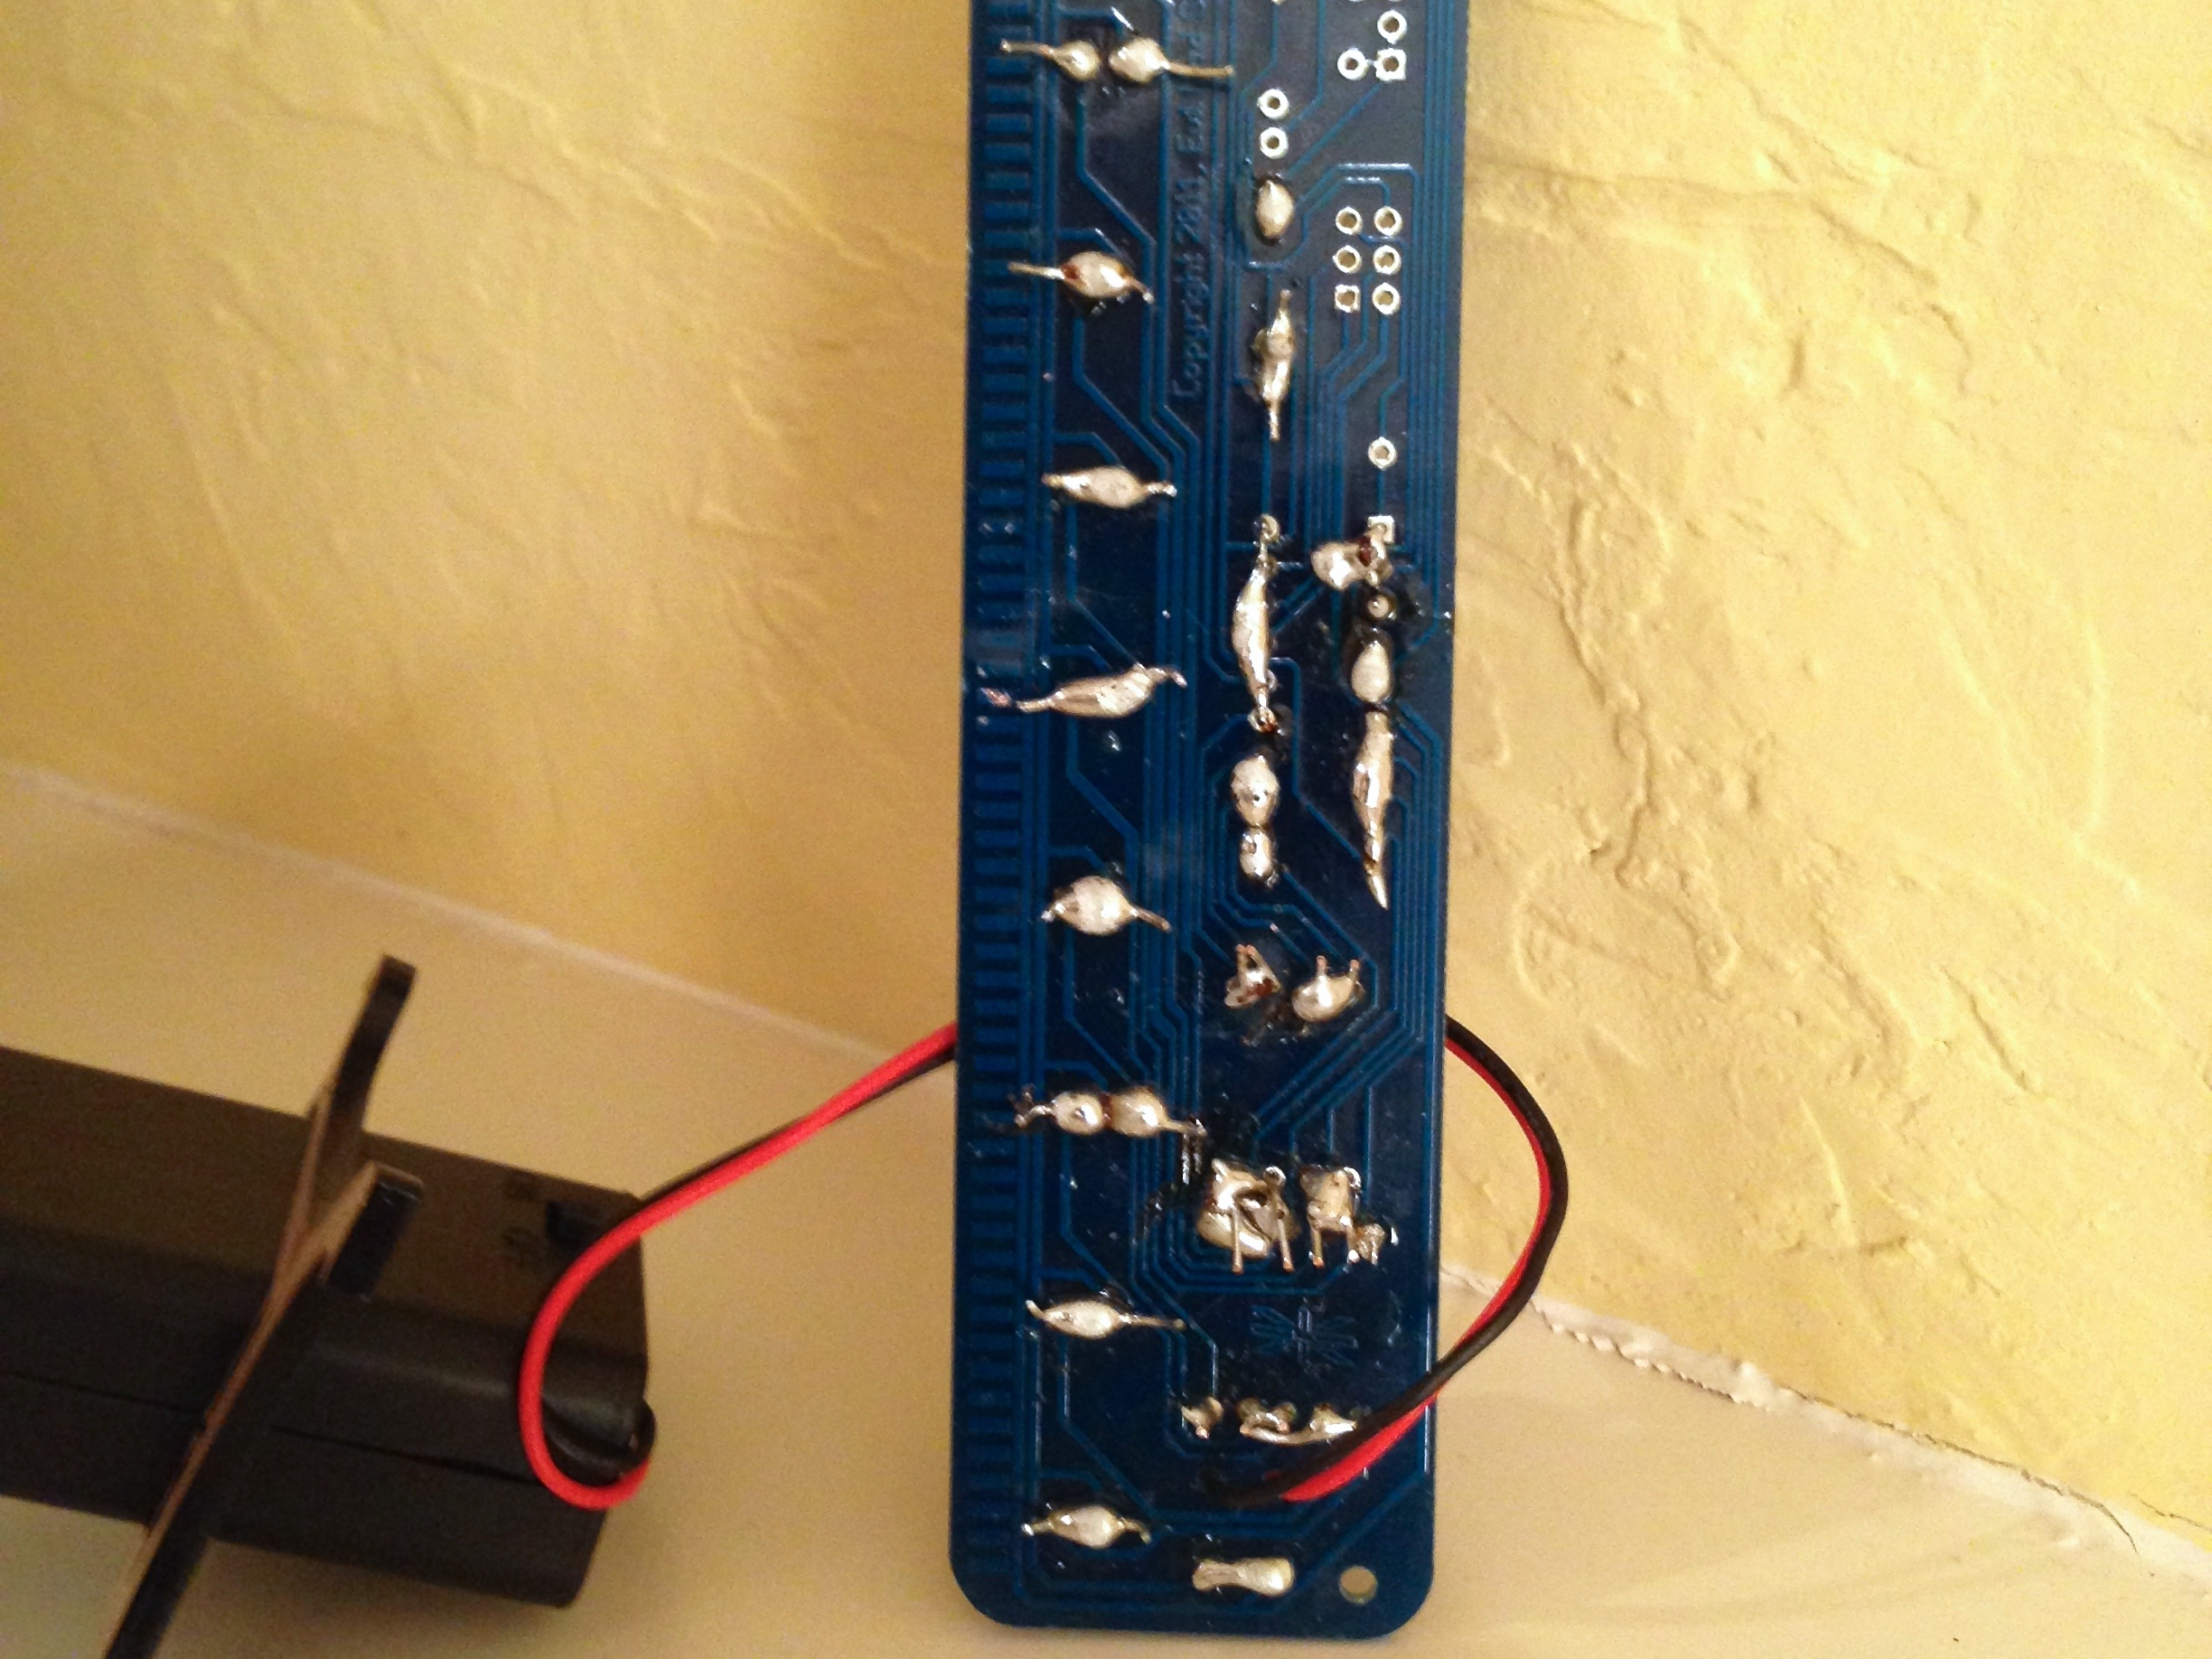
Here’s another example of what can happen when you heat a board for long enough. The two wires (red and black) from a battery holder are coming up through wide clearance holes next to the “8×8” marking, and then are soldered back down to the VCC_IN and GND_IN locations in the “Batt. In” section.
The insulation around the two wires has been melted back (almost back to the wide clearance holes) from long overheating, and the wires themselves have been frayed until there are just a couple of fine strands making all of the electrical connections. Added bonus: Stray strands like these can help to cause intermittent short circuits, when the wires get bumped.
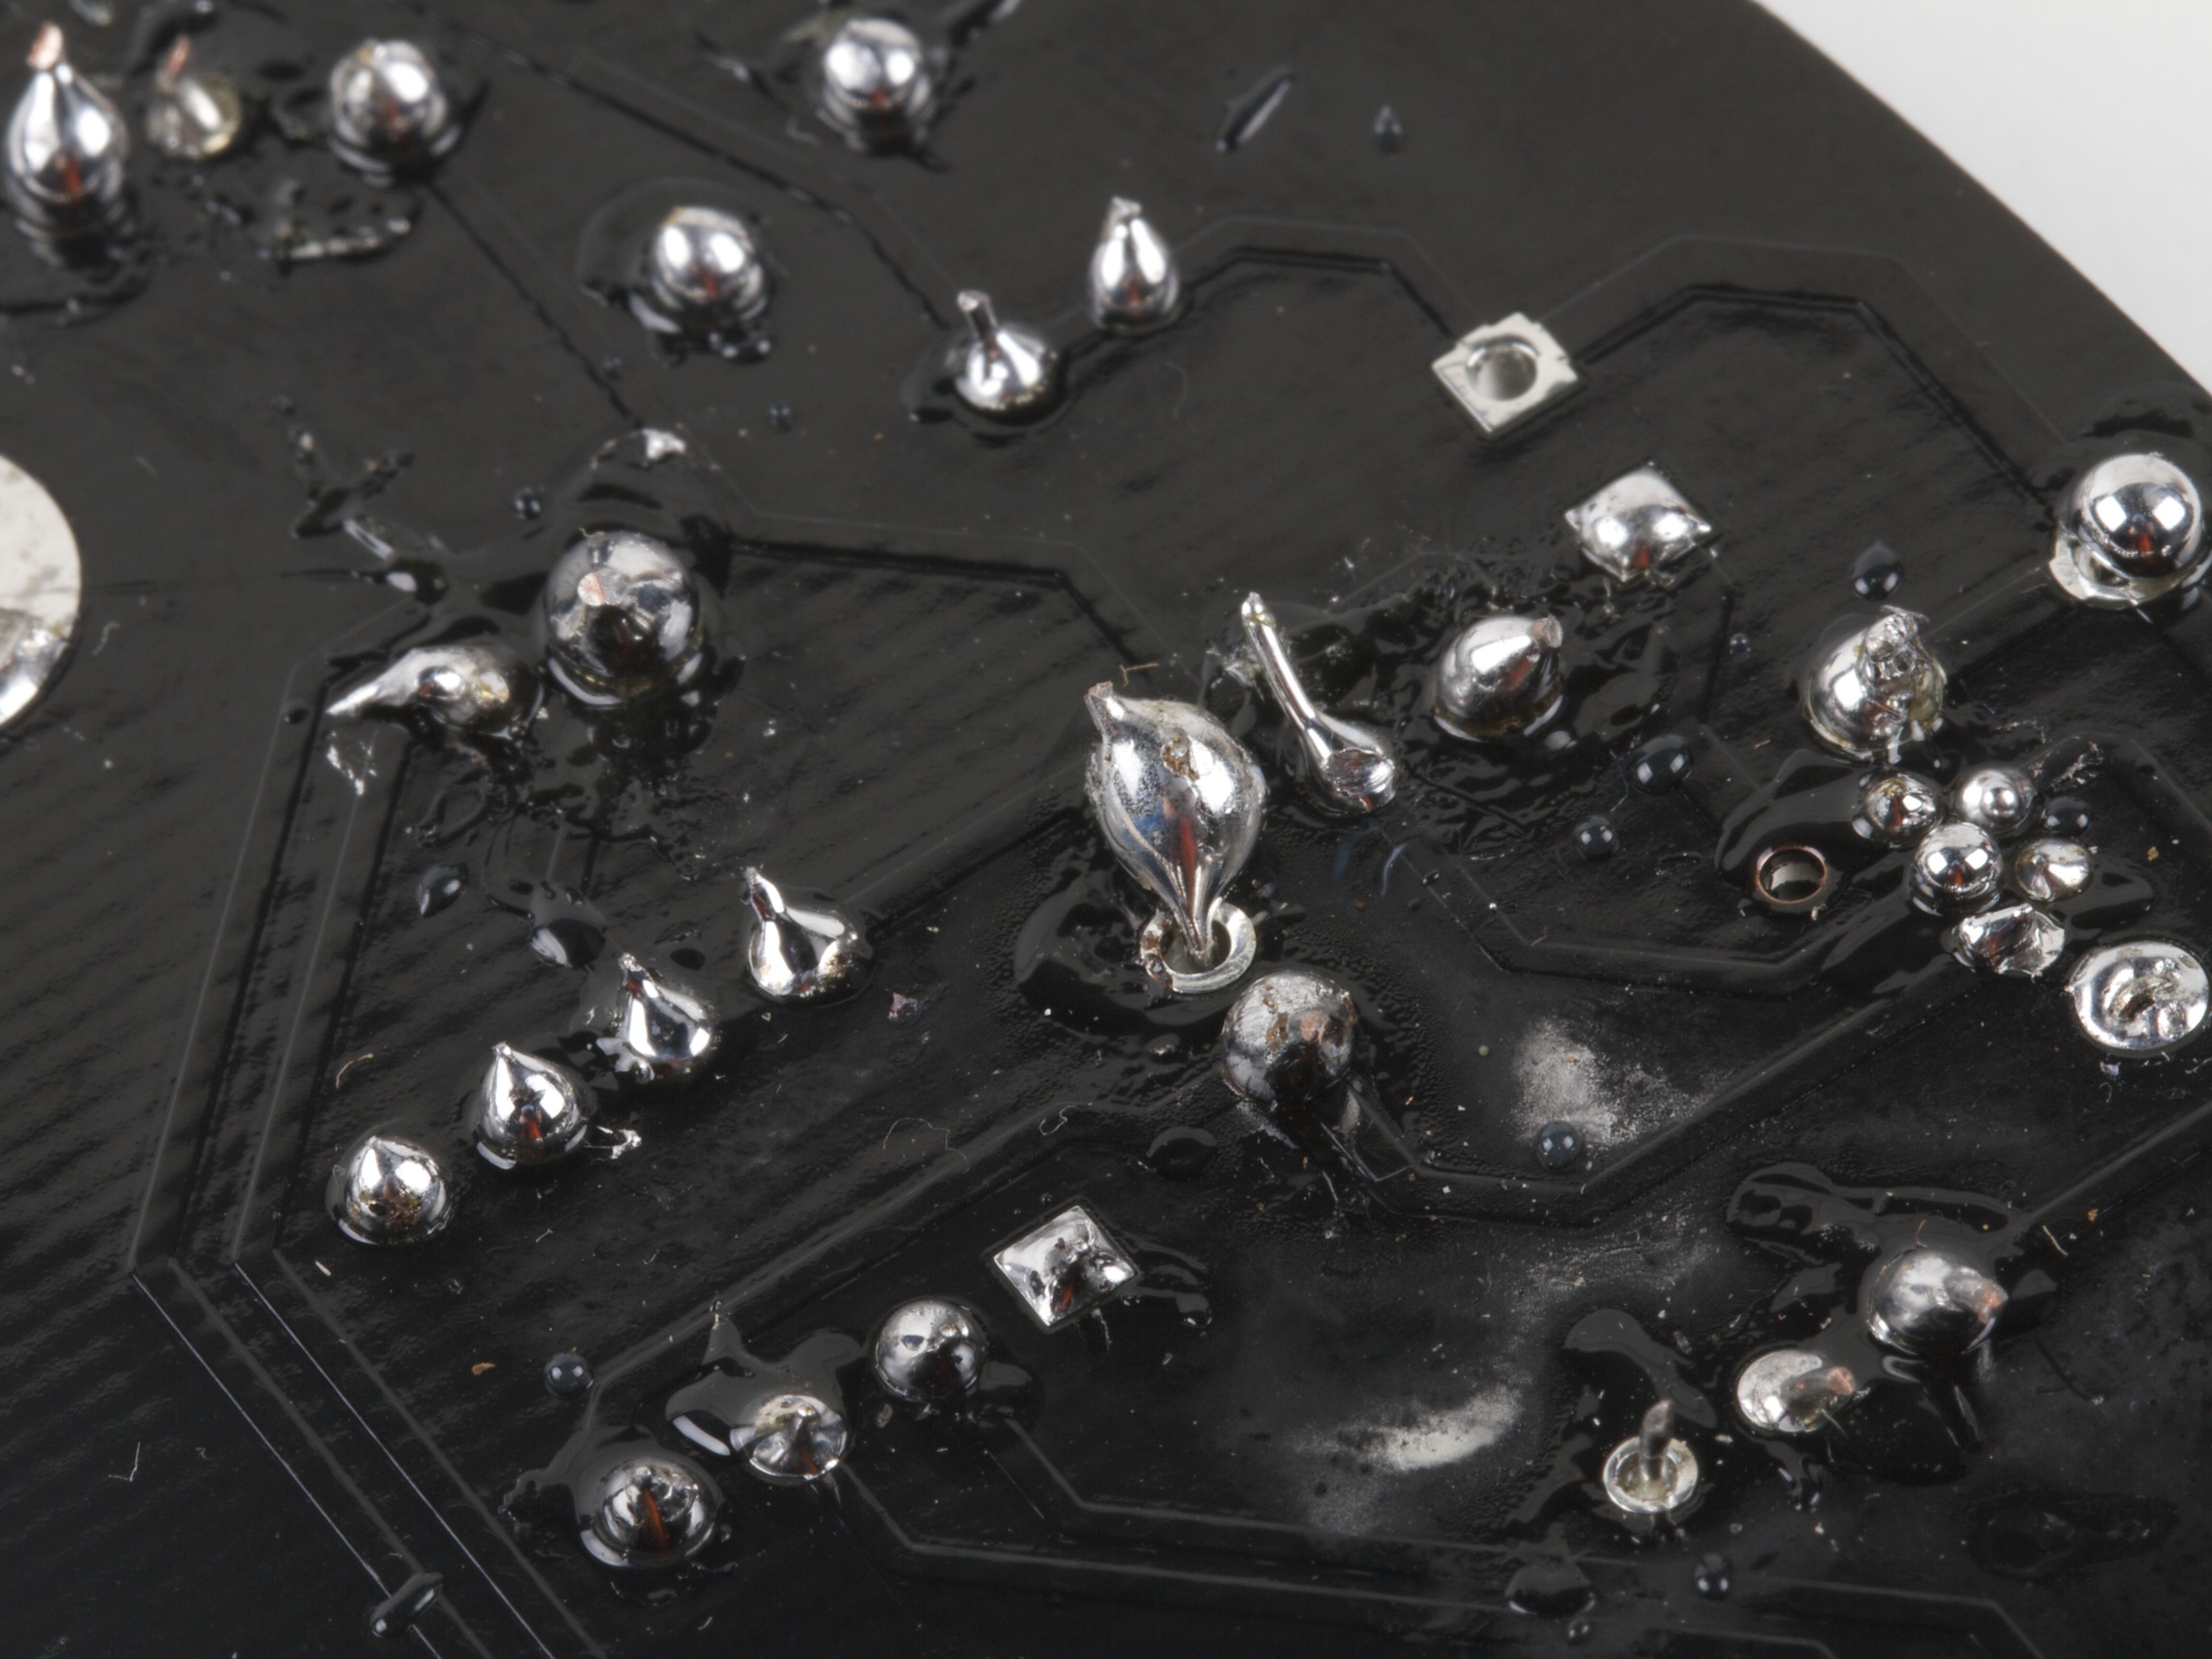
Soldering guides will often try and steer you away from making “blobby” solder joints with excess solder, but there’s clearly no good reason for this. If a little solder is good, surely more is better!
Some of the blobby solder joints (like those at at the lower left) are shaped like onions grown over the integrated circuit pins, making it impossible to see how (or even, if) the joint actually contacts the circuit board. Others — like the giant gravity-defying inverse silver teardrop in the center — seem to hover in mid-air above the circuit board, deftly managing to avoid contact with the plated through-hole of the circuit board.
Keeping the component leads long and using blob-style solder construction can also help you to protect your intellectual property, by obscuring your circuit design from prying eyes. Spaced along the left edge of this circuit board, you can see that there are eight LEDs wired up… or are there? By lumping the two pins for a given LED under a single blob of solder, no one will ever be certain! (Also worth noting: this technique may have some side effects on the functionality of those LEDs.)
The very lowest solder joint on this circuit board is where the power and ground wires (red and black) are attached from the battery holder. Note that these two wires have been soldered together. “Shorting” the power and ground together like this is a classic technique to protect a circuit from damage due to unwanted charging or static discharge. (Note, however, that if the battery is switched on with its leads shorted together like this, the battery itself will also discharge quickly, get very hot, and possibly even explode.)
Here’s another related technique: If you solder together multiple pins of your microcontroller, you can connect to all of those pins at once, ensuring that no one pin steps out of line, and that all of the pins will work together in perfect digital harmony.
Got any other favorite examples of “novel” soldering techniques? Let us know in the comments or in the flickr group, and we’ll do another roundup sometime!
We would like to sincerely thank the helpful individuals who kindly granted us permission to use their photos and also those who allowed us access to their boards for photography.