Inspired by the global hackerspace movement and (software) hack days, Kids Hack Day is a 1-day event held in various locations around the world, where children and adults come together to “hack” and make new uses of every day items.
This incredibly charming video from the Kids Hack Day kickoff event in Moscow on May 25 shows you what it’s all about. (And, we are tickled to see our own WaterColorBot and EggBot making little appearances as well.)
I loved this little piece by Bryan Kennedy titled “It’s just wood.” A concise philosophical statement about the freedoms that come along with knowing how to make things.
The same approach applies in so many different contexts. Sometimes, it’s just aluminum, just software, or just silicon. It also reminds me of what a physics professor of mine used to say when explaining how simple something was: “It’s just math.”
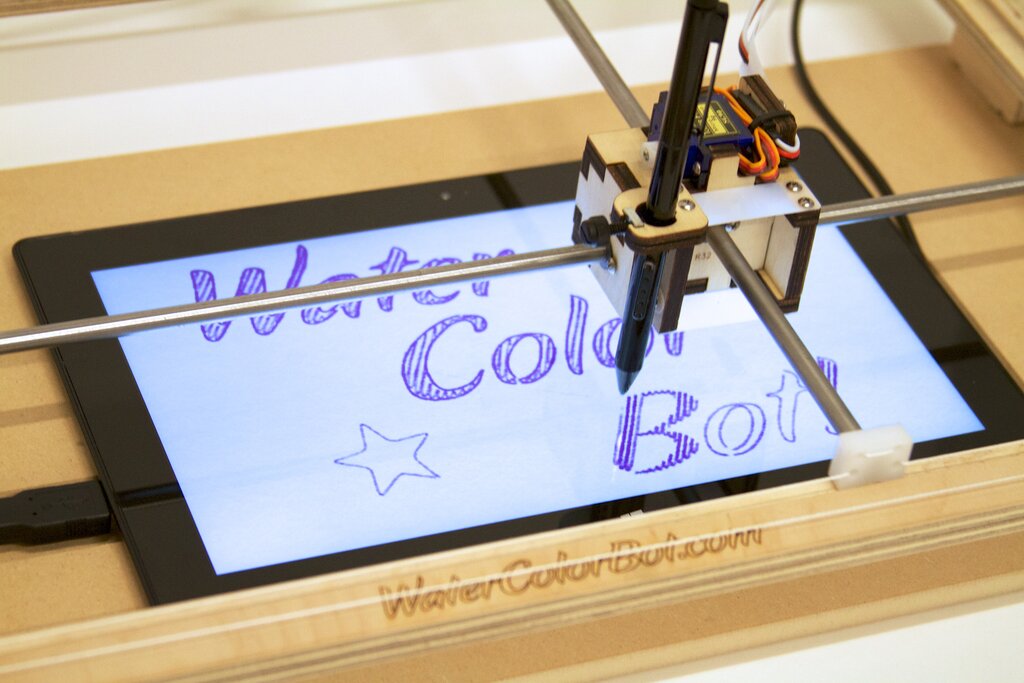
About a year ago, I started working on a project that used robotics to control a Surface Pro tablet. Not long after I started, I got my first glimpse at the the WaterColorBot on display at Maker Faire Bay Area 2013. The WaterColorBot is designed to carry a paintbrush over a piece of paper, raising and lowering it as needed to paint a picture. The movement and software control is similar to CNC router with special design modifications to make it lighter, cheaper and easier to control. A CNC router has to move heavyweight cutting bit with friction so needs expensive motors, rails, and belts. The WaterColorBot, on the other hand, needs only to move a paintbrush in a low friction environment.
I was instantly sold on the idea of using a WaterColorBot to control the Surface. I backed the Kickstarter, waited for my bot to arrive, and started working on software. When the WaterColorBot arrived, I was not disappointed. The assembly was quick and I was robotically painting in no time.
With the big mechanical and electronic solutions solved, my attention turned to the tablet. The Surface Pro is rare among tablets in that it uses a digitizer that allows extremely precise tracking with a stylus along with “hover” and “right-click” functionality. It does not need to be electrically grounded like a stylus for a screen that only supports capacitive touch. I was certain that the Surface Pro was the way to go, but not quite how it was going to be held together. The project was about to take a another serendipitous turn.
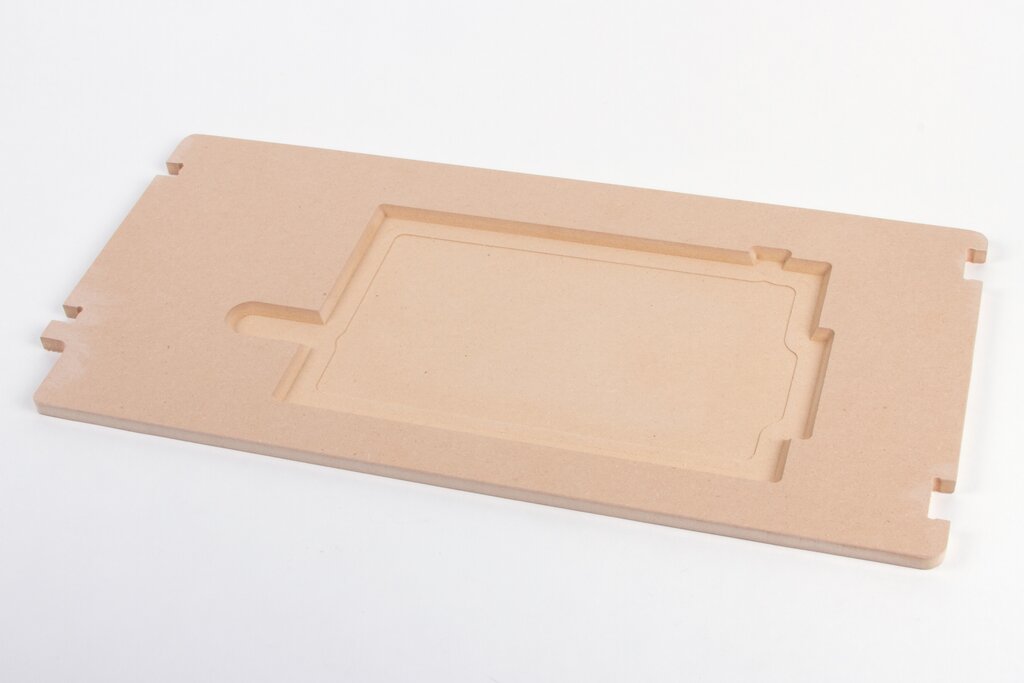
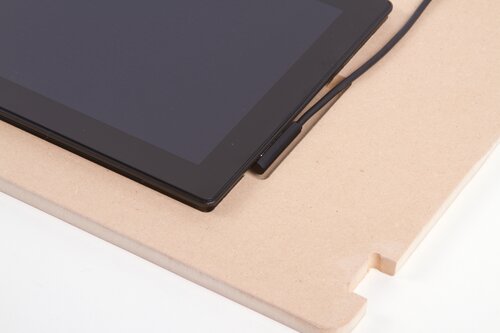
The custom-cut spoilboard
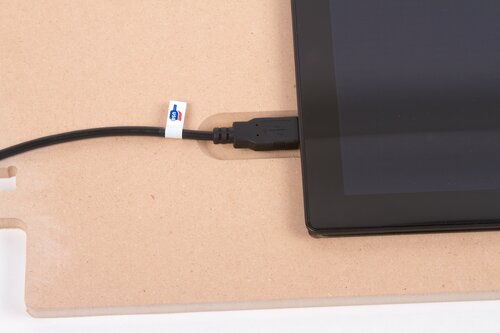
At this point, I shared my enthusiasm with Windell and Lenore of Evil Mad Scientist and they gave me a unique offer: Stop by the Evil Mad Scientist shop and together we would make a custom cut spoilboard (lower deck) fitted to mount the Surface Pro 2. Wielding digital calipers and other measurement and software tools, Windell came up with a design that held the tablet firmly and had extra space cut out for the charger, power button, and USB cable.
The area beneath the tablet has a lip and a lower recessed area. This design reduces wobble and makes it look even better. On the topic of machining – I got a few lessons in how larger CNC machines work. Windell showed me some design considerations in software and gave me a safety briefing about the CNC router itself. This thing can cut fast.
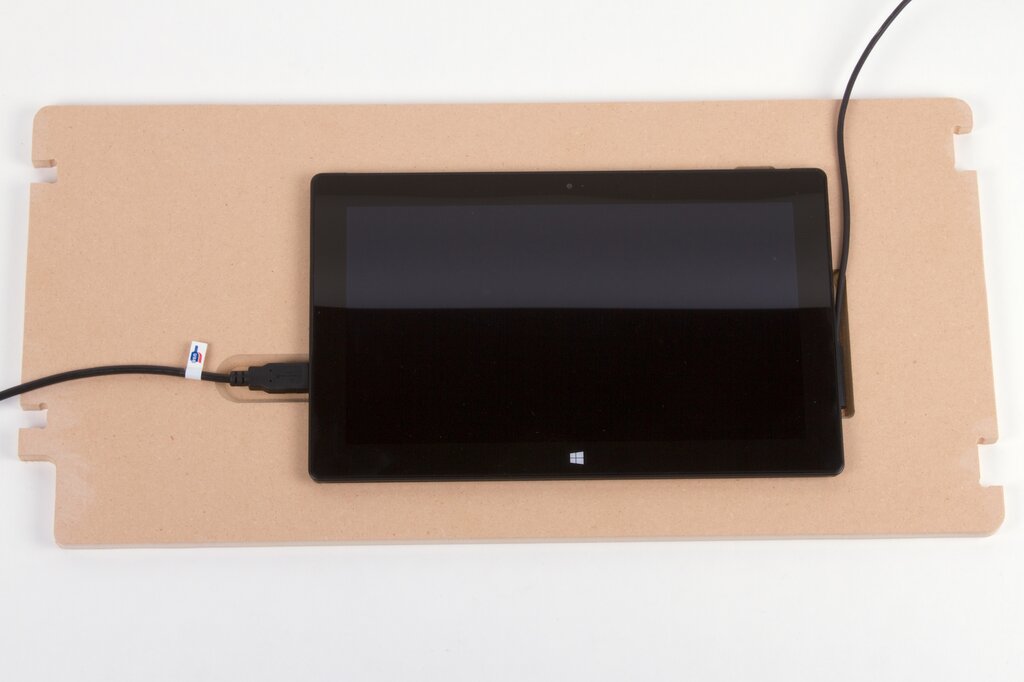
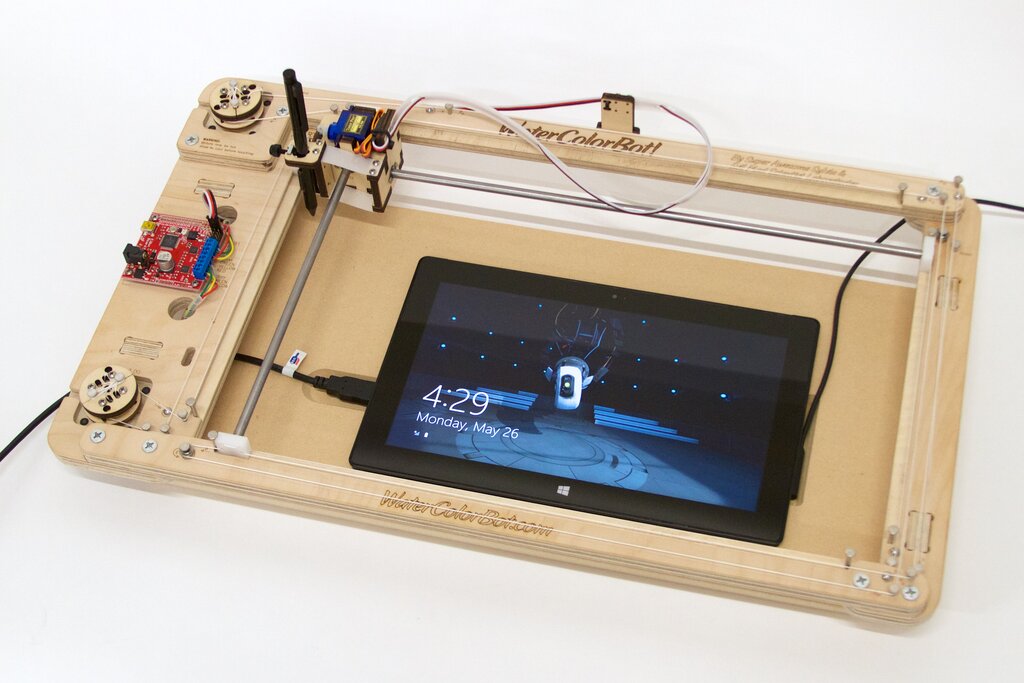
After a little sanding, we fitted the tablet, spoilboard, and WaterColorBot together. Having the co-creators of the WaterColorBot with me on this journey was priceless, as we can see from the final assembly. The first spoilboard we cut matched perfectly and the tablet is held firmly in place.
With enthusiasm fueled by seeing it all fit together, we decided to tell the WaterColorBot to do some painting. Windell loaded up an example sketch in Inkscape and, with only a minute to calibrate the stylus height, we were drawing!
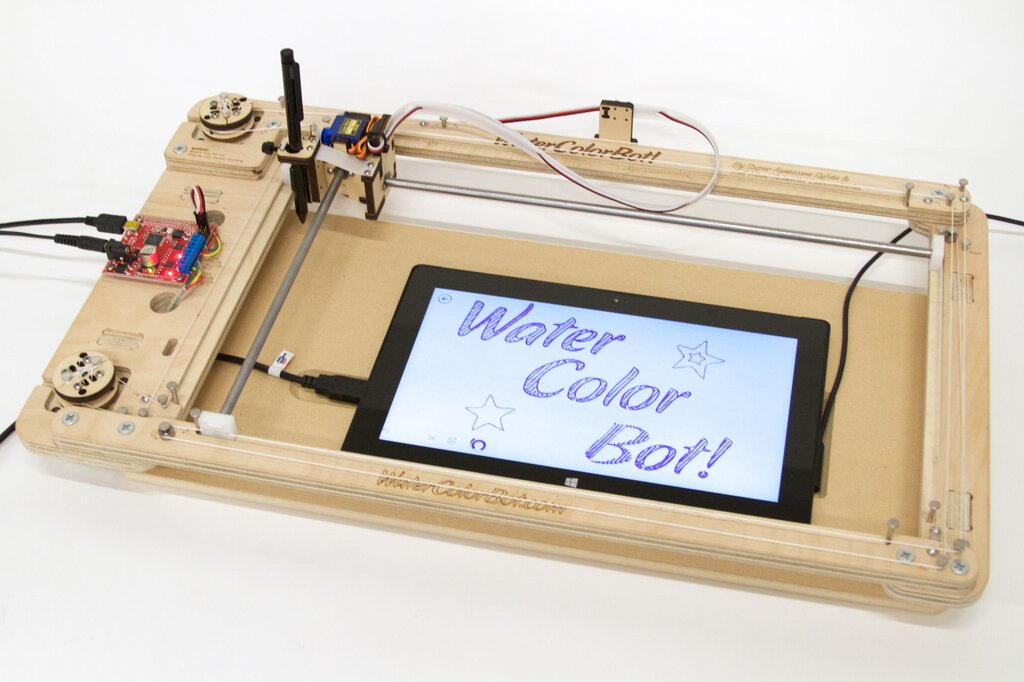
The software running on the Surface Pro is called FreshPaint and we chose a simple marker tool. In the video, you’ll hear a laughter break where the Surface picked up the floating toolbar in the app and dragged it around the screen.
Given a little time, we could have taught the WaterColorBot to change brushes and colors in FreshPaint, but our goals for the day were met. The light weight and low friction of the Surface stylus is perfectly matched for use on the WaterColorBot. A custom fitted spoilboard means the Surface will always be at the exact same place on the X/Y plane, greatly simplifying future software development. Next project: Teaching the robot how to see!
(Full disclosure: My day job is Systems Operations with Yammer, a Microsoft company. This project and use of the Surface Pro 2 is not affiliated with Microsoft in any way nor did they influence the project with sponsorship or exercise any editorial control. If they had, I’d try to talk them into contributing a Surface Pro 3! “Surface” is a trademark of Microsoft Corporation.)
James “techninja” Todd has just released Hershey Text JS, a port of the Hershey fonts to JSON, capable of being rendered quickly via JavaScript & SVG.
The Hershey fonts a classic set of “engraving” or “stroke based” (as opposed to outline based) fonts that are excellent for use with all kinds of physical cutting, drawing, and painting machines. Several years ago we introduced the Hershey Text extension for Inkscape, and you can find a more in depth introduction to the Hershey fonts in that article. Hershey Text JS is adapted from our Inkscape extension, and provides easy access to the font data for programmers who prefer to work in javascript.
Addie and Whisker of @tymkrs just posted video from their recent epic road trip including a visit to our shop. The video starts off in Colorado and wends through Arizona before getting to the bay area. After stops including the Internet Archive, the Electronics Flea Market and HSC, they arrive to tour our shop (starting at 11:53) before wrapping up at Tindie. We had a great time talking about the Eggbot, WaterColorBot, Digi-Comp II and miscellaneous vintage mechanical and electronic contraptions.
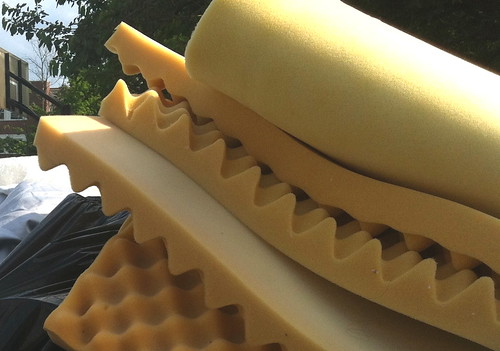
Ever wonder how they make foam rubber into an “egg crate” shape? You can tell that it isn’t molded that way, because there is not a smooth skin on the surfaces. And it clearly isn’t milled to that shape, since it comes in matched top and bottom pieces that are cut from the same initial block of foam. So how is it done? Amazingly enough, it’s done with a bandsaw.
Egg crate, acoustic, and other shapes of “convoluted foam” are cut with a special machine called a convolutor, which uses powerful rollers to feed flat sheets of foam rubber into a high-tension bandsaw. The rollers are covered with bumps that stretch and distort the foam such that the saw cuts to a variable depth, with extremely little waste.
You can watch the process in this video from Italian Cutting Systems (noting that the bandsaws are hidden behind protective covers):
Do you remember talking to me about getting one of your flickering LEDs working in a motoring museum in England? Well I thought I’d let you know that I’ve now installed it into an old lantern to mimic a gas flame, and it looks terrific. I thought you might like to see a photo of it in situ as part of the scene.