Robots in the Central Valley

Rows of busy pits

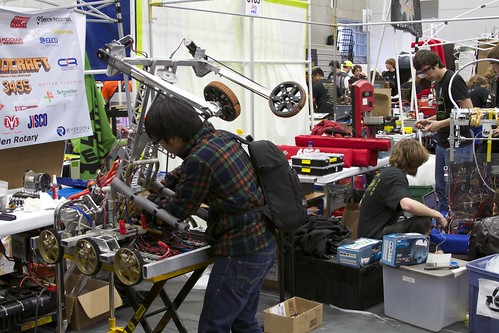
Friday was a busy day in the pits at the Central Valley Regional FIRST Robotics Competition. The teams got their robots unpacked, inspected, and ran practice rounds prior to matches this weekend. We’re here with Fremont Robotics, and we’ll be taking pictures throughout the weekend and posting them (tagged by team number where identifiable) in this flickr set.

On the field

The challenge this year is fun to watch: the robots score goals with large exercise balls and earn extra points for passing to team members and throwing the ball over a beam. The event is free to attend and open to the public, so if you’re near Madera, California this weekend, we’d love to see you here!

MakerBeam Comes of Age

makerbeam pieces

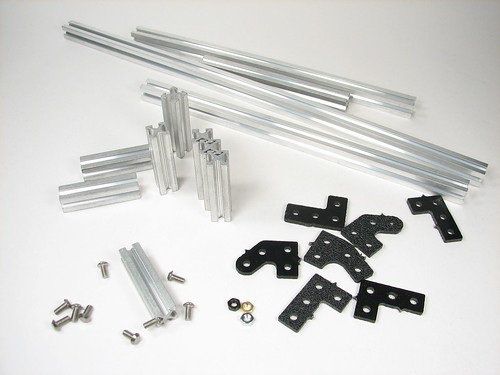
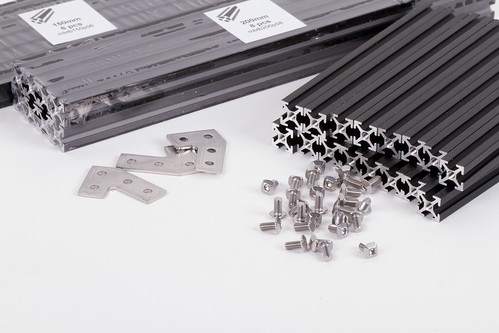
Back in 2009, we helped support the launch on Kickstarter of MakerBeam, a miniature open source aluminum T-slot profile construction set. Just a few months later, we wrote about receiving our first batch of MakerBeam parts.  And while there were some good things that might be said about those first-batch parts, there were some not-so-good things as well. For example, custom screws that couldn’t really be tightened and fastening plates made of too-brittle plastic. With some improvement — stainless steel brackets — MakerBeam eventually found limited distribution in 2011 at Sparkfun in the USA and at MakerBeam.eu, but on the whole, it seemed to be fizzling out of existence.

But, things change, sometimes for the better.  In 2012, Terence Tam’s excellent OpenBeam (a slightly larger T-slot profile, also currently sold by MakerBeam.eu) came roaring out of the gate, reminding us of what great things one can build out of extrusion profiles.  Meanwhile, the folks from MakerBeam.eu took hold of MakerBeam and began to run with it — turning a languishing project into an open source hardware success story. They recently sent us a starter kit to review, and we have to say— we were blown away.
makerbeam 2014 20

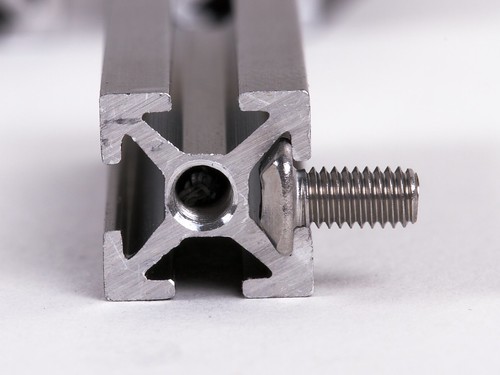
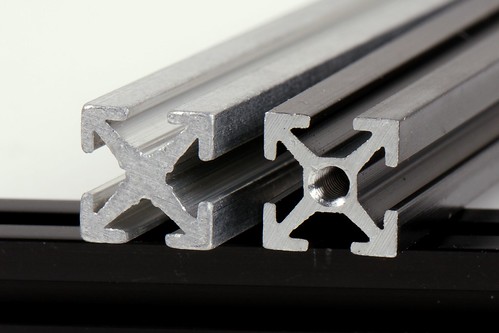
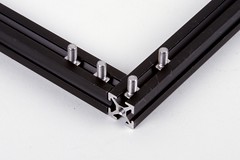
To begin with, they redesigned the profile itself.  The basic proportions are still the same (10 mm across), but the new shape has a thicker solid core that improves strength, and now allows the ends to be tapped. (The hole does not go all the way through.)  They also started having their profiles anodized, providing a harder outer surface, and tapping the ends.
makerbeam 2014 10 makerbeam 2014 11
makerbeam 2014 15 makerbeam 2014 16

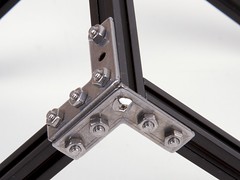
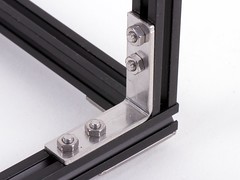
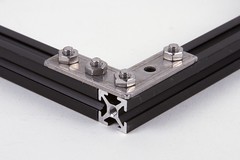
Next up: Nicely made stainless steel angle brackets and fastening plates.  Rock solid when bolted down, although (things being small) you may need to use several of them to get the kind of rigidity that you need for certain applications. We already had some of these shapes from the original MakerBeam makers.
makerbeam 2014 17

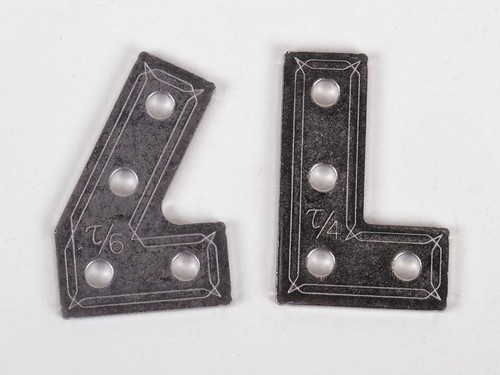
Silly: Some of the fastening plates (the ones designed by the original MakerBeam team) are inscribed with the angle in fractions of Tau, as in ?/4 instead of 90°.  Our guess: it’s certain to please many fewer people than it annoys.


makerbeam 2014 4
makerbeam 2014 5

And, most important: A fastening system that really works.  These stainless steel M3 screws with modified pyramid-shaped button socket cap heads are simply fantastic.  They slide easily into and out of the MakerBeam slots, and lock into place perfectly with a simple hex nut on the exterior.

There are arguments to be said for and against putting screw heads in the channels, but if you’re going to do it, you had damn well better do it right. And, finally, someone is doing it right.  You can read about the evolution of the fasteners on the MakerBeam.eu blog, here, here, here, here, and here.
 

makerbeam 2014 18


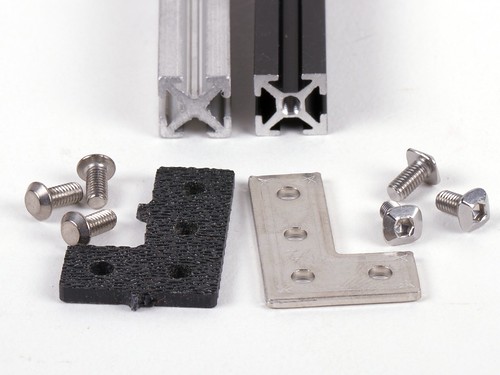
Old components, Left side:  MakerBeam profile 1.0, old-style screws, machined ABS fastening plate.
New components, Right side: MakerBeam profile 2.0, new screws, stainless steel fastening plates.
makerbeam 2014 8

So, after nearly five years, MakerBeam has come of age, and finally fulfilled its promise of being a really nice miniature construction set.  Our congratulations and thanks to MakerBeam.eu for doing such a great job of this, and especially for making these sets available for everyone else.

Larson Scanner modding

larson3

Anton wrote in to ask:

I want to purchase your Larson Scanner kit but need to be able to run it from household current … is there a converter that you would recommend?

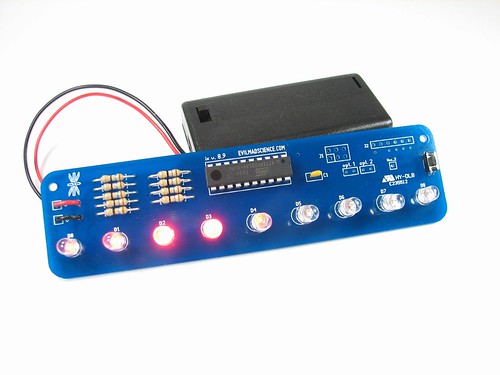
Since the Larson Scanner normally runs from 3 V DC, a regulated 3 V power supply can be hooked up in place of the 2xAA battery box. However, 5 V power supplies (like this one) are much more common, and the circuit can be run from 5 V with only minor changes. if you replace the nine 16 ohm resistors in the Larson Scanner kit with 120 – 150 ohm resistors, you can power it from 5 V directly.

Another related question we occasionally get is how to run the Larson Scanner with green LEDs. (Note: by green, we mean “pure” green LEDs which have a forward voltage of about 3 V. Older style yellow-green LEDs with a forward voltage of ~2 V can be used as drop-in replacements for the red ones.) 

If running off of battery will work for you, this is an even simpler change: merely replace the 3 V battery holder with a 4.5 V one, such as a 3xAA. It is a happy coincidence that the circuit can run with red LEDs at 3 V or green LEDs at 4.5 V using the same 16 ohm resistor value. So how about running a green Larson Scanner from a 5 V power supply? Replace the nine 16 ohm resistors with 39 ohm resistors and you should be good to go.

You can find the documentation for the Larson Scanner and more stories about modding it on our wiki. We’d love to hear about any mods you do to the Larson Scanner in the comments or see pictures in the flickr pool.

Resistor Wallet

Resistor Wallets in use

Ben wrote in with a great question:

I had a quick question regarding the Three Fives Kit. First of all I just wanted to say that great job on the kit! I LOVE mine and it was a blast to put together. I just had a quick question about one of the packing items used when the kit is shipped. I loved the resistor organizer/holder you shipped the resistors and have been trying to figure out where to get them. The best I could guess was that they are sewing needle holders, but I have been unable to find them as such.

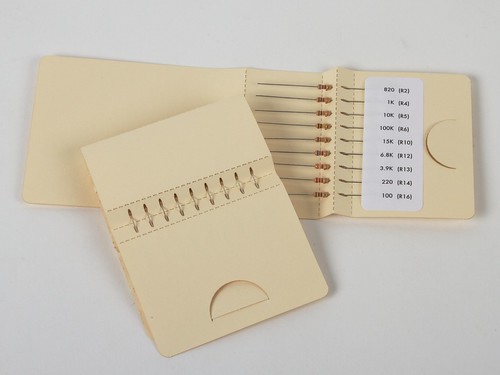
Many of our soldering kits have multiple resistor values, but the Three Fives kit is unusual among our projects in having nine individual resistors of different values. This presented an interesting problem: how to make user friendly packaging to make it easy to find the right resistor. Sure, you can read the color code stripes, but that can be a pain for folks with color blindness or just plain old poor vision.

Resistor Wallet in use

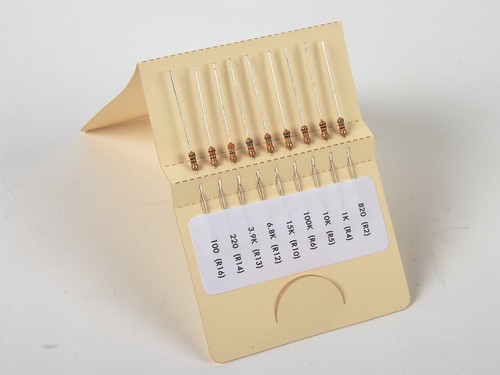
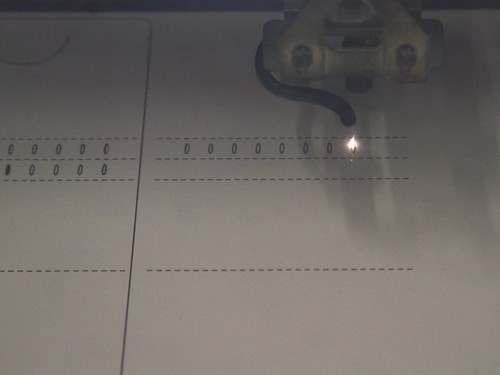
Our solution was to design a custom wallet, modeled after needle packets, to hold and label the resistors with their locations & values. The resistors are dropped into slots, secured with a label, the cover flap is closed over them and then tucked under a tab. During use, each resistor is simply pulled out from under the adhesive label.

Laser Cutting Wallets

The wallets are laser cut out of sheets of 60 lb manila cardstock. It bends easily along the perforations, but is very sturdy and can withstand many repeated bends. (Aside: this weight is very similar to punch cards, which—to go full circle—is what I use for storing sewing needles.)

Resistor Wallet

We reused the wallet with a different label when we released our multi-colored Menorah and breadboard Menorah kits, which also happen to use nine resistors in a variety of values.

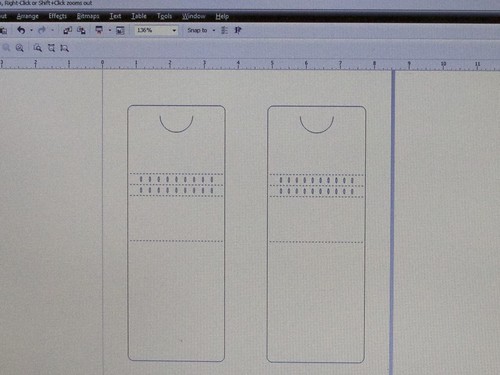
Resistor Wallet Design

Today we’re releasing this resistor wallet design in two versions: one for nine resistors, and one with slightly narrower spacing to hold ten.

If you use our resistor wallet, we’d love to hear about it or see pictures in our flickr pool!

Access Point Garage Door Opener

Over at Dead, too much lettuce., Scott built an Access Point garage door opener with a Raspberry Pi, an Arduino, and our Simple Relay Shield.

I bike to work. Bikes live in the garage. But with only 2 remotes, I could not keep one in my bag all the time to be able to get to the bike. So a new option had to be created. Most people would have bought a new remote…

Extreme Learning at the Institute for the Future

Not long ago, I participated in a workshop at the Institute for the Future on what they are calling Extreme Learning. They have just launched a site to provide resources for alternative learning paths and to share stories of extreme learners (like mine in the video above). On the extreme learners site, there are more stories from the workshop participants, who were a fascinating group from diverse backgrounds. This project is a part of the Future of Learning program.