![]()
Over on instructables, SF Media Labs has posted a 1x1x1 LED Cube tutorial.
See also: Blink an LED with an AVR.


![]()
Over on instructables, SF Media Labs has posted a 1x1x1 LED Cube tutorial.
See also: Blink an LED with an AVR.

It was the 1960’s, and people were building some very interesting digital computers. One of them was the Digi-Comp II, which we have written about extensively: a binary mechanical computer based on rolling marbles and flip-flop gates.
For an entirely different approach, look no further than How to Build a Working Digital Computer (1967) by Edward Alcosser, James P. Phillips, and Allen M. Wolk. You can download it as a free e-book (PDF, EPUB, Kindle) at Archive.org, thanks to the BitSavers PDF Document archive.

How to Build a Working Digital Computer is both an introduction to the “new and exciting field of digital computers” and a set of plans to build one. What’s especially interesting is that the plans don’t call for any specialized electronic components, but instead show how to build everything from parts that you might find at a hardware store: items like paper clips, little light bulbs, thread spools, wire, screws, and switches (that can optionally be made from paper clips).
That’s not to say that such a computer is necessarily simplistic. Arrays of paperclip logic gates can get pretty big, pretty fast.

The instructions include a read-only drum memory for storing the computer program (much like a player piano roll), made from a juice can, with read heads made from bent paper clips. A separate manually-operated “core” memory (made of paper-clip switches) is used for storing data.
So can this “paper clip” computer actually be built, and if so, would it work? Apparently yes, on both counts. Cleveland youngsters Mark Rosenstein and Kenny Antonelli built one named “Emmerack” in 1972 (albeit substituting Radio Shack slide switches for most of the paper clips), and another was built in 1975 by the Wickenburg High School Math Club in Arizona. And, at least one modern build has been completed, as you can see on YouTube.

Perhaps more surprisingly, the “paper clip” computer was also the basis of the Arkay (later, Comspace) CT-650 computer trainer, a rare, early computer that seems to have been built directly from the plans in How to Build a Working Digital Computer.


Photos of an original Comspace CT-650 posted recently at the Vintage Computer Forums show that this computer was a beautiful piece of work— no paper clips or tin cans in sight.
Although it’s a too small to see in the pictures, the fine print below the “core” memory switch array reads “PATENT PENDING.” The brains of the computer being adapted from an existing design, the patent, D210728, claims only the “Ornamental design for the data entry keyboard console.”
So go download this excellent book and make your own wonderful paper clip computer. Link: Archive.org via Friends Of DigiComp

Over at 50 Watts, Will Schofield has showcased a beautiful collection of vintage Dutch safety posters.

Head over and check them all out.

Hat tip to Chris Gammell of The Amp Hour (via Reddit).

Congratulations to Sylvia on her participation in this fantastic event! We’ll add to this list as we find more articles and links.
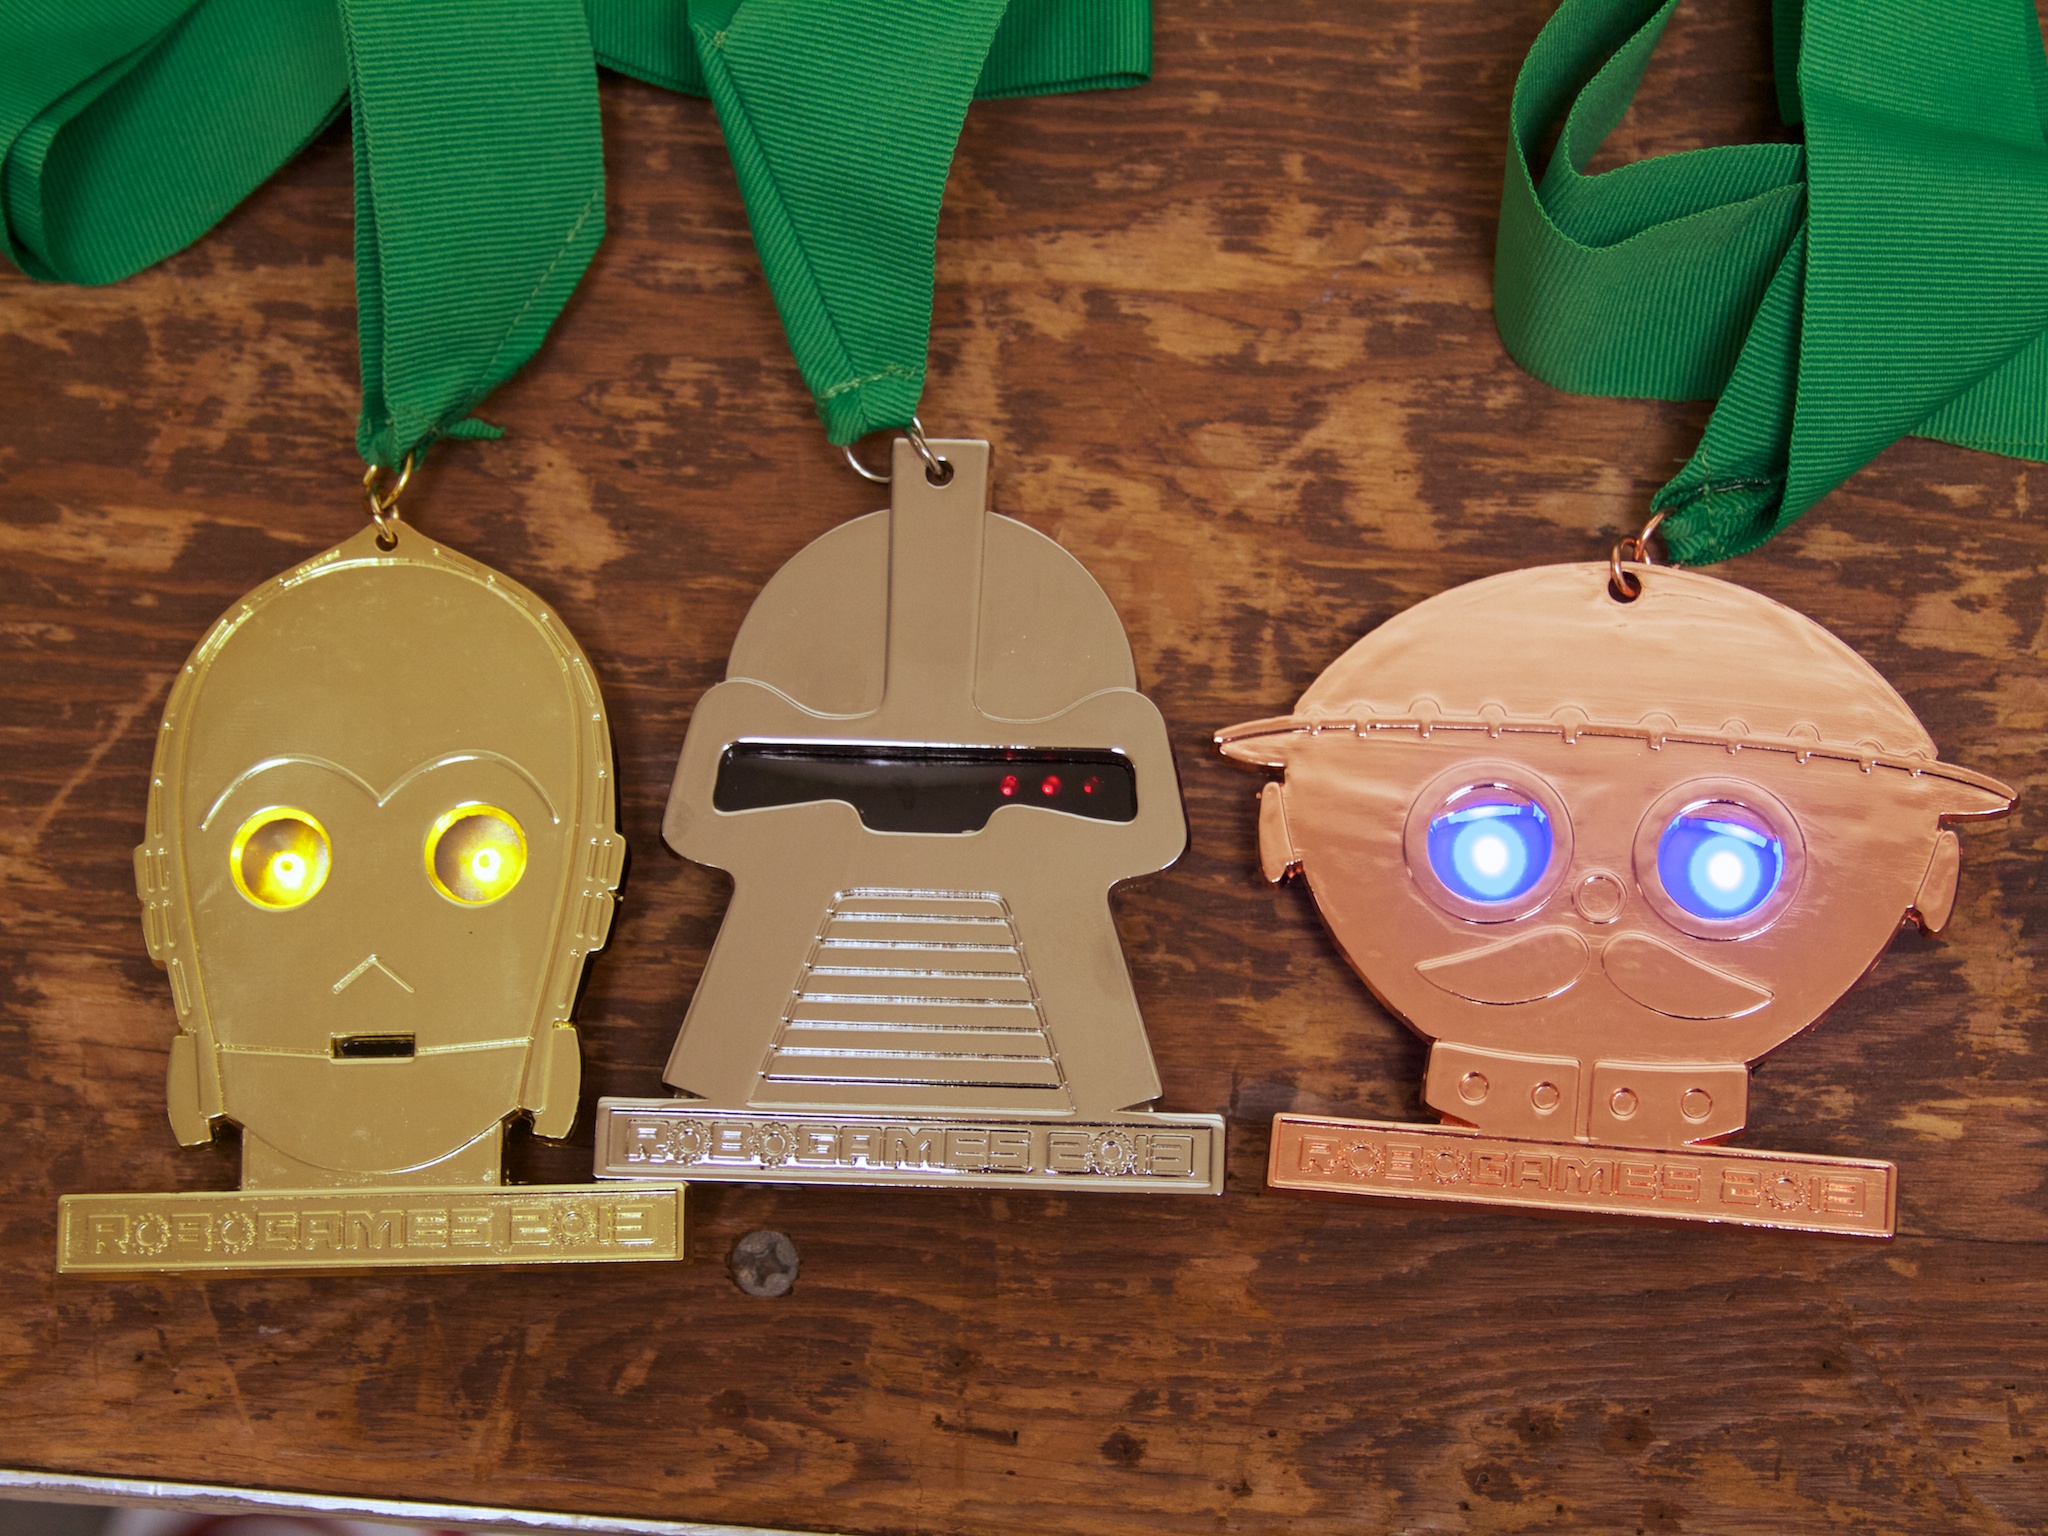
We helped build the gold, silver, and bronze medals for this year’s RoboGames competition, which finished up yesterday in San Mateo, California.
Read on for a bit about how we designed and built the electronics for, and assembled these pretty-darned neat medals. It’s a story involving LEDs, some remarkable adhesives, and a how to operate a small-scale surface mount production.
We are super-excited because Super-Awesome Sylvia, who we have been working with on the WaterColorBot, has been invited to this year’s White House Science Fair to show off her project! Way to go Sylvia!
Tune in Monday, April 22 starting at 11:30 am EDT, at wh.gov/sciencefair, to watch the event live!

Jonathan Foote over at Rotormind is at it again with our Art Controller. This time, he is using it to thermostatically control a ventilation fan.

He has wired up a TC74 temperature sensor on board and reprogrammed the microcontroller to trigger the relay when a temperature set point is reached. The temperature is set using the DIP switch. He has posted his code and shared in detail all of his modifications. Head over and check it out!
We are right in the middle of National Robotics Week, which runs April 6-14 and starts a string of events all over the country for makers of all kinds. We’ve listed a few upcoming highlights below:
You can look for events in your area on the National Robotics Week Events site and the Maker Faire Map site—feel free to add your favorites in the comments. We’ll be exhibiting at RoboGames and helping Super Awesome Sylvia show off the Watercolorbot at Maker Faire. We hope to see you there!
We have been visiting the Exploratorium in San Francisco again and again since we were teenagers in the early ’90s. And with good cause: The Exploratorium is an unparalleled museum of hands-on science, art, perception, and exploration. It’s not a children’s museum (although it is an amazing place to take children), nor is it a place where you admire giant fossilized skeletons, nor one of those museums that always seems to have a traveling exhibit with a name like “The Science of Jersey Shore.”
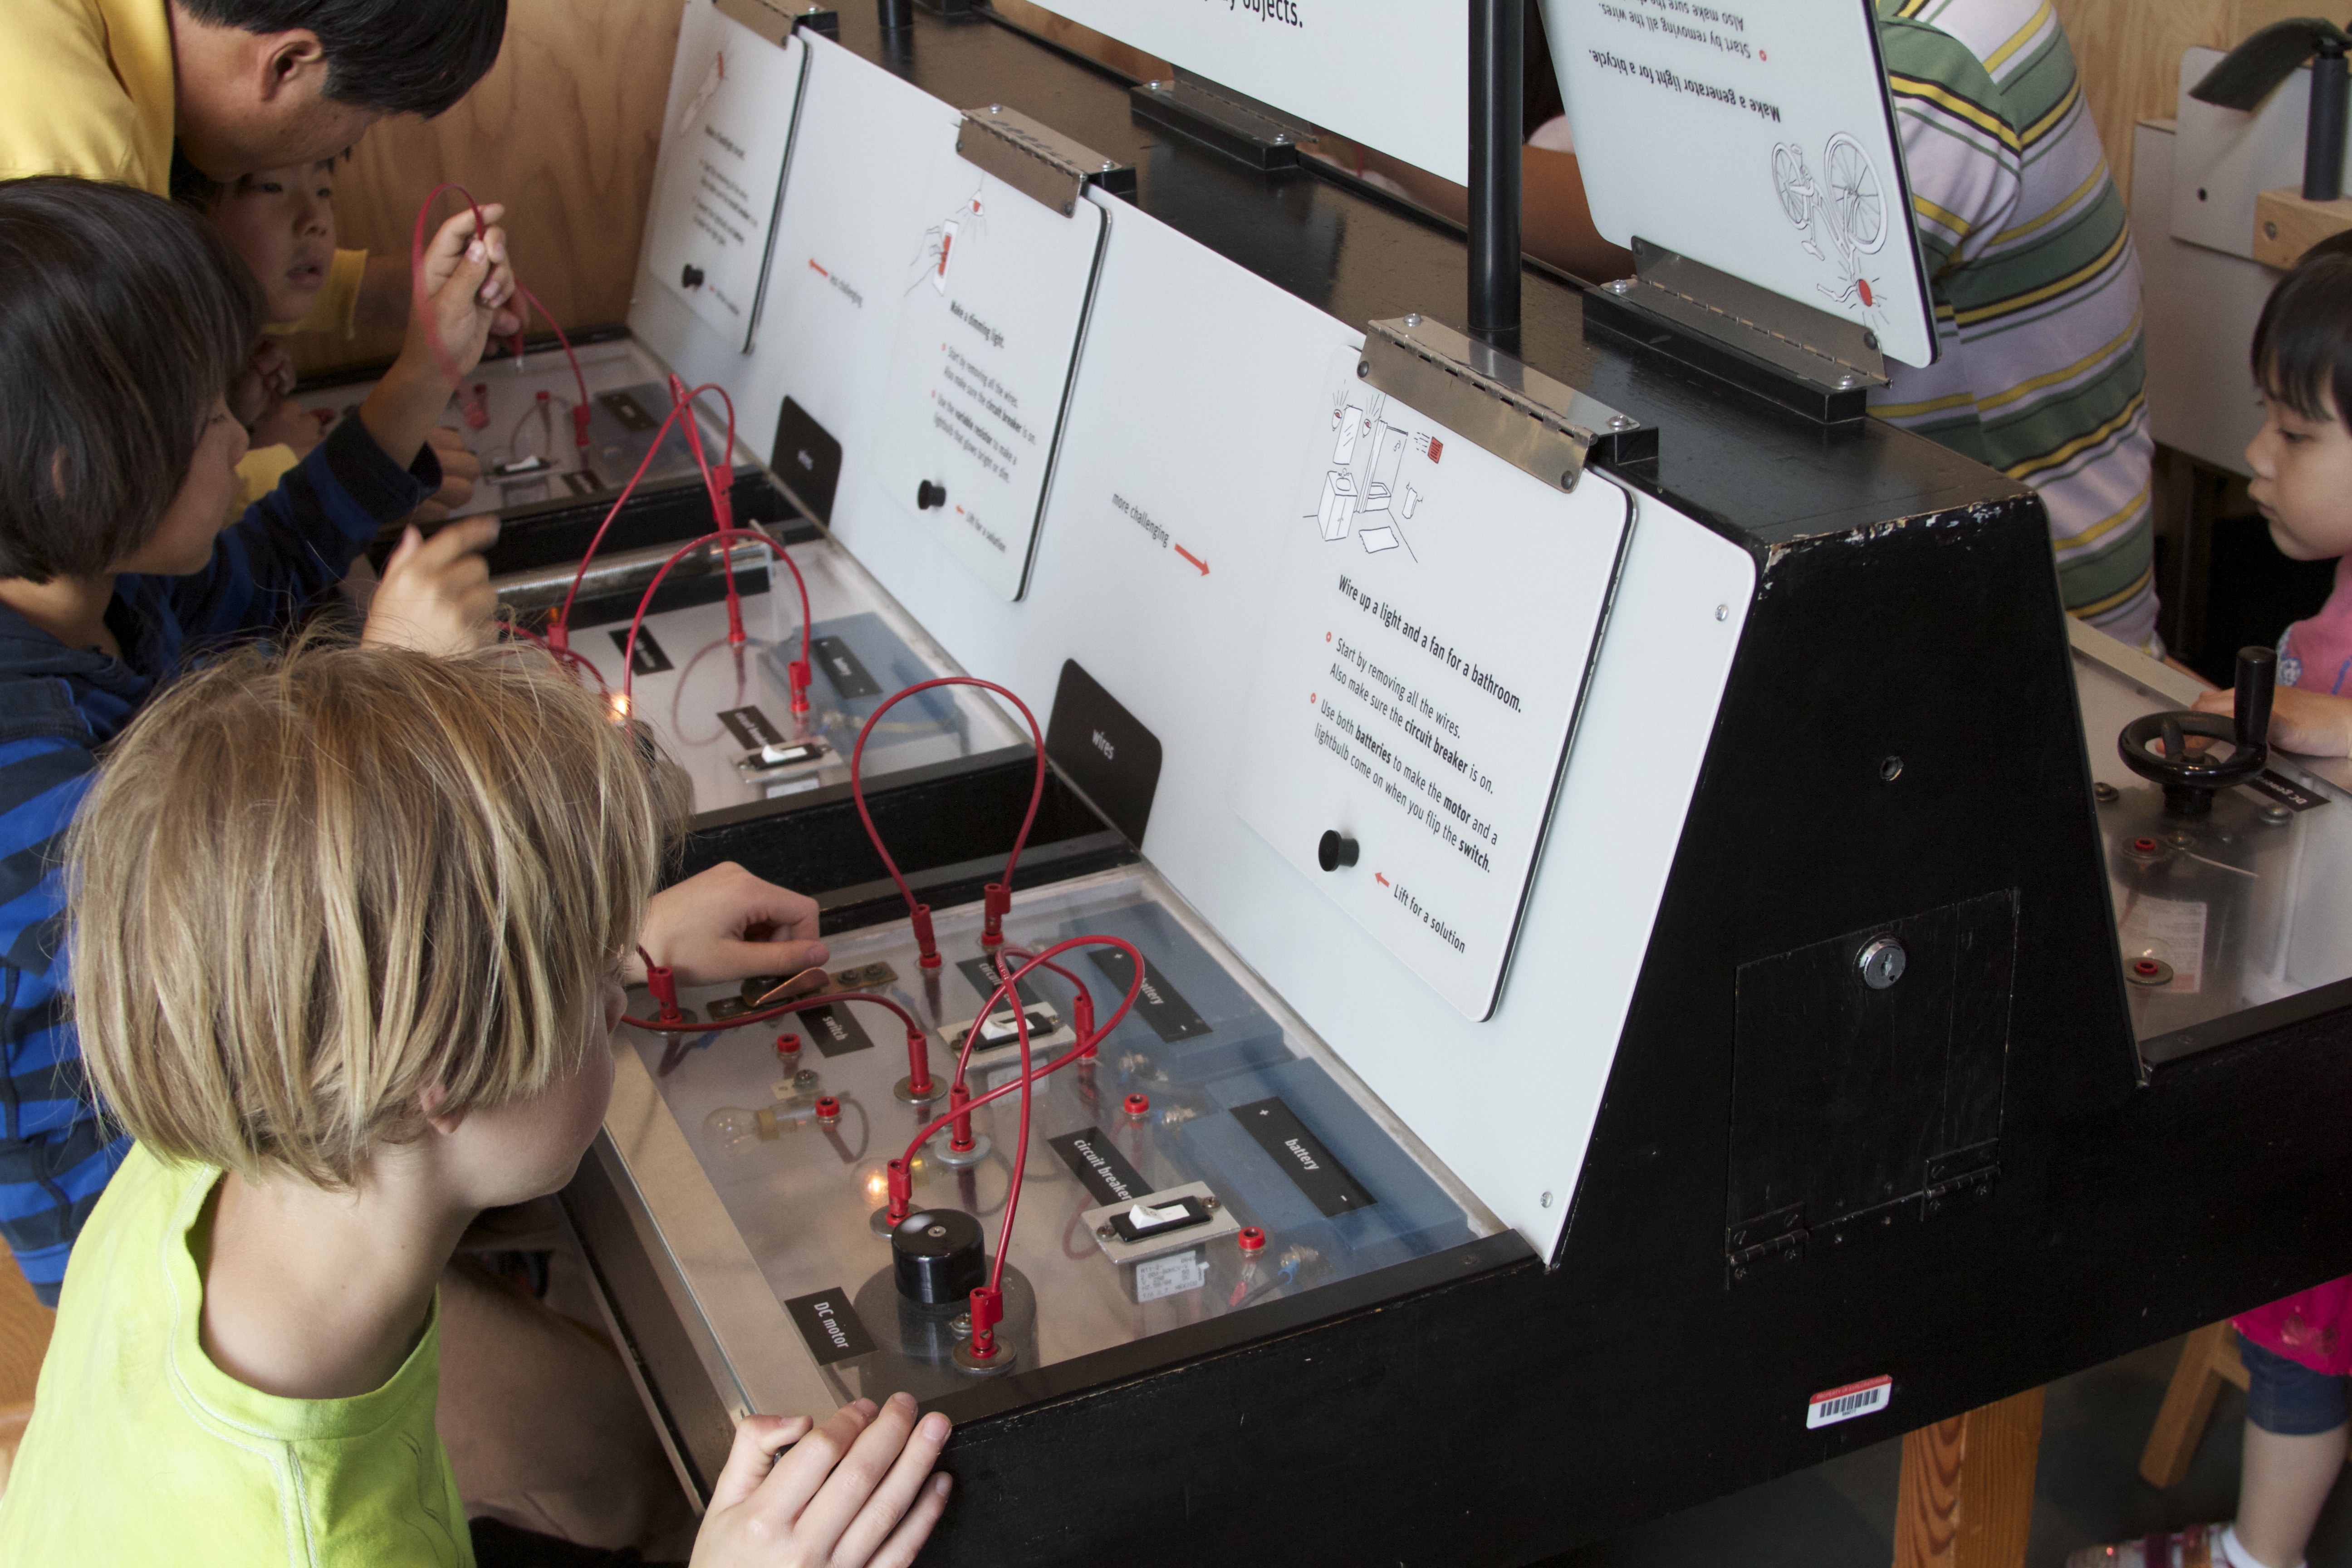
Instead, it’s a place full of simple, often-amazing yet not-too-flashy exhibits that (for the most part) you play with to learn about various phenomena. For example, at the Floating in Copper exhibit, you can get a feel for the un-earthly effects that strong magnets have in the presence of a large block of nonmagnetic, highly-conductive material. It’s one thing to read about eddy currents in an article; it’s quite another to release a chunk of metal in mid-air, only to find that it floats down to rest, more gently than a dandelion seed. You may have seen this exact exhibit at other museums (here, for example)— and if so, that’s quite likely because the Exploratorium makes many copies of its exhibits for other museums and publishes plans for others to make their own.
Since moving to the Bay Area in 2005 and starting the Evil Mad Scientist Laboratories blog, we’ve also been honored to present some of our own projects at Exploratorium events over the past few years, including the CandyFab, a Bristlebot workshop at the first Young Makers event, and some of our clock projects at the Open Make event on the theme of “Time.”


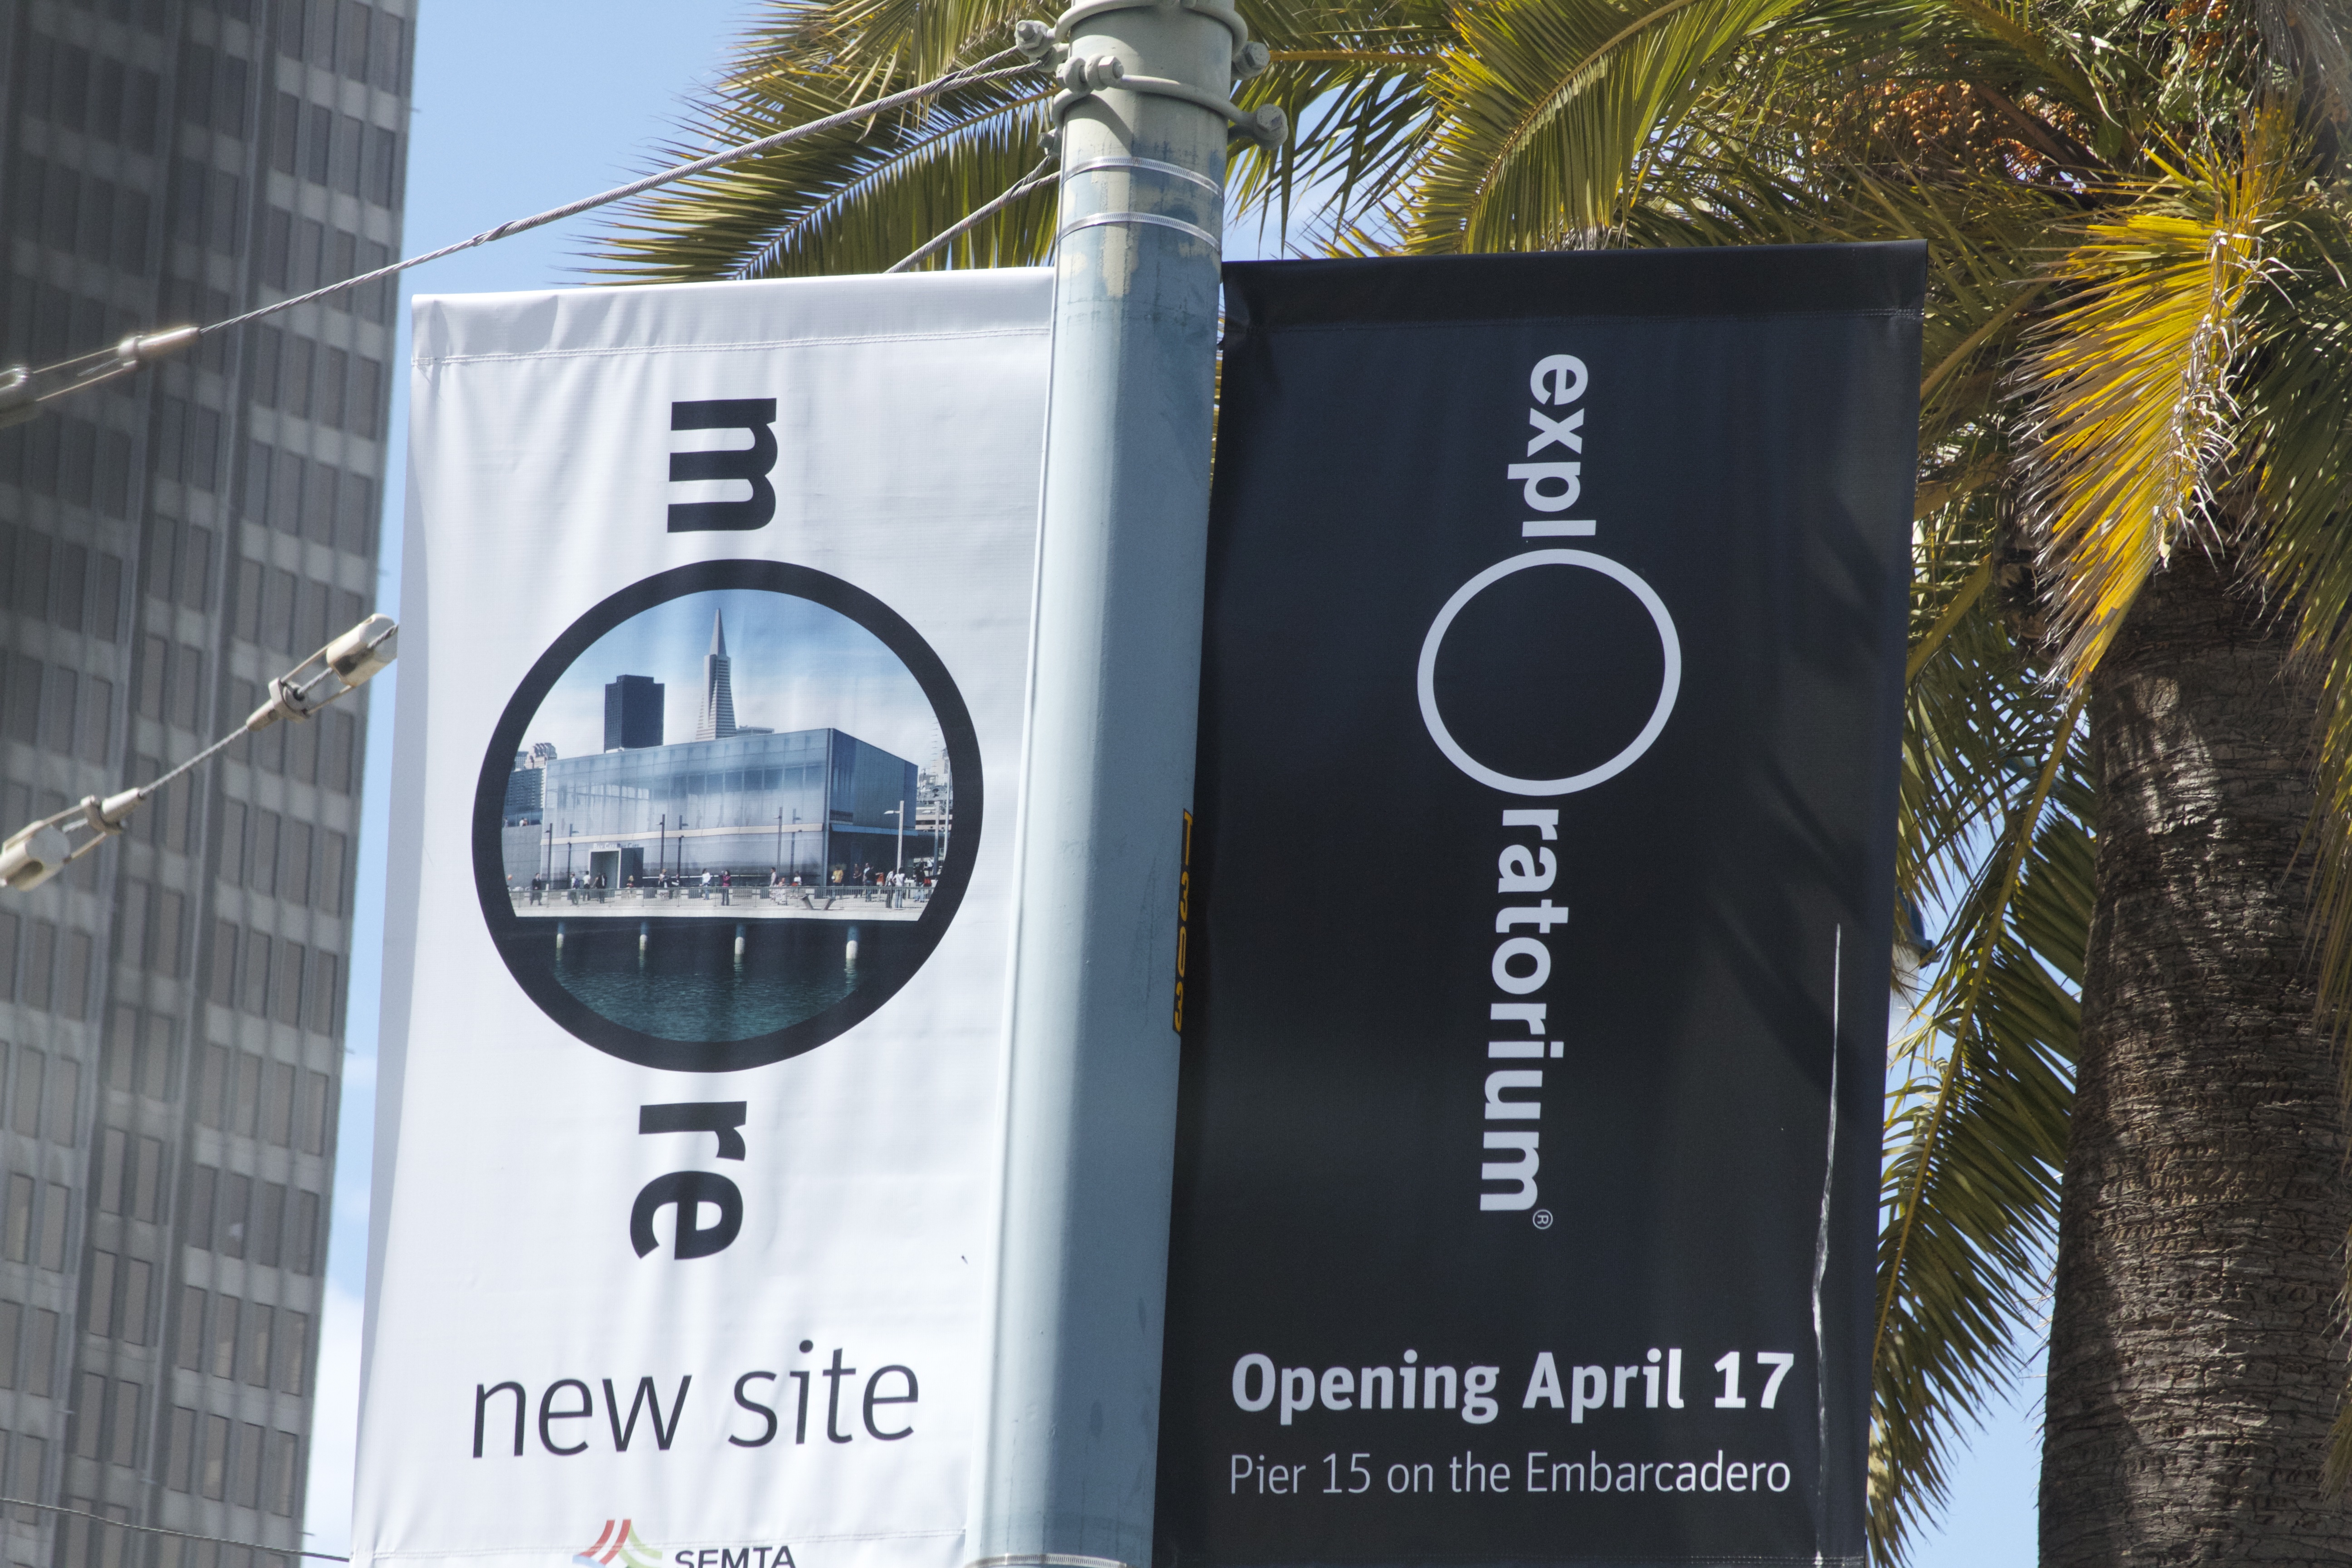
The Exploratorium has, since its founding in 1969, been located in the exhibit hall of the the Palace of Fine Arts— a huge arc of a building left over from the 1915 Worlds Fair, located in the Marina district of San Francisco, as pictured above. As the name implies, the building was designed to be a museum and was a remarkably suitable home for the Exploratorium. However, a few years ago, it came out in the news that they would be moving out of the Palace of Fine Arts, and into a space on one of the San Francisco Piers. Of course, our hearts sank at hearing this, as we could not imagine any more perfect place for the Exploratorium. Nor could we imagine that they could possibly find a place as large and welcoming anywhere else in San Francisco. We were also worried about parking, as the Palace of Fine Arts was blessed with its own parking lots, a rarity in San Francisco.
We were wrong.
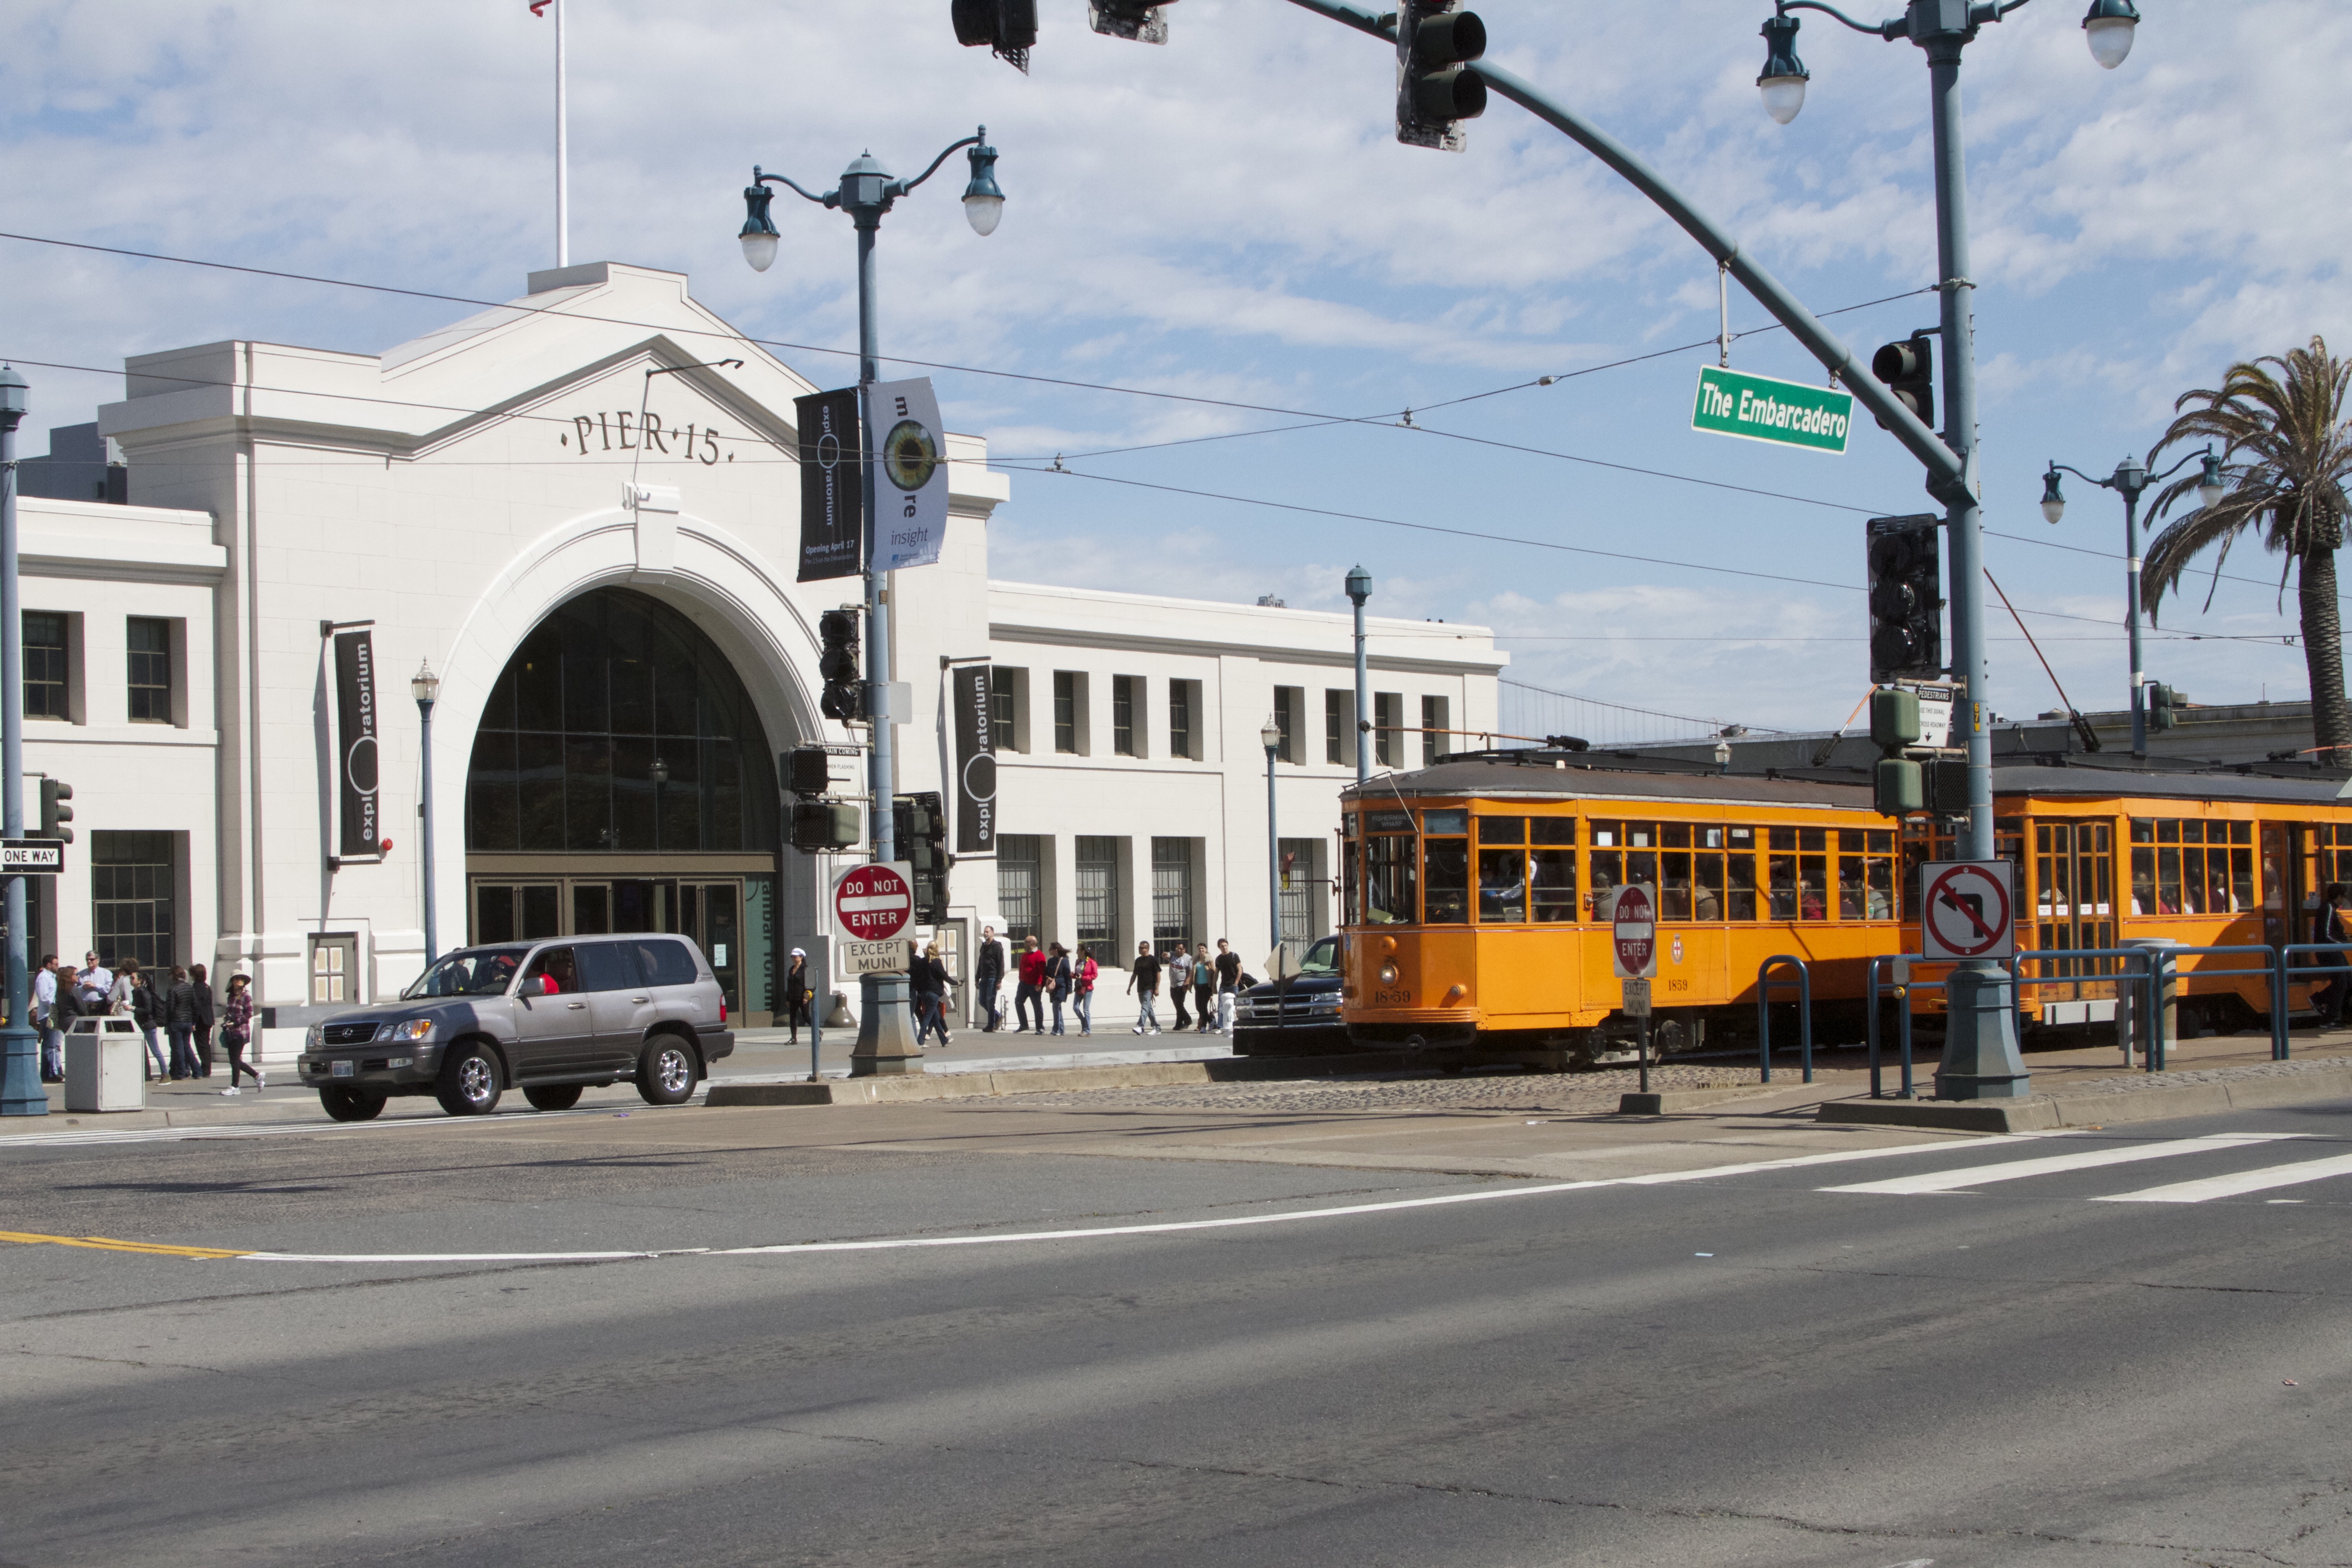
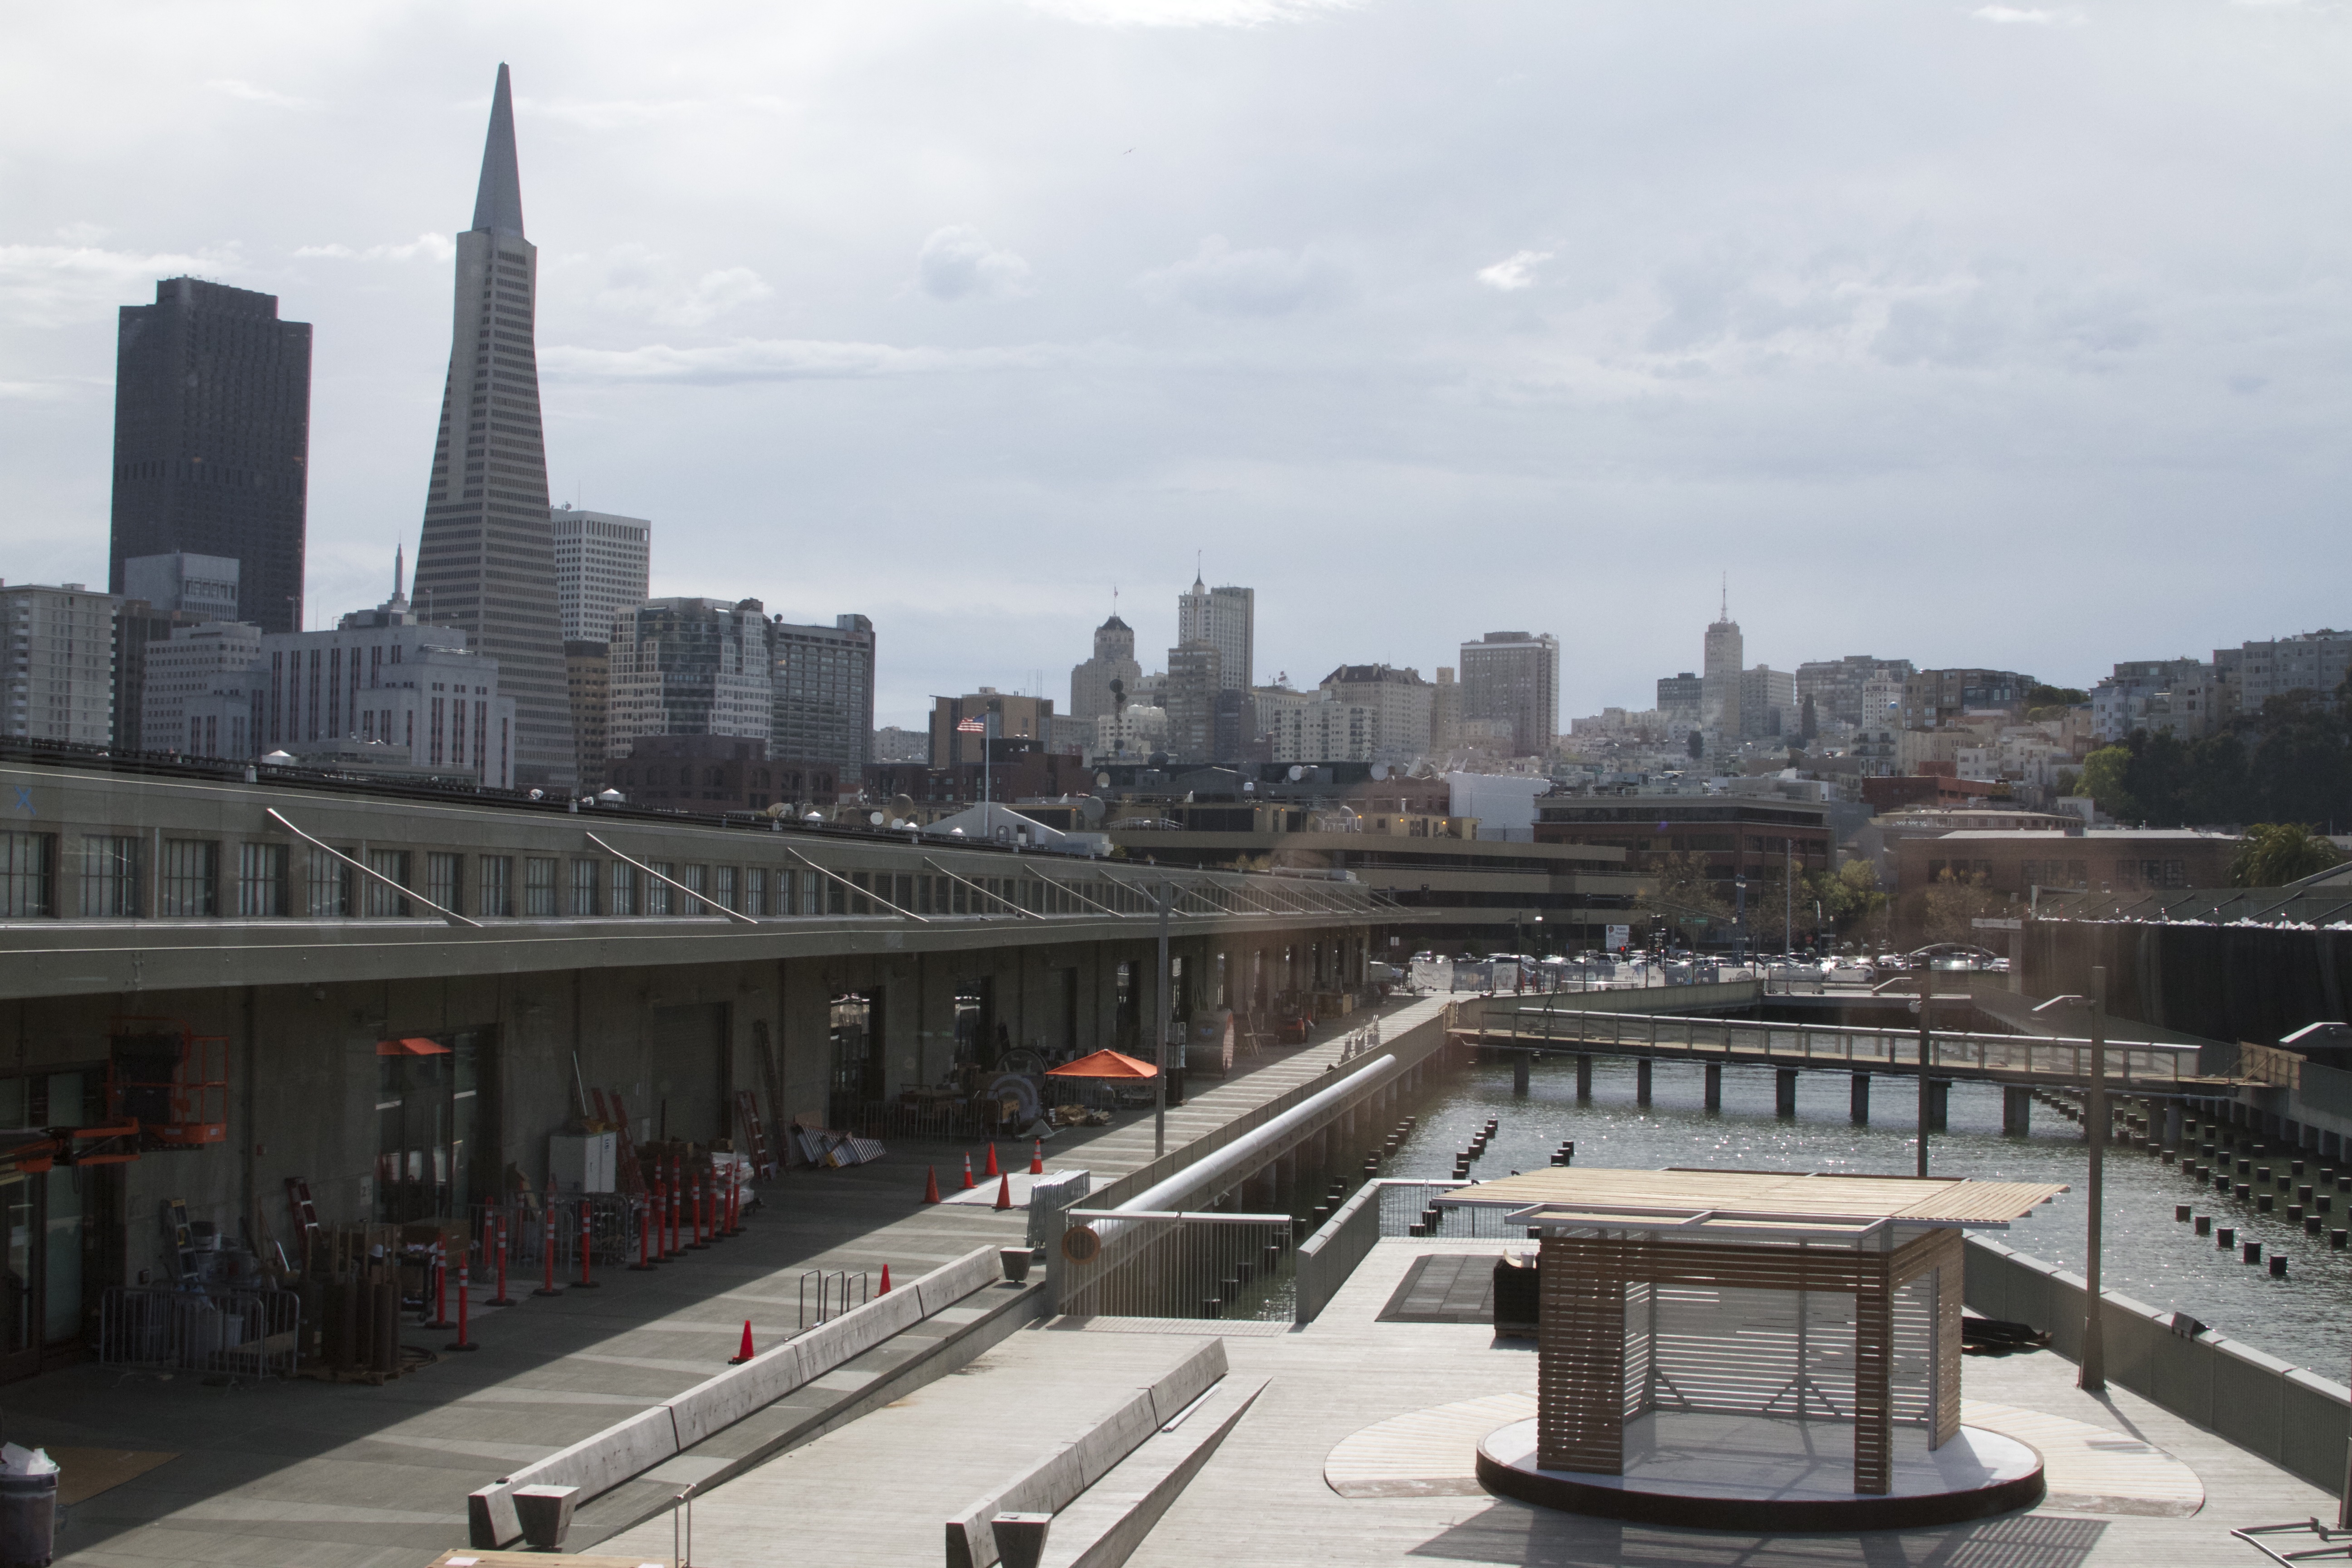
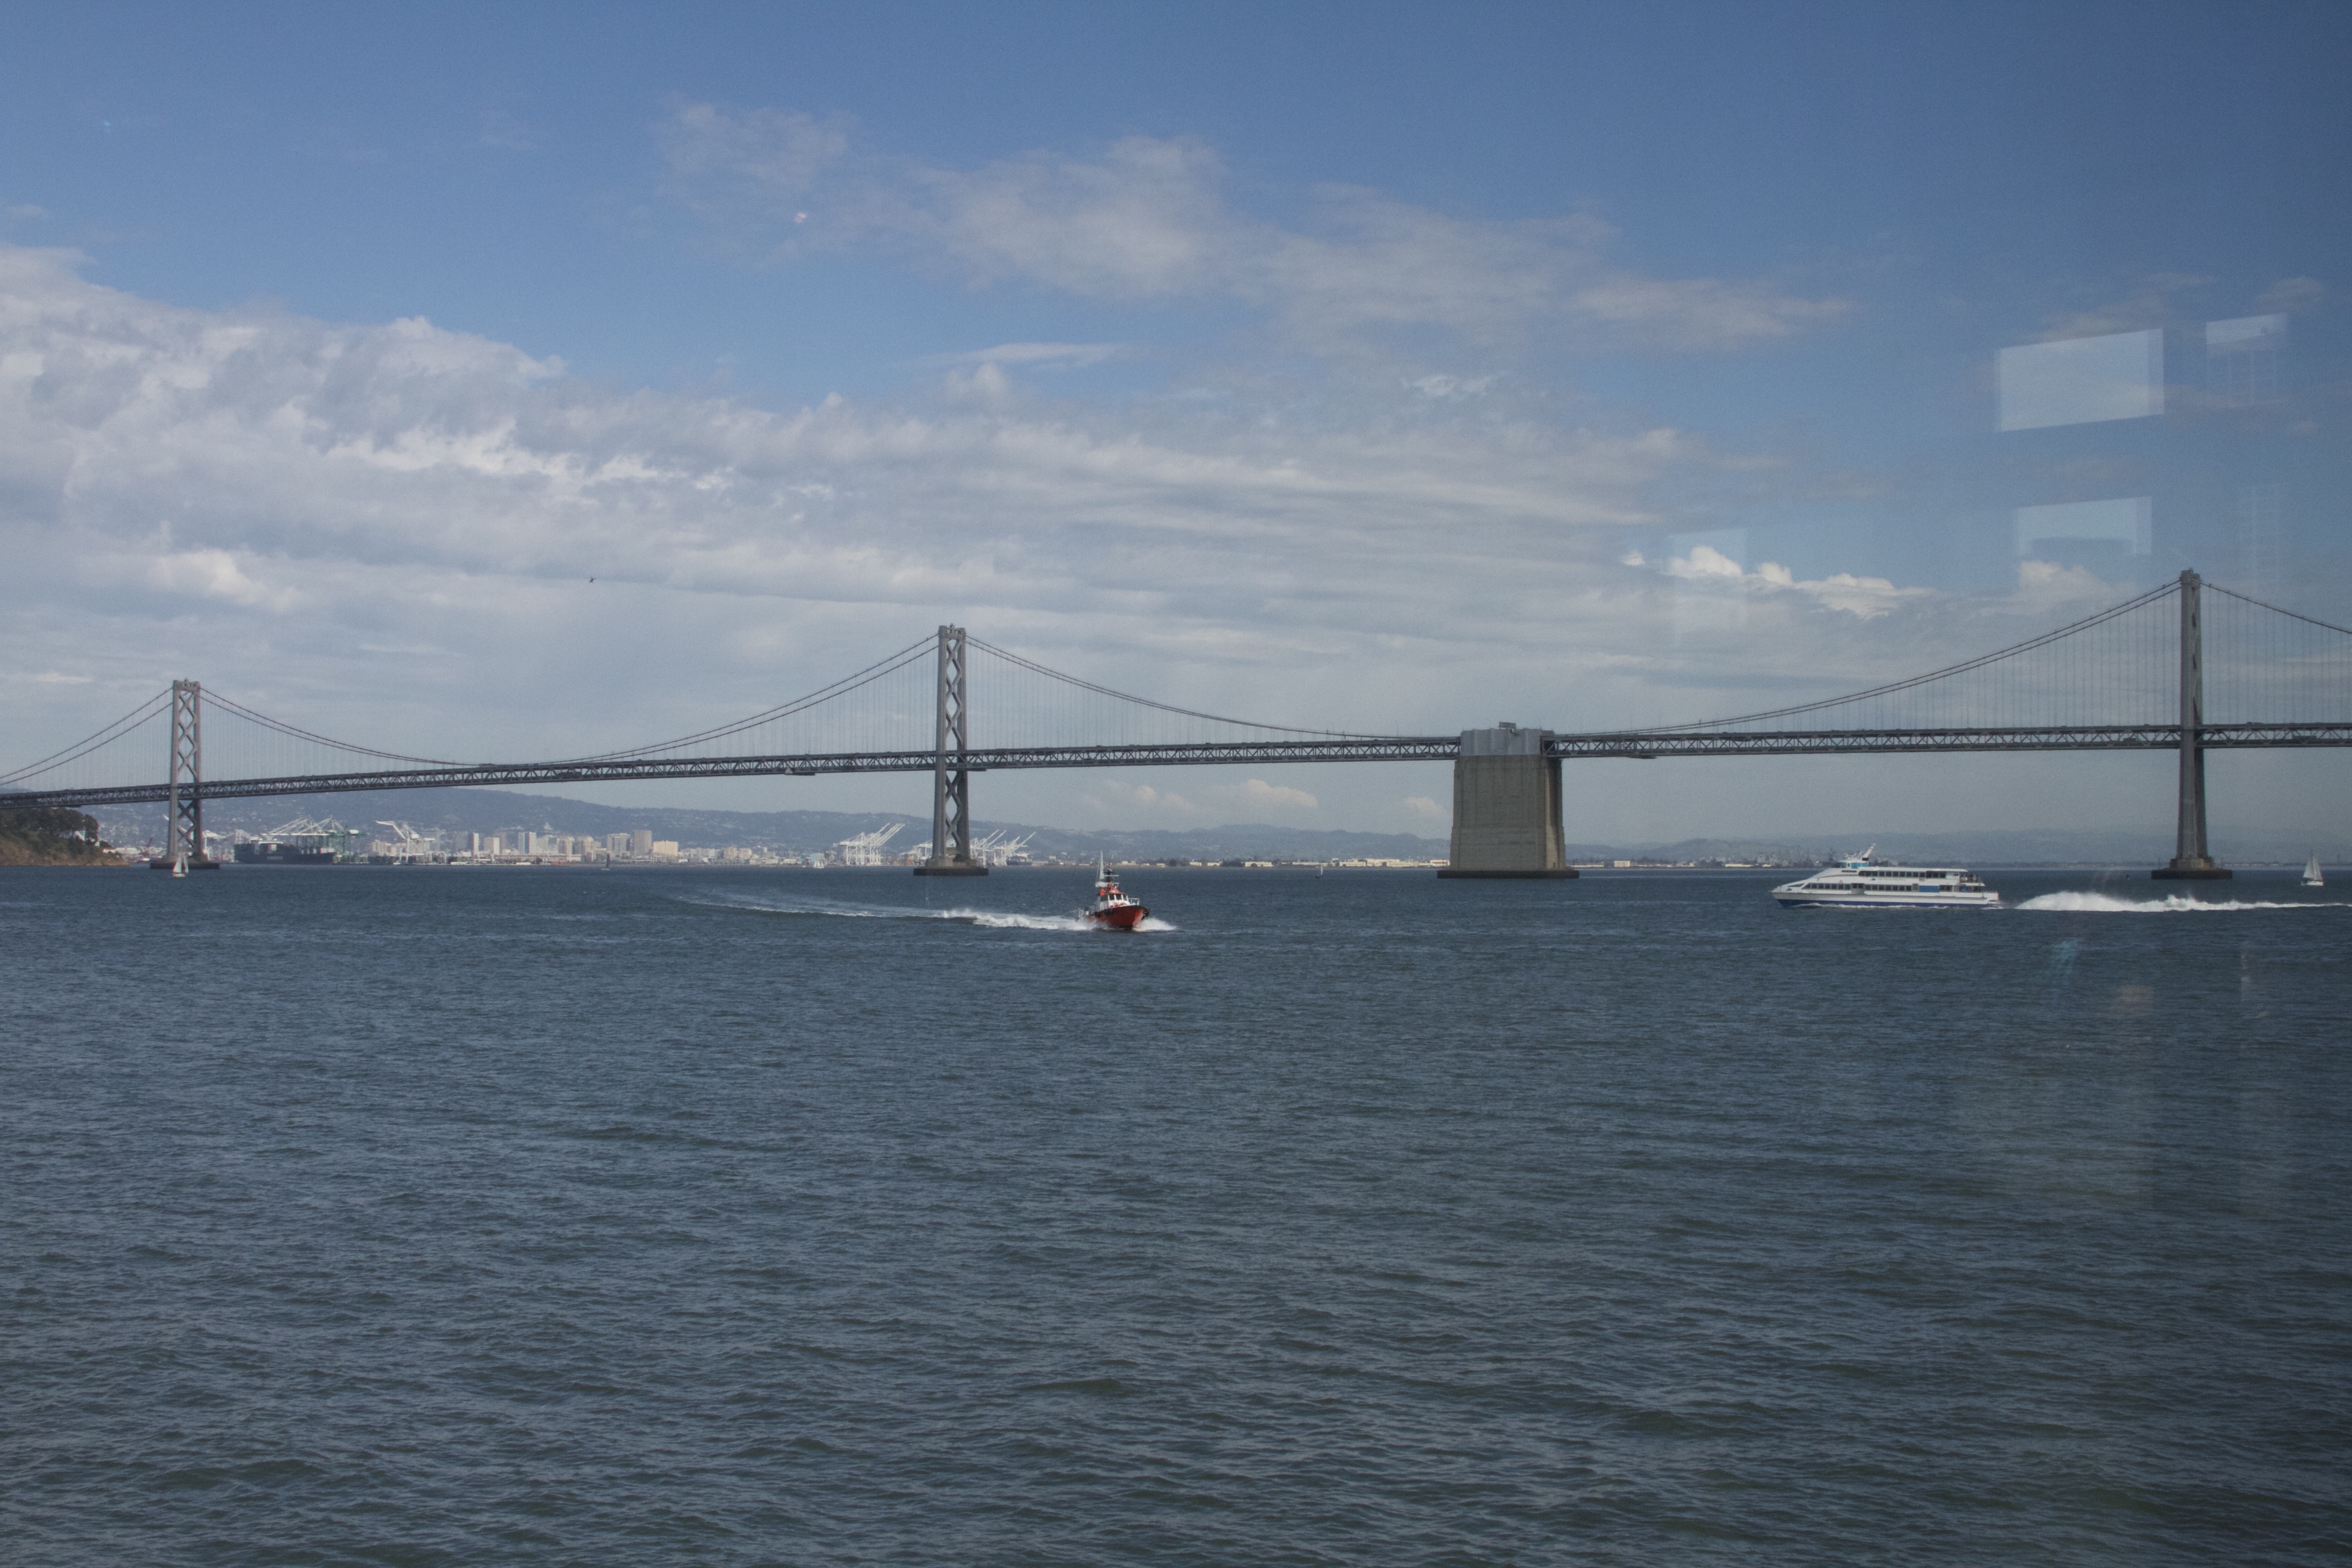
The new location at Piers 15 and 17 on the San Francisco Embarcadero is right between the Ferry Building and Fisherman’s Wharf, in the shadow of the Bay Bridge. A huge advantage of the new location is that it is much easier to get to by public transport than the Palace of Fine Arts was. There’s a MUNI train stop, and it’s just a few blocks from BART and the other public transportation that already comes to the Ferry Building.
There are also plenty of nearby parking garages and lots. We had no problem finding an inexpensive lot to park in for the day, and now taking the train is an option for us.
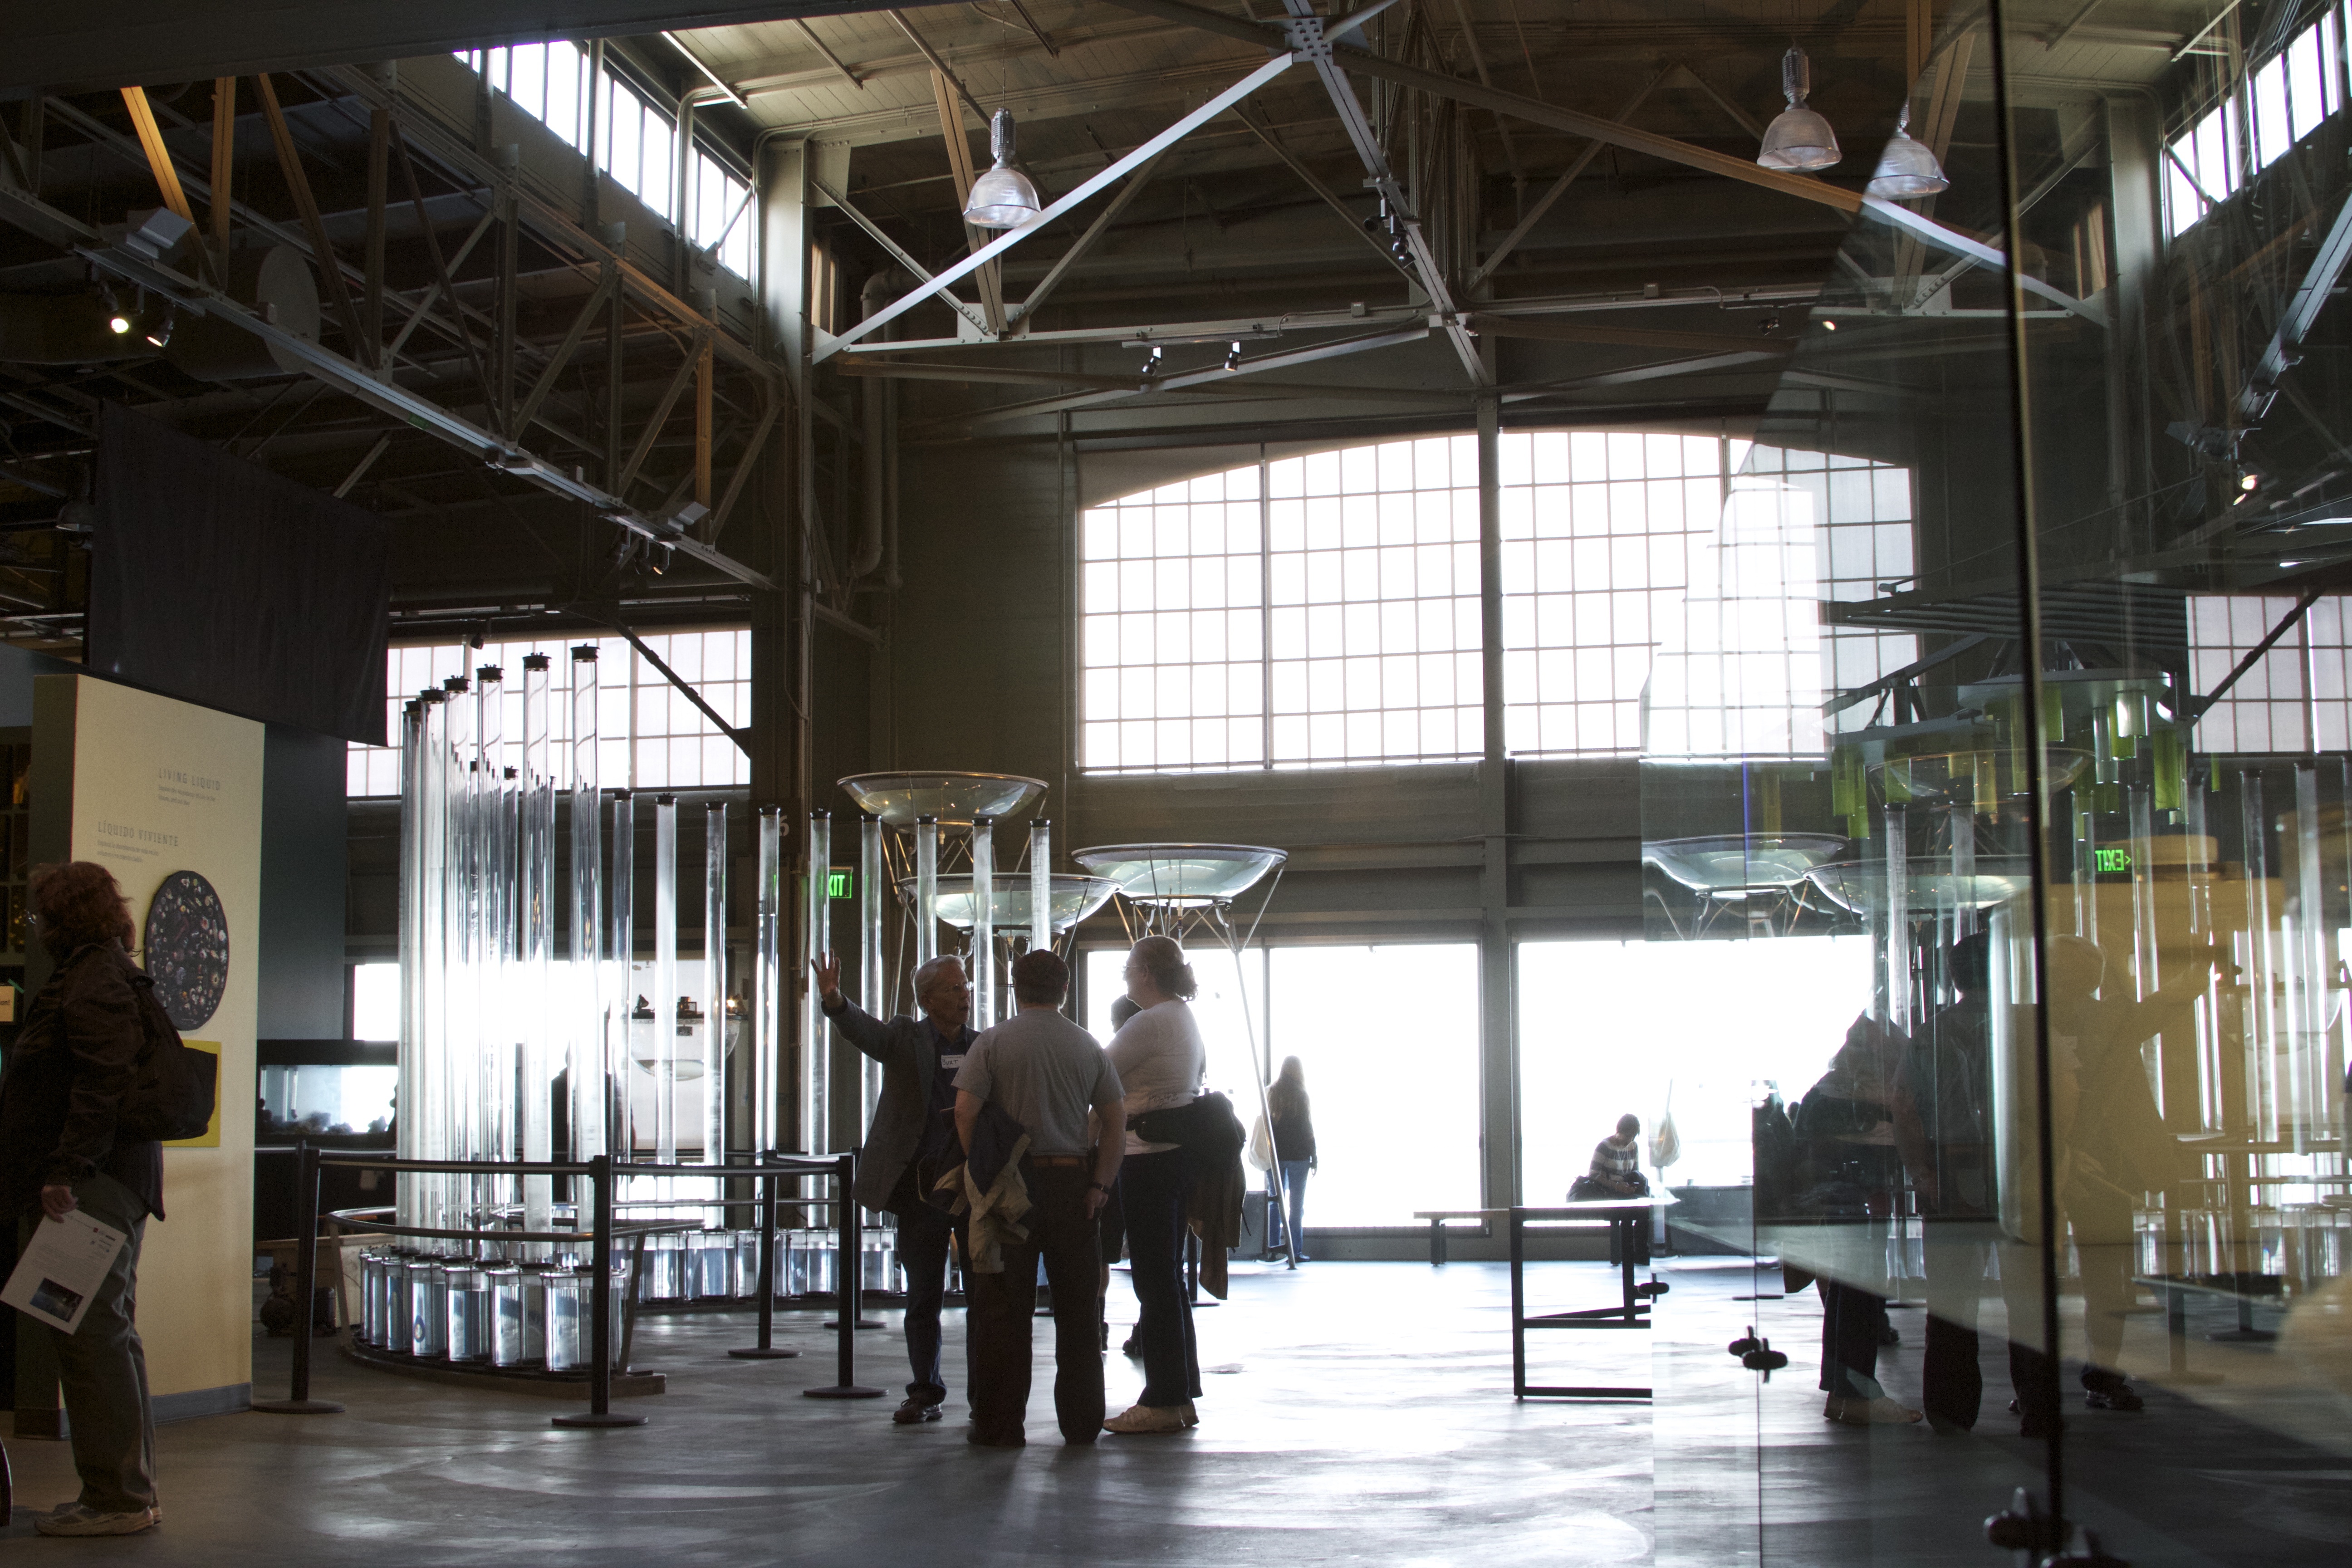
And it turned out beautifully. Here at the end of the pier, there are a number of new exhibits, many about biology and the bay.
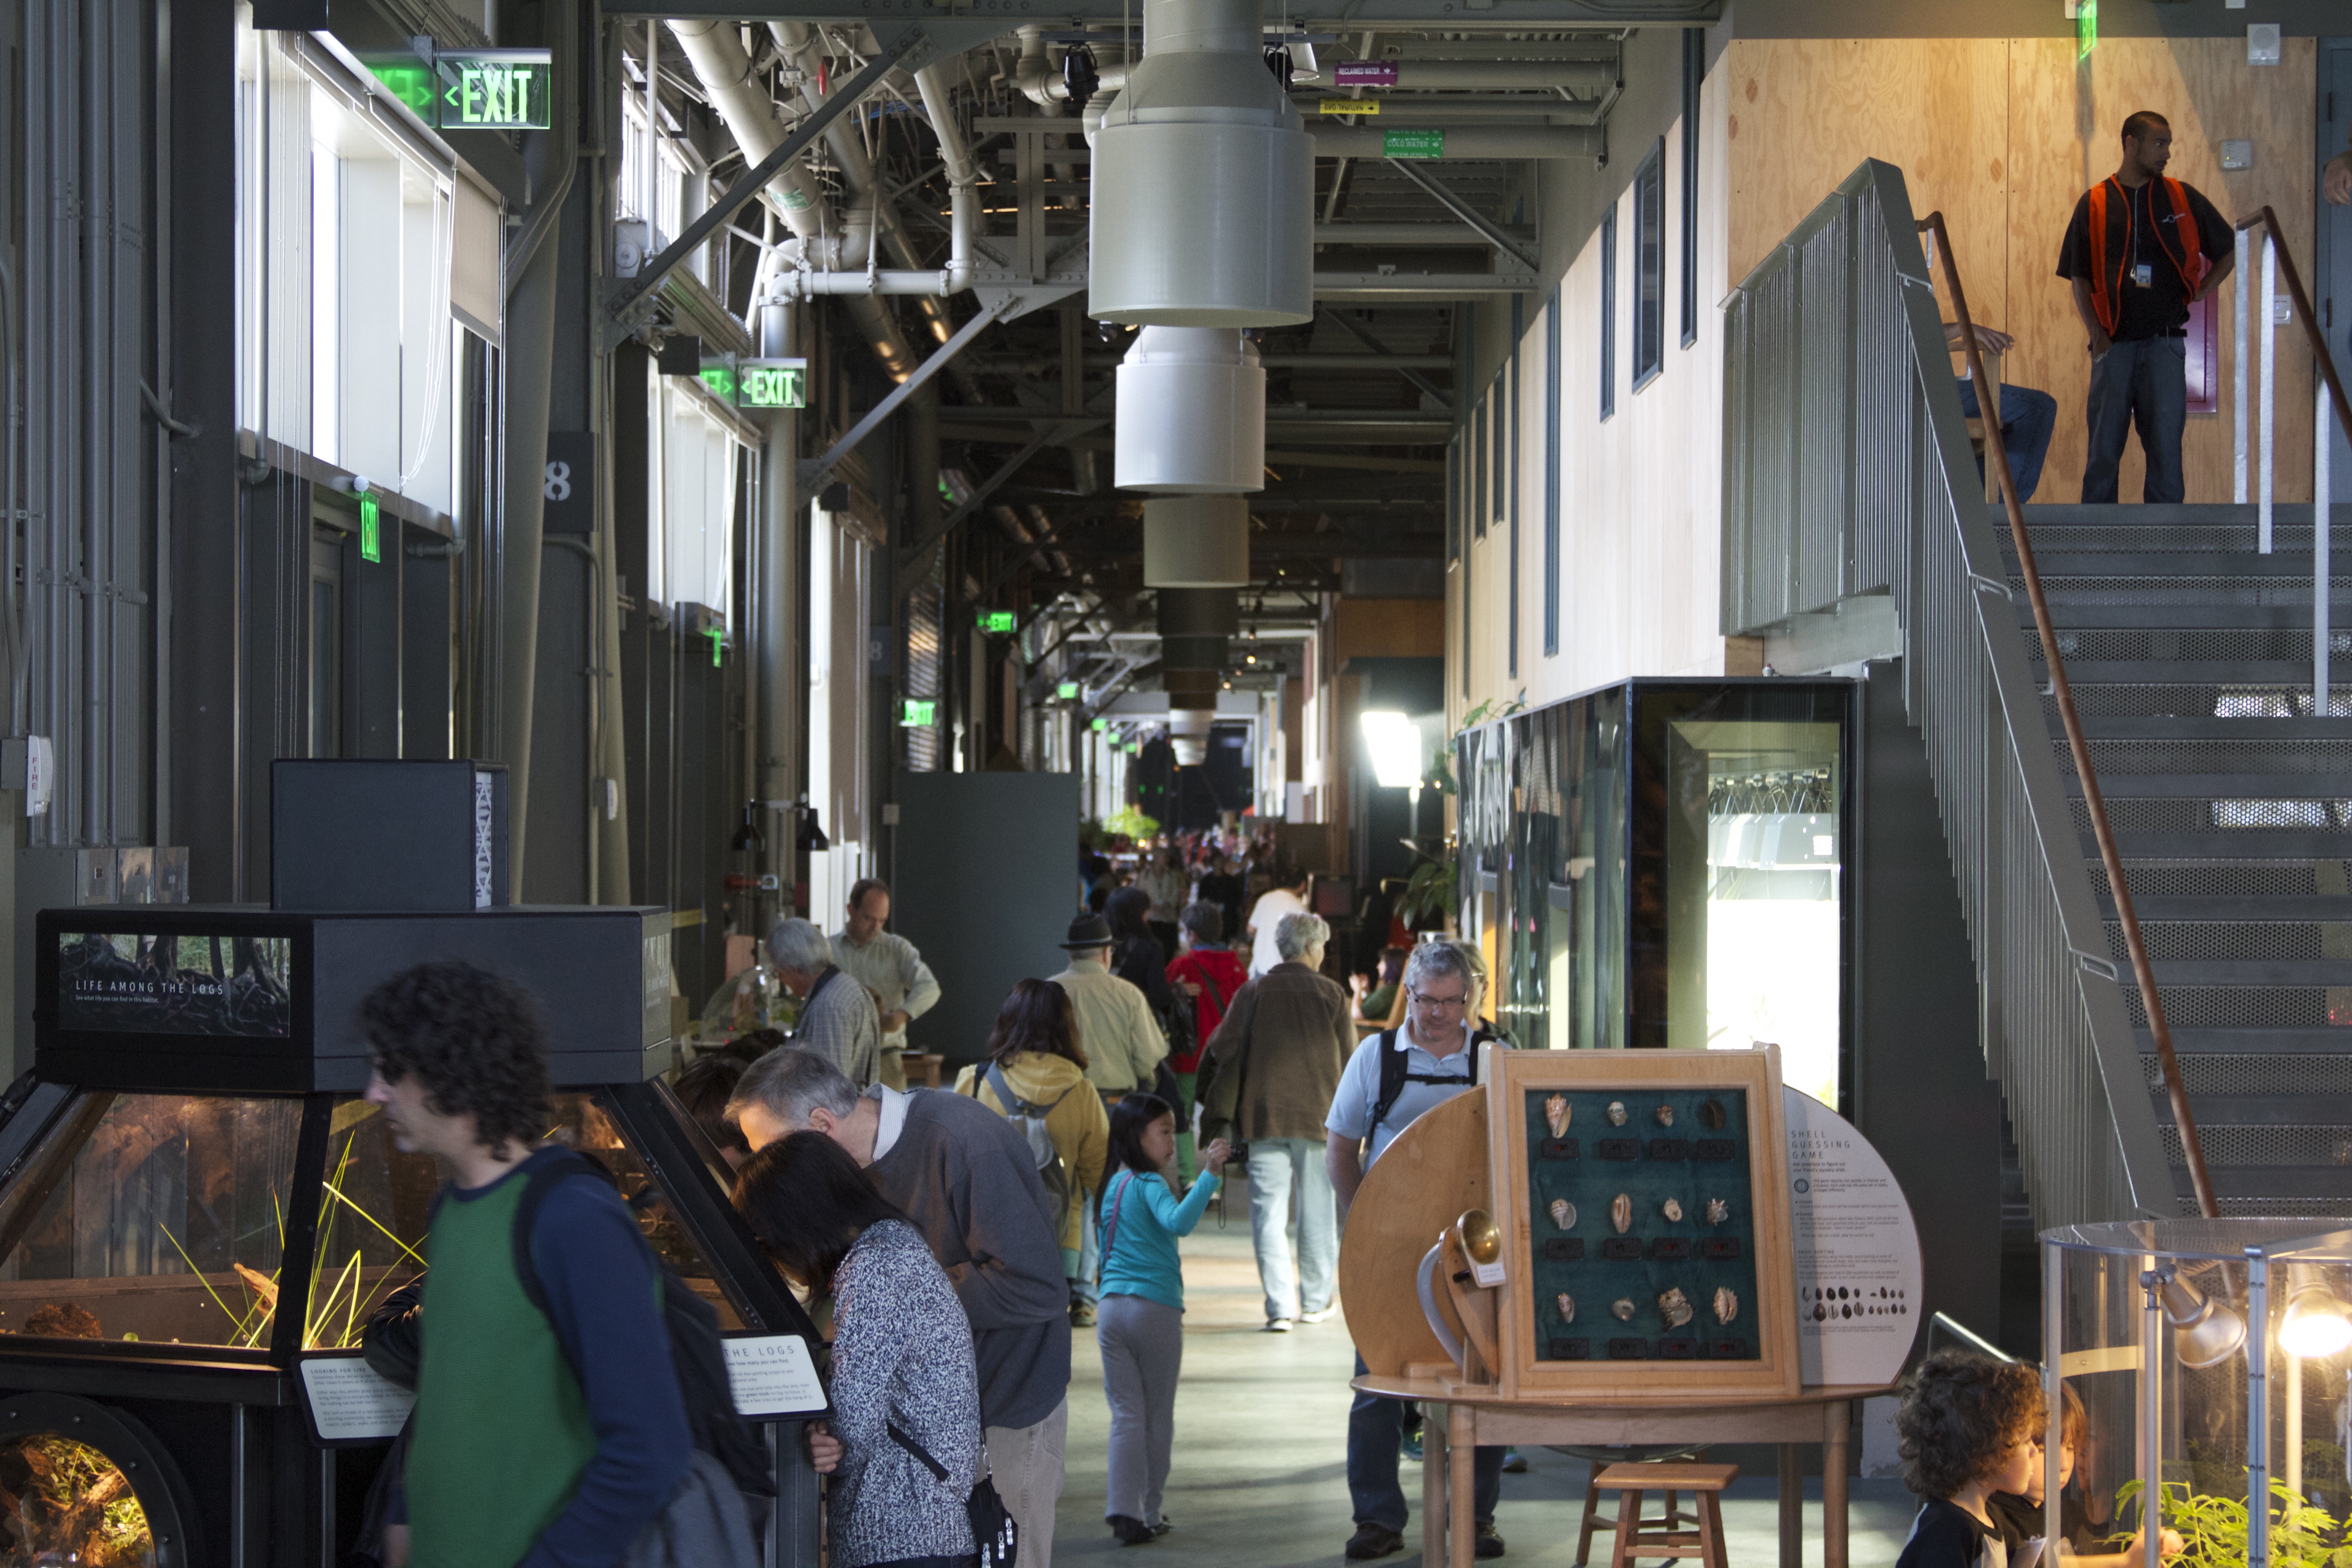
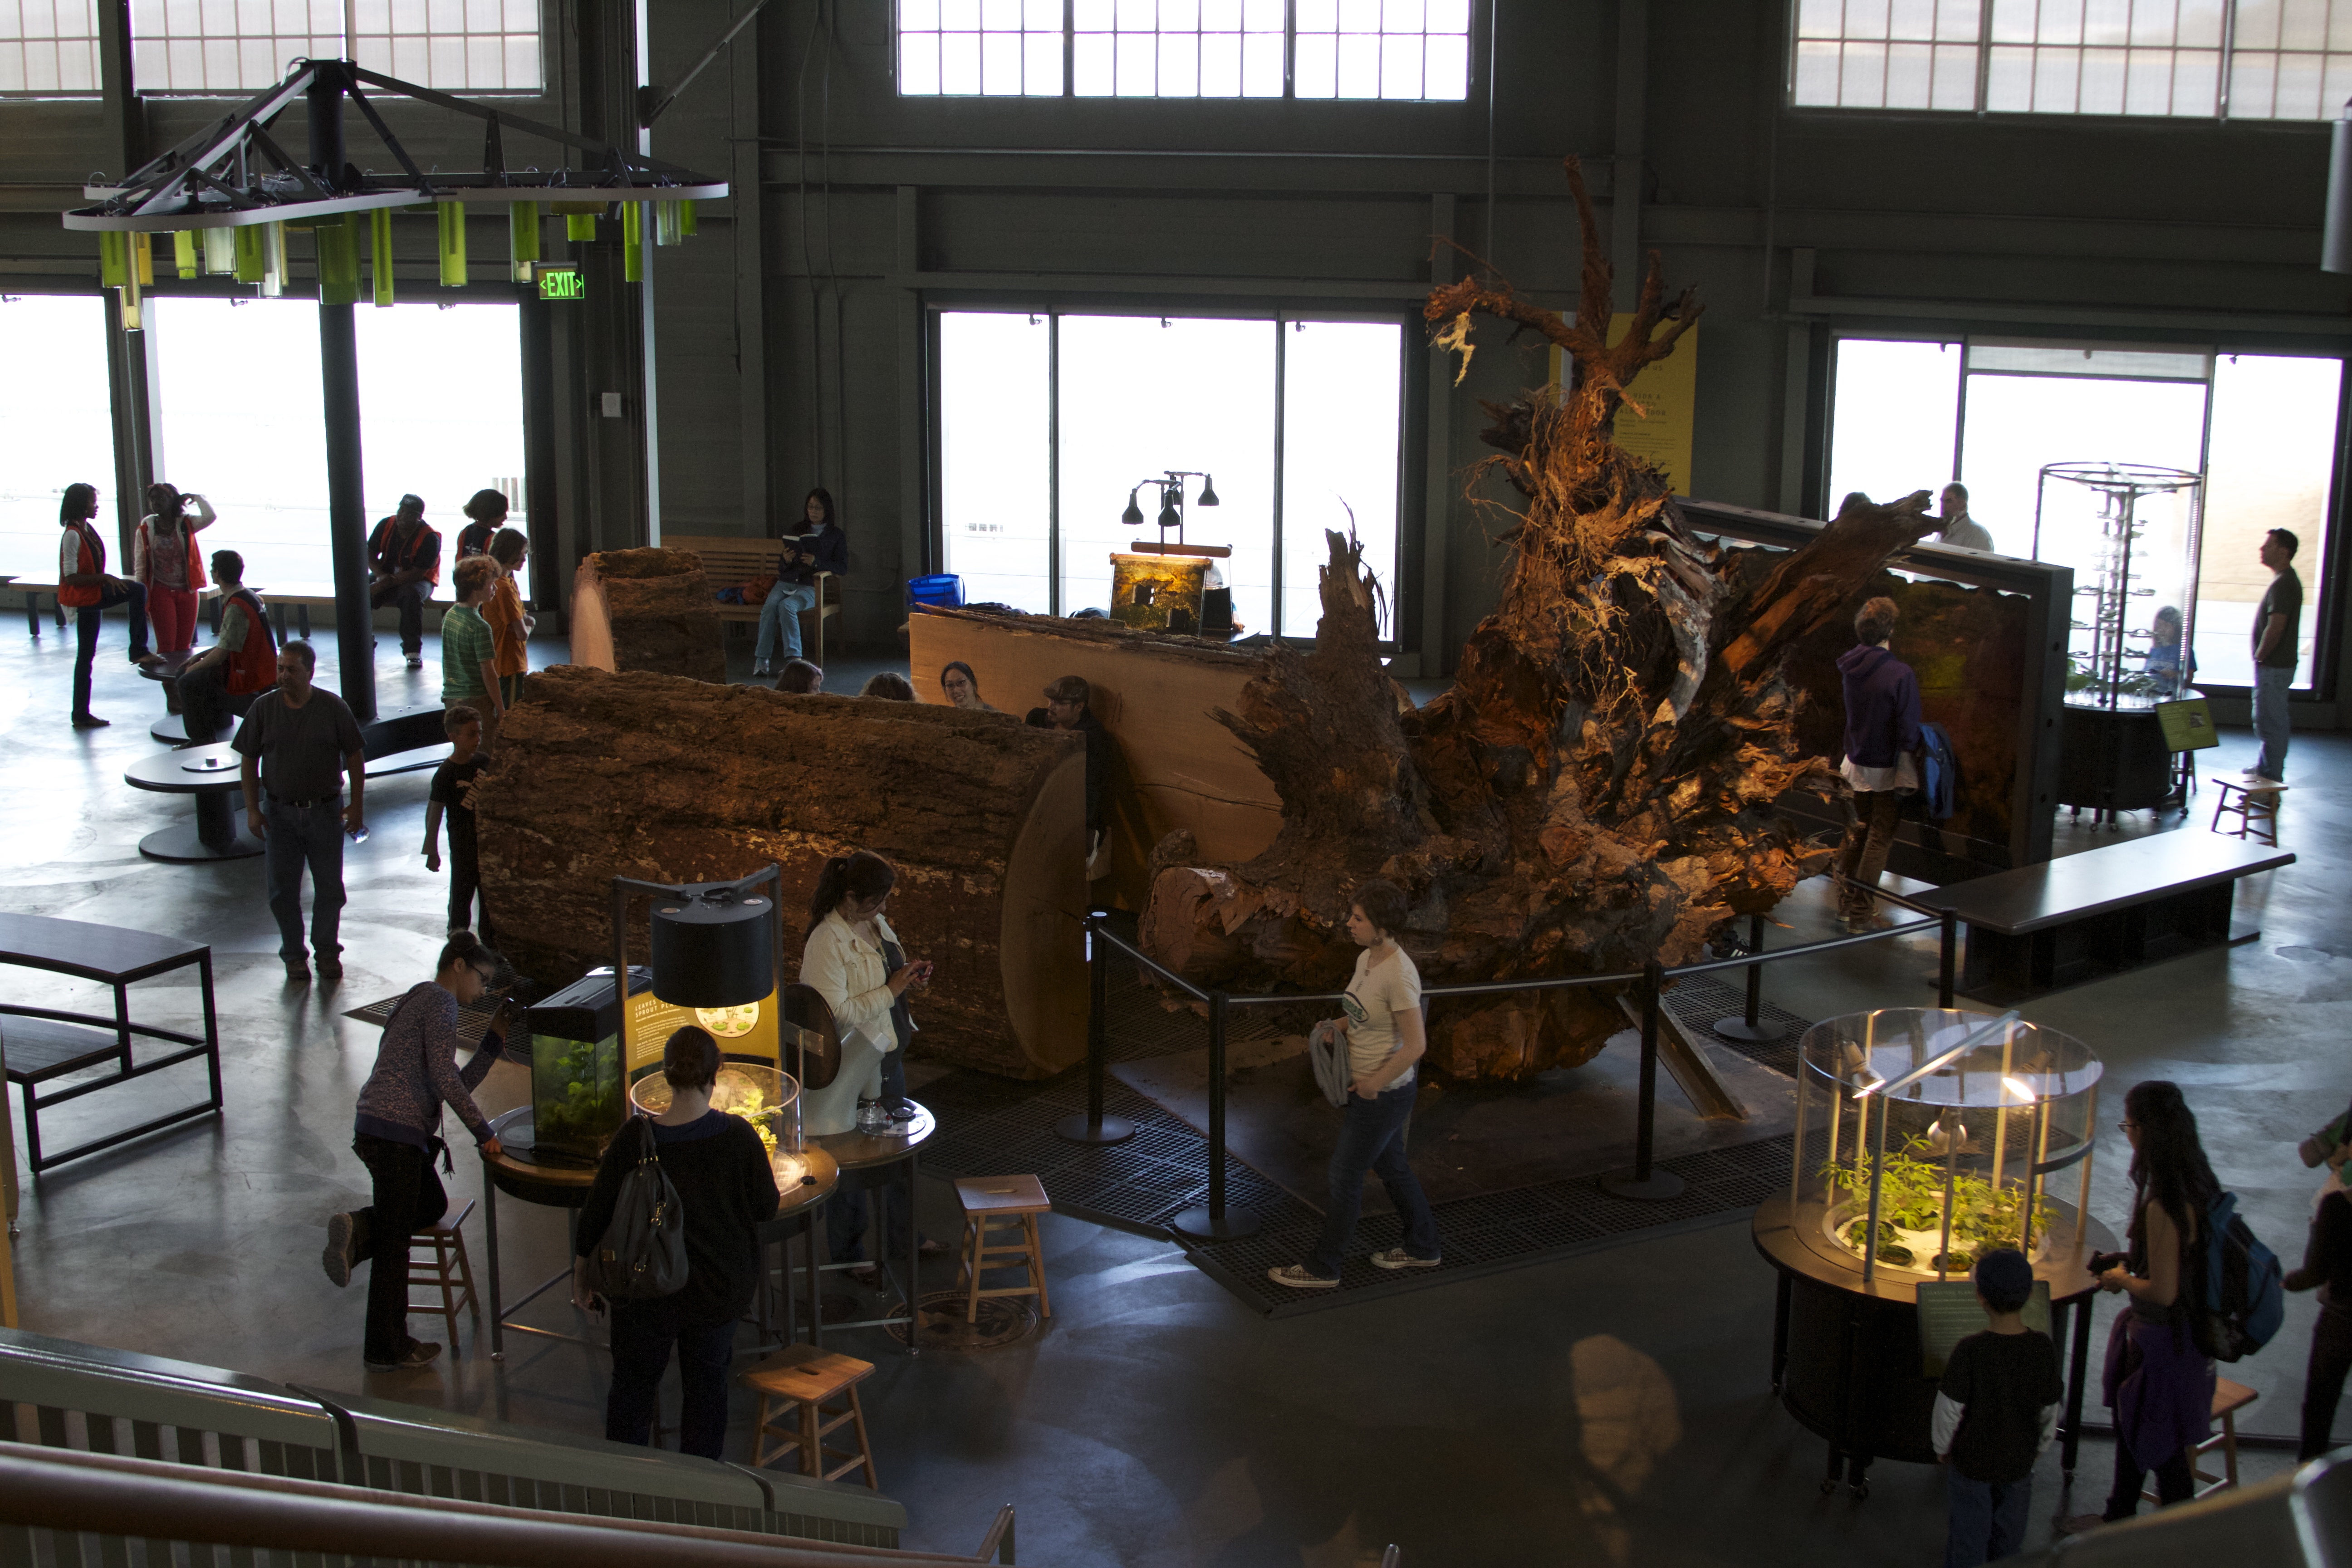
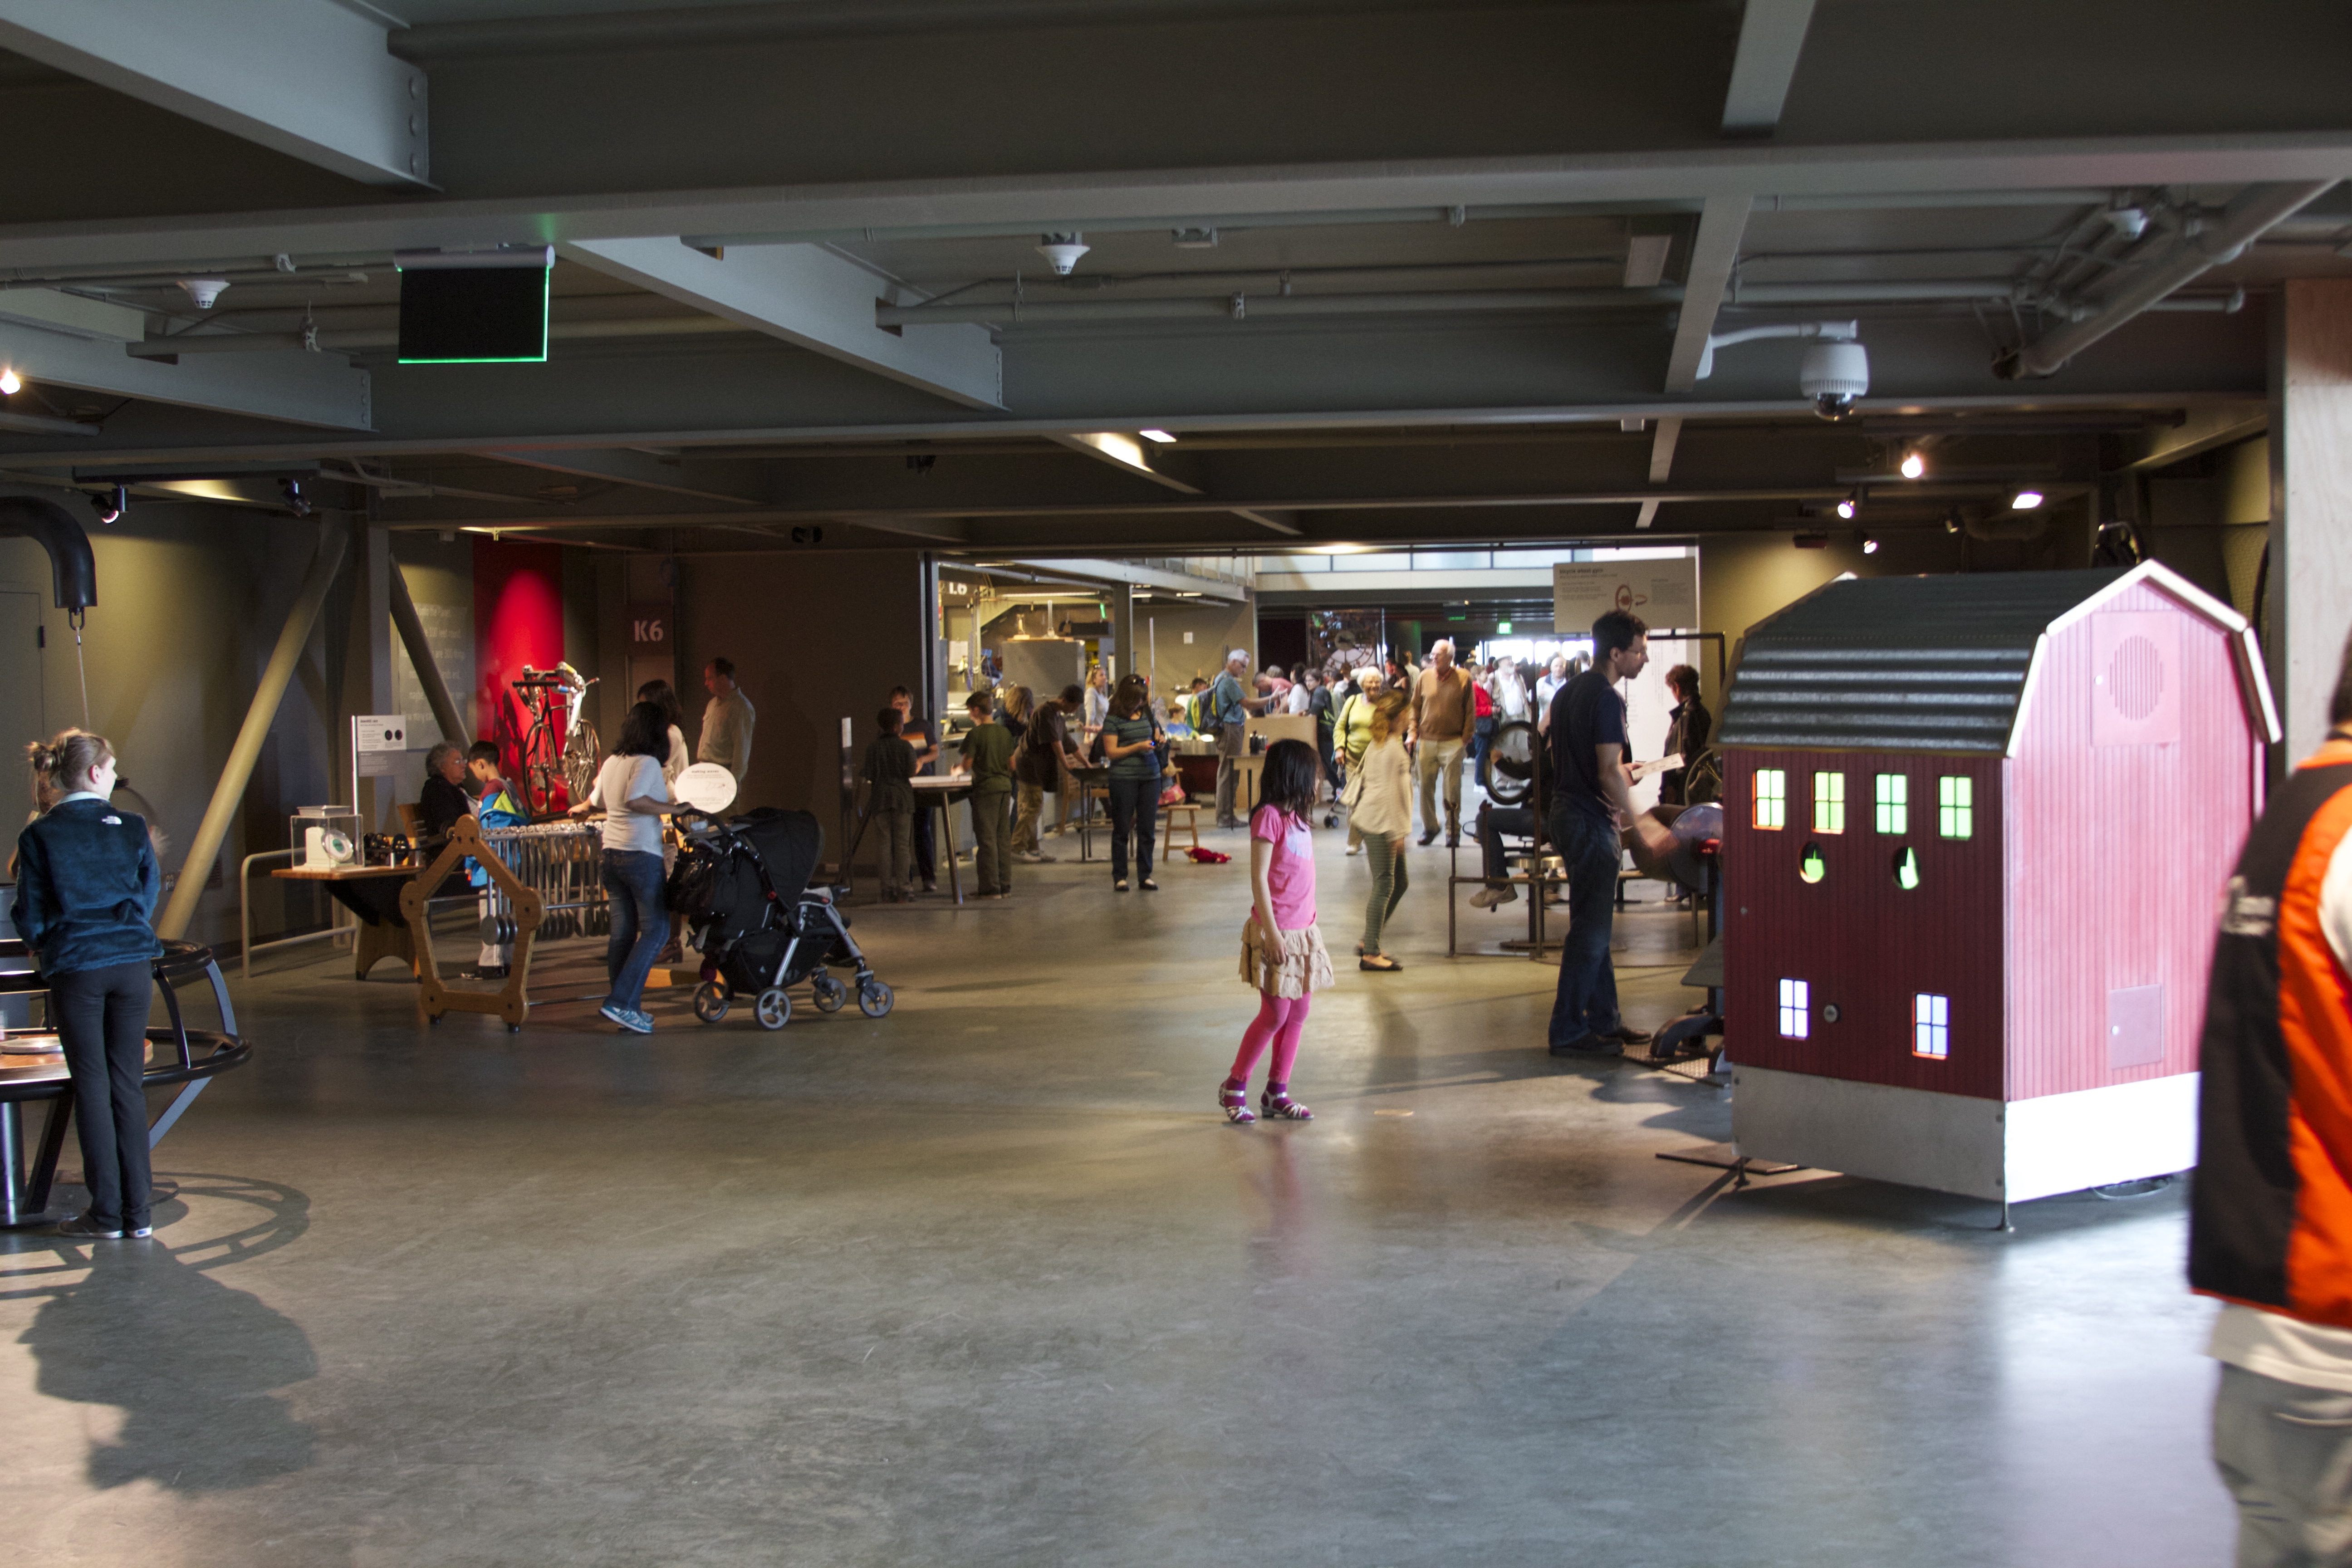
The new location is much bigger: there is three times as much space. This view is looking down one of the corridors, from the location pictured previously. The museum is packed with exhibits as far as the eye can see.
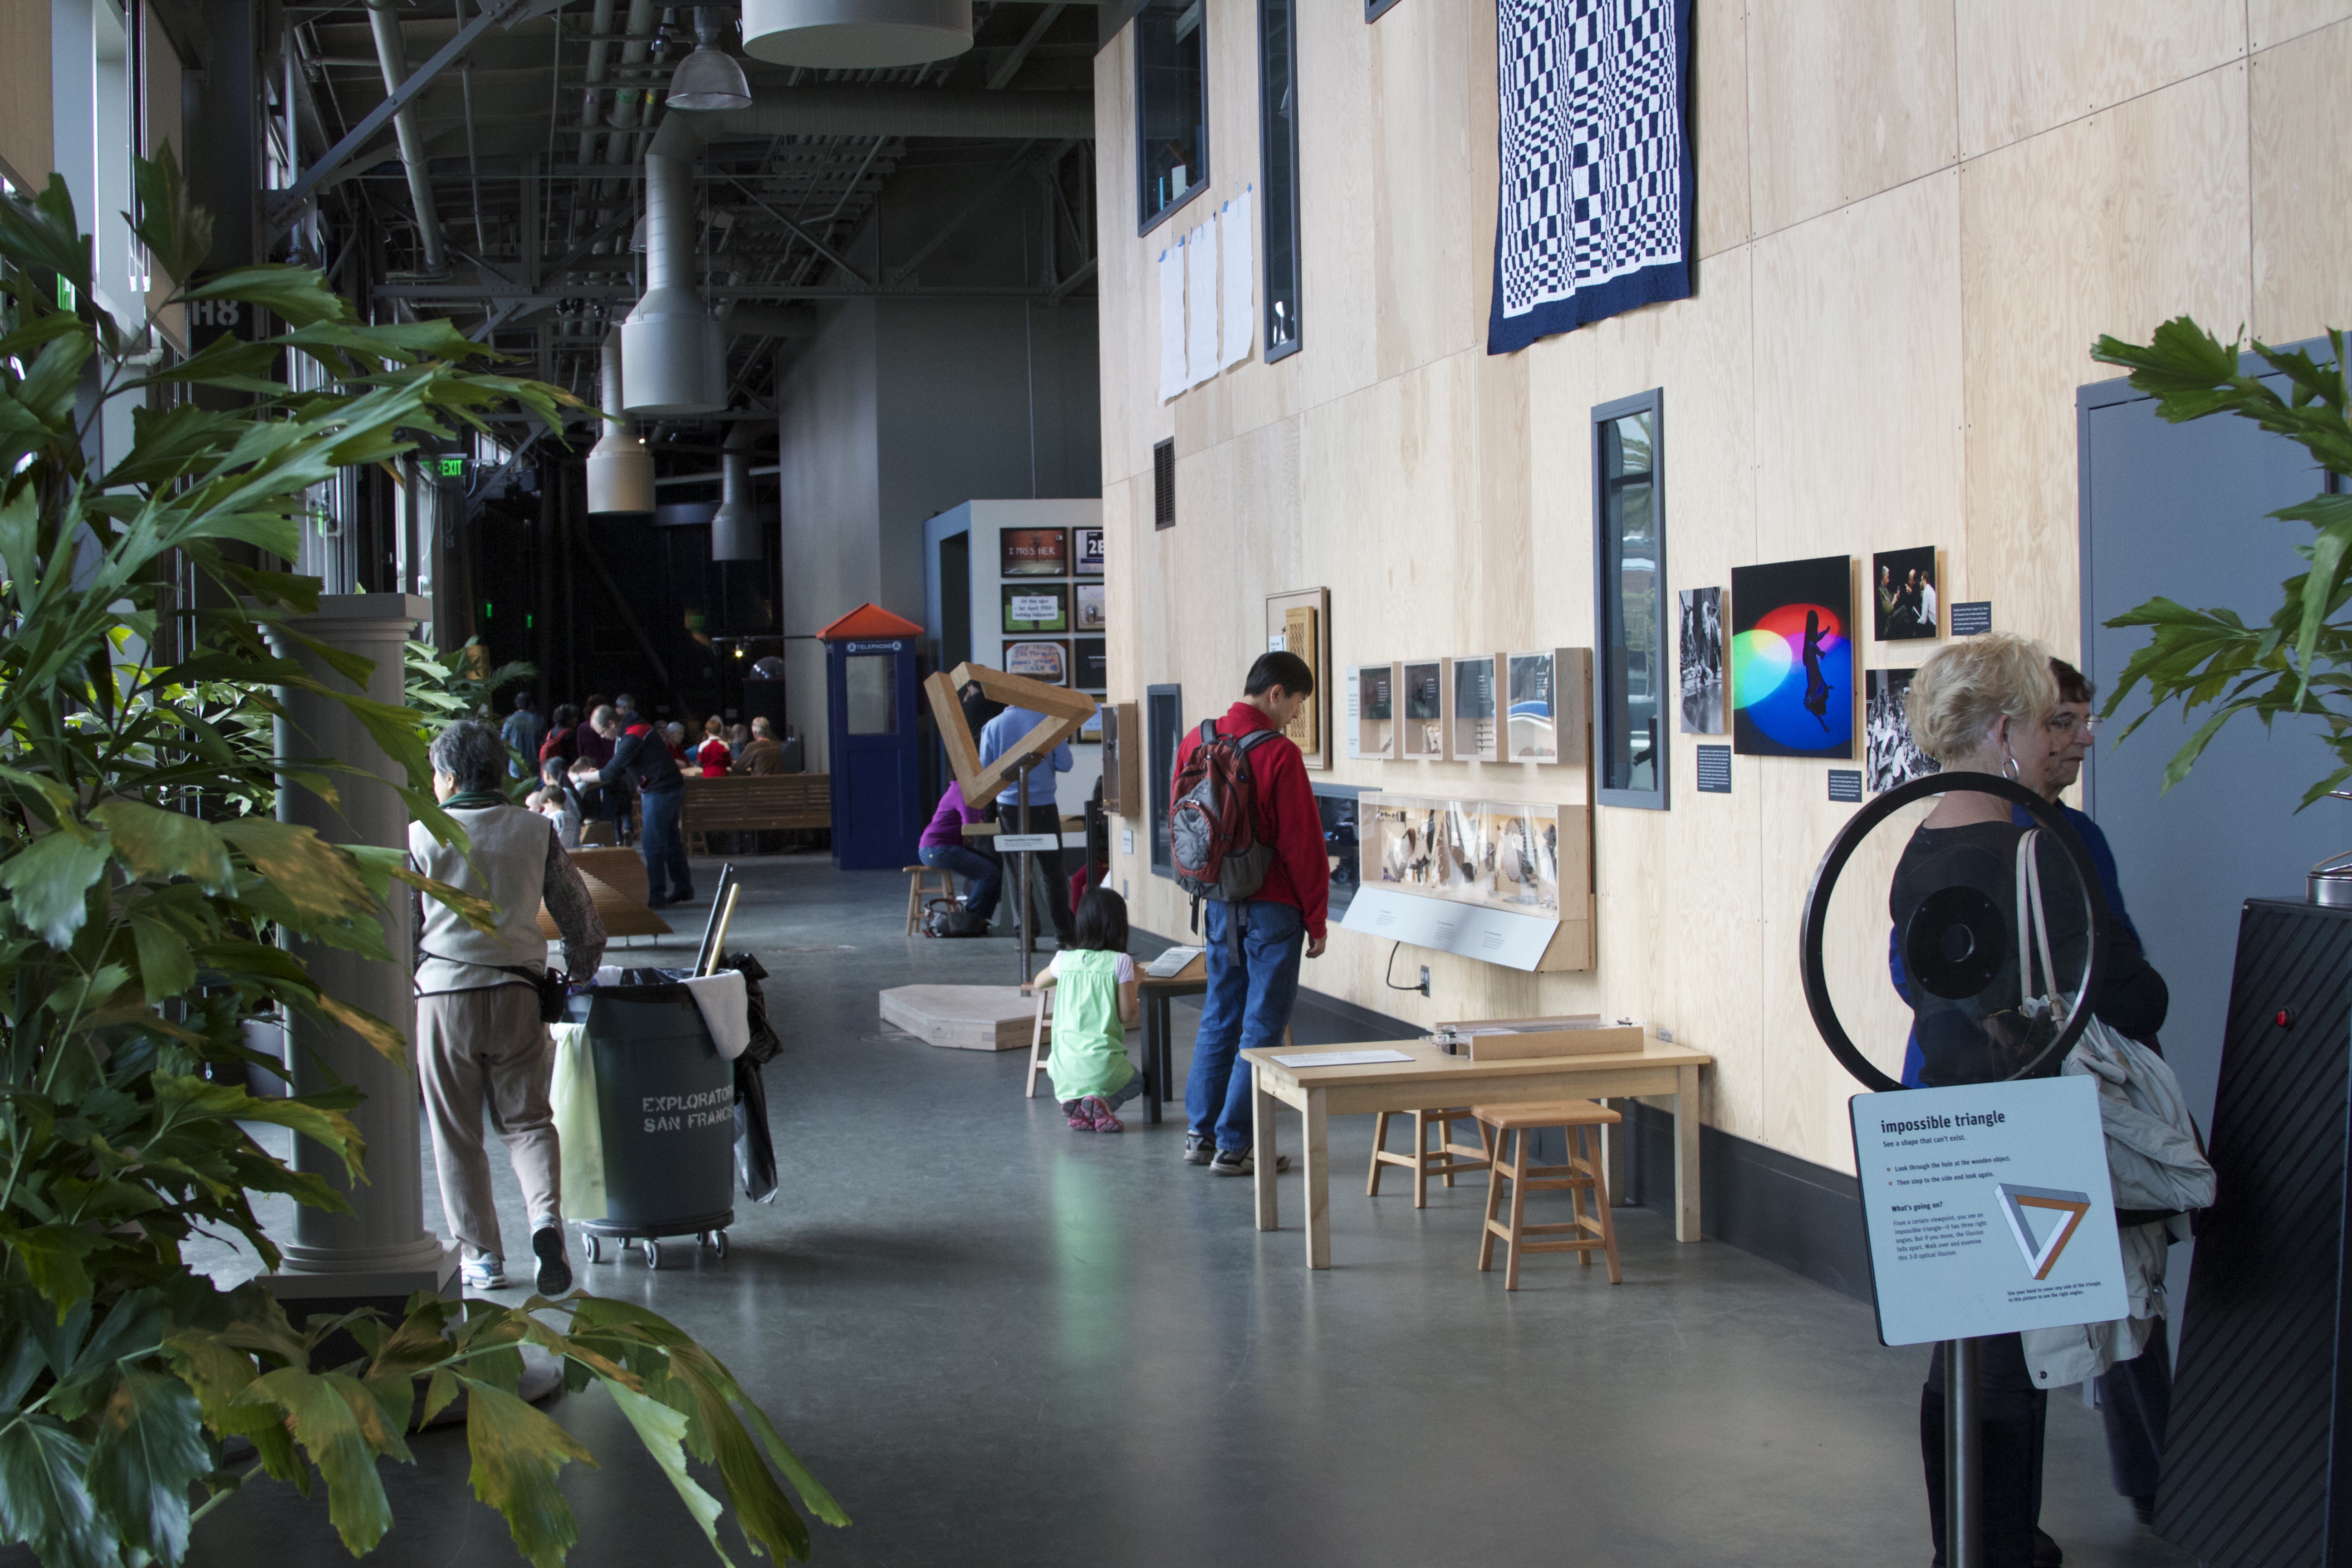
All of the spaces are well designed, and extremely good looking, taking advantage of the abundant natural light.
There are many large open areas, as well as cozy corners and nooks. The Tactile Dome is being rebuilt on a larger scale (in a space with a higher ceiling than this) and will be opening this summer.
Activity in the new bio labs is visible through large windows. In neighboring spaces, we saw them growing continuous replacement plants for the touchable plant exhibits and various organisms for people to look at under the microscopes.

The new location has the same spirit, and despite our expectations, still feels like the Exploratorium. The workshop is just as prominent as before, and still out in the open so that visitors can see new exhibits in progress and old ones being repaired.
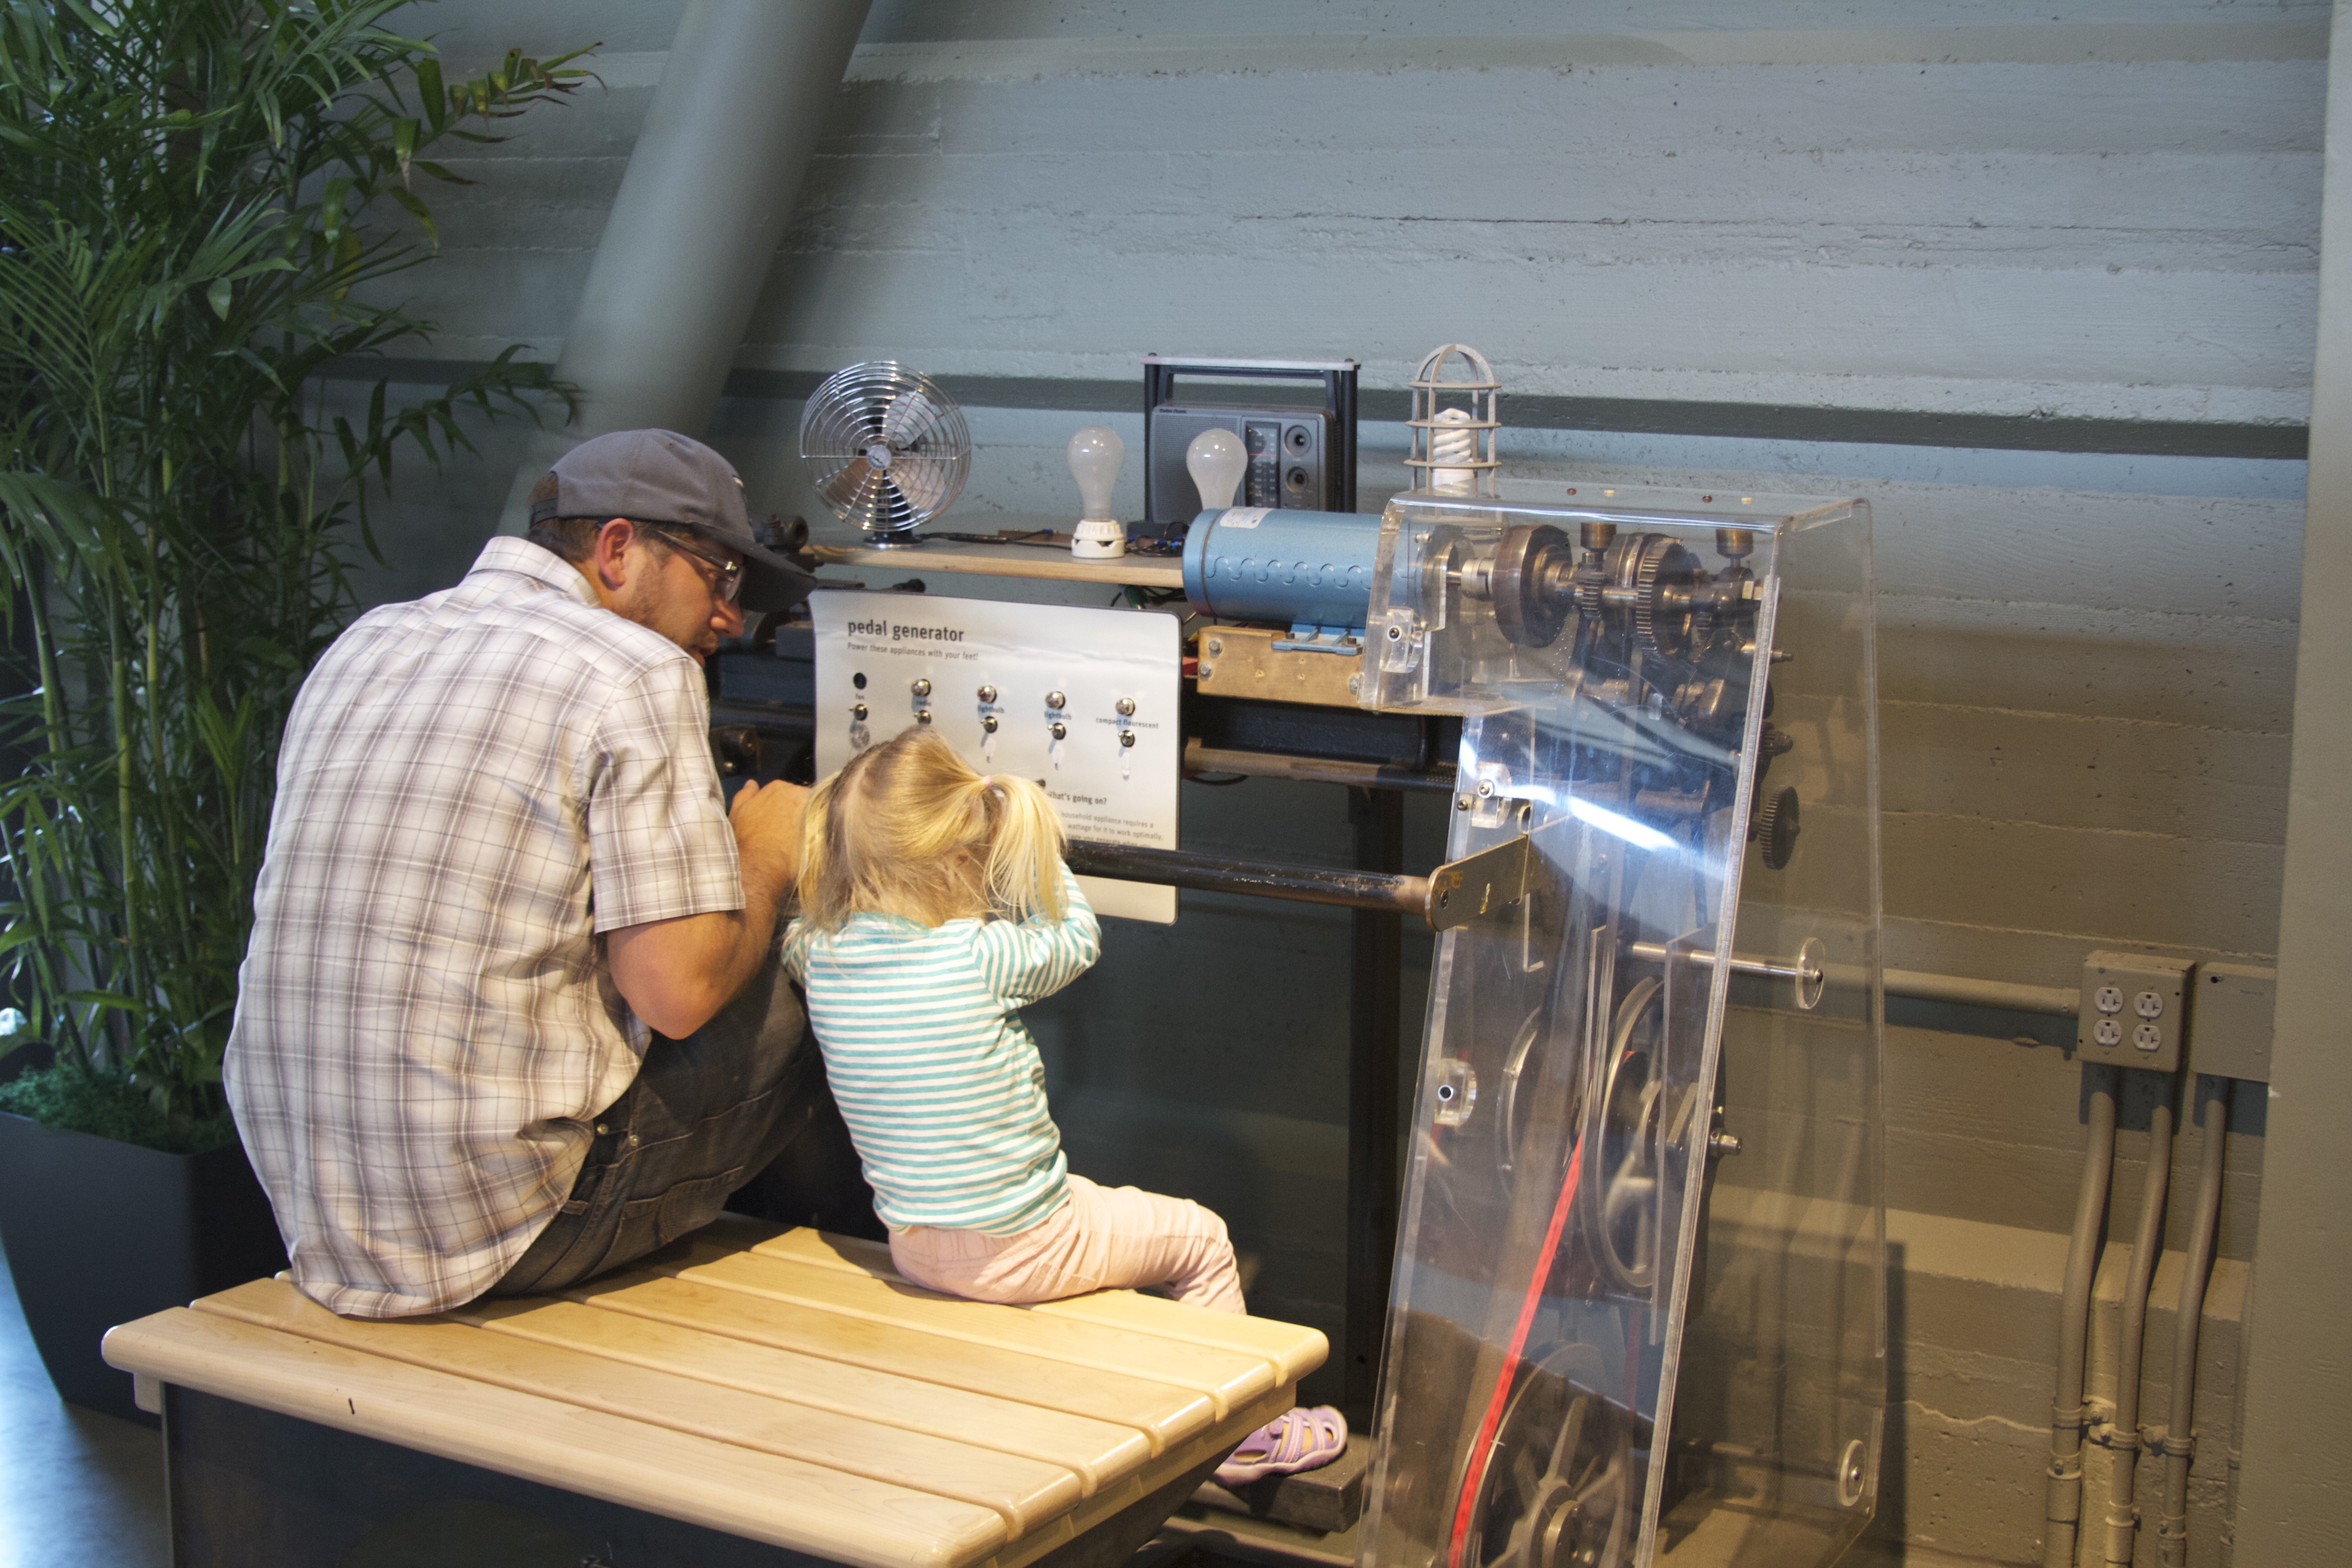
Our old favorites on electricity and magnetism (like Daisy Dyno) felt right at home, and were as popular as ever.
The acoustics are much more friendly, making conversations and discussions much more enjoyable.
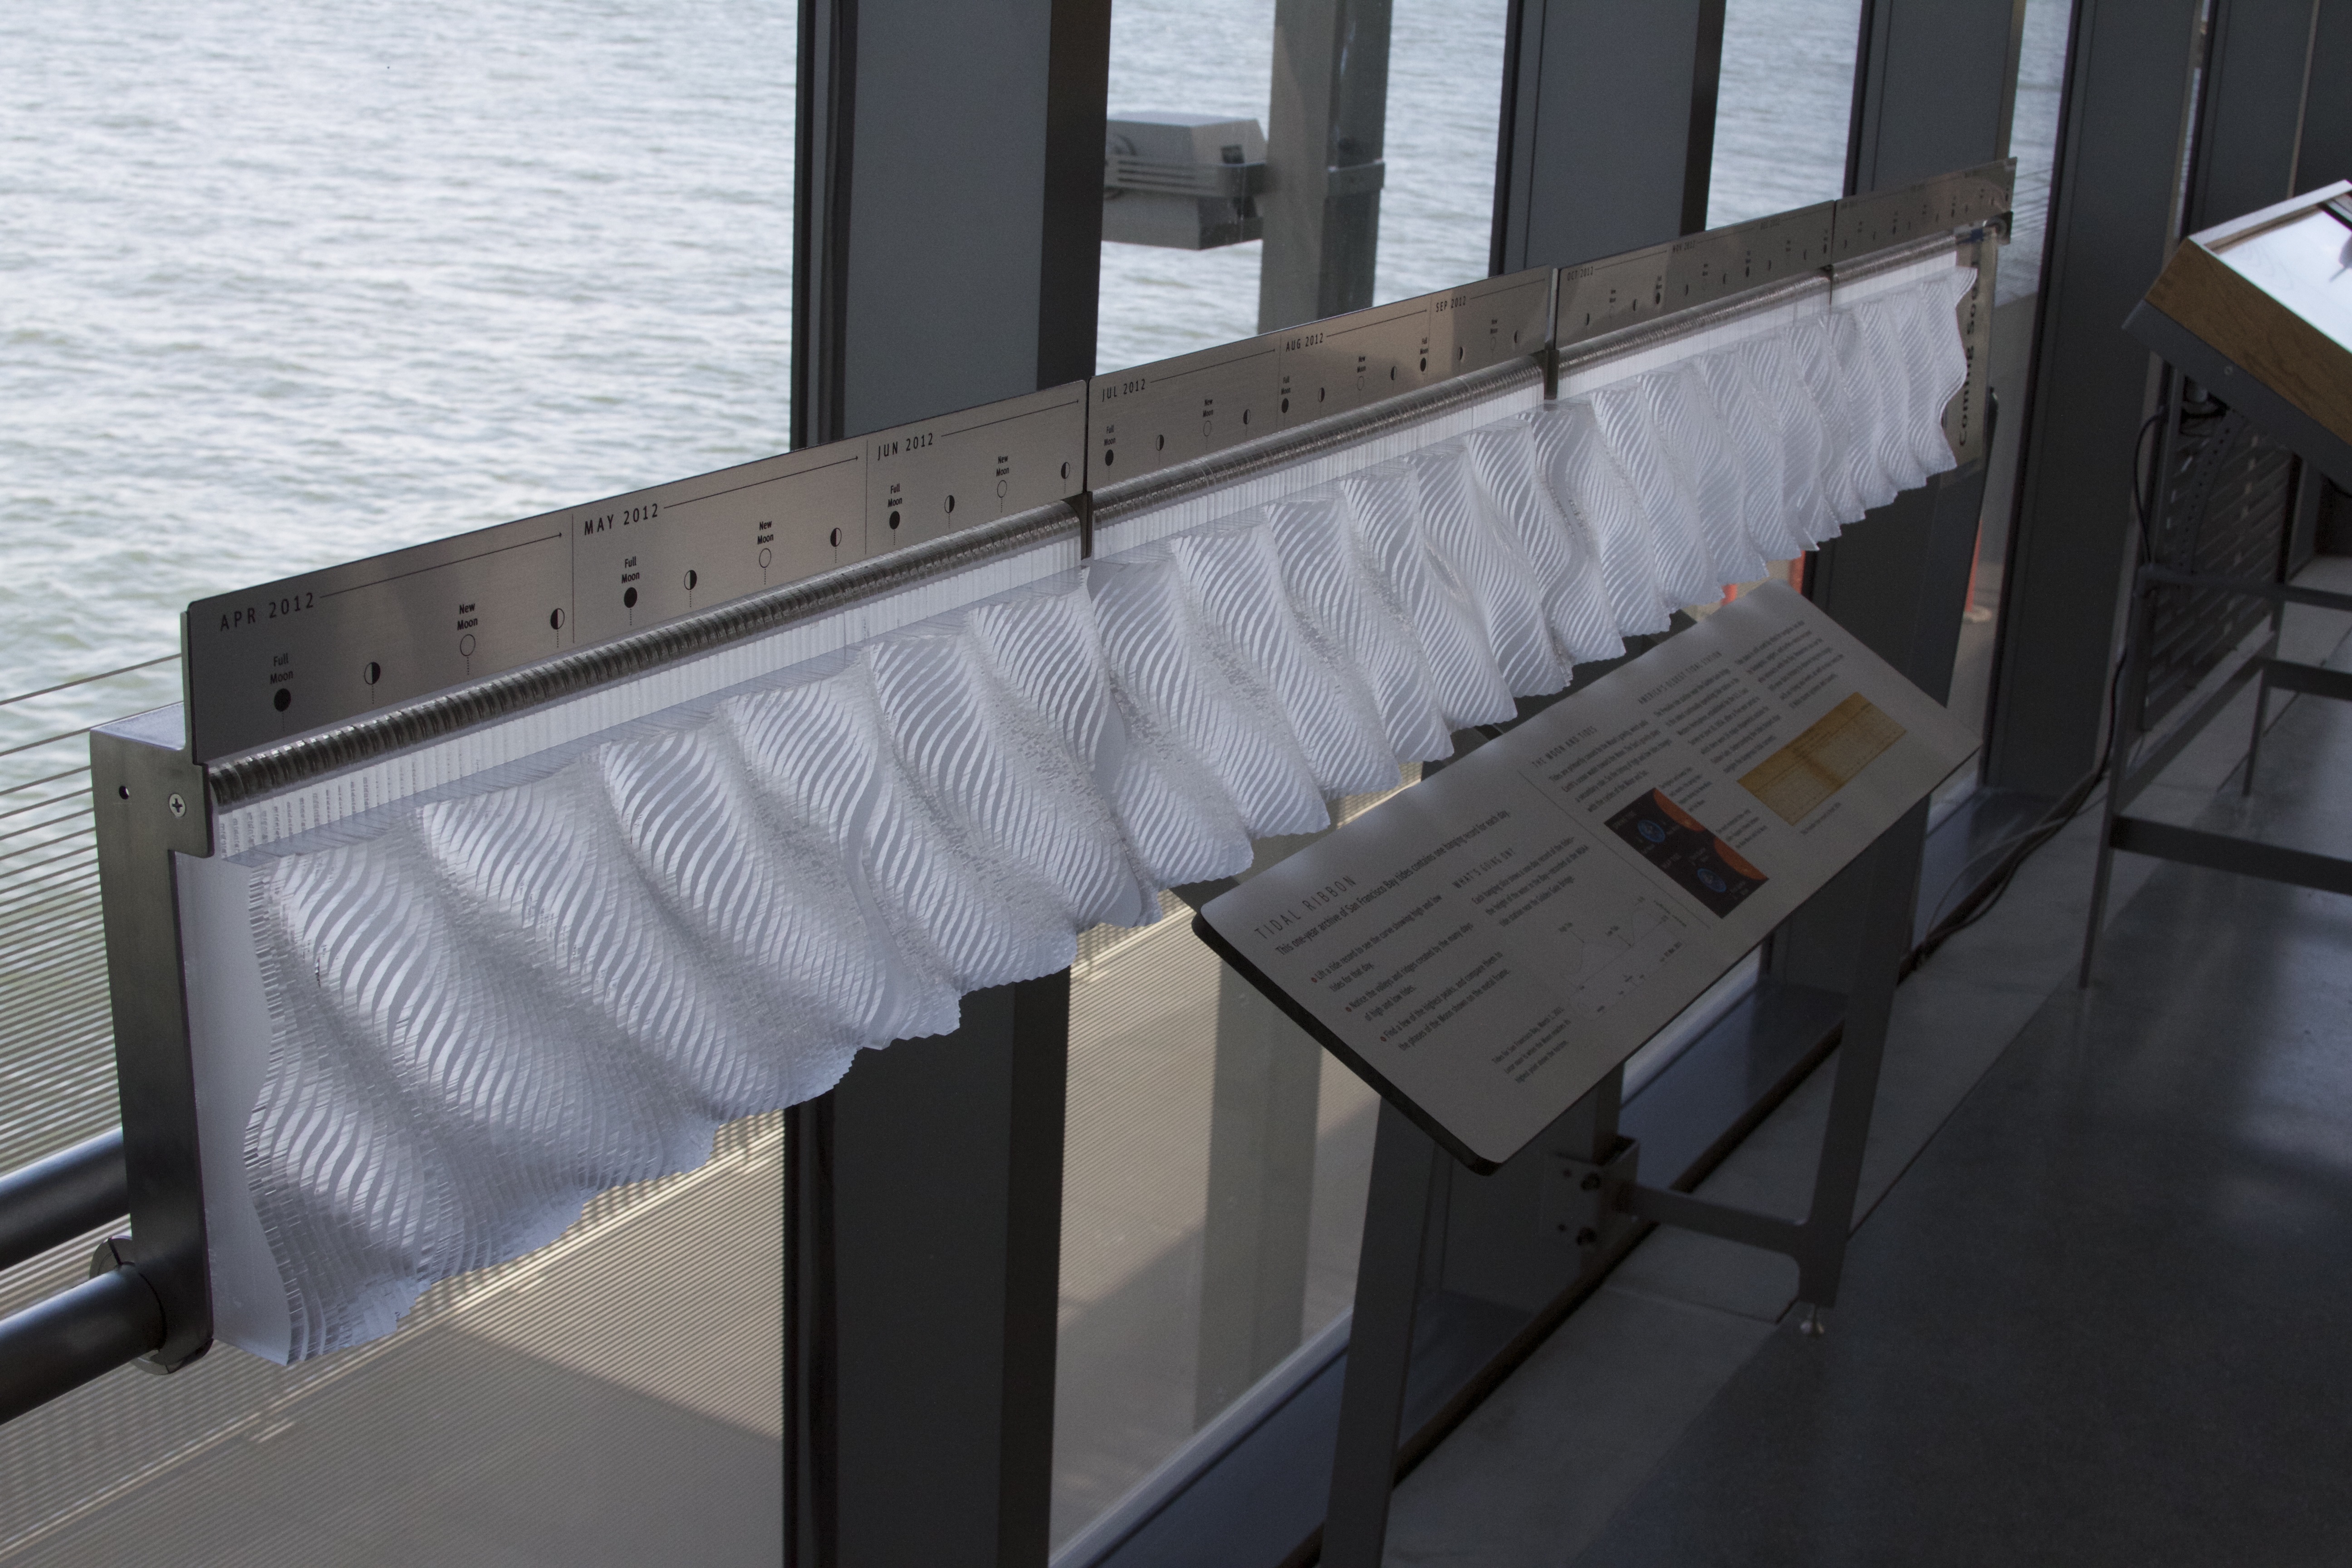
The one new building on the pier is the Bay Observatory, which has stunning views as well as brand new exhibits on bay topics such as geology, geography and tides. Above is a 3D tide table with the tides for each day represented by a the shape of each piece of plastic marked with the time and lunar information.
Since this was an early preview, many exhibits are still in progress or yet to be installed. This outdoor space between Piers 15 and 17 will be opening soon and the museum plans to eventually develop additional space on Pier 17.
Congratulations to the Exploratorium on such a successful move and wonderful new home!
The museum will be opening to the public on April 17, and tickets will be available online soon. There are additional member previews coming up on April 6 and 9 as well— check the calendar for details and other upcoming events.

Over at How 2 Today, Chris Connors has written about his Egg Lathe project, which was inspired by the Egg-Bot. It’s made with recycled materials and he has published design files and posted a video of how it works. Looks like a great project, and a fun way to decorate eggs.
