Prefabricated Octolively Modules

Octolively Modules

Last year we released Octolively, an open source interactive LED kit, designed to respond in gentle and complex ways to stimulus provided by human interaction.

While Octolively has been a success (and a lot of fun), thus far it has only been available as a soldering kit. Today, we’re pleased to supplement those with a new version: prefabricated Octolively modules, all built-up and ready-to-use, so you can jump right in and start playing with the LEDs.


Octolively Modules

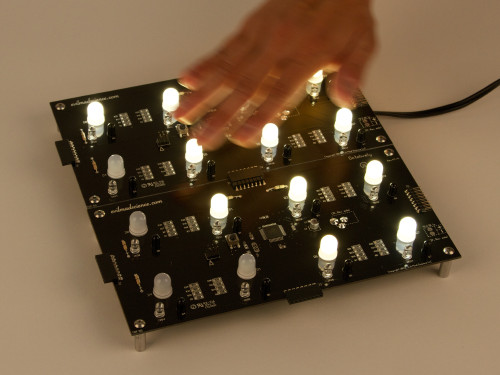
Like the soldering kit version, each “prefab” Octolively module is 4 × 8 inches (10.16 × 20.32 cm) in size, and features eight huge (10 mm) ultrabright LEDs, spaced along a two-inch grid.  And, for every LED, there is an independent infrared proximity sensor pair, configured to act as a reflective motion sensor.
Octolively Modules

The most obvious change from the soldering kit version of Octolively is that the topside components take up a lot less space. All of the resistors, capacitors, and the microcontroller have been replaced by their surface mount equivalents.


Octolively Modules

However, this not really a “surface mount” circuit board, it’s more accurately a “mixed technology” board.   Some of the components— in particular many “optoelectronic” components, like our visible and infrared LEDs —just don’t have great surface mount versions.  For example, when we’ve tried building motion sensors circuits with SMT infrared LEDs (even the pricier types that have itty-bitty lenses) we found that they just didn’t project enough IR light to be effective. Similarly, we’ve found that visible surface mount LEDs tend to be perceived as dim, even when a huge amount of light is being emitted, because the light usually goes into a very wide angle.


Octolively Modules

The microcontroller is an Atmel ATmega164A, in the 44-pin TQFP package.  (And in case you’re wondering, yes that’s exactly as redundant as “ATM machine.” )

Those white gumdrop-looking things are (as before) the big 10 mm LEDs, but they certainly seem even bigger sitting next to that chip.
 

Octolively Modules

Ready-to-use Octolively modules are available now at Evil Mad Science.

Additional details— including the datasheet and documentation links —are available on the product page.

Mystery components!

MysteryComponent1
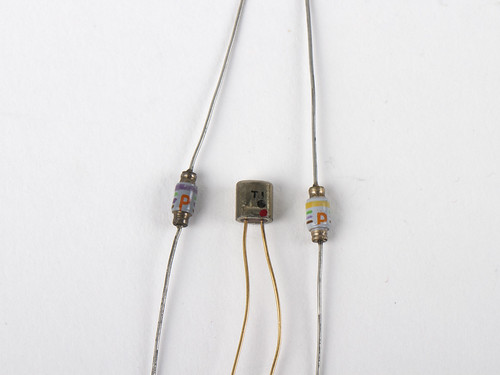
While picking out interesting vintage diodes at the electronics flea market, we came across a couple of components— possibly also diodes because of where we found them —of types that we have never seen before.  And we can’t resist a good mystery.


MysteryComponent4

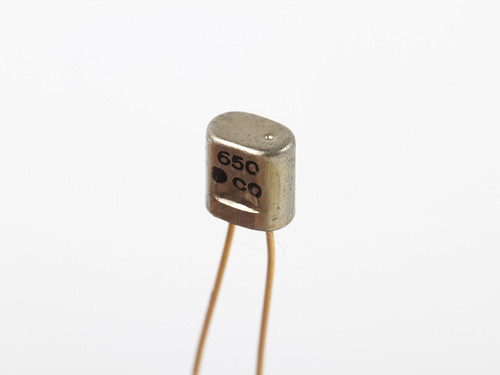
First, there’s this little two legged can, marked with 650, a black dot, and CO on one side. The other side (as you can see in the photo above this one), is marked T 1 and has black and red dots.


Secondly, a couple of things that look kind of like resistors:
MysteryComponent6

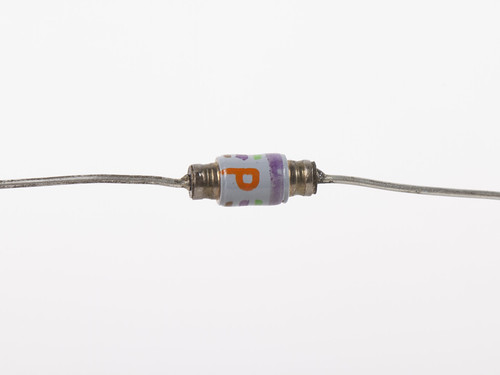
They are very small, only about the size of 1/4 W resistors.  They are marked with a red capitol letter “P” and a set of four colored stripes. The “P” marking interrupts the three narrower bands in both cases.

MysteryComponent8
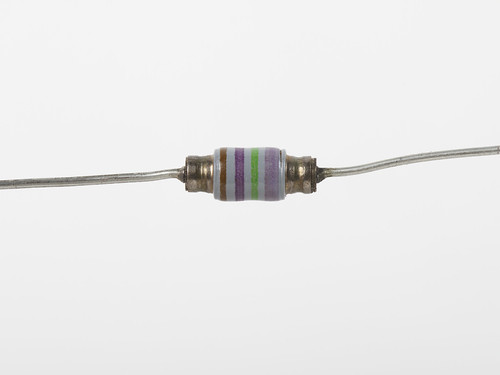
Here’s a good look at the color bands: brown, violet, green, and then a broad yellow.  (We could be reading this wrong; is the broad stripe supposed to be read first?)

MysteryComponent7
This one has brown, violet, green, and then broad violet.

So, what are they?  We don’t actually know, but if you do, or if you have a good guess, we’d love to hear it!

Evil Mad Scientist at Maker Camp

Maker Camp Banner

Maker Camp is a virtual DIY camp for teens created by the folks at Make Magazine and Google. It’s free and open to all on Google+. I am excited to be participating in Maker Camp this week as the guest camp counselor on Thursday, July 26.

Electric Origami

The activity I’ll be leading will be Electric Origami. Schedule, materials lists and how to join the camp are all on the Maker Camp site and Make’s Google+ page.

Maker Camp Banner

I’m looking forward to hanging out with the campers! I’ll be posting the direct link to the broadcast and hangout as soon as it is posted on Thursday.

Update: Introductory information has now been posted for the Make G+ hangout, which begins at 12 noon, PST.

Update 2: The stream is up, link is here!  And, there’s a youtube stream, too!

The 2012 Open Source Awards

open source awards

Congratulations to the recipients of the Open Source Awards announced today at OSCON: Bradley Kuhn, Elizabeth Krumbach, Massimo Banzi, Christie Koehler, and Jim Jagielski!

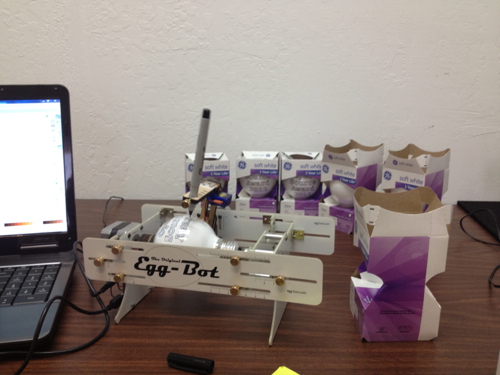
lightbulb in eggbot

We were honored to participate in the creation of the awards which were given out this year. Using an Eggbot, we plotted the Open Source Award design onto lightbulbs which were integrated into the awards which were given out on stage. Additionally, the award recipients are each receiving an Eggbot. It is exciting and fitting that this year’s award is itself open source hardware which works on open source software and was created using open source tools.

lightbulbs and eggbot

Top photo by Sarah Novotny.

Creating optical rotary encoders with Inkscape

screenshot of optical encoder extension

Kalle Hyvönen of DGK Electronics has created a new Inkscape extension that might be handy for all of us robot builders:

I developed an extension for Inkscape which can create optical rotary encoder discs in any size/number of segments. It currently supports single and two-track (quadrature) encoders but I’m going to add support for gray encoded discs as well.


Link: Inkscape extension for creating optical rotary encoder discs
(via Inkscape on G+)

A Simple Relay Shield for Arduino

Relay Shield

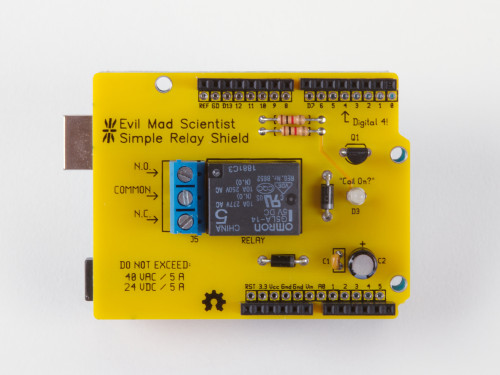
Introducing our newest kit: the Evil Mad Scientist Simple Relay Shield for Arduino.

It’s a dead-simple single-purpose low-cost mechanical relay board, with a single low-power SPDT relay that can switch moderate loads of up to 5 A, AC or DC.

Relay Shield

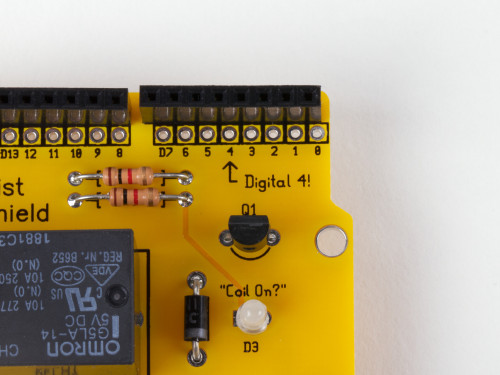
The relay is controlled by digital line 4— and that’s well labeled, too.

No library is needed. For a demo, just open the Arduino “Blink” example sketch and change the LED pin to 4.   When output Digital 4 on your Arduino is low, the relay is in the “normal” state: the “Common” pin of the screw terminal is connected to the N.C. (“Normally Closed”) pin of the screw terminal.

When output Digital 4 goes high, the “Coil On?” LED will light up and the relay enters (for lack of a better term— suggestions welcome!) the “abnormal” state, and the Common pin is instead connected to the N.O. (“Normally Open”) pin of the screw terminal.

Relay Shield

One of the main concerns about using higher voltages and/or currents on an Arduino shield is that you potentially have these things wired awfully close to things sticking up from your Arduino board, like the microcontroller itself or the USB connector.  If you sometimes would like a little more breathing room, a good solution is to add the insulator shield Googly Eye Shield between the two.

Relay Shield

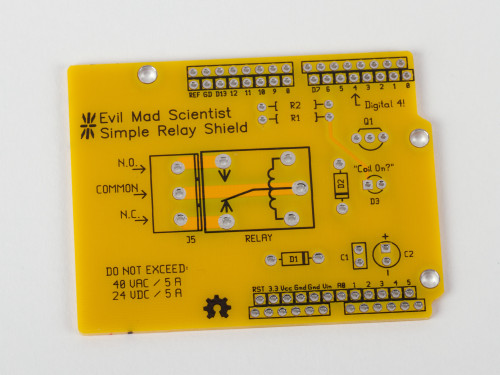
The Simple Relay Shield circuit board is a standard 2-layer, 1/16″ thick FR-4 PCB, but with highly-visible yellow soldermask.  While it is (yes) very simple, the Simple Relay Shield is an open source hardware project. The circuit board is designed in gEDA, and the design files are available for download at the Evil Mad Science Wiki.

The Simple Relay Shield is available now at Evil Mad Science.

Interesting Diodes from the Electronics Flea Market

Diodes from the eFlea

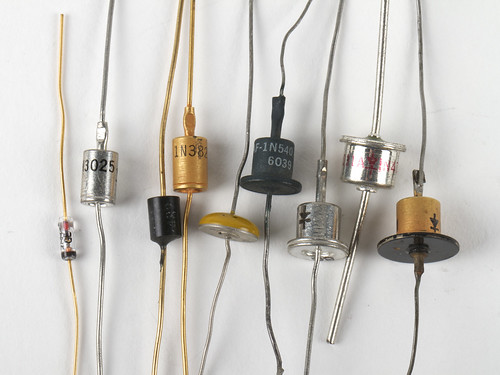
We have written before about the the Silicon Valley Electronics Flea Market, one of our favorite places to go treasure hunting. At this weekend’s flea, we came across a cache of beautiful old diodes, including some in rather unusual packages.

Continue reading Interesting Diodes from the Electronics Flea Market

Replacing the laser tube

Epilog Tube Swap 1

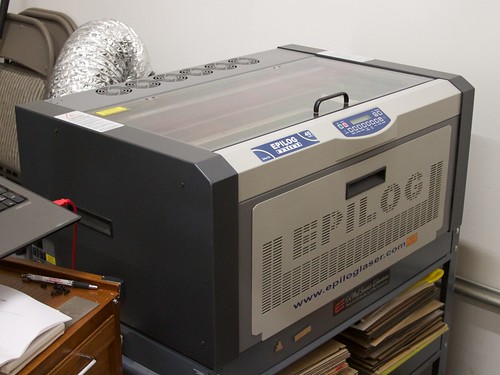
One of the most useful tools in our shop is our laser cutter— or more formally, our low power carbon dioxide laser cutting and engraving machine.   We use it for all kinds of mechanical prototyping, cutting parts out of wood and acrylic, and even some production parts, like the cases for our clock kits, the custom cloth numbers on our d12 and d20 bag kits, and the pen arm on the Eggbot kit.

Epilog Tube Swap 8

And while this has been a fantastic and reliable machine for the last several years, eventually the moment that we had dreaded arrived.  Our laser power began to droop, and it started getting harder and harder to cut through the materials that we regularly work with.  A visit from a technician confirmed that the power had fallen significantly, and that we needed a new tube.  The replacement process is actually managed as a swap: The factory sends us a new laser cartridge, and we send them back our old one.

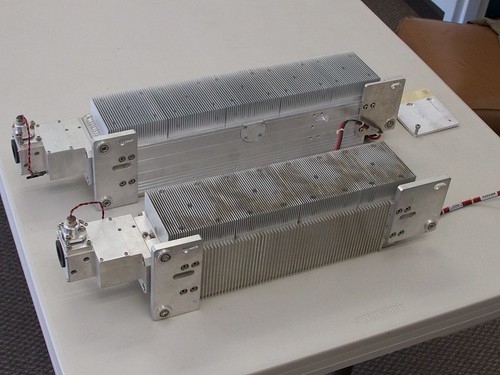
But on the bright side, we get to take a close peek at the laser hardware. It is interesting to note that many commercial laser engravers have user serviceable parts inside. Even the laser cartridge itself can be replaced by relative novices. The smaller (closer, dirtier) of the two cartridges shown above is our old one, and the new (well, refurbished) cartridge came with installation instructions and mounting bracket adapter to compensate for the change in shape from the previous cartridge to the newer one.

Continue reading Replacing the laser tube

Make your own epic-scale water weenie!

Water Weenie 32

Summer is here, and with it, the advancing aqueous arms race!  Squirt cannons, water balloon launchers, and myriad other technologies for soaking your fellow citizens.

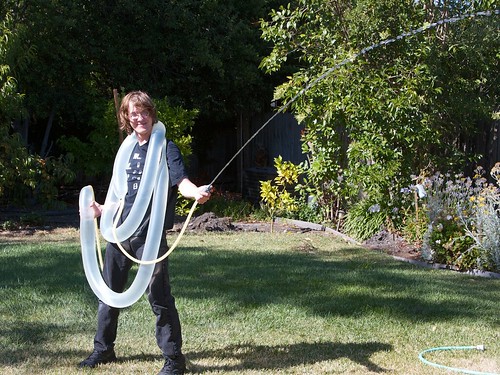
One of the classic squirt mechanisms is the “water weenie,” where the water is stored under pressure in a length of elastic tubing, and the force to eject the water is provided by the restoring force of that tubing. Often the elastic tubing is a simple length of latex “surgical” tubing, or in the case of the classic Wham-O Water Wiennie, a literal rubber balloon.   While people have almost certainly been squirting each other with these things since (we’re guessing about ten minutes after) the invention of the water balloon, the technology has more recently been reinvented as the “constant pressure system” used in modern high-end water guns.

Here is our take on the water weenie: How to make your own high-performance, arbitrary-capacity squirt machine, starting with basic hardware.    Our 10′ version shown above— which you can lift if you’re strong!  —throws water up to 25 feet and can empty over ten gallons of water onto your target in one continuous shot.  And of course, you can make it bigger if you want to.


Continue reading Make your own epic-scale water weenie!