Tag Archives: art

WaterColorBot at Kickstarter: One Day Left

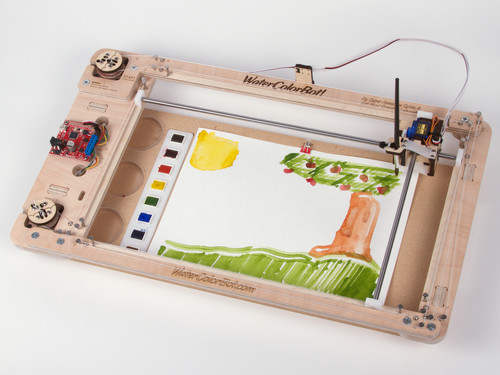
WaterColorBot Drawing
The Kickstarter campaign for Super Awesome Sylvia’s WaterColorBot is almost at a close, with just 24 hours remaining; it winds up tomorrow (Thursday) morning, at 7 AM eastern time.

So, if you haven’t signed up yet— and you think you might like to —this would be a great time to do so. If you’d like to learn more about the WaterColorBot, we’ve written a number of articles here on our blog, and there is also a detailed introduction on the Kickstarter page itself.

And for those of you who have backed our project, we are thrilled to have your support, and to have you along with us as we unleash so many art robots upon the world this fall. We can’t wait to see what kinds of amazing things people will create with them.

WaterColorBot Drawing

Artwork painted on the WaterColorBot by Robert “RoboGenius” Sloan

Laser Marking with Moly

MolyMarking 9

A low power CO2 laser cutter (like the one that we use) is fantastic for cutting and engraving wood, fabric, paper, and plastics. It’s also great for engraving painted or otherwise surface coated metal, like anodized aluminum (for example, making the labels on a Maglite).

However, with only a few exceptions, a laser like this generally falls down flat if you want to cut or engrave a chunk of bare metal. One exception is that you can actually cut through metal if it’s thin enough. Another is that you can make dark marks on metal with the help of a ceramic coating compound like CerMark.  CerMark is sprayed on metal, then blasted with the laser so that it fuses to the surface, leaving a dark, permanent mark. Unfortunately, a spray can of CerMark costs $60, and as it is a specialty item, it may not be easily available when you happen to need it. So what do you do if you need something like this and you don’t have it?
Continue reading Laser Marking with Moly

Marking Klein Bottles with the Eggbot

Untitled

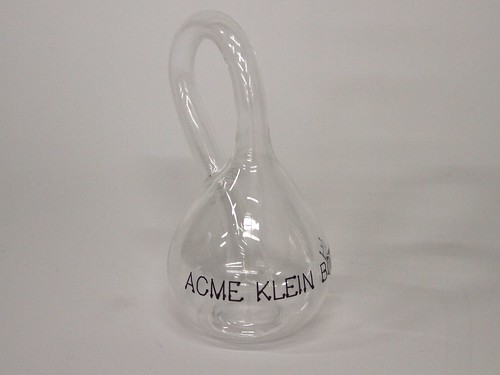
We were lucky enough to have a visit from Cliff Stoll, geek celebrity and proprietor of Acme Klein Bottle. Acme is the finest source of Klein bottles on the internet.

Cliff came with an esoteric dilemma: how to engrave a glass Klein bottle. Acme Klein bottles are blown from borosilicate (Pyrex) glass, which has a low coefficient of thermal expansion, which means that the usual way of engraving a curved glass surface—laser engraving—doesn’t actually work.  With more common types of glass, you can use a laser engraver to etch anything you want into the surface. But with Pyrex, the surface simply melts unevenly rather than creating the microfractures that give an etched appearance.
Untitled

So how would you etch the curved surface of a Klein bottle? It turns out, to our surprise, that it is remarkably easy to do it with an Ostrich Eggbot fitted with a diamond engraver attachment.

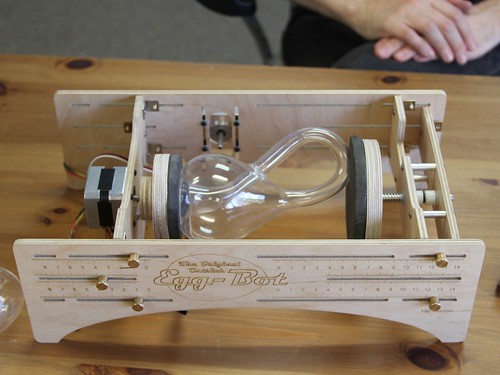
There was one complication, which is that a Klein bottle is a funny shaped object! In order to fixture the Klein bottle in the Eggbot, we made a couple of extra large couplers—much larger than the tiny pads normally used to hold the ends of an egg—with EVA foam rubber pads on their surfaces. The extra large couplers held the Klein bottle securely for rotation.
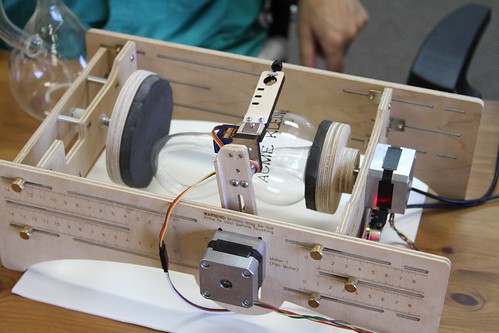
Untitled

Untitled

We did some initial tests with Sharpie and a medium sized Klein bottle to make sure our fixturing worked well.
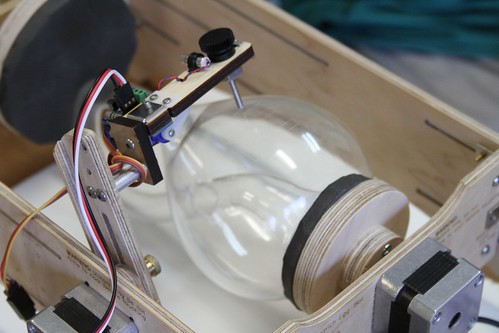
Untitled

And then we hooked up an engraver for a real test.
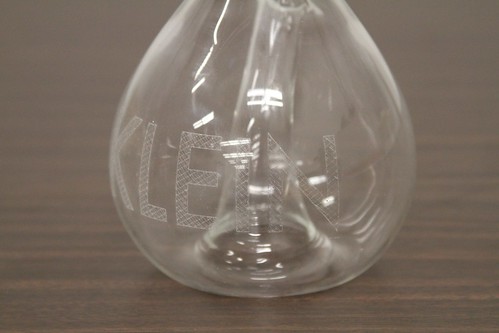
Untitled

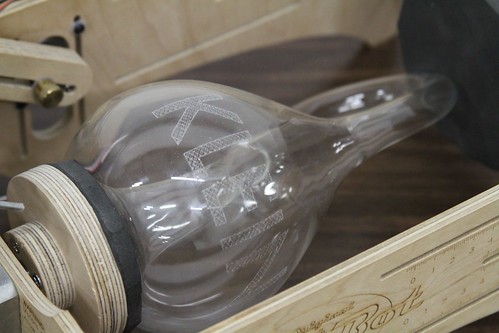
Here’s what the Klein bottle looked like after engraving. Not being particularly creative, we etched the word “KLEIN” into the side.  Because the Klein bottle is made from thick borosilicate glass, it takes engraving remarkably well. It is a much more sturdy object than the fragile Christmas ornaments that we have engraved in the past.
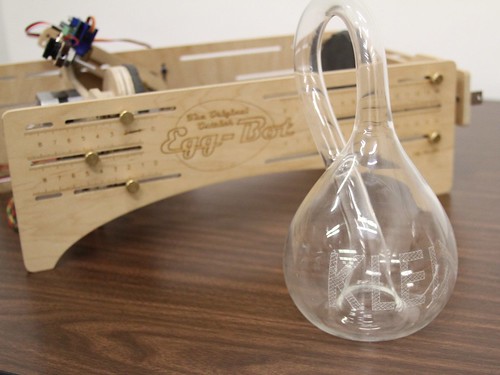
Untitled

While we can’t imagine that it is a major market segment, the Eggbot seems to be ideal for working with Klein bottles (insomuch as anything can be perfect for working with a closed, non-orientable, boundary-free manifold). But regardless, it’s quite wonderful to find an unexpected application like this, where our little robot can solve a real-world problem that we had never even considered.

Eggers using Eggbots

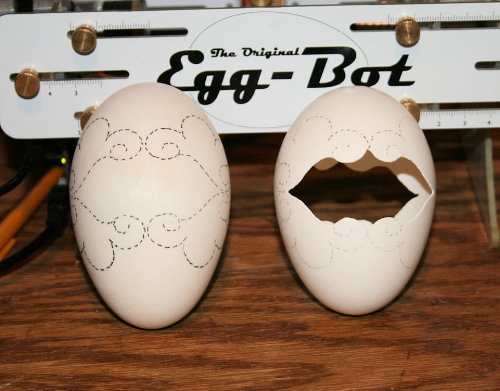
One of our favorite things about the Eggbot is that we get to connect to the communities that embrace it and find new uses for it. One such group is (not surprisingly) egg artists. They affectionately call themselves “eggers” and are, more likely than not, members of the International Egg Art Guild. One of their enterprising members, Fran, has been creating patterns for use with the Eggbot and sharing them through the Eggers Eggbot Group on Facebook or on Thingiverse.

A pattern, after being marked with the Eggbot using a pencil or marker, can be carved, painted, or decorated in a variety of ways. Carving is generally done by hand using a lightweight air powered drill (such as the Turbo Carver).

As with any specialized group of enthusiasts, they have regional shows to display and sell their creations, and to buy and sell the tools of the trade. Fran uses her Eggbot both for marking eggs for her own projects, and for marking eggs to sell at shows for others to finish.

The Eggbot is particularly useful in evenly distributing a repeating pattern around the egg—something that can be difficult to do by hand. The interlocking circles shown on two of the ostrich eggs above were also used to make the egg ornament at the top.

Thank you to Fran for sharing your pictures and projects!

Photomask Mirrors

Untitled

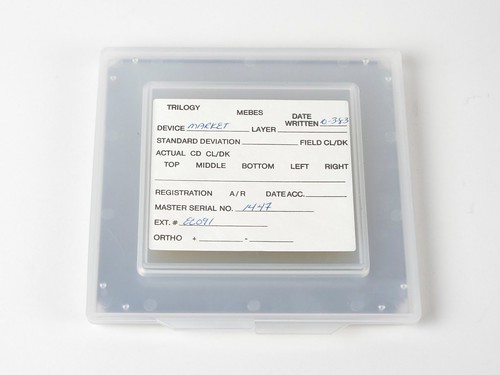
At our local Silicon Valley electronics surplus shops and electronics flea market, we frequently come across all sorts of bizarro semiconductor manufacturing paraphernalia. Here is one of those types that we have written about before, in our coaster project:

Photolithographic masks, or photomasks are clear templates used in semiconductor manufacturing. Typically, they are made of UV-grade fused silica and have a highly intricate chrome metal film pattern on one side.

The most commonly available masks are test patterns used for calibration, as production masks are guarded carefully. This particular one dates back to 1983!

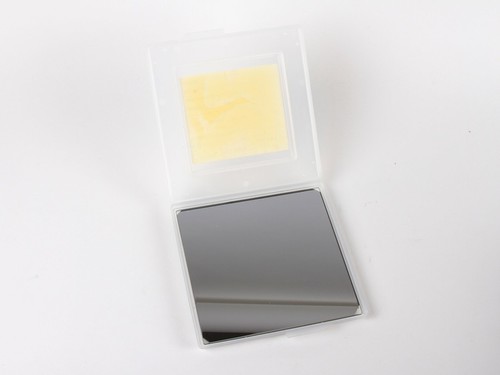
Untitled

Now looking inside at it, it’s hardly a mask at all. It’s nearly fully silvered—perhaps a mask pulled out before the etching step of its process.

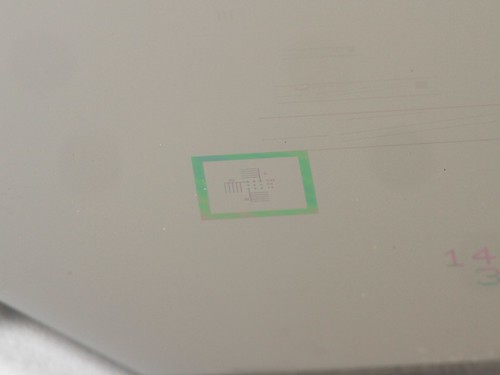
Untitled

If you look at an oblique angle, you will find a few incredibly detailed patterns, and some printed on markings. This one is marked “5.1 INCH ARRAY” across the top and “1447 3-OCT-83-13. 5” across the bottom.

Untitled

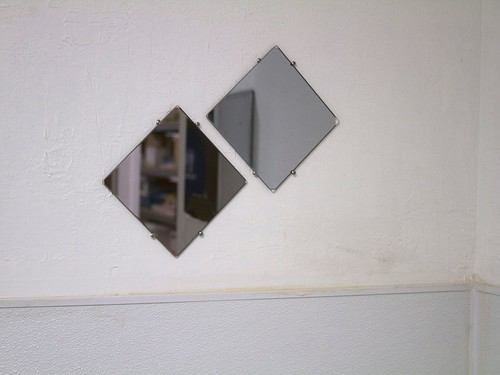
So, what to do with them? Since they don’t have the neat patterns that made those coasters so cool, we used some truss-head screws to mount them to the wall.

Untitled

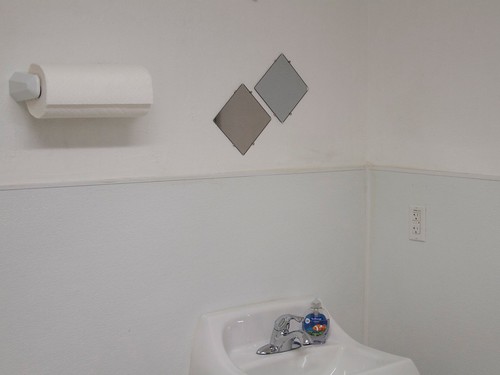
And here we are then, using a couple of photolithographic mask as bathroom mirrors! (With a couple of units at different heights for different-height people.) It solves a couple of problems at once: how to display the beautiful ephemera of semiconductor manufacturing, and what to do about a soulless little extra bathroom at our shop that didn’t come with a mirror.


WaterColorBot Kickstarter Update #1

KS_Thankyou

Our sincere gratitude goes out to all of our Kickstarter backers and everyone who has helped to spread the word about our WaterColorBot Kickstarter campaign. It has been incredibly rewarding to see each new pledge come in, from friends both old and new. We’re thrilled to announce that we exceeded our funding threshold of $50,000 after just over 60 hours: WaterColorBots are coming!

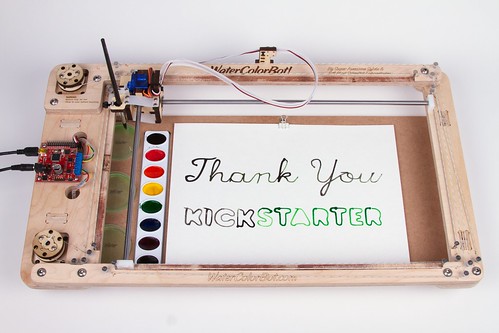
Today we recorded a little video that you can see on our update page of the WaterColorBot saying (well, painting) “Thank You.” One of the questions we have heard a few times (and have added to our FAQ) has been, “Can the robot go get more paint when it runs dry?” The answer is yes, as you can see in the video.

So is it all in the can and ready to ship? No, not quite yet. You may notice one goof in the video: an unnecessary color change. We’re still sanding away at the rough edges, in order to make sure that everything is ship-shape before we ship.

Thanks for all of the great questions and comments. We’ve already started adding to the FAQ based on your feedback, and we’ll continue to do so as the fantastic questions keep coming in. We’ve already got some excellent suggestions for future software directions, and changes and additions to the API. Getting real feedback from all of you about the different ways that you hope to use the WaterColorBot is immensely helpful in guiding us forward.

We’ve seen the project posted all over the internet, including on AdafruitBoing BoingEngadgetTech CrunchGizmodo Germany, and even as far away as Indonesia at Jeruknipis. Many of you have posted it to Twitter and Facebook, and we’re grateful for all of your support.

We had planned to post an update after a couple of days, but we didn’t imagine that we would get to post about surpassing our threshold so soon! We’ll be posting more updates in the near future. There are a lot of interesting details about the WaterColorBot that we haven’t yet written about and are looking forward to sharing with you.

Introducing The WaterColorBot

Today we’re thrilled to be launching our newest kit: the WaterColorBot.

The WaterColorBot is a brand-new project from Evil Mad Scientist Laboratories and Super Awesome Sylvia — a friendly art robot that moves a paint brush to paint your digital artwork onto paper, using a set of watercolor paints.

We’ve previously written about how we got started on this project (in a guest post by Sylvia), and about Sylvia’s visit to the White House Science Fair, where she was able to give President Obama a personal demonstration of the WaterColorBot.

And now, you can get one too!  We’re launching the WaterColorBot today on Kickstarter, and we’d like to ask for your support in getting it out there.  The WaterColorBot is an enormously powerful tool for helping to get young people interested in technology:

Beyond simple fun, we think that the WaterColorBot has enormous potential for STEM and STEAM education, especially as a way to get young people engaged with hands-on technology and robotics. We are particularly interested finding ways to inspire young women to pursue careers in science and technology. We cannot imagine any better way to do so, than starting with a robot co-designed by a 12 year old girl.

Perhaps more than anything else that we’ve done, we think that the WaterColorBot really can make the world a better place, one (young) Evil Mad Scientist at a time.

DIY Hatbox Stamps

Matthew Borgatti recently put up an excellent post about the process of creating a hat box stamp for Pork Pie Hatters:

A professional looking tool made from a few simple digital fabrication techniques and some easy hand finishing. I really love when a process can be this straightforward and precise and take the hand crafting out of the equation. Laser cutting allows me to put the time and labor and love in the conception step and not on the execution.

He walks through the details of the aesthetics, design, fabrication and finishing.

Bullet Time Fireworks with a GoPro and a Ceiling Fan

fireworksfireworks

Just in time for the Fourth of July, Jeremiah Warren created an incredible relatively low-budget “bullet time” rig— with a 240 fps GoPro camera mounted to a ceiling fan —to photograph fireworks. He posted a full writeup showing how to build it on his web site.

fireworks

fireworks

The clever hack about using the GoPro on the ceiling fan is thanks to Mark Rober, who showed how to do it back in May, mostly with smaller-scale subjects.  But Jeremiah has taken the idea and run with it, adapting it for larger-scale photography.

And as you can see, the results are simply fantastic.You can find more videos and the full how-to on Jeremiah’s site.