Tag Archives: art

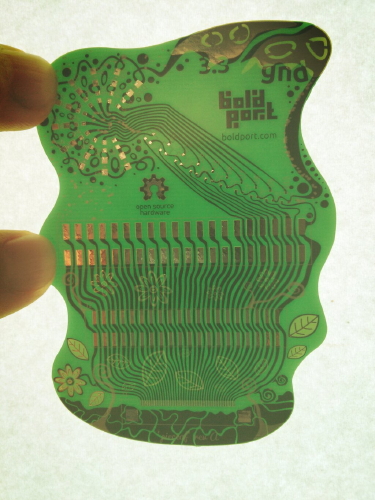
PCBmodE: Make your PCB a work of art

The folks at BoldPort have created PCBmodE, free open source software for designing printed circuit boards, but with an artistic perspective. Traditional EDA tools are designed from an engineering perspective, whereas PCBmodE treats the PCB as a creative palette. They aim to give you freedom to express your design with all the tools of the medium.

We wanted to create circuit boards that have curvey traces, meandering paths, and multiple soldermask layers, so we developed PCBmodE (say “PCB mode”), an open source Python software that unshackle us from the constraints imposed by traditional PCB design tools. We use the power of Inkscape — the leading open source vector graphics editor — to achieve any shape imaginable. Together with our powerful back-end tools, we can manufacturable beautifully functional boards.

They’ve posted about several of their example boards including pieceof (pictured above), a Raspberry Pi daughterboard called shimmy, and a tribute board dedicated to Bob Pease. This is a really neat approach to building circuit boards, and it looks like it has a lot of potential.

Play with your food: How to Make Sconic Sections

Sconic Sections

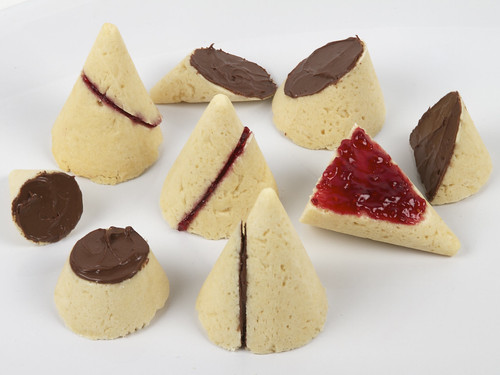
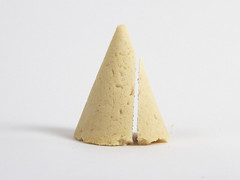
The conic sections are the four classic geometric curves that can occur at the intersection between a cone and a plane: the circleellipseparabola, and hyperbola.

The scone is a classic single-serving quick bread that is often served with breakfast or tea.

And, at the intersection of the two, we present something entirely new, delightfully educational, and remarkably tasty: Sconic Sections.

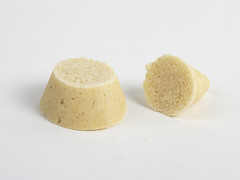
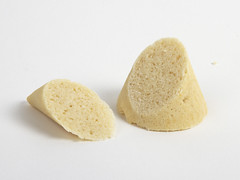
Sconic Sections: Circle Sconic Sections: Ellipse
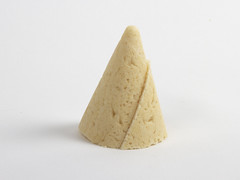
Sconic Sections: Parabola Sconic Sections: Hyperbola

In what follows, we’ll show you how to bake cone-shaped scones, to slice them into plane geometric curves, and to highlight those curves by selective application of toppings.  We’ll also discuss some of the methods that didn’t work so well, as we refined our methods for making these.

Onwards, towards parabolic preserves and hyperbolic Nutella!

Continue reading Play with your food: How to Make Sconic Sections

Using the Eggbot for Pottery

Eggbot Cups
We recently got the question,

Would the Ostrich Egg-bot allow me to “decorate” on a greenware pottery mug or bowl or similar shape?

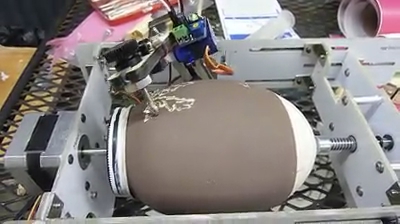
The answer turns out to be yes. Garth, of Extreme Craft posted video of using his Original Eggbot for this. He first used a simple wood screw as a stylus.

Eggbot

He later used our diamond engraving tool, with great results. It is a use we hadn’t anticipated!

Lightning Necklace

lightning_lolnecklace_11

Erin “RobotGrrl” recently posted about a wearables project:

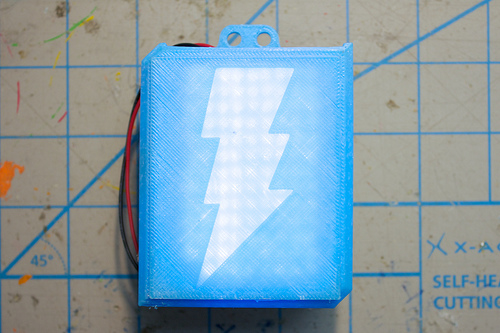
Here was a quick project that I created in time for C2MTL. It’s a simple, blinky, 3D printed, wearable electronic. We wanted to wear something that would be interesting and a conversation starter.

lightning_lolnecklace_3


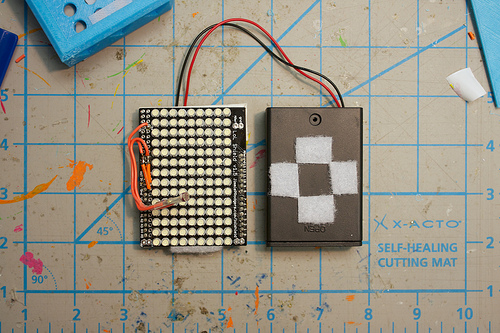
She used a LOL Shield on top of a Diavolino in a 3D printed case with a translucent lightning bolt. It was a success:

I wonder if all wearable electronic projects are like this- if people come up to you just because it’s something different and want to know more. Perhaps more world-wide friendliness & curiosity could be an unexpected result from wearable electronics! So, it worked and we were able to get people to talk to us. I extremely recommend this to other shy/not-exactly-social people.

Client Bot by Nerd Industries

Mathias from Nerd Industries wrote in to tell us about their “Client Service Director Prototype” project. The Client Bot moves on a rail from one client logo the next, dusting each logo in sequence with a little brush. Mathias says:

We came up with the idea that it might be funny to build a robot holding a feather duster and constantly dusting the logos. We named the guy “our client service director” and started developing it.

The robot consists of an aluminum carriage. We put a multiphase motor inside and connected it to a robot arm. Also we attached an Arduino board to it as a controller and equipped it with a rechargeable battery pack. Everything has been mounted together with plastic screws to avoid conduction. The robot is powered through the rails.

The “feather duster” is actually a make up brush stolen from Christoph’s wife. You can see the general motion of the robot in the short clip below.

Client Service Director Prototype from Nerdindustries on Vimeo.

They’ve used a video of this charming robot to feature their client portfolio, and that’s where you can see it in its full glory.

Quick project: 24-hour Cosplay Sword

Cosplay Sword 1

Junior Evil Mad Scientist Chris came to us for help with what turned out to be a funny little (well, huge) cosplay prop project. The kind of project that starts off with a conversation that goes like this:

“You want to build what?”
“A giant sword for my costume for FanimeCon!”
“And when do you need it by?”
“Uh… tomorrow?”

So, we got to help make a 64″ long replica sword, one of several from the flash game Epic Battle Fantasy 3 (which we had admittedly never heard of before), in what turned out to be kind of an interesting (if quick) project.

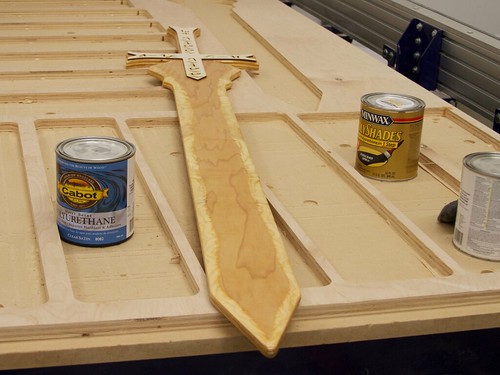
Chris drew up the outline for the sword in Inkscape, by tracing the outline of a bitmap drawing of the sword in a larger collection (where you can find this one in the top row, one third of the way from the left).   We cut the outline on our CNC router from lightweight 3/4″ hardwood plywood— strong enough to not be floppy, yet light enough to be carried — and sanded the sides until it could be handled without creating splinters. We also sanded a slight bevel around the edges of the blade, so as to create the illusion of a sharpened edge without actually thinning it much around the edges.

Next, we needed to paint the sword silver.  We had some silver spray paint on hand (left over from our 555 Footstool project!), but if you directly spray paint lightweight plywood, it tends to soak into the wood unevenly, dry slowly, and leave a finish that awkwardly highlights the grain of the underlying wood.  Instead, we coated the sword with a fast-drying sanding sealer and allowed it to dry for two hours before getting out the spray paint.
 

Cosplay Sword 3

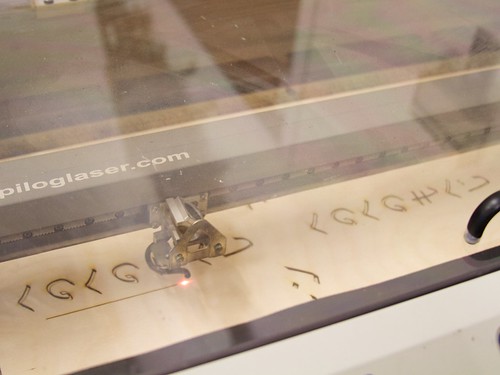
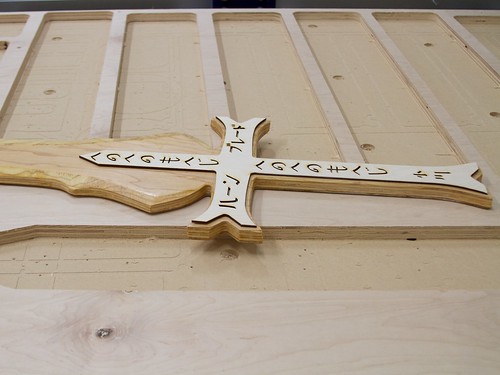
In the mean time, we made the hilt details— what might count as greebles —by laser cutting two sheets of thin 1/8″ thick plywood on each side, in a shape slightly inset from the outline of the thicker plywood.  There are two of these, one to go on each side of the hilt.
Cosplay Sword 2

Once the sanding sealer had dried enough to gently sand, we test-fit the parts together. The photo above shows how the parts look after laser cutting and with the slick, yellowish finish that the sanding sealer gives to the plywood.

Next, we spray painted the body of the sword. Primer gray for the hilt section and metallic silver for the blade section, and allowed it to dry overnight.

Separately, we painted the laser-cut overlays black with black one-part polyurethane finish (the same type that we used for our ASCII art Tie Fighter project), and allowed them to dry separately.

Cosplay Sword 4

In the morning, a little superglue attaches the newly-black hilt details, an old leather belt becomes some lashing details, with the help of a staple gun, and… it’s off to the show.

In case you’re interested, you can download a copy of Chris’s sword design here, as an Inkscape SVG file.


You can find more costume projects in our Halloween Project Archive.
Kitty’s Morning Tea

Kitty’s Morning Tea: Kinetic Theory of Matter for Kids, by Christine Liu, is a remarkably charming book and physics lesson for young children.  It’s a short twelve-pages about tea, molecules, and kinetic energy that you can read (in its entirety) above, in a digital edition released by the author.   We love seeing science-themed educational materials for youngsters— and this is no exception.

Christine and friends are running an (already funded) campaign on Kickstarter to print the book and get it into the hands of children, and you can get your own printed copy as one of the rewards.  It’s also available in a Kindle edition, free for the short remaining duration of their campaign.

DIY Deck Ambiance with Flickering LEDs

Jack Olsen (of the awesome 12-Gauge Garage) wrote in about using our flickering LEDs to line the deck and pergola he had just built.

He says, “The LED candle effect is great, and really gives the place a relaxed feel at night.” You can read more about the deck project over at the Garage Journal forums, where he describes the build in more detail:

It has 28 real candles on it that I’ve hollowed out to accommodate flickering LED lights. It’s pretty convincing.

I have a pair of 3 v power supplies — each feeds half the light set. They’re plugged into a switched outlet with wire running down along the edge/underside of the deck and up through one of the pillars, then sneaking around the back of the wooden frieze thing and into holes drilled in the backside of the frame.

He even sent us a before shot, so you can see just how from-the-ground-up building the deck was. Thanks for sharing your project with us!

All photos by Jack Olsen.

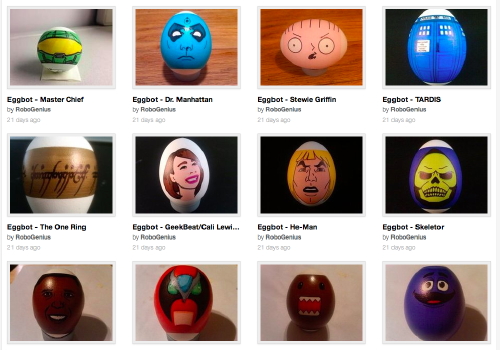
Designs for Eggbot by RoboGenius

We’ve been watching the work of RoboGenius for quite some time. He has created some of the neatest non-geometric work anybody has done on the Egg-Bot. Recently, he uploaded a number of his designs to thingiverse, which means you can try them out, too. He has also been posting great pictures of them to flickr. When asked in the Egg-Bot user list how he created them, he posted:

The short answer is that it’s all done line by line in Inkscape.

The slightly more tedious answer is that it starts with an image (generally something off the web, or that has some significance to me), then I import that image onto my 3200px X 850px template in Inkscape and position it where I want it on the egg/ball. I then take a look at the image and decide how many color layers I’ll be needing for the plot and add those to the project, naming them sequentially followed by the color I use for the layer (for example: 1 – Yellow, or 5 – Black). I always begin with the lightest colors first, and generally end in black. Then it’s simply a matter of tracing over the picture on the correct layer using the bezier line tool (Shift + F6), and bending those lines with the path editing tool (F2). Once I get the basic lines created, I’ll create and fill any solid shapes using the EggBot Contributed Hatch fill extension (spacing should be set to 6 for eggs). To add shading, you simply go over the same places a couple of times with the same color, which can be achieved with Copy and Paste, and occasionally the shading can be enhanced by altering the angle of the line to match the angle of the shape or intended shadow (the Master Chief design is a good example of this technique).

That’s pretty much it. To finish off the project, I like to color all of the lines in a layer to match the marker used in that layer, then delete the layer with the picture in it.

Thank you for generously sharing both your designs and your techniques, RoboGenius!