Tag Archives: cnc

Hershey Text v 3.0

Some years ago we wrote a neat little Inkscape extension called Hershey Text. Hershey text could take a little bit of text that you would type and render it into stroke fonts, also known as engraving fonts.

We are very pleased this week to release an all-new version of Hershey Text, written from scratch, and far more useful, capable, and extensible. We have a comprehensive user guide for it as well.

Hershey Text v 3.0 will be bundled into future versions of Inkscape, but it’s also included with the new AxiDraw software and available on its own for download today.

Continue reading Hershey Text v 3.0

New AxiDraw Software v 2.5

We’re pleased to announce the release of the latest version of the AxiDraw software, 2.5. which includes a number of frequently-requested features that we’ve been working on over the last year.

An expanded user guide

Perhaps foremost, we have updated and greatly expanded the PDF AxiDraw user guide, which covers how to use the AxiDraw, including every part of the software. In addition to sections that go over the new features, we have thoroughly revised the rest, including a larger and clearer section on getting started.

A new SVG optimization tool

In normal use, the AxiDraw software plots elements in the same order that they occur in the file. However, depending on how your file was generated, that may not be the most efficient way to do things. If the order of the elements in the file is poor enough, the plot time can actually be dominated not by writing and drawing time, but by pen-up movements (illustrated here in red) between objects.

We’ve written a new SVG ordering utility, that can sorting of objects in an SVG document, re-ordering them as needed to reduce pen-up travel. It’s also a layer-aware and group-aware sorting tool, that can process a full document and reorder elements on each layer of the document and either respect or break apart other groups in your document. This tool is available in two versions: An individual Inkscape extension as well as an integrated version that you can use automatically within the AxiDraw software.

Better support for using multiple machines

The new AxiDraw software supports assigning names to individual AxiDraw units over USB, which you can use as semi-permanent labels when printing to a particular machine. You can also now plot to a specific AxiDraw, or simultaneously plot the same document to a number of connected machines.

A new version of Hershey Text

This release includes an all-new version of Hershey Text, our software for creating stroke-based text within Inkscape. You can about the new features in our blog post announcing it.

And more!

Amongst other improvements in the new software are the following:

  • Updated to use Inkscape 0.92
  • Paths in the document are now clipped gracefully and precisely at the boundaries of both the artboard (drawing canvas) and machine travel.
  • Supports more SVG object and layout types natively
  • Faster plotting on paths with very high vertex density
  • Online version check added
  • Improves behavior of Hatch Fill extension
  • Bug fixes galore

We recommend this new version to all AxiDraw users; you can download it for Mac, Windows, or Linux, following our guide here.

The AxiDraw SE/A3

AxiDraw SE/A3

We’re very pleased to introduce a new member of the AxiDraw family: the special edition AxiDraw SE/A3. This new model joins our existing models including the AxiDraw V3 and AxiDraw V3/A3.

Like the AxiDraw V3/A3, the AxiDraw SE/A3 has an XY travel suitable for use paper up to 11×17″/A3 size. However, in place of the central extrusion that makes up the body of that machine, the AxiDraw SE/A3 has a central beam that is CNC machined from a solid billet of 6061-T6 aluminum, and then anodized to a sleek black finish.

This heavy, rigid structure — it’s a solid block of metal! — provides dramatically better straightness and stiffness, even compared to the already-stiff AxiDraw V3/A3. This design adds mass exactly where you want it: to the non-moving base that forms the X-axis of the machine. In order to keep the weight light where it matters, the moving Y-axis of the AxiDraw SE/A3 uses the same stiff and light custom aluminum extrusion that we use on the AxiDraw V3/A3.

We made a video showing off the SE/A3, and how it’s made:

The AxiDraw SE/A3 is available to order now at the Evil Mad Scientist shop.

The Incredible Computer-Controlled … Computer!

wcb-surface 7

A guest post by Daniel Gentleman 

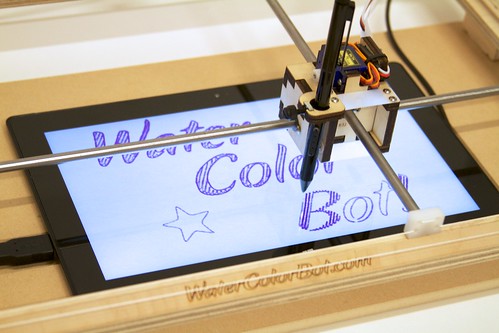
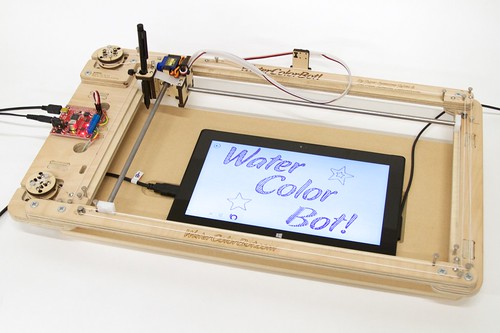
About a year ago, I started working on a project that used robotics to control a Surface Pro tablet. Not long after I started, I got my first glimpse at the the WaterColorBot on display at Maker Faire Bay Area 2013. The WaterColorBot is designed to carry a paintbrush over a piece of paper, raising and lowering it as needed to paint a picture. The movement and software control is similar to CNC router with special design modifications to make it lighter, cheaper and easier to control. A CNC router has to move heavyweight cutting bit with friction so needs expensive motors, rails, and belts. The WaterColorBot, on the other hand, needs only to move a paintbrush in a low friction environment.

I was instantly sold on the idea of using a WaterColorBot to control the Surface. I backed the Kickstarter, waited for my bot to arrive, and started working on software. When the WaterColorBot arrived, I was not disappointed. The assembly was quick and I was robotically painting in no time.

With the big mechanical and electronic solutions solved, my attention turned to the tablet. The Surface Pro is rare among tablets in that it uses a digitizer that allows extremely precise tracking with a stylus along with “hover” and “right-click” functionality. It does not need to be electrically grounded like a stylus for a screen that only supports capacitive touch. I was certain that the Surface Pro was the way to go, but not quite how it was going to be held together. The project was about to take a another serendipitous turn.


wcb-surface 1
The custom-cut spoilboard

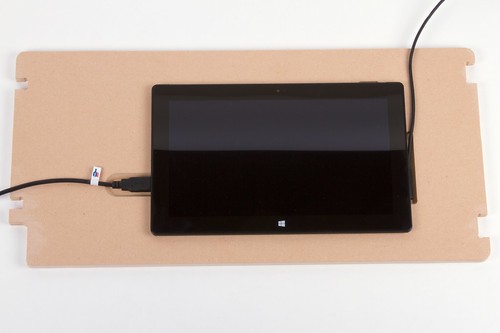
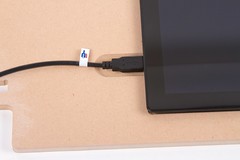
At this point, I shared my enthusiasm with Windell and Lenore of Evil Mad Scientist and they gave me a unique offer: Stop by the Evil Mad Scientist shop and together we would make a custom cut spoilboard (lower deck) fitted to mount the Surface Pro 2. Wielding digital calipers and other measurement and software tools, Windell came up with a design that held the tablet firmly and had extra space cut out for the charger, power button, and USB cable.

wcb-surface 2
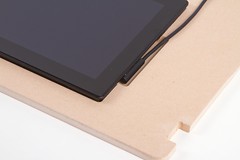
wcb-surface 3 wcb-surface 4

The area beneath the tablet has a lip and a lower recessed area. This design reduces wobble and makes it look even better. On the topic of machining – I got a few lessons in how larger CNC machines work. Windell showed me some design considerations in software and gave me a safety briefing about the CNC router itself. This thing can cut fast.

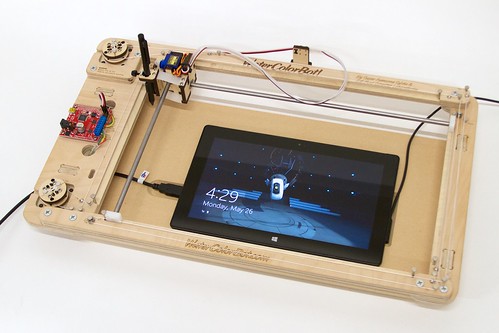
After a little sanding, we fitted the tablet, spoilboard, and WaterColorBot together. Having the co-creators of the WaterColorBot with me on this journey was priceless, as we can see from the final assembly. The first spoilboard we cut matched perfectly and the tablet is held firmly in place.

wcb-surface 6

With enthusiasm fueled by seeing it all fit together, we decided to tell the WaterColorBot to do some painting. Windell loaded up an example sketch in Inkscape and, with only a minute to calibrate the stylus height, we were drawing!

wcb-surface 7

The software running on the Surface Pro is called FreshPaint and we chose a simple marker tool. In the video, you’ll hear a laughter break where the Surface picked up the floating toolbar in the app and dragged it around the screen.

Given a little time, we could have taught the WaterColorBot to change brushes and colors in FreshPaint, but our goals for the day were met. The light weight and low friction of the Surface stylus is perfectly matched for use on the WaterColorBot. A custom fitted spoilboard means the Surface will always be at the exact same place on the X/Y plane, greatly simplifying future software development. Next project: Teaching the robot how to see!

wcb-surface 8
(Full disclosure: My day job is Systems Operations with Yammer, a Microsoft company. This project and use of the Surface Pro 2 is not affiliated with Microsoft in any way nor did they influence the project with sponsorship or exercise any editorial control. If they had, I’d try to talk them into contributing a Surface Pro 3! “Surface” is a trademark of Microsoft Corporation.)
 

WaterColorBot-style pen holder for DIY Laser

Jens added a new tool option to his DIY Laser: a pen holder.

Due to safety concerns I couldn’t run the laser out in public, but to be able to show of the CNC capabilities I built a penholder.

The pen holder design was inspired by the WaterColorBot’s brush holder, with its parallel flexure hinges.

BAMF2014: Makesmith CNC

BAMF 2014 326
BAMF 2014 327
Part of our continuing coverage of highlights from the 2014 Bay Area Maker Faire

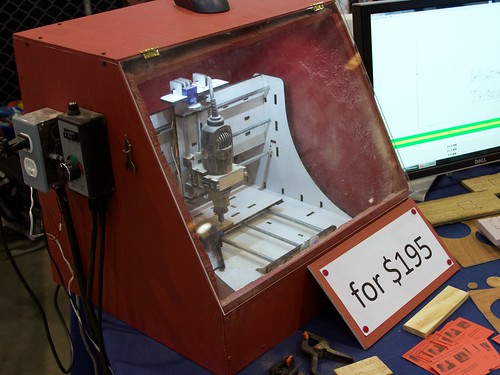
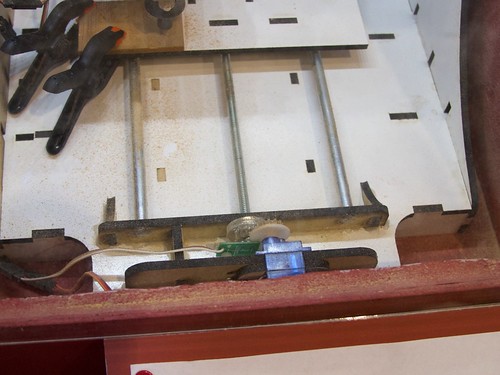
Let’s file this under “intro machines.” The Makesmith CNC, currently available on Kickstarter for just $195 including everything but the Dremel tool. It makes very clever use of appropriate technology: Three tiny hobby servo motors, modified for continuous rotation, turn gears that turn the lead screws (well, all-thread) to drive the XYZ stage. An magnetic encoder monitors the rotation, making a high-resolution, closed-loop control system.  No bushings, melamine-coated MDF parts, Arduino control.  Planned for future open source hardware+software release, too.

Perfect?  Nope, but the creators of the project seem to be keenly aware of its abilities and limitations (many discussed here), and oh does it have affordability on its side.

StippleGen and a low-power DIY laser cutter

Jens demonstrates using StippleGen2 with his low-power (300 mW!) DIY laser cutter and a classic image of Louis Armstrong.

After letting StippleGen2 crunch the numbers for a while I imported the resulting vector graphic file into inkscape and generated the G-code so that I could use my laser cutter to cut the image into a black paper. 2 hours and 23 minutes later I had a 20×20 cm piece of paper with about a 1000 holes in it and it looks awesome! Would be perfect for a lamp shade or just nice to put up in a window and let the sun shine through. I can highly recommend StippleGen2 it’s super easy and a lot of fun.

The Egg-Bot Electro-Kistka

Hardware 1
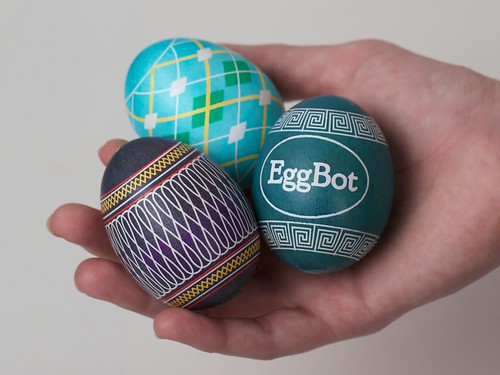
Pysanky eggs

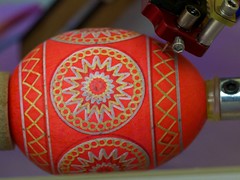
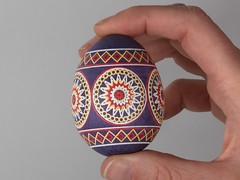
We’re pleased to announce the availability of the Egg-Bot Electro-Kistka: An electric hot wax pen designed to be used with the EggBot. A kistka is the wax tool used in the traditional wax-resist and dye (batik) method to produce colorful eggs in the same fashion as Ukranian pysanky.

We would like to acknowledge that this is not by any means the first time that anyone has strapped a kistka to an EggBot— We wrote about Ann’s DIY version a few months ago, and we’ve seen other versions (both manually heated and electric) in YouTube videos dating back several years.

Hardware
 Hardware 2 Hardware 4

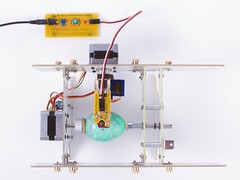
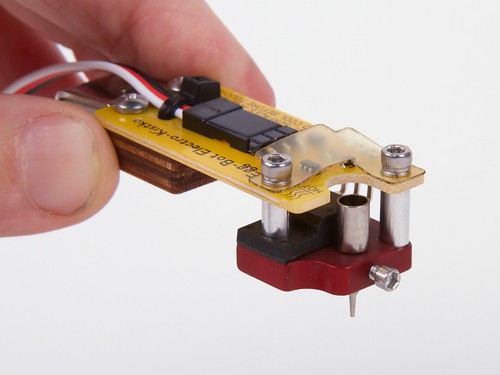
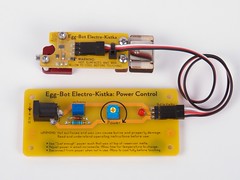
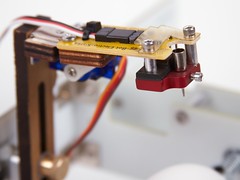
The Electro-Kistka consists of two main parts, connected by a cable: A heater assembly that gets mounted to the EggBot’s pen arm (in place of the usual pen holder), and a power control board that sits behind the EggBot.

The power control board is relatively simple: it accepts input from a plug-in power supply, and has an adjustment pot so that you can set the power level of the kistka.

The heater assembly has two parallel surfaces that you can see in the pictures.  The upper is a yellow circuit board with control electronics, and the lower red part is a machined aluminum heater block that holds the actual kistka tip.
Hardware 3 Hardware 6

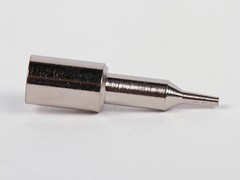
The kistka tip (right) has a small wax reservoir at the top and a smaller-yet point on the bottom that feeds molten wax onto the egg surface through gravity and capillary action.

Designing a good kistka tip is an art unto itself, and we are using field-proven kistka tips, wax, and other accessories from Folk Impressions, manufacturers of the excellent “white handle” electric kistka.  The tips are interchangeable and a number of sizes are available. For all of the examples shown here, we’re using only the #2 (medium) tip that comes with the kit.

Process: two-tone

The basic wax resist process is as follows: Apply wax to the parts of the egg that should remain the present color, and then dye the entire egg a different color.
Twain 1 Twain 2
Twain 4 Twain 5

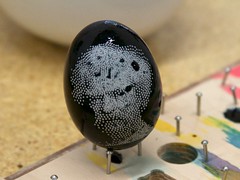
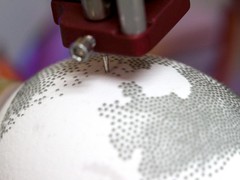
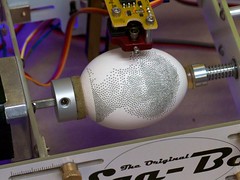
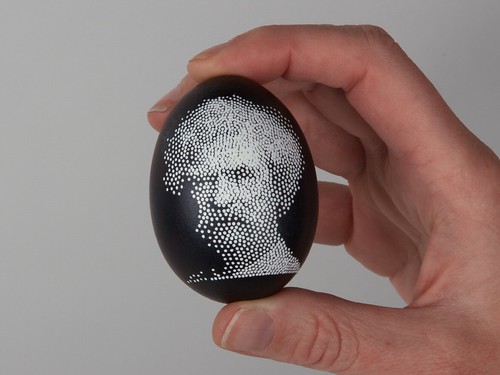
For a simple two-tone image — white on black — we started with Mark Twain, one of our example images from the StippleGen project.  From a user standpoint, drawing wax onto the egg works exactly the same way as using a felt tip marker in the EggBot — it’s just a different tool that does the drawing.  The wax itself is black-colored beeswax, which is nice because you can see it against the egg.

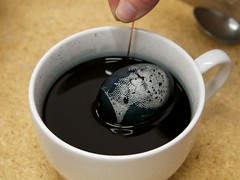
After the EggBot finishes, we dip the egg in dye for a couple of minutes, and leave it to dry on a grid of little nails.
Twain 7

Once the egg is dry, we remove the wax with a heat gun on the low setting (a glorified hair dryer…) and a tissue. With the black wax gone, the contrast is stunning. (If you are interested, here is how it looks before the wax is removed.)
Eggbot Logo 1 Eggbot Logo 2

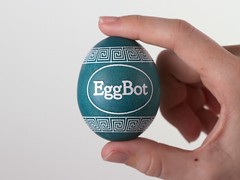
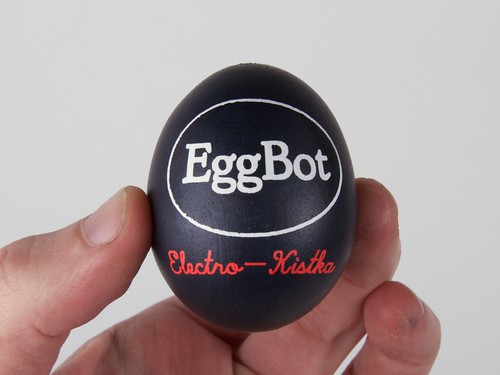
Another example of a two-tone egg.  Alternately, you could dye the egg before the wax resist first goes on (say, yellow), and then dye it blue afterwards. The end result would be yellow lettering on a blue background.
Process: Multicolor
overkill 1 overkill 2
overkill 3 overkill 4

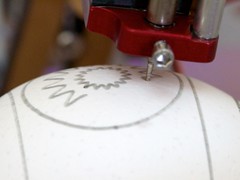
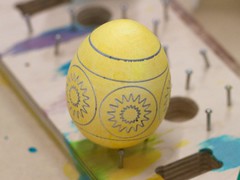
Making multicolor eggs uses the same process, but with added complexity.  For this example, we applied wax resist on a bare (white) background, and then dyed the egg yellow and allowed it to dry (upper right).  We then applied a second layer of wax, dyed the egg red and allowed it to dry.  Finally, we applied a third layer of wax (lower left), dyed the egg blue, and allowed it to dry.  The results after removing the wax (lower right) show the white, yellow, red, and blue areas — not bad!

A caveat: It is harder than it looks.  While two-tone eggs are straightforward, we have found it to be challenging to precisely reposition an egg after removing it for dyeing. Thus, it takes considerable patience and experience to produce multicolor eggs with good registration between subsequent color layers.  We’d be interested in exploring better ways to do this.
traditional 2
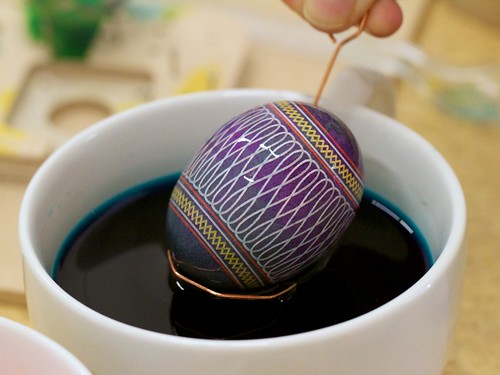
Still, maybe it’s worth the effort.

MoreEggs 4

The Egg-Bot Electro-Kistka begins shipping this week.

Eggbot Code Easter Egg

Over in the Eggbot forums, user ragstian has been poking around in the firmware for the the controller board for the Eggbot, the EBB. He found an easter egg: holdover code from an old demo mode which would do standalone plots without a computer attached. The plot above depicts one of the very earliest versions of the Eggbot kit.

And on the reverse, www.egg-bot.com. Nicely done!