Tag Archives: cnc

WaterColorBot Software and Documentation

We’re wrapping up this week’s updates on the WaterColorBot project with some notes about software and documentation.

Documentation

Our guides for setting up and using the WaterColorBot are already extensive, and still growing. You can find them at the Evil Mad Scientist wiki, or get there with a shortcut: watercolorbot.com/docs.
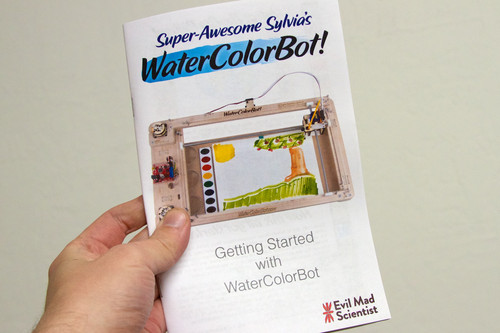
getting started booklet
Getting Started with WaterColorBot
One of the most important parts of the WaterColorBot’s documentation is our booklet “Getting Started with WaterColorBot.” The booklet covers the process of assembling the WaterColorBot kit, basic usage, an overview of software options, and a host of tips and tricks. It’s available on our documentation site in PDF format.
video still
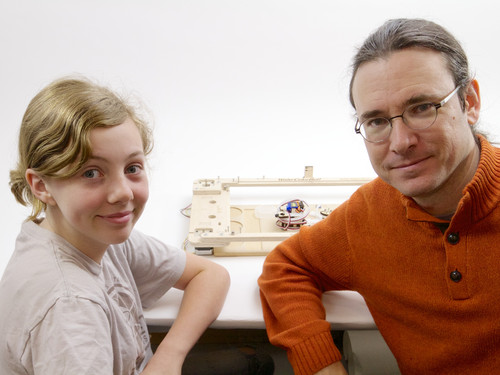
Assembly video
We’ve put together a setup video, walking through the steps of putting together the WaterColorBot kit. The video is strictly optional, and covers much of the same ground that the booklet does. You can watch it at http://watercolorbot.com/setup.html, or find it linked from our documentation page.


Software

There are, at present, three primary applications that you can use to control the WaterColorBot, each of which has unique advantages.
RoboPaint RT
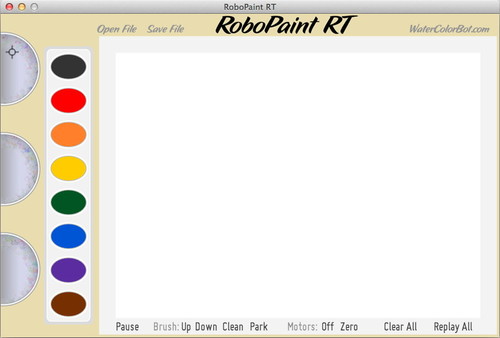
RoboPaint RT
The simplest of the three programs is RoboPaint RT, which is the one that we featured in our Kickstarter video. RoboPaint RT is a “real time” application that allows you to paint with the WaterColorBot. It’s straightforward and manual: Click on a color in the paint palette to change to that color, click on the water to dip the brush in the water, and drag the brush to paint on your paper.

With RoboPaint RT, you can also replay your drawing to make multiple copies, and save the file to open up and print again later. This program can be a lot of fun to play with and is a great way to get acquainted with the WaterColorBot. For those with good artistic skill, it can also be a remarkably powerful program.
 

RoboPaint
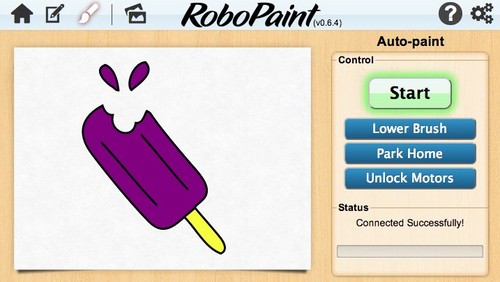
RoboPaint
Next up is RoboPaint, another stand-alone application written by the WaterColorBot team. In RoboPaint, you can open existing artwork in SVG format, snap the colors to your paint palette, and paint the document. It also has a rudimentary edit mode that lets you create new drawings to print. If you’re starting with existing SVG artwork, RoboPaint is generally the best of the three programs to use for a few different reasons. Most importantly, it’s good at automatically filling in large solid regions of a painting.
 

Inkscape drawing
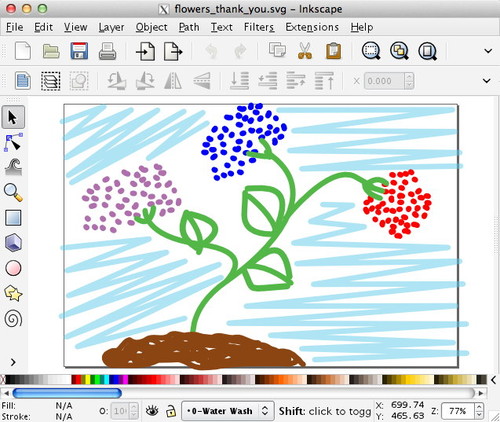
Inkscape, with extensions
The third primary application is Inkscape, a superb, free vector graphics editor, for which we have written an extension (a plugin) to control the WaterColorBot. Our extension provides fine grain control over exactly what will be painted, but more-or-less requires that you create the artwork within Inkscape to take full advantage of the features.

Above, the drawing used to make the Robo-painted thank you cards that we wrote about earlier this week.

Inkscape is also capable of importing artwork in PDF format (as well as tracing bitmap graphics to some extent), and saving as SVG graphics that can be used with RoboPaint. If you’ve ever used an Eggbot (and its Inkscape based driver) you might want to start here, before trying the other apps.

 
And if you like to code…
For developers (and people who just like to tinker with code), there are additional options:

– Rolling your own, starting with our examples. RoboPaint RT is written in Java/Processing, RoboPaint is written in JavaScript, and the Inkscape extensions are written in Python. These can provide a nice starting place, in a few different environments.

– Direct serial control. The “EBB” motor controller board used on the WaterColorBot can be independently controlled from any environment that can send serial data to your USB ports.  Its command set documentation is here.

– The RESTful API. RoboPaint includes the “CNCserver” API for WaterColorBot, documented here. You can use this interface to control the robot locally (from your computer) or remotely (from anywhere on the internet, if you enable the remote option within RoboPaint and tell the other computer what your IP address is). Currently this is a low-level API; we are working on a higher level version where you can simply send an SVG file for RoboPaint to process and paint.


WaterColorBot kits are shipping now, and we are still taking pre-orders for December shipment. 

WaterColorBot Goes into Production

This has been a busy and invigorating week at WaterColorBot HQ, as we’ve finalized the hardware design for the WaterColorBot and begun in earnest the manufacturing process.

That term “finalized” carries a lot of weight with us. It marks the end of a seven month period of making regular iterative improvements to the WaterColorBot design. When we launched our Kickstarter campaign back in July, we had thought that we were already done with the process. However, it turned out that having these two extra months between launch and shipping gave us an invaluable opportunity to refine and finesse many of the little details that we had already spent so much time on.

Here are some of the highlights of that process; some subtle yet wonderful little improvements that we’ve made to the WaterColorBot.


An improved brush lift mechanism

Since we started the project, the carriage on the WaterColorBot has been refined through over 30 revisions, including a half dozen or so just since we launched our Kickstarter campaign in July. Some of these revisions have been minor (for example, rounding the corners more to make it more finger friendly, or tweaking the tolerances on the guide bushings).

Other revisions have been more substantial. In the last few revisions, we changed the way that the brush-lift servo motor actually lifts the brush. Previously, the motor directly pushed the brush holder up or down. But there is now a little stainless steel wire form that transmits motion from the motor to the brush holder. By adding it, we’ve made it so that the brush has a full 3/4” (19 mm) of travel– up from 1/2” (12 mm) –making it possible to push the brush down lower to better wash between changing paint colors, and to go up higher, more readily clearing paper and paint.


An improved lower deck 


The lower deck of the WaterColorBot, affectionately known as the “spoilboard” is machined from medium-density fiberboard (MDF), with indentations to index the paint set and water dishes, and a clip to hold the paper. In WaterColorBot 1.0, we’ve moved from 1/4” to 3/8” thick MDF, making it tougher, more substantial, and better weighted. We’ve also added new laser-engraved indexing marks that show you where to position other sizes of paper (US letter and A4), in case you’re not using 9×12 watercolor paper.

On a related note, we’ve also been developing an alternative plastic spoilboard as an add-on accessory, which may be helpful for artists who like to paint on soaking-wet paper.


Better bearings, yet again

And finally, one last upgrade to the motion control system. As you may recall, the carriage that holds the brush is moved by cords driven by stepper motors. After upgrading to the Spectra cord last month, we found that we could make a further improvement in the overall performance of the robot by replacing three specific plain-bearing stainless steel pulleys with miniature ball bearings. Those three places are the three locations on the WaterColorBot where the cord is directed in a U-turn (for example, at point ‘E’ above). Without the ball bearings, the friction at those three points can potentially be significant, particularly if the cord is operated under tension. And with the ball bearings, the robot can run faster and smoother, with lower current to the motors.


The WaterColorBot kit is now available for pre-order at the Evil Mad Scientist Shop.


WaterColorBot at Kickstarter: One Day Left

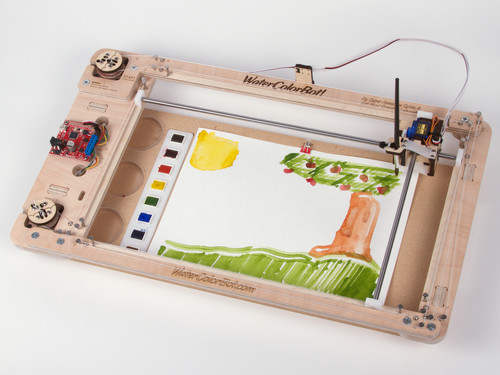
WaterColorBot Drawing
The Kickstarter campaign for Super Awesome Sylvia’s WaterColorBot is almost at a close, with just 24 hours remaining; it winds up tomorrow (Thursday) morning, at 7 AM eastern time.

So, if you haven’t signed up yet— and you think you might like to —this would be a great time to do so. If you’d like to learn more about the WaterColorBot, we’ve written a number of articles here on our blog, and there is also a detailed introduction on the Kickstarter page itself.

And for those of you who have backed our project, we are thrilled to have your support, and to have you along with us as we unleash so many art robots upon the world this fall. We can’t wait to see what kinds of amazing things people will create with them.

WaterColorBot Drawing

Artwork painted on the WaterColorBot by Robert “RoboGenius” Sloan

Three Little Upgrades to the WaterColorBot

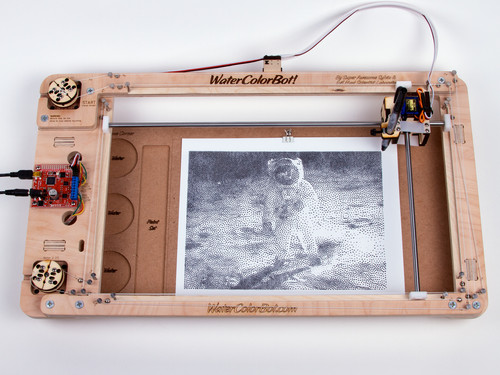
WaterColorBot Drawing

Even while the Kickstarter campaign for our WaterColorBot is in full swing, we’re continuing to improve its hardware design. Here are a select few of the refinements we have made since the last revision that will make the WaterColorBot better for everyone.

Continue reading Three Little Upgrades to the WaterColorBot

Quick project: 24-hour Cosplay Sword

Cosplay Sword 1

Junior Evil Mad Scientist Chris came to us for help with what turned out to be a funny little (well, huge) cosplay prop project. The kind of project that starts off with a conversation that goes like this:

“You want to build what?”
“A giant sword for my costume for FanimeCon!”
“And when do you need it by?”
“Uh… tomorrow?”

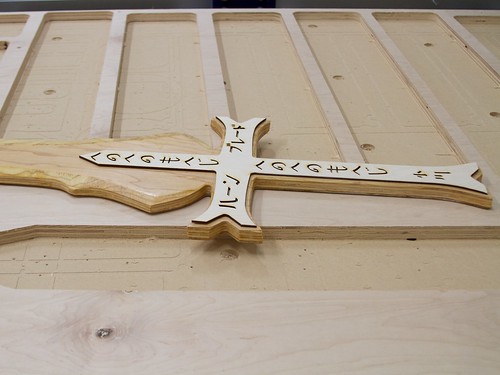
So, we got to help make a 64″ long replica sword, one of several from the flash game Epic Battle Fantasy 3 (which we had admittedly never heard of before), in what turned out to be kind of an interesting (if quick) project.

Chris drew up the outline for the sword in Inkscape, by tracing the outline of a bitmap drawing of the sword in a larger collection (where you can find this one in the top row, one third of the way from the left).   We cut the outline on our CNC router from lightweight 3/4″ hardwood plywood— strong enough to not be floppy, yet light enough to be carried — and sanded the sides until it could be handled without creating splinters. We also sanded a slight bevel around the edges of the blade, so as to create the illusion of a sharpened edge without actually thinning it much around the edges.

Next, we needed to paint the sword silver.  We had some silver spray paint on hand (left over from our 555 Footstool project!), but if you directly spray paint lightweight plywood, it tends to soak into the wood unevenly, dry slowly, and leave a finish that awkwardly highlights the grain of the underlying wood.  Instead, we coated the sword with a fast-drying sanding sealer and allowed it to dry for two hours before getting out the spray paint.


Cosplay Sword 3

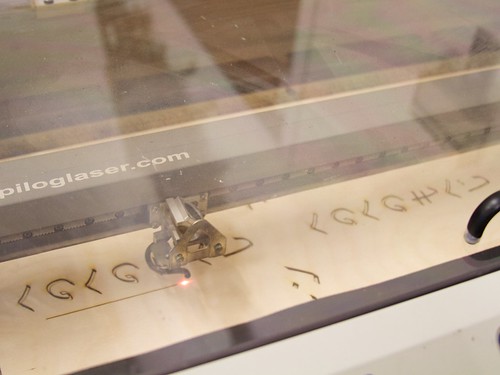
In the mean time, we made the hilt details— what might count as greebles —by laser cutting two sheets of thin 1/8″ thick plywood on each side, in a shape slightly inset from the outline of the thicker plywood.  There are two of these, one to go on each side of the hilt.

Cosplay Sword 2

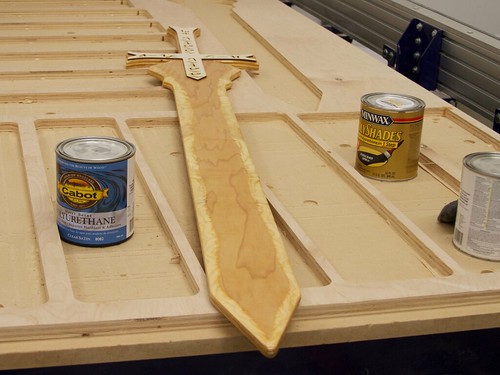
Once the sanding sealer had dried enough to gently sand, we test-fit the parts together. The photo above shows how the parts look after laser cutting and with the slick, yellowish finish that the sanding sealer gives to the plywood.

Next, we spray painted the body of the sword. Primer gray for the hilt section and metallic silver for the blade section, and allowed it to dry overnight.

Separately, we painted the laser-cut overlays black with black one-part polyurethane finish (the same type that we used for our ASCII art Tie Fighter project), and allowed them to dry separately.

Cosplay Sword 4

In the morning, a little superglue attaches the newly-black hilt details, an old leather belt becomes some lashing details, with the help of a staple gun, and… it’s off to the show.

In case you’re interested, you can download a copy of Chris’s sword design here, as an Inkscape SVG file.


You can find more costume projects in our Halloween Project Archive.

Help Bring PancakeBot to Bay Area Maker Faire

Pancakebot

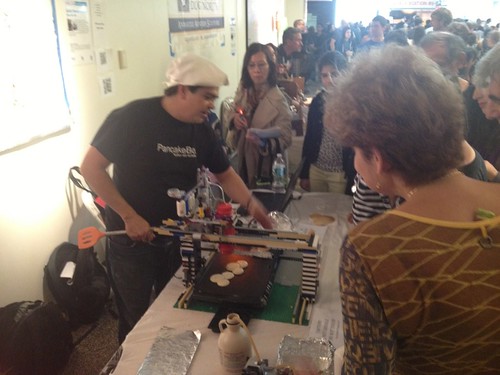
Miguel, the great guy behind PancakeBot, a CNC pancake printer made out of Lego, is running an Indiegogo campaign to help bring the whole family all the way from Norway to the Bay Area Maker Faire. We met Miguel at the New York Maker Faire last year, and got a chance to see PancakeBot in action.

Even if you can’t support the campaign, you should check out the video to see the machine in action, cheered on by enthusiastic young pancake aficionados. And come to Maker Faire in May, where we’ll hope to see Miguel and family with the awesome PancakeBot.

Highlights of Maker Faire New York

Mayoral Proclamation of Maker Week

Maker Faire has grown to an overwhelming event, where it just isn’t possible to experience everything, but we’ve pulled together a few highlights of the 2012 “World” Maker Faire in New York.

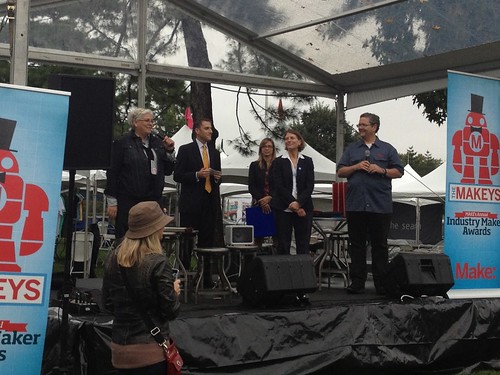
Maker Faire started out on Friday night with a Mayoral Proclamation declaring Maker Week in New York.  Mayor Bloomberg’s words— about his own tinkering background —were surprisingly personal and resounded with many of us.

Jeri Ellsworth

Shortly after the reading of the proclamation, Jeri Ellsworth was crowned Maker Hero at the Makey Awards while decked out in LEDs from eyelashes to skirt hem. Congratulations, Jeri!

Once Maker Faire got into full swing, we only were able to catch a few heats of Nerdy Derby, but it was a huge hit.

 We also enjoyed the wooden automata by Dug North.

We had the pleasure of speaking with Alden Hart about TinyG and grblShield, two motor controller boards designed for low-cost CNC machines.

DIWire is an open source CNC wire bender from Pensa.

Another CNC project we were excited to see in person was Pancake Bot, a pancake batter dispenser made from Lego.

MFNY3

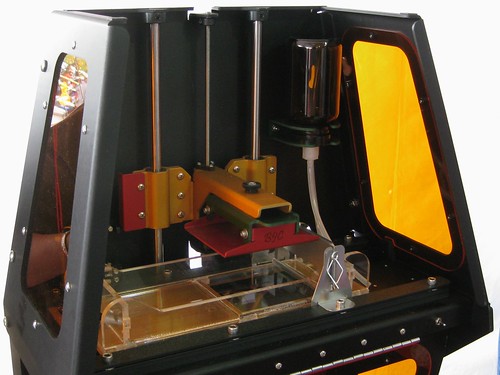
While the sheer number of 3D printers was somewhat overwhelming, a couple of newcomers stood out from the crowd: the B9Creator and the Form 1, both resin-based printers.

Felt touch sensor arms

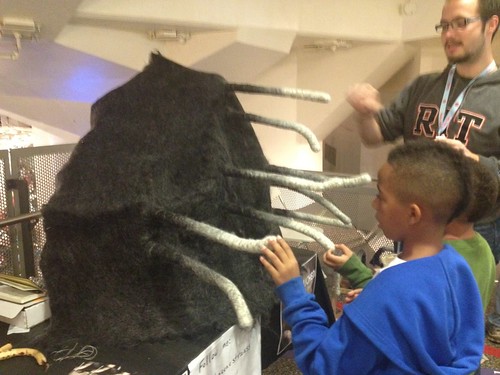
The Touched installation by artist Rebecca Strauss would quickly retract when touched, and then gradually relax again.

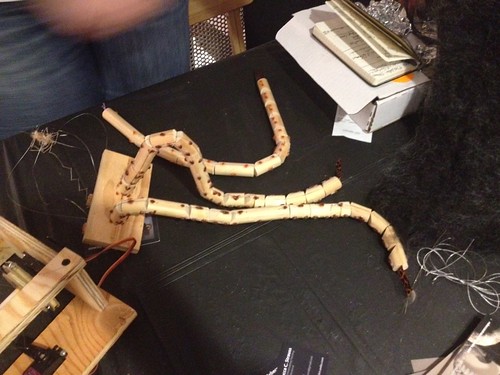
arms without their felt cover

It was made with conductive felt sensors mounted over wooden armatures.

Flipbookit

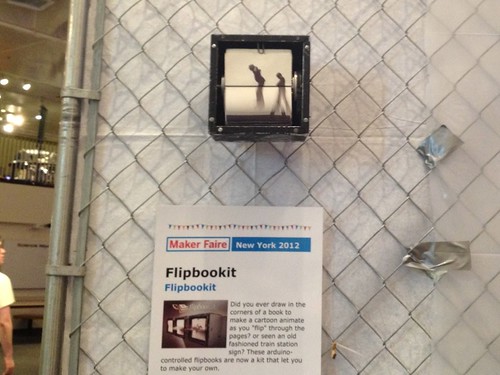
The flipbookit mechanical animation kit is on kickstarter right now. It looks much better in person than on the internet.

OLED boards

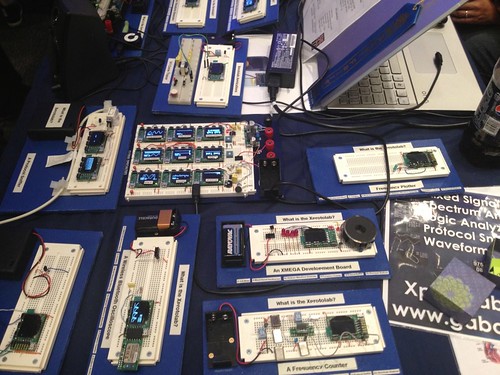
These tiny OLED oscilloscopes by Gabotronics made us go “squee”!

lasercut textures

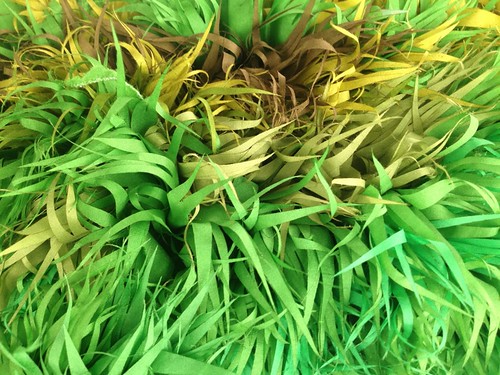
Our good friend Jenine Bressner created rich textures from laser cut fabric.

MFNY2

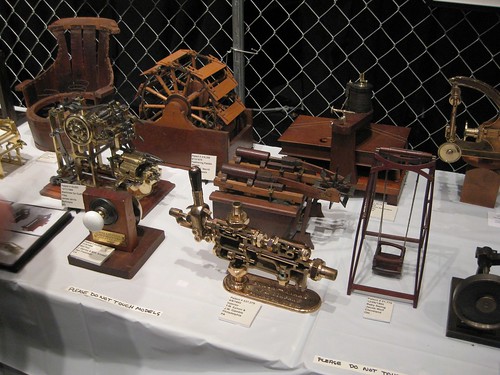
And forming a bridge with the makers of the past, there was a beautiful collection of patent models from The Rothschild Petersen Patent Model Museum.

Photo of Jeri Ellsworth by Becky Stern.