Tag Archives: open source

Advancing open hardware with a few clear words.

2313Card - 2

Over the last few years we’ve been excited to be part of the rapidly growing open-source hardware community. One of the recurring issues in this community has been the lack of agreement on what constitutes an acceptable license for open hardware. For open source software, there’s a common language to start with: the Open Source Definition. But where is the analogous root document for us hardware folks?


Of course, there simply isn’t one. Or rather, there hasn’t been one until now.


Over the last few months, we’ve been helping to hammer out a draft definition of what it means to be open source hardware, in collaboration with open source stars including folks from Chumby, Bug Labs, Sparkfun, Arduino, Adafruit, MakerBot, Eyebeam, Make, and Creative Commons, amongst others. It’s a modest but important step in defining what it means for a project to be open hardware.

The current draft definition is labeled version 0.3, and hopefully we’ll be advancing it towards a 1.0 in the coming months. There’s an Open Hardware Summit scheduled to take place before Maker Faire NY. As things advance we’ll be working on ways to connect to actual licenses and to the other needs of our community. If you have the inclination, please check out the draft and see what we’ve been up to.

Q & A with MakerBeam

miniTspider

We mentioned MakerBeam in our September linkdump. At that time they had just launched, with the initial goal of raising $10,000 to begin extruding aluminum.

One month later, MakerBeam has just cleared their funding goal, and Evil Mad Scientist Laboratories is very happy to be one of the institutional sponsors that is helping them to get off the ground.

Sam Putman, one of the MakerBeam founders, is here to answer some of the what, why, and how questions about this project.

Congratulations on reaching your goal!

Thank you, and thanks for your help! We can’t wait to see what EMSL is going to do with MakerBeam.


Tell us about your project!

Sure! MakerBeam is an open-source metal building system. There’s a technology called T-slot (example here) that is widely used for industrial automation, robotics and machine enclosures.

MakerBeam has defined a standard called Mini-T which is a miniature version of T-slot. It’s small enough to work as a model building system, and precise and strong enough to build real machines and robots with it.


You’ve chosen to do this as open hardware. Why?

Short answer: because we want it to succeed.

The usual model for starting a business like this is to design it, protect your IP, and use the proprietary IP to capitalize the company in exchange for some percentage of ownership.

We’re turning that completely around: We are giving our designs away under Creative Commons licenses. To fund the manufacture, we’re offering various rewards to people who back the project, including Alpha and Beta kits for people who want to help us develop and grow.

If someone lent us $10,000, we’d have to pay it back with interest or sell some part of the company. By raising the money in pledges, we can satisfy everyone who has pledged without taking a step that puts the project in debt.

Since we don’t have to securitize that debt, we don’t have to have restrictive IP. It’s a win on top of a win.

Also, we’re making components, like nuts and bolts or polished rods. We want people to use them without restrictions, and not be concerned that their supplier might change terms or go under. Anyone can extrude their own Mini-T, so the only way it’s disappearing is if the demand for it ceases.


Tell us about Kickstarter.

I love the Internet because it provides us with disruptive technologies faster than I can really process what’s happening. I wake up one morning and Wikipedia has gone from being an interesting experiment to the fount of all knowledge, or Facebook has found all my old high school friends for me, or Twitter has given the planet a short-attention-span nervous system.

Kickstarter is like that, and it’s just the beginning. The model is simple: creators put up projects, with a funding goal and time limit. Pledgers back projects in exchange for whatever rewards are offered, and if the goal is reached within the time limit, everyone’s accounts are charged and the project is funded. If not, no risk, no worries, no charge.

So we put up a pledge page (link), got the word out, and now we’re going to be doing the project. Simple as that.

This is game-changing in more ways than I can cover here, and once Kickstarter opens project creation to everyone, I think we’re going to see a massive migration of creativity, particularly in the arts, to Kickstarter.

How about open source projects?

Kickstarter and sites like it will make a huge difference for the FOSS movement. There must be thousands of projects that people would build if they could cover expenses.

A great example of what’s possible: someone builds a new piece of hardware, let’s say a controller, and publishes the schematics and some video of the controller in action. They could put the project on Kickstarter and raise the funds to have it manufactured.

The key to making this work is to remember that your backers are investing in your project, but that the returns aren’t monetary. They are going to want to be involved and to get something that no one else will have.

I think the best thing an open source project can offer is a chance to be involved in development. By offering Alpha and Beta kits, we’re giving people a chance both to play with the beam early and to help us develop everything that goes with it.

A software project, for example, might be ready for Kickstarter when it has working code and an arm-length list of features that could be added. Backers who contribute significantly could pick the features the developers will concentrate on, while smaller contributors get a serial-numbered 3D print of the project mascot for their desk.

We’re actively getting invites into the hands of open source developers, so if you want one, get in touch. [You can reach MakerBeam here.]

How do you see MakerBeam fitting into the open hardware ecosystem?

We’ve pictured it from the beginning as a basic component. The design is tweaked to allow circuit boards to slot right into the sides, which makes building simple enclosures easy. In general we think reaching into the box of MakerBeam is going to be a good first step in prototyping most stuff under two feet on a side.

We’re especially excited about collaboration with people working on robotics and CNC. We’re shipping an institutional kit to oomlout in the UK, which does awesome open-source robotics out of mostly laser-cut acrylic, and of course we’re hoping EMS finds MakerBeam useful in developing the CandyFab and everything that goes with it.

We really hope this will release a lot of creative potential. The world of open hardware is blessed with an ever-growing array of sensors, precision servos and stepper motors, and controllers. When it comes time to make that into a robot, people are still reaching for the LEGO or cutting stuff with a laser. With MakerBeam they can just bust out an Allen wrench and get straight to work.

Thanks, and congratulations again!

Thank you! Our Kickstarter round (link) is open for another 10 days. Alpha kits are all sold, so the only way to get beam by Christmas is the institutional level. Beta kits ship in February and we’ll have those until pledges close.

We are aiming to sell to the public beginning at Maker Faire 2010 in May. We’re stoked and excited to see what people are going to build.

Programming Meggy Jr RGB

Last week we released an Arduino environment library for the Meggy Jr RGB. The code is an open source project here, and the downloadable package comes several example programs, ranging from very simple to moderately complex. (One of the examples is a new game called Froggy Jr, where you help your a little round green frog cross the street and then a river.)

Today, to make it all a bit more useful, we are releasing the Meggy Jr RGB Programing guide, which you can download Here (600 kB PDF file).

Continue reading Programming Meggy Jr RGB

Meggy Jr RGB

Meggy Rainbow

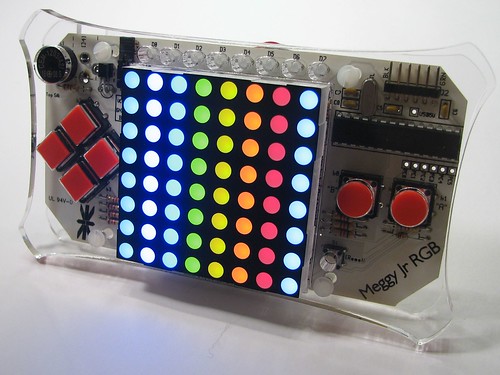
Meggy Jr RGB is a new kit that we designed as a platform to develop handheld pixel games. It’s based around a fully addressable 8×8 RGB LED matrix display, and features six big fat buttons for comfy game play. The kit is driven by an ATmega168 microcontroller, and you can write your own games or otherwise control it through the Arduino development environment. Meggy Jr is fast, programmable, open source and hackable. And fun.
Continue reading Meggy Jr RGB

Business card AVR breakout boards: Version 1.1

Card version 1.1

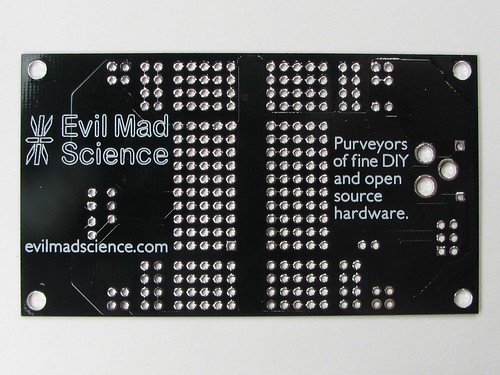
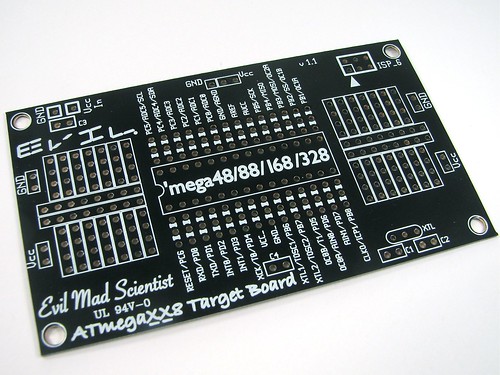
We’ve just released a new version of our super-handy business card sized target board for programming 28-pin AVR microcontrollers like the ATmega168 and ATmega328. These are just the thing for programming these chips through an ISP programmer like the USBtinyISP.

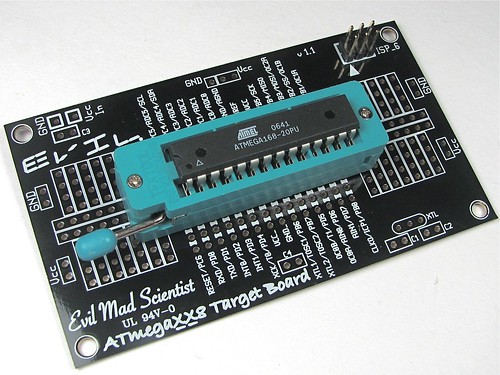
We use these for a lot of our simple microcontroller projects; Tennis For Two and the Lissajous POV come to mind. The new version has basically the same design but adds some extra prototyping area and makes the holes big enough to accept a ZIF socket:

ZIF Kit
Like the original version of this target board, this circuit board is a fully open source hardware design. For much more information– including the detailed design files– please see the update that we’ve added to the end of our original article about this project.

MiniPOV Cylon firmware

MiniPOV3 Cylon   MiniPOV3 Cylon head-on

The MiniPOVs were created by AdaFruit Industries. They Rebelled. They Evolved.
And now, they may be invading your front porch.

It’s an open secret that here at evilmadscientist we go both ways: analog and digital.

So, here is yet another way to get a Cylon pumpkin circuit– a useful component for halloween. (Yes, you can do KITT too, we won’t stop you.) We’ll spare you the carved pumpkins and dive right into the details.

There seem to be a lot of MiniPOV kits out there. If you’ve got one, this is a fast way to make a passable slowly-scanning eye.

Note that we are not using the “POV” part of the MiniPOV– you don’t need to wave your pumpkin back and forth; it really is just a slowly-moving image.

(You can get a MiniPOV direct from Adafruit or from the Make store, probably in time for the big day.)

This is a one minute project for some of you (you know who you are), but if you are really starting from scratch there isn’t any giant time advantage to going doing it this way instead of analog.

Once you have a working minipov, the first step is to download the firmware (4 kB .ZIP file) and unzip it. If you are programming the MiniPOV3 directly through its serial port,
pop open a terminal and move to the directory. Type (with a return after each line):

make all

make program

And… that’s it.

(If you have a GUI for programming AVRs and know how to use it, you can of course use that instead of programming through the terminal.)

If you are using some other AVR programmer or are programming a bare ATtiny2313 without a MiniPOV at all, you will need to edit the header of the included makefile to reflect the type of AVR programmer and the port where it is located. (And then, proceed with the instructions above.)

While this makes a pretty good looking pumpkin, there is still room for improvement in the firmware– the motion is reasonably smooth but doesn’t yet capture the incandescent fade that the analog versions do. I’ll leave it to the community to improve this firmware; if you have some better code, let me know and I’ll help roll it in.

Update:
Tim Charron sent in a greatly improved version of this program– please give it a try.


You can find more pumpkin related projects in our Halloween Project Archive.

CandyFab.org : The CandyFab Project

CandyFab.org


Today we are spinning off one of our projects and launching a new web site: CandyFab.org. The new site is intended to help foster a community around the idea of accessible, low-cost, and open-source three-dimensional fabrication technologies.

The first major goal of The CandyFab Project is to completely re-engineer the CandyFab within the coming year. We plan to produce an open reference design in hardware and software for what will become the CandyFab 5000S– a low-cost solid freeform fabrication machine that can be built with commercial off-the-shelf parts.
If you’d like to participate in designing, constructing, or using machines like this, we’d love to hear from you. Hop on over to CandyFab.org.

Laying out printed circuit boards with open-source tools

There has historically been, and still is, a lack of good, free MacOS native EDA (electronic design automation) software. The situation has somewhat improved in the past few years because the X11 layer in Mac OS X allows graphical unix applications to run natively on the Mac, concurrently with other programs. I recently learned to use some of these tools in the gEDA suite to lay out printed circuit boards. These (loosely, if at all, organized) notes should be helpful to anyone that wants to get started making PCBs using a mac, linux, or other unix-like system.
Continue reading Laying out printed circuit boards with open-source tools

LabVIEW routines for the MAKE Controller

MakeController

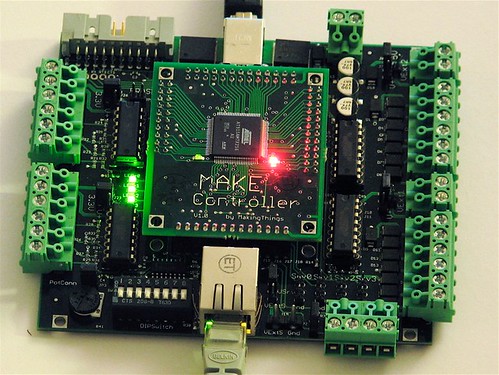
As evidenced by a growing collection of projects, the MAKE Controller has great potential as a hardware platform enabling computers to really do things.

We won a MAKE Controller for our set of Halloween projects this year, and we’re just starting to play around with it. Having spent some pondering how best to communicate with the board, it’s clear that one of the barriers to more widespread use of this and other embedded systems is the lack, or perceived lack at least, of user-friendly software for programming and communication.

A number of open-source software packages, such as processing and Ruby, can communicate with the MAKE Controller using its OSC interface. However, there has been a noticeable absence of a suitable interface to LabVIEW, a program that is commonly used for interfacing to other similar types of hardware.

So, we wrote one. It’s a simple LabVIEW “vi” routine for issuing (most) simple commands and queries to the MAKE controller. We’ve also included some example routines to help you get your blinky lights going a few minutes sooner.
Continue reading LabVIEW routines for the MAKE Controller