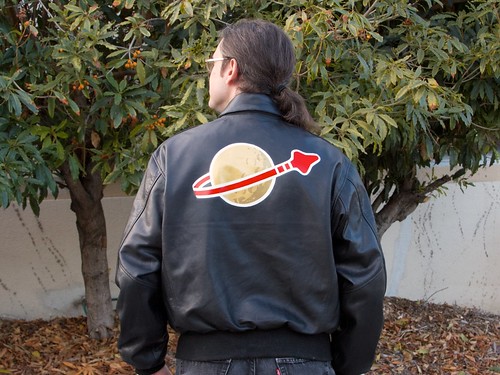
Last January, I wrote about how to make your own traditional painted-leather “bomber” jacket, in a tutorial about how I made my Classic Lego Space Flight Jacket. Since then, several people have asked us for a future update post, to see how well it has aged after a year. And so, here we are. After a year of regular use, how well are those nifty flexible leather paints holding up?
Tag Archives: painting
A Compendium of Watercolor Paint Pan Palettes
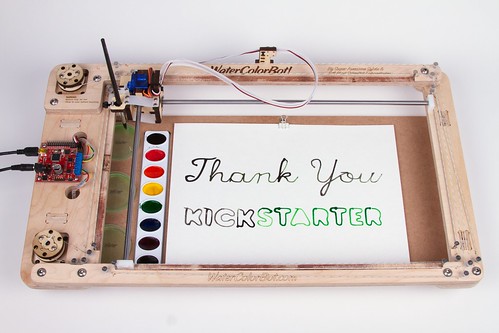
As part of the documentation for the WaterColorBot project, we’ve put together a compendium of information about commonly available watercolor paint palette sets. For each of the sets, we’ve tested to see how well they work in the WaterColorBot— in terms of physical size, color order, paint quality, brush quality, and so forth.
You can find the complete list on our documentation wiki site, here.
The Classic Lego Space Flight Jacket
Here’s a little project that we’ve been working towards for a long time: a custom-painted leather flight jacket (“bomber jacket”) featuring the “Classic Lego Space” logo. (Yes, I totally spent years serving in the Lego space corps!) And, if you’ve ever wanted to make your own painted leather jacket — whatever the theme — here’s how to do it.
Robo-Painted Thank You Cards
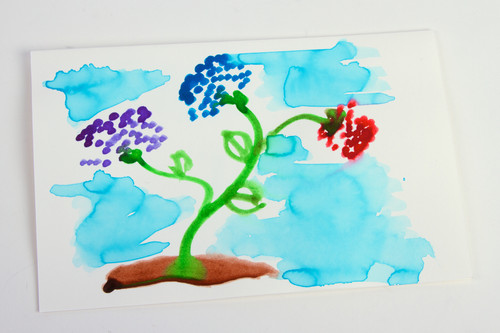
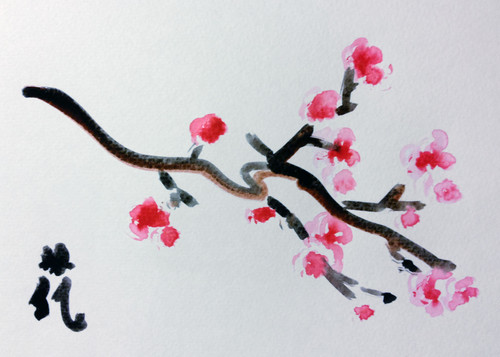
One of the rewards from the Kickstarter campaign for our WaterColorBot was a “Robo-Painted” thank-you card. Our collaborator Sylvia designed the cards and supervised while the robot painted them.

We (the humans) were a little tired after just signing the insides of 75 cards— we can only imagine how exhausted the WaterColorBot must have been after painting the fronts and insides! They were actually painted in three passes: for the inside “Thank you” text, for the light-blue (extra-wet) background on the front, and for the flower subject on the front.

Of course, the real magic of robotics is that it is so reproducible, card after card. And yet, the real magic of watercolor as a medium is that it isn’t completely reproducible. Look at the subtle little variations caused by the amount of water either in the light blue background or in the flower subject. We see the same kinds of “organic” variation that we might expect from a human artist. Simply wonderful.
WaterColorBot Goes into Production

This has been a busy and invigorating week at WaterColorBot HQ, as we’ve finalized the hardware design for the WaterColorBot and begun in earnest the manufacturing process.
That term “finalized” carries a lot of weight with us. It marks the end of a seven month period of making regular iterative improvements to the WaterColorBot design. When we launched our Kickstarter campaign back in July, we had thought that we were already done with the process. However, it turned out that having these two extra months between launch and shipping gave us an invaluable opportunity to refine and finesse many of the little details that we had already spent so much time on.
Here are some of the highlights of that process; some subtle yet wonderful little improvements that we’ve made to the WaterColorBot.
An improved brush lift mechanism

Since we started the project, the carriage on the WaterColorBot has been refined through over 30 revisions, including a half dozen or so just since we launched our Kickstarter campaign in July. Some of these revisions have been minor (for example, rounding the corners more to make it more finger friendly, or tweaking the tolerances on the guide bushings).
Other revisions have been more substantial. In the last few revisions, we changed the way that the brush-lift servo motor actually lifts the brush. Previously, the motor directly pushed the brush holder up or down. But there is now a little stainless steel wire form that transmits motion from the motor to the brush holder. By adding it, we’ve made it so that the brush has a full 3/4” (19 mm) of travel– up from 1/2” (12 mm) –making it possible to push the brush down lower to better wash between changing paint colors, and to go up higher, more readily clearing paper and paint.
An improved lower deck


The lower deck of the WaterColorBot, affectionately known as the “spoilboard” is machined from medium-density fiberboard (MDF), with indentations to index the paint set and water dishes, and a clip to hold the paper. In WaterColorBot 1.0, we’ve moved from 1/4” to 3/8” thick MDF, making it tougher, more substantial, and better weighted. We’ve also added new laser-engraved indexing marks that show you where to position other sizes of paper (US letter and A4), in case you’re not using 9×12 watercolor paper.
On a related note, we’ve also been developing an alternative plastic spoilboard as an add-on accessory, which may be helpful for artists who like to paint on soaking-wet paper.
Better bearings, yet again

And finally, one last upgrade to the motion control system. As you may recall, the carriage that holds the brush is moved by cords driven by stepper motors. After upgrading to the Spectra cord last month, we found that we could make a further improvement in the overall performance of the robot by replacing three specific plain-bearing stainless steel pulleys with miniature ball bearings. Those three places are the three locations on the WaterColorBot where the cord is directed in a U-turn (for example, at point ‘E’ above). Without the ball bearings, the friction at those three points can potentially be significant, particularly if the cord is operated under tension. And with the ball bearings, the robot can run faster and smoother, with lower current to the motors.
The WaterColorBot kit is now available for pre-order at the Evil Mad Scientist Shop.
WaterColorBot at Kickstarter: One Day Left
The Kickstarter campaign for Super Awesome Sylvia’s WaterColorBot is almost at a close, with just 24 hours remaining; it winds up tomorrow (Thursday) morning, at 7 AM eastern time.
So, if you haven’t signed up yet— and you think you might like to —this would be a great time to do so. If you’d like to learn more about the WaterColorBot, we’ve written a number of articles here on our blog, and there is also a detailed introduction on the Kickstarter page itself.
And for those of you who have backed our project, we are thrilled to have your support, and to have you along with us as we unleash so many art robots upon the world this fall. We can’t wait to see what kinds of amazing things people will create with them.
Artwork painted on the WaterColorBot by Robert “RoboGenius” Sloan.
Using Artist Grade Materials with the WaterColorBot
One of the questions that we’ve had on the WaterColorbot is about its ability to use higher-quality materials. And in particular, can you use it with fine (artists’) watercolor paints?
The WaterColorBot comes with a starter set of Crayola watercolors. This kind of paint set is great for kids and great for learning how to use the WaterColorBot. And in the United States at least, it’s also easy to obtain direct replacements from your local office or art supply store.
But on the other hand, watercolors like these do not offer the depth or range of color nor the archival quality that professional artists expect and require. And, replacement paint sets may not be so easy to find overseas, or even in less urban areas of the US. Fortunately, you can use the WaterColorBot with other paints, and we’re working on expanding the number of different ways that you can.
The first, easiest solution is to note that the Crayola paint set actually comes with (well, in) a perfectly-sized paint palette; simply rinse out the remaining paint with cold water.
The empty Crayola palette can be reused with tube-based watercolor paints, which are available at art supply stores worldwide. Like dry (pan) watercolors, tube based watercolors are available in many grades, from very inexpensive to fine artists’ watercolor, and in a truly impressive range of colors.

While the the empty Crayola palette is perfectly serviceable, it is a bit flimsy, and we are also planning to offer a couple of more durable permanent palettes as optional accessories for the WaterColorBot.
Here is the first of those accessories: A milled plastic palette for use with tube-based watercolor paints. It’s tough and permanent with eight oval wells.
For artists who prefer to paint from pans (dry paint), our second accessory is a palette that cradles up to eight “standard” half pans, which are one of the preferred shapes for artists’ watercolors. The word “standard” is in quotation marks because there is actually quite a range of variation in the size of half pans; this particular palette is sized for Winsor & Newton (and Cotman) watercolors. We also plan to offer other holders to fit half pans from other manufacturers.
And what about paper?
The WaterColorBot is designed to fit 9×12” paper, which is one of the most common sizes for watercolor paper. Heavier and finer grades of paper (140 Lb, 300 Lb) can be used without issue, and standard methods for affixing paper to the board– such as tape and tacks –will work just fine. Larger sheets of paper can be cut down to fit, and smaller paper– including A4 and US letter –can be used, although you may need to pay attention to the margins.
WaterColorBot Kickstarter Update #1
Our sincere gratitude goes out to all of our Kickstarter backers and everyone who has helped to spread the word about our WaterColorBot Kickstarter campaign. It has been incredibly rewarding to see each new pledge come in, from friends both old and new. We’re thrilled to announce that we exceeded our funding threshold of $50,000 after just over 60 hours: WaterColorBots are coming!
Today we recorded a little video that you can see on our update page of the WaterColorBot saying (well, painting) “Thank You.” One of the questions we have heard a few times (and have added to our FAQ) has been, “Can the robot go get more paint when it runs dry?” The answer is yes, as you can see in the video.
So is it all in the can and ready to ship? No, not quite yet. You may notice one goof in the video: an unnecessary color change. We’re still sanding away at the rough edges, in order to make sure that everything is ship-shape before we ship.
Thanks for all of the great questions and comments. We’ve already started adding to the FAQ based on your feedback, and we’ll continue to do so as the fantastic questions keep coming in. We’ve already got some excellent suggestions for future software directions, and changes and additions to the API. Getting real feedback from all of you about the different ways that you hope to use the WaterColorBot is immensely helpful in guiding us forward.
We’ve seen the project posted all over the internet, including on Adafruit, Boing Boing, Engadget, Tech Crunch, Gizmodo Germany, and even as far away as Indonesia at Jeruknipis. Many of you have posted it to Twitter and Facebook, and we’re grateful for all of your support.
We had planned to post an update after a couple of days, but we didn’t imagine that we would get to post about surpassing our threshold so soon! We’ll be posting more updates in the near future. There are a lot of interesting details about the WaterColorBot that we haven’t yet written about and are looking forward to sharing with you.
Introducing The WaterColorBot
Today we’re thrilled to be launching our newest kit: the WaterColorBot.
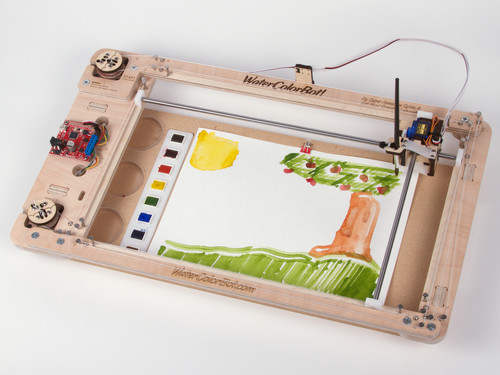
The WaterColorBot is a brand-new project from Evil Mad Scientist Laboratories and Super Awesome Sylvia — a friendly art robot that moves a paint brush to paint your digital artwork onto paper, using a set of watercolor paints.
We’ve previously written about how we got started on this project (in a guest post by Sylvia), and about Sylvia’s visit to the White House Science Fair, where she was able to give President Obama a personal demonstration of the WaterColorBot.
And now, you can get one too! We’re launching the WaterColorBot today on Kickstarter, and we’d like to ask for your support in getting it out there. The WaterColorBot is an enormously powerful tool for helping to get young people interested in technology:
Beyond simple fun, we think that the WaterColorBot has enormous potential for STEM and STEAM education, especially as a way to get young people engaged with hands-on technology and robotics. We are particularly interested finding ways to inspire young women to pursue careers in science and technology. We cannot imagine any better way to do so, than starting with a robot co-designed by a 12 year old girl.
Perhaps more than anything else that we’ve done, we think that the WaterColorBot really can make the world a better place, one (young) Evil Mad Scientist at a time.
How to paint things using stickers as stencils
You’ve got something that just looks boring. Maybe it’s too plain, or has been defaced by ugly corporate logos. You want to jazz it up, and you want it to be permanent. Here’s an easy way to make a fabulous multicolor paint job using stickers to mask your layers.
Continue reading How to paint things using stickers as stencils


