Tag Archives: science

The Exploratorium on the Bay

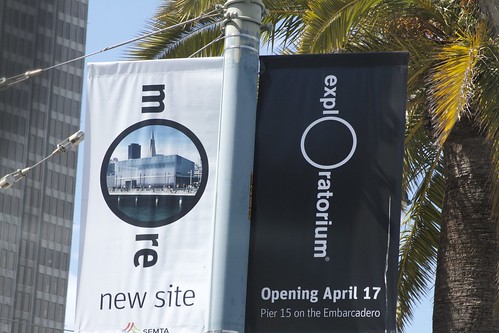
Exploratorium Banners on the Embarcadero

We have been visiting the Exploratorium in San Francisco again and again since we were teenagers in the early ’90s.  And with good cause: The Exploratorium is an unparalleled museum of hands-on science, art, perception, and exploration.  It’s not a children’s museum (although it is an amazing place to take children), nor is it a place where you admire giant fossilized skeletons, nor one of those museums that always seems to have a traveling exhibit with a name like “The Science of Jersey Shore.”

Instead, it’s a place full of simple, often-amazing yet not-too-flashy exhibits that (for the most part) you play with to learn about various phenomena.  For example, at the Floating in Copper exhibit, you can get a feel for the un-earthly effects that strong magnets have in the presence of a large block of nonmagnetic, highly-conductive material.  It’s one thing to read about eddy currents in an article; it’s quite another to release a chunk of metal in mid-air, only to find that it floats down to rest, more gently than a dandelion seed.  You may have seen this exact exhibit at other museums (here, for example)— and if so, that’s quite likely because the Exploratorium makes many copies of its exhibits for other museums and publishes plans for others to make their own.

Since moving to the Bay Area in 2005 and starting the Evil Mad Scientist Laboratories blog, we’ve also been honored to present some of our own projects at Exploratorium events over the past few years, including the CandyFab, a Bristlebot workshop at the first Young Makers event, and some of our clock projects at the Open Make event on the theme of “Time.”

Palace of Fine Arts
Exterior of the Exploratorium, at the Palace of Fine Arts (2010).
Photo by Scott Beale / Laughing Squid under CC BY-NC-ND license.
Reconsidered Materials
Interior of the Exploratorium, at the Palace of Fine Arts (2006).
Photo by Scott Beale / Laughing Squid under CC BY-NC license

The Exploratorium has, since its founding in 1969, been located in the exhibit hall of the the Palace of Fine Arts— a huge arc of a building left over from the 1915 Worlds Fair, located in the Marina district of San Francisco, as pictured above. As the name implies, the building was designed to be a museum and was a remarkably suitable home for the Exploratorium. However, a few years ago, it came out in the news that they would be moving out of the Palace of Fine Arts, and into a space on one of the San Francisco Piers.  Of course, our hearts sank at hearing this, as we could not imagine any more perfect place for the Exploratorium. Nor could we imagine that they could possibly find a place as large and welcoming anywhere else in San Francisco. We were also worried about parking, as the Palace of Fine Arts was blessed with its own parking lots, a rarity in San Francisco.

We were wrong.

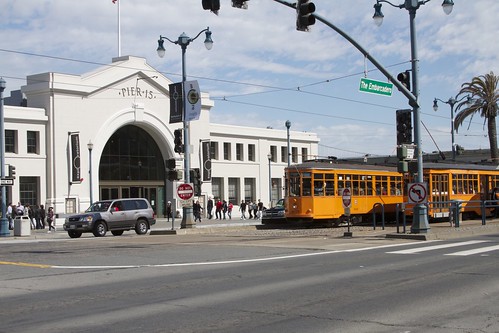
Pair of Vintage Street cars in front of the Exploratorium

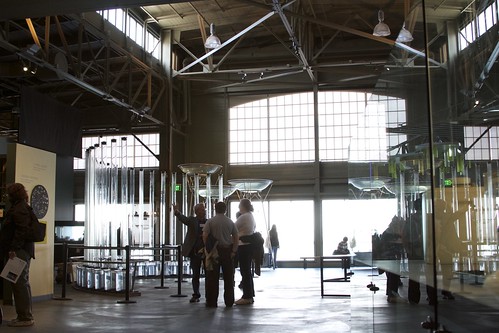
Amazing space and lighting on the bay
On Saturday, we went to a member preview at their new location at Pier 15, which will be opening on April 17. We took a number of pictures as we explored, and in addition to sharing some of the highlights here, we have put up a flickr set from our visit.

The new location at Piers 15 and 17 on the San Francisco Embarcadero is right between the Ferry Building and Fisherman’s Wharf, in the shadow of the Bay Bridge.   A huge advantage of the new location is that it is much easier to get to by public transport than the Palace of Fine Arts was. There’s a MUNI train stop, and it’s just a few blocks from BART and the other public transportation that already comes to the Ferry Building.

There are also plenty of nearby parking garages and lots. We had no problem finding an inexpensive lot to park in for the day, and now taking the train is an option for us.

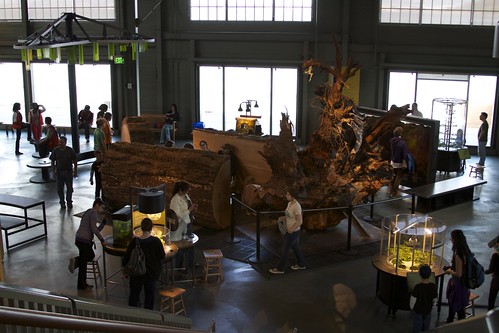
Looking down on plants and water exhibits

And it turned out beautifully. Here at the end of the pier, there are a number of new exhibits, many about biology and the bay.

Hall by the bio labs

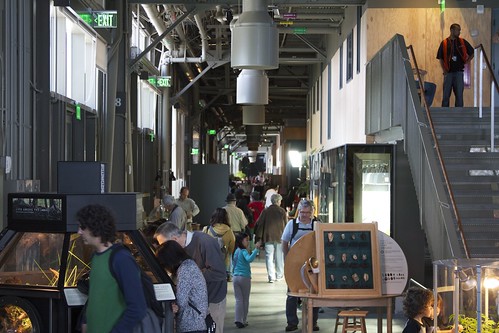
The new location is much bigger: there is three times as much space. This view is looking down one of the corridors, from the location pictured previously. The museum is packed with exhibits as far as the eye can see.

So many exhibits!

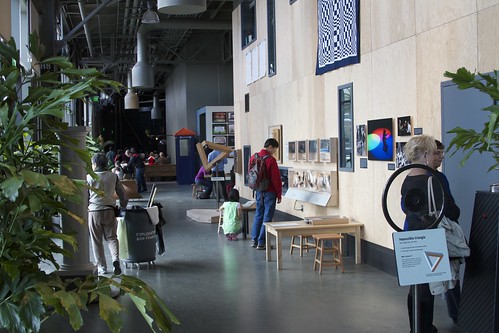
All of the spaces are well designed, and extremely good looking, taking advantage of the abundant natural light.

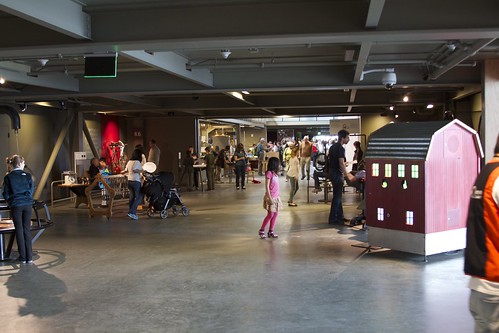
Open areas between exhibits

There are many large open areas, as well as cozy corners and nooks. The Tactile Dome is being rebuilt on a larger scale (in a space with a higher ceiling than this) and will be opening this summer.

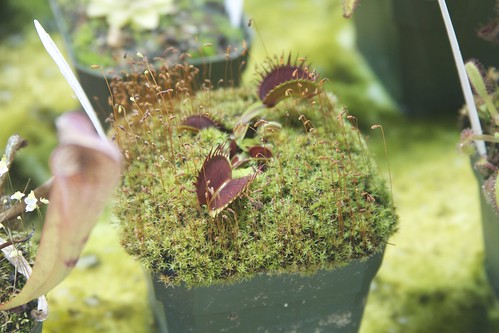
Carnivorous plants

Activity in the new bio labs is visible through large windows. In neighboring spaces, we saw them growing continuous replacement plants for the touchable plant exhibits and various organisms for people to look at under the microscopes.


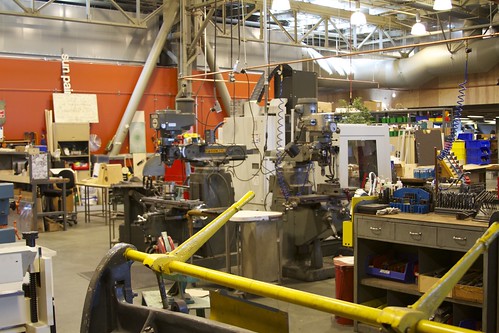
The workshop at the Exploratorium

The new location has the same spirit, and despite our expectations, still feels like the Exploratorium. The workshop is just as prominent as before, and still out in the open so that visitors can see new exhibits in progress and old ones being repaired.

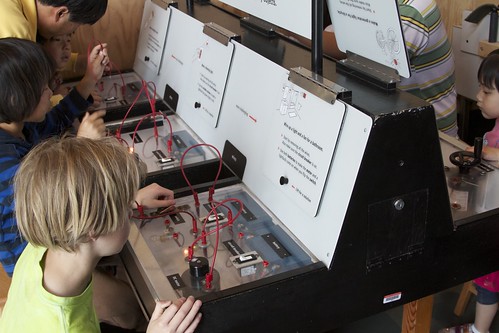
Playing with electricity

Our old favorites on electricity and magnetism (like Daisy Dyno) felt right at home, and were as popular as ever.

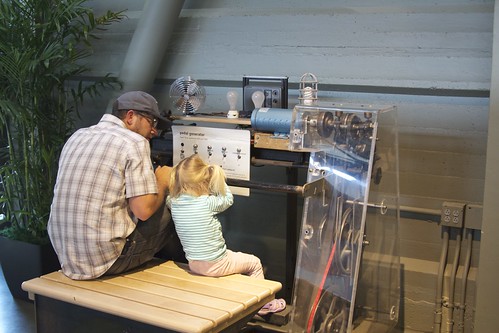
Generations exploring together

The acoustics are much more friendly, making conversations and discussions much more enjoyable.

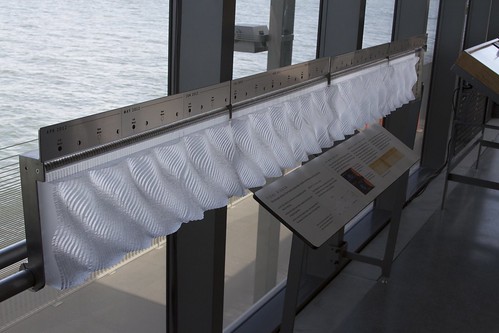
Tidal exhibit

The one new building on the pier is the Bay Observatory, which has stunning views as well as brand new exhibits on bay topics such as geology, geography and tides. Above is a 3D tide table with the tides for each day represented by a the shape of each piece of plastic marked with the time and lunar information.

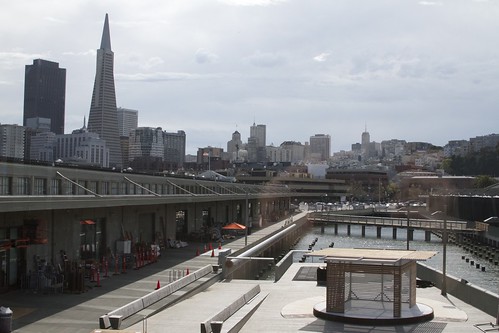
View of the city

Since this was an early preview, many exhibits are still in progress or yet to be installed. This outdoor space between Piers 15 and 17 will be opening soon and the museum plans to eventually develop additional space on Pier 17.

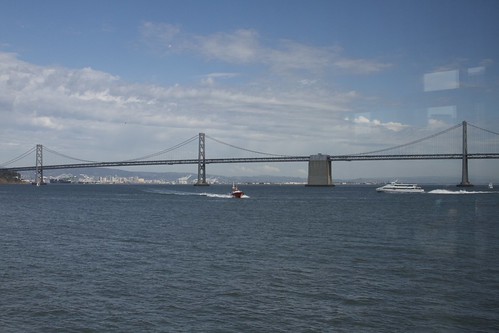
Bay Bridge

Congratulations to the Exploratorium on such a successful move and wonderful new home!

The museum will be opening to the public on April 17, and tickets will be available online soon. There are additional member previews coming up on April 6 and 9 as well— check the calendar for details and other upcoming events.

Bristlebots being used for research at Harvard

A group of scientists and engineers at Harvard are using Bristlebots to study swarming behavior. They have published an article titled “Swarming, swirling and stasis in sequestered bristle-bots.” They have a couple of supplementary videos up on youtube as well. There’s a nice writeup of it at New Scientist, with a link to a full pdf at arxiv.org.

Download and Print: Evil Mad Scientist Valentines

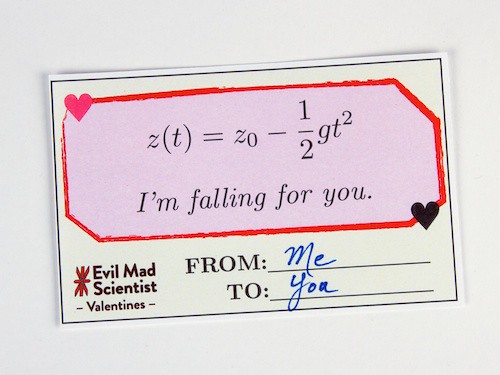
EMS Valentines 1

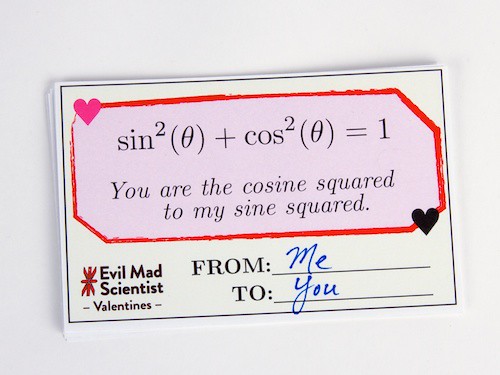
If you’re anything like us, you’ve at some point come across supposedly-nerdy valentines and thought to yourself, “A real geek would have used an equation to express that sentiment.”  And if so, have we have got just the thing for you!

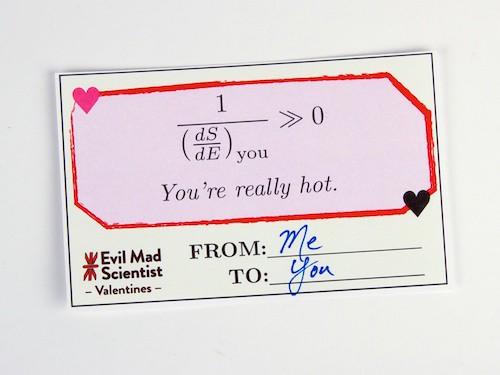
EMS Valentines 3

Here’s our collection of six little valentine cards, each of which adds a little authenticity and class to the not entirely uncommon “geek” valentine genre.

Suppose that you want to communicate to your valentine just how hot you think they are. Sure, you could go with a picture of a thermometer— or a Sriracha bottle —but isn’t the thermodynamic definition of temperature itself in a whole category of its own?

EMS Valentines 5

And what better way to say “I love you,” than with the gift of trigonometric identities?


Lo Res Valentines

You can download the original file here (260 kB .PDF document).

Print it out on (or otherwise affix to) card stock, and [some steps omitted] enjoy the resulting lifelong romance.


Update: New cards have been released! Please check out the 2019 set, which contains all 42 cards from 2013 through 2019.

Makerspace Launch

The Makerspace program is a joint effort by O’Reilly’s Make division and Otherlab to put dedicated space and tools for hands-on making into high schools. They describe their aims on their about page:

By creating makerspaces in an educational context, students can have access to tools and equipment that they might not have otherwise; they can collaborate on projects that are driven by their own interests, and by doing so, develop the capacity and confidence to innovate. We see making as a gateway to deeper engagement in science and engineering but also art and design.

On Monday, September 10, we’ll be attending the Makerspace launch event at the College of San Mateo. We’ll be demoing a few kits and are excited to have the opportunity to meet educators interested in bringing making into the classroom. If you’ll be attending, please stop by our table and say hi!

Curiosity on Mars!

NASA Ames

Congratulations to Curiosity! As the New York Times says this morning,

In a flawless, triumphant technological tour de force, a plutonium-powered rover the size of a small car was lowered at the end of 25-foot-long cables from a hovering rocket stage onto Mars early on Monday morning.

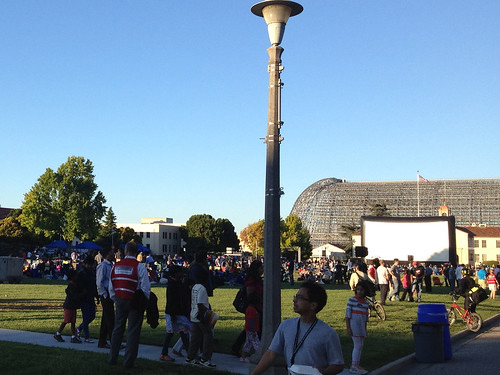
A crowd of some 5000 people gathered on the plaza at NASA Ames Research Center late last night (it was only Monday Morning on the east coast) to watch presentations by mission scientists and finally the live broadcast, on the big screen.

This was a thrill.  Not only was the landing process itself incredible— watch this video, “Seven minutes of terror” if you haven’t —but it was amazing to be in a crowd of so many people excited to watch the landing as well.  Many of the people in the audience screaming and cheering had worked on various parts of the mission, including the ground-breaking (pun intended) scientific instruments aboard the rover and the new lifting-body heat shield to get it there.

Curiosity closes in on Mars

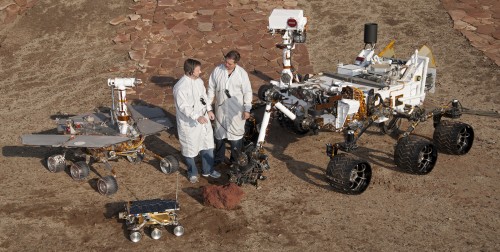
On Sunday night, the Mars Science Laboratory rover Curiosity (the one on the right; the biggest, baddest, most awesomest Mars rover ever) will attempt to land on Mars. Curiosity is a nuclear powered Mini Cooper sized robotic geologist, much bigger and more capable than previous rovers. It’s going to be a moment of great excitement when Curiosity touches down, and there are a number of ways that you can watch.

If you have the opportunity (Mars rover pun intended) check with your local science museum, planetarium or hackerspace to find out if they’re hosting a viewing party.

Curiosity model at Exploratorium

Here in California, the Exploratorium currently hasa special exhibition up, including the simplified full-scale model of the rover in the picture above. They will be airing a live webcast of the landing on Sunday night.  And, NASA Ames Exploration Center in Mountain View, is hosting a live broadcast on-site with over 5000 people. The free tickets for the event went very quickly.

And, if you can only watch on the internet, NASA TV is NASA’s official video channel.  Star Talk Radio has a list of places to watch online. Space Industry News has a similar lineup, which includes a link to a google map of events.

Viewing the Transit of Venus

Transit of Venus with binoculars

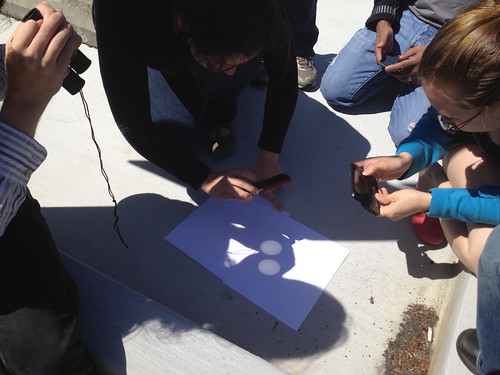
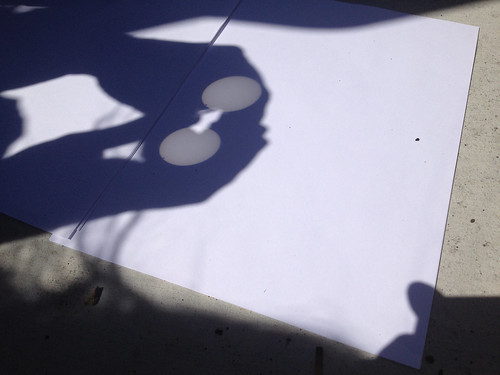
Venus is just now passing between the earth and the sun, and so we stepped outside to take a look. We brought out a pair of binoculars to use to project the image of the sun onto a piece of paper on the ground. We also took a solar viewing film, but it turns out that the binoculars were a great way to see it as a group. These pictures were taken just after Venus crossed over the edge, and the speck you can see at the edge is much clearer if you click through to the large size on flickr. Over there, you may also be able to make out a couple of sunspots that we were also able to see with the binoculars, but not with the viewing film. Remember, don’t look directly at the sun without proper safety equipment! (See our earlier post for more details on viewing techniques.) The transit is still underway, so you still have a chance to get outside and see it!

Transit of Venus Closeup


Update:  Part II, with a slightly different method.

Venus Transit 3

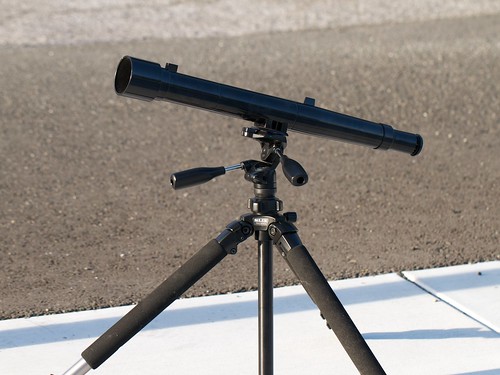
To get a slightly better view, we used a simple telescope mounted to a tripod.

Aside: This is the Galileoscope, a high-quality, very low cost telescope for $50 (or as little $25 in classroom packs).  It’s designed to let you discover everything that Galileo could see with his telescope, including craters on the moon and the moons of Jupiter, albeit with modern optics that dramatically improve image clarity.


Venus Transit 2

Now, the one thing that you really don’t want to do with a telescope is directly look at the sun through it. (It’s bad enough to stare into the sun; it’s much worse to concentrate the light into a tiny spot.  That’s a good way to start fires, not view the Transit!)

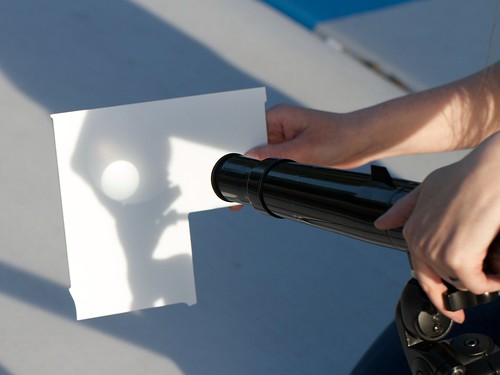
What you can do is to project the light from the telescope onto a piece of paper or matte-white plastic. Adjust the focus until the edges are sharp and— poof! —suddenly, you can see the sunspots.
Venus Transit 1

And the image quality isn’t half bad.  This picture was taken right at the “peak” of the Transit, when Venus was as far into the disk of the sun as it went.  Our image on the screen is about two inches (five cm) across, and it’s easy to make out the features.
Most stunning of all is the incredibly rare opportunity to see a planet in the sky not just as a “point of light” but to see it for what it is: another planet just like ours, slowly orbiting around the same sun.
A Spectacular Speck on the Sun

Today, Tuesday June 5, 2012, the planet Venus— the planet in our solar system that is closest to the shape and size of Earth —will leisurely pass squarely between the Earth and sun.

The Transit of Venus, as it is called, is a once (or maybe twice) in a lifetime event. If at all possible, make an effort to see it today, because you won’t have another chance… at least until the year 2117.

While it will not be visible everywhere in the world (see map), it will be visible for all of North America, Asia, Australia, and eastern Europe. (The latter, towards sunrise on June 6.)   The transit begins at 22:09 UTC, peaks at 01:29 UTC, and ends at 04:49 UTC.  Here in the PDT time zone, that’s 3 PM, peaking at 6:30 PM, and finishing below the horizon. (More at the LA Times.)

Now, how to actually view it?

If you were clever, you might have stashed away an eclipse-viewing filter from the recent solar eclipse.  If not, another option— one that is cheap and easy to find at hardware stores —is a set of welding glasses with a #14 filter. (That’s black glass. Sadly, those dark green goggles that you found in the shed are likely not safe for direct solar viewing.)

But, as the Ontario Science Center warns you,

Be careful: there are many materials that may seem to block out the Sun’s rays, but which are not safe to use for solar viewing. DO NOT LOOK AT THE SUN THROUGH sunglasses, photographic neutral density filters, polarizing filters, photographic film, dark plastic such as garbage bags, or smoked glass.


The other approach to consider is indirect viewing. You can build a pinhole projector, or a simpler yet version.  You can also use a telescope set of binoculars to focus sunlight onto a surface for indirect viewing. (Using binoculars or a telescope for direct viewing requires a carefully chosen solar filter, to be safe.)

If all else fails— maybe you’re in cloudy Portland —NASA has got you covered. Head right over here for a “live” feed of solar pictures from the SDO spacecraft in orbit around the Earth, and updating every 15 minutes.

Update: A nice summary of the historical background of viewing transits of Venus is here.

[Image source]

Shadows of an Eclipse

Eclipse 2012- 5

There were a lot of amazing things that we saw this weekend at Maker Faire— everything from live demonstrations of snails creating artwork (by Presley Martin) to the DIY pick and place machine (from buildyourcnc.com).

There was also something special in the sky: the solar eclipse on Sunday.

Eclipse 2012- 9

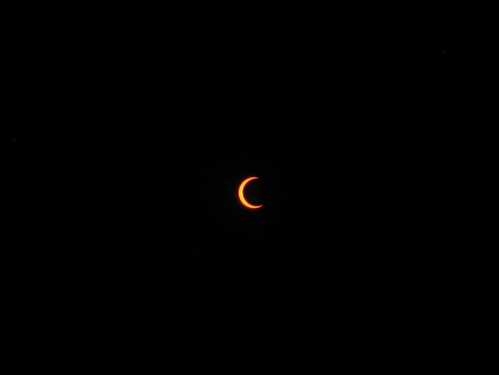
Viewed elsewhere (e.g., further north in California) this was an annular eclipse, where the sun does not disappear entirely, but instead becomes a ring of fire (since the apparent size of the moon is not large enough to block the full disk of the sun).

For us at Maker Faire in San Mateo, it was a spectacular partial eclipse, which we were able to view through solar viewing filters, kindly handed out by the Exploratorium.


Eclipse 2012- 8

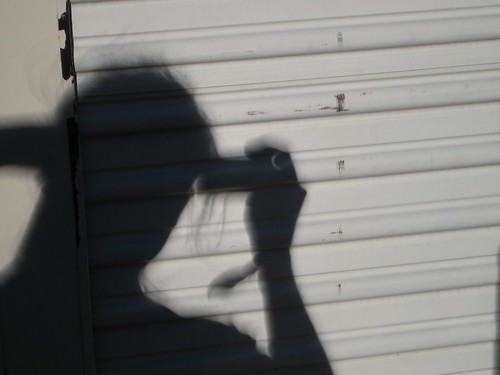
Of course, it turns out that you don’t actually need a solar filter to watch the eclipse. Any little aperture— in this case the cap between my hand and the camera —can act as the pinhole in a pinhole camera and project the image of the sun onto a surface.


Eclipse 2012- 4

Eclipse 2012- 2

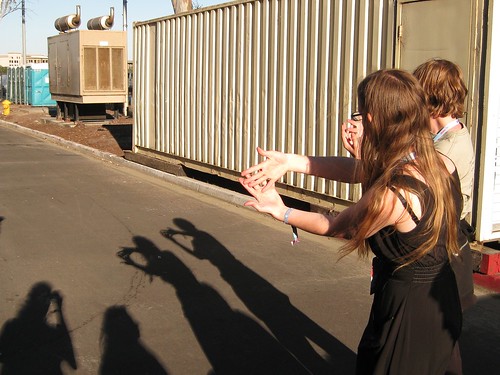
So if you’re not sure if an eclipse has started, or how much of an eclipse it is, just hold out your hands and make some little apertures; the shadows will show up with little bright spots in the shape of the sun, whether that’s a circle, ring, or crescent.

Eclipse 2012- 1

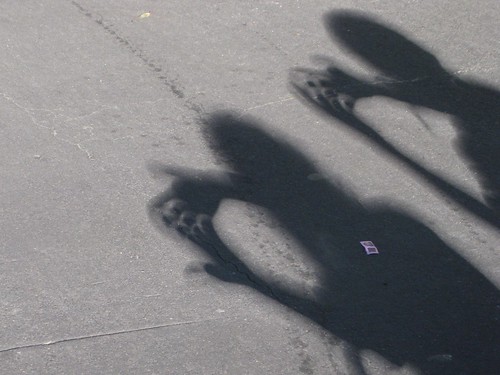
Stranger yet is to look around at all the shadows that you see every day. Even the shadow of your hand takes on an unexpected shape when the sun is anything other than round.
There are actually five outstreched fingers on my hand here, but you can hardly tell that when every bit of light that seeps through (or around the edges) projects a crescent-shaped image.

We take for granted that the shadow of an object will the same shape as the object, but as you can see, that isn’t necessarily the case when the light source isn’t round.

The CO2inator

A guest project by Rich Faulhaber, contributing Evil Mad Scientist.

Setup

“Infusing unsuspecting whole fruit with gaseous CO2 in the entire Tri-State Area!

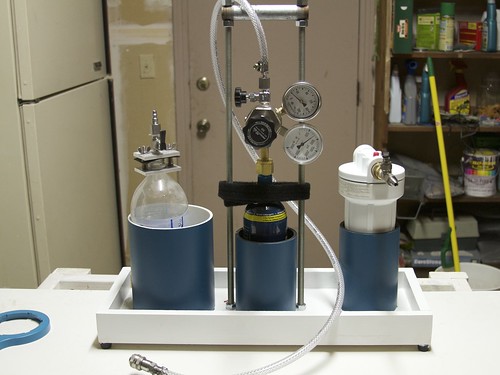
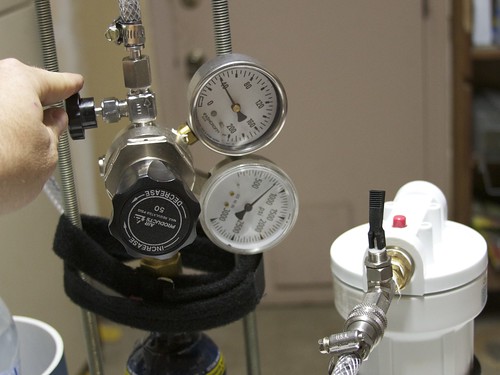
In an effort to make fruit fun for the kids, I built a carbon dioxide injector from parts in my garage with the purpose of carbonating whole fruit! With a common house water filter housing, a 16 Oz paintball CO2 canister, an old gas regulator, and some miscellaneous valves and fittings, I was able to bring this fizz fruit apparatus to life, and the kids love the results.

The principle
Carbon dioxide dissolves well in water, hence the reason you find it as the source of fizz in all your favorite soda drinks. When you open your soda and let it sit out on the counter you will find that after some period of time the soda loses its fizz and becomes “flat.” The rate at which the drink loses its fizz depends on pressure, temperature and the surface area of the liquid and the environment. Skipping the thermodynamics lecture, let me just tell you that the process works in reverse as well. To reverse this process, one needs only to have a high pressure CO2 environment, a medium to infuse (i.e., the fruit) and enough time to let the gas diffuse across the fruit skin and dissolve into the water inside. Refrigerating the fruit helps tremendously in the process as well.

Valve

Parts list


  • 16 Oz paintball cylinder (or a more proper CO2 tank if you happen to have one)

  • Gas Regulator
  • Household water filter housing
  • Some hose
  • Toggle or ball valve
  • Miscellaneous fittings to hook it all up
  • Fruit

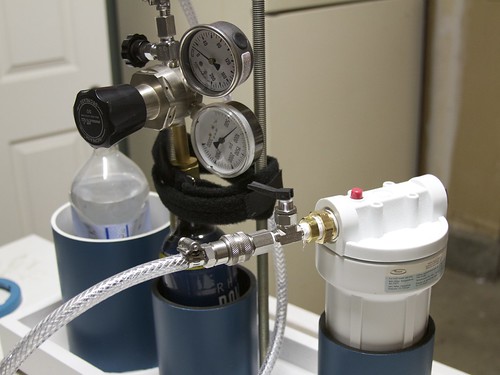
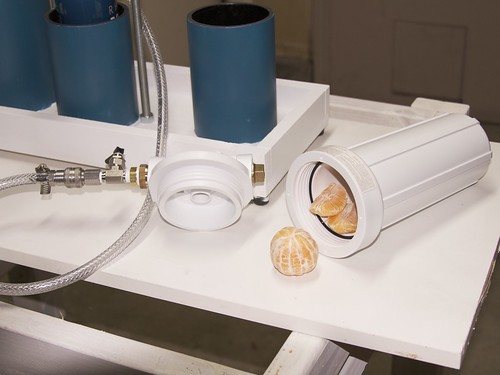
This type of water filter housing is designed to withstand water pressures in excess of 100 psi, and it comes with two ports and an o-ring seal. These can be bought for about ten dollars at Lowes or Home Depot. Its ports are standard 3/4-inch type. Use Teflon tape (plumbers tape) on all the threads. Thread in a plug on one side and a valve on the other. I used a toggle valve with a quick disconnect to make everything easier. The hose can by any standard type rated for at least 100 psi. Small bundles are available in the plumbing section of your hardware store.

For gas handling I used an old single stage regulator. These can be quite expensive new but often times you can find deals at garage sales or in surplus stores. You don’t need anything fancy, just something to step down the pressure to something manageable– well below 100 psi. My CO2 source is a standard-issue paintball cylinder.

Pressure


Procedure:


  1. Pre-chill the fruit in the refrigerator. Get it nice and cold. My favorites are grapes, oranges and blueberries. However, just about any fruit with a large water content will work.

  2. Open the house water filter by unscrewing the lid. Place your cold fruit inside.

  3. Connect the CO2 tank to your water filter housing. This is where the quick disconnects come in handy.

  4. Adjust the regulator output to about 40-60 psi, the higher the better but make sure all your connections are extra tight and sealed or “it might get dangerous.” If you think you have a leak somewhere, you can apply some soapy water where you think the leak is and look for bubbles. If you see bubble just tighten until they stop forming.

  5. Start pressurizing the house filter by opening the toggle valve. On top of the water filter housing there is a pressure relief button. Depress this while you fill to get some of the residual air out.

  6. Once pressurized, shut the toggle valve and disconnect the CO2 line. You can store the unit in the fridge or somewhere out of sight.

  7. Then, you wait. Depending on the fruit, temperature, and pressure, carbonation should occur between 20-60 minutes. If you go too long at too high a pressure the skin of the fruit can burst and it will be a big mess, if you go too short and at too low of a pressure, the results will be unimpressive. Experiment with your fruit, pressure, and duration until it suits your tastes.

  8. Open the toggle valve to release the pressurized gas then unscrew the lid to the housing and enjoy your newly carbonated fruit.

Fruit

And of course, the kids love the “poppy fizz” inside the fizzy fruit.